Running Bear's January 2023 Coffee Shop


Status
Not open for further replies.
WELL, looks as if the rainey will hold off long enough for the ROSE PARADE and maybe the ROSE BOWL today.
We are 100 miles from the festivities and the weather there can be much different from locally.
Speaking of weather, we had a few more "drizzles" and even a few brief periods of bright sunshine; expecting 58f high with partly sunny today. More chances of rain Wed and Thur is in the forecast.

The Newport family returned from their week on Maui and the two G-sons (age 15 and 13) were ecstatic.
It was their first time to the Islands and both of them have been in the life-guard program for a couple of years in Newport -- they had a blast surfing -- too bad they did not visit the North Shore of Oahu where the really big waves come in. I have a feeling that they may want to go back?

OK .. I've jabbered long enough about much of nothing.
Have a great start to the New Year!
 
So our last full day was today (meaning we are sleeping at our home base). Tomorrow late afternoon we'll go to the airport (Osaka International or Itami airport, the old Osaka airport and now mainly domestic and near international, with Kansai International having taken its place in the 90s) and sleep at the hotel there for our early morning Wednesday flight.

My son wanted to go to Osaka to buy a nice carry on to take back. I went with him and my daughter tagged along as she didn't want to just stay at the house all day.

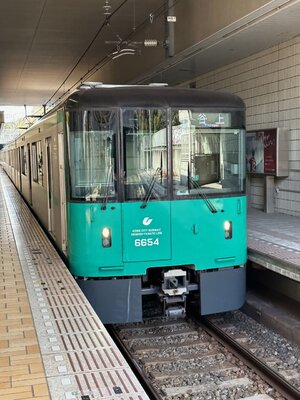
So our day started with another subway ride

IMG_2032.jpg

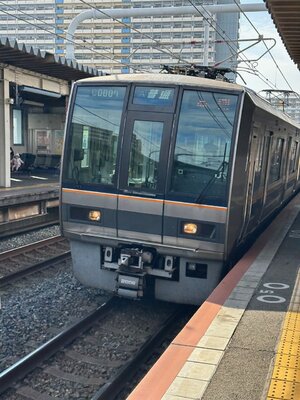
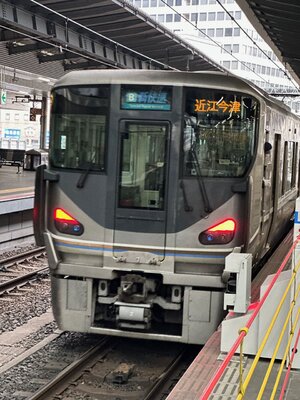
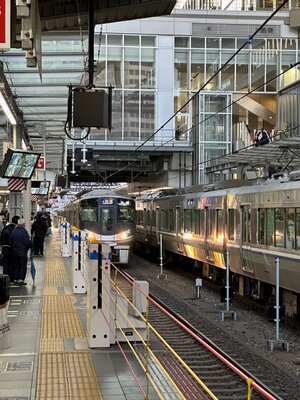
We then transferred to a JR train. First a JR 321 series local of the JR Kobe/Kyoto line and then at "Kobe" station we transferred to a "Special Rapid", that only stopped a few times all the way to Osaka (Umeda). I only got the Rapid in Osaka as it was pulling out of the station (hence the red tail lights). I think the Rapid is a JR Series 225 but it could be a 223. I'm not knowledgable enough to recognize them right off hand as they are similar.

IMG_2044.jpgIMG_2066.jpg

We wen to Yodobashi Camera and my son bought the Pla-Rail train I mentioned before as well as a plastic card box for some trading cards he got. In order to get the tax free on that floor we needed to spend a little more so I had to buy a couple sets of n-scale containers (not shown). We then went to buy the carry on on the 3rd floor. He spent some time looking and finally decided on one.

We then went to this big trendy mall full of mostly fashion / clothes stores and that sort of thing. The daughter wanted to see one store there. It was on the other side of the station tracks by the Hankyu station and a short walk. They had a big atrium with this huge red whale suspended in it. Don't know why.

IMG_2072.jpg

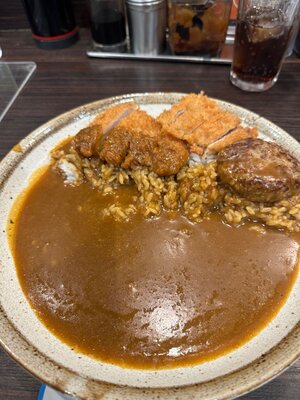
After she found the store (but not the item she wanted to see [not buy as she is out of moola]) my son said he was hungry and wanted to eat curry. He found a CoCo Curry House in the maps app and lead us there. It was a late lunch. I had the 200 gram rice pork curry with Hirekatsu (a type of pork cutlet) and an extra hamburg (Japanese ground meat patty more akin to a hamburger style of meatloaf). I chose heat level 4 which is pretty hot but still easily eatable. It was pretty good. The place is all over and is good basic Japanese style curry.

IMG_2073.jpg

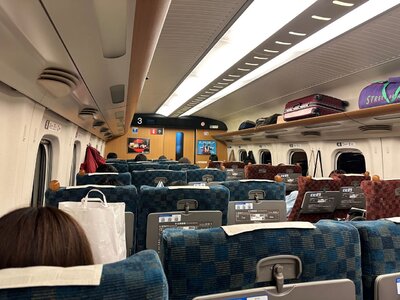
My son wanted to go to the Shin-Kobe station on the way back home so he could get some nice gift boxes for his bosses as well as some other snacks. (Japan has a tradition of gift boxes you buy and bring back to co-workers or whomever when you are on vacation -- whole stores dedicated to these -- all stations have stores that feature the boxes with the local specialties etc). The problem is that Shin-Kobe is only accessible from Osaka on a Shinkansen bullet train or by going to Kobe -- Sannomiya station on a normal train and then taking the subway one station backtracking and a longer trip all together. So we wanted to quickly get back to the JR Osaka Station and take a train the one stop to Shin-Osaka station and try and get on the Shinkansen. We made it to Osaka station and there was a rapid in about 4 minutes to Shin-Osaka. We got on that one (see below) and went the one stop. We thought we had like 4 minutes to get up to the Shinkansen tracks but it was really 6 minutes and we were able get on the Shinkansen (Sakura -- the nice N700s :) ) in one of the non-reserved cars. On the Sakura the non-reserved cars are 5 across (3 x 2) where the reserved seats are 2 x 2 (4 across). This is a shot of the non-reserved car seating. (IIRC the JR Central N700 has 3x2 both reserved and non-reserved which is why I like the Sakura service over the Hikari service when going S of Osaka).

IMG_2079.jpgIMG_2082.jpg

Tonight I made tacos and burritos for the people we've been staying with. We brought some taco seasoning, 3 different sauces, and some soft tortillas. My sister in law had some thin Japanese style grilled beef in the freezer (probably USA beef but but Japanese style). I sliced it up into bite sized chunks, added onions and green pepper, and a can of chopped green chilies, and cooked it for the main meat filling. A can of refried beans with chopped onions, cheese, chopped tomatoes, and chopped lettuce, with 3 different sauces (Rojas, Cilantro Lime, and Guacamole sauce with habanero) rounded it out. It was pretty good and they don't usually get "mexican" (broadly meant) style food. (There are Mexican restaurants in Japan and even a few Taco Bells for the die hards).

It was fun. We also found real melon soda at the store in Shin-Kobe my son was buying his gift boxes and snacks at (a special 7-11 that was mostly the special gift boxes but all had a full Japanese 7-11 in it as well).

Tomorrow the last bit of packing and I don't know what else. Wednesday the long ride home. Where we'll be greeted by a ton of snow, as I understand it :(
 
Unfortunately I have, but I don't have the space for a tank compressor, even a small 2.5Ltr one.
I've used the Iwata brand compressors for years. Their tankless Smart Jet is a great unit and does not have any issues with pulsing. It seems they licked that issue somehow. The drawback is they aren't cheap, at the $250 US range. The good news is they are lightweight and quiet, and the Smart feature turns it off when you aren't spraying. I would still have mine but at a show we ran out of them, and my partner sold mine as used when I was out of the booth. I get a better unit out of that deal, so I wasn't PO'd but that goes to show the demand we had for them.
 
Thank you Everybody for your kind words.

My wonderful sister passed away peacefully at 3:15pm.
Sorry for your loss Louis! I think the hardest part of getting old isn't the aches, the pains, the lack of youthful energy, or even the serious diseases some of us have to deal with. It's watching friends and loved ones fall away one by one. Been dealing with that myself this past year, much more frequently than I'd like.
 
WELL, looks as if the rainey will hold off long enough for the ROSE PARADE and maybe the ROSE BOWL today.
We are 100 miles from the festivities and the weather there can be much different from locally.
Speaking of weather, we had a few more "drizzles" and even a few brief periods of bright sunshine; expecting 58f high with partly sunny today. More chances of rain Wed and Thur is in the forecast.

The Newport family returned from their week on Maui and the two G-sons (age 15 and 13) were ecstatic.
It was their first time to the Islands and both of them have been in the life-guard program for a couple of years in Newport -- they had a blast surfing -- too bad they did not visit the North Shore of Oahu where the really big waves come in. I have a feeling that they may want to go back?

OK .. I've jabbered long enough about much of nothing.
Have a great start to the New Year!
Glad they enjoyed Maui. Terry, my sister and a few of their friends are on Maui till Saturday. They are at Wailea-Makena on the southwest side of the Island. The whole island is gorgeous but as I have written before, for me there is not enough to do. I no longer want to play golf everyday or ride horses a few days a week.

I hope they saw the whales off of Kapalua. That never gets old.

My sister’s condo in Pasadena is 2 blocks off of Colorado, the route of the Rose Parade. She said seeing the floats up close is just amazing. Last year she and a friend went to the assembly site and saw the float folks putting the finishing touches on the night before. The smell of flowers 🌸 is great per my sister

I hope your rains continue but in a milded manner
 
Good Morning All!
34F @93% - no snow yet.

Survived the weekend - suspected that I would as it has been *years* since we have been out on New Years; 4th of July also for that matter. I did get out yesterday to watch the Sea game. I kinda thought that it would have been a better game as both were 7 n 8. Guess that the Jets just didn't come to play.

Soldering: I have been doing that since I was 12Yo - 58 years. It is an art. The 3 most important things for a good solder connection are:
1. Clean
2. Clean
3. Clean
Soldering iron tip, and material to be connected; wire, brass, copper ... etc need to be shiny and free of debris. For anything electronic - rosin core solder; period. The smaller the item is to solder the less heat you need. In other words, you would not use a 1000W honker iron for soldering 23Ga wire onto something. Soldering silver is more art to the art. Gold is a whole new ball game. they both need way less heat than electronic stuff and a specialized solder that is usually 96%/4% tin/silver for silver, Gold has a pretty unique way - Google it.

For electronic stuff: Do not use anything abrasive on your tip. Do not use a wet sponge to clean the tip. Stick the tip into your small bucket of rosin flux for an instant, pull it out and it will be shiny shiny shiny. If needed, anchor the receiving material to be soldered somehow. In the case of a rail joiner, slide it on a piece of rail, turn it over so you have access to the bottom. Now touch the joiner with the iron to start the heat process, then after a second or two, touch the solder on the wire AND the joiner at the same time and watch the solder flow into the joint. Only takes another second or two to complete the process. If ya did it right, the joint will be shiny with both the wire and joiner mechanically connected with no gap. If the solder has a dull look, won't work. You did not clean stuff good enough. If the solder has bumps or divots, not enough heat or time. Besides shiny solder, the next important thing is that mechanical connection. You do not want a blob of solder between the two materials as solder is not very strong by itself. Once bonded good mechanically, you should not have any problems with it for years.

Oh, and if you have access to a solder pot, use it. I got one about 5 years ago and when ima doing wiring, I dip the wire in about 1/4"; after the insulation is removed; of course. Makes the bonding process faster.
Note that the temp controller irons are pretty much eye candy. If you have to 'turn the temp up' more than 5 to 10 degrees; get smaller solder. If turning it down more than 5 to 10 degrees, get bigger solder and possibly a smaller tip. Temp depends on the solder mix and if your temp is too high, you will blast the pcb pads off if soldering that type - then where will you be?

Galvanized metal ( think Suydam kits ) requires acid core solder and acid flux. Usually this takes a little longer as you probably are having to heat a bigger area - which takes a higher wattage iron. Same process as above - clean first, solder later. Again the bond can not have a blob of solder between the two materials. If so, try, try again.

Tip geometry makes a difference. A round sharp point is good for that really tiny stuff, a little bigger for the example above with the joiner as the round tip will contact BOTH the wire and material, where a chisel tip is good if you need to get under a device and hit that ground plain that is almost impossible to solder. The bigger your material, the bigger the chisel area can be and the more time to heat.

Irons: my go to favorite is still a Weller pencil iron. They are worth the cost. The latest and greatest from China will work for awhile, but pretty much like anything else from China ... expect something to go sideways sooner or later. I do have a cheapie from China and have given it a go. Works as advertised; although Ima waiting for the other shoe to drop.

Last is hot air. For y'all that are dealing with surface mount chips you will find this is the way to go.
If you are populating a new pcb, you will be using solder paste which contains flux and solder powder ( 60/40 solder ). Once you get the idea, pretty easy. You paint the solder paste across the PCB pads that are clean and shiny for the device, place the device trying to align the pads with the feet, then put in a 130 - 150 degree oven. This does not take long - 20 to 30 seconds and you can see the device align perfectly with the pads. Done deal. If you have had too much coffee and are slightly shaking - put this off for later. It does not take much for those devices sitting on solder paste to move about. If you bump ( or drop ) the pcb in the over, clean it all off and start over.

If you don't have access to the board to put it in an oven, hot air time. Hot air machines have nozzles that are sized to the device you wish to do. If removing a device that lost it's smoke, aim the air gun at the device as close as you can get it because you do not want to spill that heat over into the device's neighbor. You will see change in the color of the solder and can pull it off the board. When replacing: paint paste on the CLEAN pads, then align the device as close as you can, then heat it with the air gun. Be careful here as if there is too high a volume of air, you will be searching for the device. Again, you can see the solder change color and flow proper.

You can also use a Butane torch in a pinch - just remember that it is way hotter than your iron and you can destroy stuff pretty fast.

Whew - wrote a book!

Later
 
Good morning from my portion of Wisconsin. 30f degrees now heading to a calm 37. Any snow received on Saturday is gone and nothing predicted until some rain on Saturday.

Not really sure what I want to do today. Maybe just a ATV ride through the woods. There are a couple trails I can drive that are not used by the horses so if any ruts are created it won’t brother anything. I will stay off the horse trails. This lousy Winter is getting boring.

enjoy the day
 
Good Morning All!
34F @93% - no snow yet.

Survived the weekend - suspected that I would as it has been *years* since we have been out on New Years; 4th of July also for that matter. I did get out yesterday to watch the Sea game. I kinda thought that it would have been a better game as both were 7 n 8. Guess that the Jets just didn't come to play.

Soldering: I have been doing that since I was 12Yo - 58 years. It is an art. The 3 most important things for a good solder connection are:
1. Clean
2. Clean
3. Clean
Soldering iron tip, and material to be connected; wire, brass, copper ... etc need to be shiny and free of debris. For anything electronic - rosin core solder; period. The smaller the item is to solder the less heat you need. In other words, you would not use a 1000W honker iron for soldering 23Ga wire onto something. Soldering silver is more art to the art. Gold is a whole new ball game. they both need way less heat than electronic stuff and a specialized solder that is usually 96%/4% tin/silver for silver, Gold has a pretty unique way - Google it.

For electronic stuff: Do not use anything abrasive on your tip. Do not use a wet sponge to clean the tip. Stick the tip into your small bucket of rosin flux for an instant, pull it out and it will be shiny shiny shiny. If needed, anchor the receiving material to be soldered somehow. In the case of a rail joiner, slide it on a piece of rail, turn it over so you have access to the bottom. Now touch the joiner with the iron to start the heat process, then after a second or two, touch the solder on the wire AND the joiner at the same time and watch the solder flow into the joint. Only takes another second or two to complete the process. If ya did it right, the joint will be shiny with both the wire and joiner mechanically connected with no gap. If the solder has a dull look, won't work. You did not clean stuff good enough. If the solder has bumps or divots, not enough heat or time. Besides shiny solder, the next important thing is that mechanical connection. You do not want a blob of solder between the two materials as solder is not very strong by itself. Once bonded good mechanically, you should not have any problems with it for years.

Oh, and if you have access to a solder pot, use it. I got one about 5 years ago and when ima doing wiring, I dip the wire in about 1/4"; after the insulation is removed; of course. Makes the bonding process faster.
Note that the temp controller irons are pretty much eye candy. If you have to 'turn the temp up' more than 5 to 10 degrees; get smaller solder. If turning it down more than 5 to 10 degrees, get bigger solder and possibly a smaller tip. Temp depends on the solder mix and if your temp is too high, you will blast the pcb pads off if soldering that type - then where will you be?

Galvanized metal ( think Suydam kits ) requires acid core solder and acid flux. Usually this takes a little longer as you probably are having to heat a bigger area - which takes a higher wattage iron. Same process as above - clean first, solder later. Again the bond can not have a blob of solder between the two materials. If so, try, try again.

Tip geometry makes a difference. A round sharp point is good for that really tiny stuff, a little bigger for the example above with the joiner as the round tip will contact BOTH the wire and material, where a chisel tip is good if you need to get under a device and hit that ground plain that is almost impossible to solder. The bigger your material, the bigger the chisel area can be and the more time to heat.

Irons: my go to favorite is still a Weller pencil iron. They are worth the cost. The latest and greatest from China will work for awhile, but pretty much like anything else from China ... expect something to go sideways sooner or later. I do have a cheapie from China and have given it a go. Works as advertised; although Ima waiting for the other shoe to drop.

Last is hot air. For y'all that are dealing with surface mount chips you will find this is the way to go.
If you are populating a new pcb, you will be using solder paste which contains flux and solder powder ( 60/40 solder ). Once you get the idea, pretty easy. You paint the solder paste across the PCB pads that are clean and shiny for the device, place the device trying to align the pads with the feet, then put in a 130 - 150 degree oven. This does not take long - 20 to 30 seconds and you can see the device align perfectly with the pads. Done deal. If you have had too much coffee and are slightly shaking - put this off for later. It does not take much for those devices sitting on solder paste to move about. If you bump ( or drop ) the pcb in the over, clean it all off and start over.

If you don't have access to the board to put it in an oven, hot air time. Hot air machines have nozzles that are sized to the device you wish to do. If removing a device that lost it's smoke, aim the air gun at the device as close as you can get it because you do not want to spill that heat over into the device's neighbor. You will see change in the color of the solder and can pull it off the board. When replacing: paint paste on the CLEAN pads, then align the device as close as you can, then heat it with the air gun. Be careful here as if there is too high a volume of air, you will be searching for the device. Again, you can see the solder change color and flow proper.

You can also use a Butane torch in a pinch - just remember that it is way hotter than your iron and you can destroy stuff pretty fast.

Whew - wrote a book!

Later
As Troy would say, wording the words.

But, thanks a good reminder for some of us and a tutorial for others.
 
Last is hot air. For y'all that are dealing with surface mount chips you will find this is the way to go.
If you are populating a new pcb, you will be using solder paste which contains flux and solder powder ( 60/40 solder ). Once you get the idea, pretty easy. You paint the solder paste across the PCB pads that are clean and shiny for the device, place the device trying to align the pads with the feet, then put in a 130 - 150 degree oven. This does not take long - 20 to 30 seconds and you can see the device align perfectly with the pads. Done deal. If you have had too much coffee and are slightly shaking - put this off for later. It does not take much for those devices sitting on solder paste to move about. If you bump ( or drop ) the pcb in the over, clean it all off and start over.

If you don't have access to the board to put it in an oven, hot air time. Hot air machines have nozzles that are sized to the device you wish to do. If removing a device that lost it's smoke, aim the air gun at the device as close as you can get it because you do not want to spill that heat over into the device's neighbor. You will see change in the color of the solder and can pull it off the board. When replacing: paint paste on the CLEAN pads, then align the device as close as you can, then heat it with the air gun. Be careful here as if there is too high a volume of air, you will be searching for the device. Again, you can see the solder change color and flow proper.

when I've been populating my light boards (PCB) with SMD I've used a hot plate. I bought a hot plate and IR thermometer and populate everything and last carefully on the hot plate for a very short while. It is amazing to watch the solder melted every line up (unless you have too much pate on). The hot air gun is a good idea to fix things or for some singleton applications (just attaching one chip).
 
Good Morning All!
34F @93% - no snow yet.

Survived the weekend - suspected that I would as it has been *years* since we have been out on New Years; 4th of July also for that matter. I did get out yesterday to watch the Sea game. I kinda thought that it would have been a better game as both were 7 n 8. Guess that the Jets just didn't come to play.

Soldering: I have been doing that since I was 12Yo - 58 years. It is an art. The 3 most important things for a good solder connection are:
1. Clean
2. Clean
3. Clean
Soldering iron tip, and material to be connected; wire, brass, copper ... etc need to be shiny and free of debris. For anything electronic - rosin core solder; period. The smaller the item is to solder the less heat you need. In other words, you would not use a 1000W honker iron for soldering 23Ga wire onto something. Soldering silver is more art to the art. Gold is a whole new ball game. they both need way less heat than electronic stuff and a specialized solder that is usually 96%/4% tin/silver for silver, Gold has a pretty unique way - Google it.

For electronic stuff: Do not use anything abrasive on your tip. Do not use a wet sponge to clean the tip. Stick the tip into your small bucket of rosin flux for an instant, pull it out and it will be shiny shiny shiny. If needed, anchor the receiving material to be soldered somehow. In the case of a rail joiner, slide it on a piece of rail, turn it over so you have access to the bottom. Now touch the joiner with the iron to start the heat process, then after a second or two, touch the solder on the wire AND the joiner at the same time and watch the solder flow into the joint. Only takes another second or two to complete the process. If ya did it right, the joint will be shiny with both the wire and joiner mechanically connected with no gap. If the solder has a dull look, won't work. You did not clean stuff good enough. If the solder has bumps or divots, not enough heat or time. Besides shiny solder, the next important thing is that mechanical connection. You do not want a blob of solder between the two materials as solder is not very strong by itself. Once bonded good mechanically, you should not have any problems with it for years.

Oh, and if you have access to a solder pot, use it. I got one about 5 years ago and when ima doing wiring, I dip the wire in about 1/4"; after the insulation is removed; of course. Makes the bonding process faster.
Note that the temp controller irons are pretty much eye candy. If you have to 'turn the temp up' more than 5 to 10 degrees; get smaller solder. If turning it down more than 5 to 10 degrees, get bigger solder and possibly a smaller tip. Temp depends on the solder mix and if your temp is too high, you will blast the pcb pads off if soldering that type - then where will you be?

Galvanized metal ( think Suydam kits ) requires acid core solder and acid flux. Usually this takes a little longer as you probably are having to heat a bigger area - which takes a higher wattage iron. Same process as above - clean first, solder later. Again the bond can not have a blob of solder between the two materials. If so, try, try again.

Tip geometry makes a difference. A round sharp point is good for that really tiny stuff, a little bigger for the example above with the joiner as the round tip will contact BOTH the wire and material, where a chisel tip is good if you need to get under a device and hit that ground plain that is almost impossible to solder. The bigger your material, the bigger the chisel area can be and the more time to heat.

Irons: my go to favorite is still a Weller pencil iron. They are worth the cost. The latest and greatest from China will work for awhile, but pretty much like anything else from China ... expect something to go sideways sooner or later. I do have a cheapie from China and have given it a go. Works as advertised; although Ima waiting for the other shoe to drop.

Last is hot air. For y'all that are dealing with surface mount chips you will find this is the way to go.
If you are populating a new pcb, you will be using solder paste which contains flux and solder powder ( 60/40 solder ). Once you get the idea, pretty easy. You paint the solder paste across the PCB pads that are clean and shiny for the device, place the device trying to align the pads with the feet, then put in a 130 - 150 degree oven. This does not take long - 20 to 30 seconds and you can see the device align perfectly with the pads. Done deal. If you have had too much coffee and are slightly shaking - put this off for later. It does not take much for those devices sitting on solder paste to move about. If you bump ( or drop ) the pcb in the over, clean it all off and start over.

If you don't have access to the board to put it in an oven, hot air time. Hot air machines have nozzles that are sized to the device you wish to do. If removing a device that lost it's smoke, aim the air gun at the device as close as you can get it because you do not want to spill that heat over into the device's neighbor. You will see change in the color of the solder and can pull it off the board. When replacing: paint paste on the CLEAN pads, then align the device as close as you can, then heat it with the air gun. Be careful here as if there is too high a volume of air, you will be searching for the device. Again, you can see the solder change color and flow proper.

You can also use a Butane torch in a pinch - just remember that it is way hotter than your iron and you can destroy stuff pretty fast.

Whew - wrote a book!

Later
And I forgot a couple of things - ima old and allowed to forget sh.t right?

If you are soldering immediately after cleaning stuff you should not have a problem. If you wait a day or so, then paint some rosin flux on both parts which will clean that tiny bit of oxidation off and give you that perfect bond. You do have a small paint brush to delegate to this, right? Copper starts oxidation immediately, brass not so fast.

And, that flux protects the solder as it ends up on the top of it. Used to be the industry did not clean the flux off. About 20 years ago, the left wingers decided that flux was the devil item and lobbied to get it removed. So, stuff went into a solvent bath, then water rinse. Added to the process time and $$$. Then they decided that lead based solder was no go. No lead solder is sometimes a pain as it takes longer to heat and does not flow as good. I only use lead based solder with the appropriate PPP and fan.
 
Good morning all, 20F in east central Minnesota, cloudy

We are supposed to get a foot of snow tonight, however we are right on the cutoff line, hope it misses us!!!!

Todd: Anyone who has done something since age 17 and now in their 60's would certainly be considered an expert, I stand up and listen when you talk soldering!

My tool of choice is the chainsaw, bought my first one in 1976 with birthday money (age 18) and I build 7 log cabins over the years also logged thousands of cords of timber, and that is just the beginning. When wife makes a suggestion about something with trees, logging, wood, I can barely contain my disbelief since that is my area of expertise.

Christian - interesting thoughts on the N scale, just last night I thought about putting a N scale layout under my HO layout, since that one is high and I have lots of room down there.

McLeod - glad you are back

I did a little work on the Cornerstone bldg:

base coat down also edged filed, will be painting some bricks/lintels then adding grout,

IMG_3038 r.JPG


the kit came with the window fillers, don't think I will be using them however would look good if it was a background building


I did not read all posts yesterday it was a busy day so forgive me if I forgot to acknowledge a comment...

Dave LASM
 
Hello Happy Members !
because I will never be able to build a large H0 scale layout (mostly for the lack of space), I'm thinking about going to N scale. But I know absolutely nothing about N scale. So, is a good or a bad idea? All your comments and advice will be greatly appreciated.

I like N-scale. You can do much more in a given area. Be aware that N-scale can be close to or just as expensive as H0. Especially Euro stuff. Japanese prototypes are the least expensive in general and can be sourced directly from Japan though you folks in Euro land will have all sorts of taxes and fees and brokerage fees and fees for this and that to receive the shipments (based on reports on a forum for Japanese N scale I am on). I just bought a brand new diesel locomotive (used for small trains and yard work called a DE10) for about USD 48 (that is tax free and a good exchange rate). Since I am in Japan I didn't have to pay shipping but shipping can be reasonable. Japan is a huge train country and has a huge N-scale industry. A good amount of the stuff I have I had sent from Japan and there are places that can send it relatively inexpensively price wise.

Euro N-scale are expensive. But there is a good amount to be had. I do German/Swiss/Austrian trains and except for KATO they are very expensive but very well made. Lots of cool stuff to choose from.

US seems to be in the middle price wise -- I paid about $115-$135 for my DCC equipped KATO locomotives new (some were end of year sale). You can get the same stuff DC for about $85-$110. There are a lot of other brands and a good amount of American prototypes available N-scale from what I see in the shops. I only have 4 Union Pacific locomotives and a bunch of container well cars and a few flat cars and I only got them because the UP runs in our area and I see them whenever I am on that side of town. I can't speak too much about US N-scale models. I think @Texas Hobo and a few others here are doing N-scale.

I would vote YES if you are doing a vote. KATO Unitrack is a good system for "put it together" track like you use for your "flash layouts".
 
Good Morning All. Cloudy and a pleasant 65° out there right now. Not supposed to go above 71° today with thunderstorms starting around noon. They're still non-existent on the radar, but the pattern could bring potentially severe weather later on today. High winds, hail, tornadoes, and heavy thunderstorms, and then again, it may be all east of here like the last time. We're at least 15° above average temperature-wise so far this week, however it only made it to 78° yesterday. I'm looking at a couple of cooler nights before resuming mid-60's for a while.

Yesterday was rather bland, which is not a bad thing any more. 2022 was not a stellar year health-wise for me. It started with two months of pneumonia, then the angioplasty and stent in June after the stress test, followed by 2 1/2 months of sciatica. Still dealing with the lung congestion although it is getting better on it's own. I am just not used to anything less than near perfect health. I should attempt to lose more weight. The 40 pounds that I lost in 2018-2019 really made a difference, I am going to go for 20 more. It's that damn second helping at supper that does me in.
I spent about 30 minutes with the push mower yesterday! Always a thrill to mow on New Years Day. I also did my morning walk around the property lines, which has been a New Years Day tradition since we bought this place 42 years ago.
How can this new year be better? For me, mostly I want to maintain my current health. I would love it if the Stock Market rebounds, but I have no control over that. It would be nice to get that $40K back, but as I posted before, it's all on paper right now. I do look forward to two years of inaction in Washington DC, as gridlock produces no stupid legislation that will make my taxes go up. For the country overall, something needs to be done about this immigration/asylum mess. Most of you up north do not realize what it is doing to Texas and the other three southern border states. New York City is freaked out about getting 9000 migrants in the last six months, Texas is getting over 9000 a day!!! Some current governmental officials need to be investigated, but nothing will come of it other than grandstanding.

Thanks for the reactions and comments regarding the random scenes that I posted yesterday.

Amazing that there were 73 posts in the Coffee Shop on the first day of this new year. And there were plenty more elsewhere on the forum; I am having a hard time keeping up. Matter of fact, I am not keeping up!:(

First day of the year saw me out in the train shed for a while. Since I am going to have to assemble it soon, I decided to do some pre-assembly on the Fermentation Tank Details kit from Walther's for the tanks that I am rehabbing.
IMG_2723.JPG

Most of the assembly is for the stairway unit. The first thing that I read in the instructions is this.
IMG_2725.JPG

That had me concerned, but I looked it up and Testor's Liquid Cement will work. Good because I didn't want to use Gorilla Glue due to it's short work life.
After a lot of work, I got it together.
IMG_2720.JPG

IMG_2722.JPG

While this has only 17 individual parts, it has over 60 glue points, hence the hesitation to use the Super Glue.

Tom O -
No resolutions for me to break. I am just going to try to be better then the day before. Some days I succeed, some days I fail but I move on…
I like that philosophy, hope that you don't mind if I repeat it.
Karl - Taylor Ham??? What happened to the scrapple???
Todd - Yes, Car 54 is alive and running on my layout.
Chrιstιaη -
Willie: Are you really going to kill that poor bird with a chainsaw ?
It's the Texas way of doing things. Texas Chain Saw Massacre as Curt pointed out.
HO scale versus N scale - Other than the size of equipment, there's not a whole lot of difference between the two.
Hughie - I also have scenes on the layout that mean something to me personally. Here's me, my wife and her brother looking over my newly acquired used '61 VW Beetle. I paid $400 for it and used it for 6 years.
12-26-13 036.JPG

Both me and my wife have gotten bigger and my BIL's "Elvis pompadour haircut" has thinned out! He still wears his black leather jacket though.
I have some other scenes as well.

Time to go now, everybody have a grand day.
 
Oops ! As always I made a big mistake and deleted my post about "Going to N scale". Apologies to all.
Hello Happy Members !
because I will never be able to build a large H0 scale layout (mostly for the lack of space), I'm thinking about going to N scale. But I know absolutely nothing about N scale. So, is a good or a bad idea? All your comments and advice will be greatly appreciated.
 
Status
Not open for further replies.


Back
Top