
You are using an out of date browser. It may not display this or other websites correctly.
You should upgrade or use an alternative browser.
You should upgrade or use an alternative browser.
BearClaw Valley Railroad
- Thread starter jim81147
- Start date
ModelRailroadForums.com is a free Model Railroad Discussion Forum and photo gallery. We cover all scales and sizes of model railroads. Online since 2002, it's one of the oldest and largest model railroad forums on the web. Whether you're a master model railroader or just getting started, you'll find something of interest here.


Rick , what ended up working best for me was staining with a rag . I just put on a latex glove and got a scrap of towel , dipped the rag in the stain and then pulled the lumber through it much the same as wiping a dipstick when checking your oil . I had good control over how much color was put on . It takes about 3 pieces of lumber to become a certified expert I would think that with soaking them you may get more color than you want , you will use more stain and you may find that you will still have to wipe them anyways . I used minwax stain for mine . The color is Jacobean . Look at LynnB 's thread also , he got some nice color using an alcohol/ink wash .



Affiliate Disclosure: We may receive a commision from some of the links and ads shown on this website (Learn More Here)




R
roofintrash
Guest
Outstanding job on the trestle. Love the color of the stain too. You have to be crosseyed after adding all the bracing.
Lynnb
Well-Known Member
Fantastic job on the trestle. When you are ready to mount rail on it I would highly recommend the ME bridge track. You would want to keep the joining rails at each end loose so they can be joined onto the trestle track following the curve and make sure the joining rails are not short if there on a curve. I need to replace one track on one of my non trestle joining rails which is of course in the curve. Right now it has a joint only 20 ties or so down the rail and I will be changing it so it is a full 3 foot length and solder the joints to the trestle rail.
Thank you guys for all the kind words .
Lynn , I was worried about the joints on the bridge when I first decided to do this at this size. What I did , was when laying the track , all removable trackbed pieces were first fit and tested then the track went down . All joints were soldered well back into the permanent part of the roadbed . The only thing I opted not to do was to use bridge track . I may decide later that that was a mistake , though I hope not .
Lynn , I was worried about the joints on the bridge when I first decided to do this at this size. What I did , was when laying the track , all removable trackbed pieces were first fit and tested then the track went down . All joints were soldered well back into the permanent part of the roadbed . The only thing I opted not to do was to use bridge track . I may decide later that that was a mistake , though I hope not .
Well guys , here is the view that I had envisioned , albeit finished of course , that prompted this entire scene . Now that the bridge is in position I can build the bent foundations and then start on the landforms . I hope that all the extra eyes will find the defects , and point them out while I still have time to fix them .
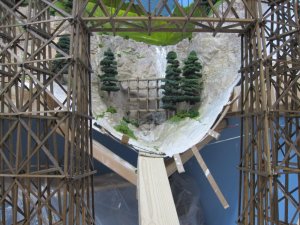
Here are a couple more views of the bridge .
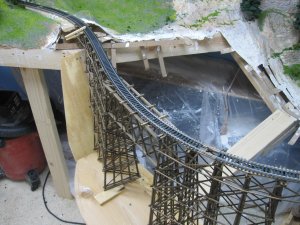
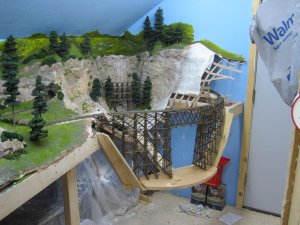
Here are a couple more views of the bridge .
flyboy2610
Loveably weird
That is going to be one fantastic scene right there, yessiree bob!
Last edited by a moderator:

R
roofintrash
Guest
The bridge and scene turned out awesome. Nicely done.
I am curious how you stained the wood. I am building a couple small bridges and quite a bit of retaining wall, so have a buttload of lumber to do. I was thinking about just dumping it in a bucket of stain for a while and then lay it out on newspaper to dry. If you have a different method,I'm all ears.
I am curious how you stained the wood. I am building a couple small bridges and quite a bit of retaining wall, so have a buttload of lumber to do. I was thinking about just dumping it in a bucket of stain for a while and then lay it out on newspaper to dry. If you have a different method,I'm all ears.
The bridge and scene turned out awesome. Nicely done.
I am curious how you stained the wood. I am building a couple small bridges and quite a bit of retaining wall, so have a buttload of lumber to do. I was thinking about just dumping it in a bucket of stain for a while and then lay it out on newspaper to dry. If you have a different method,I'm all ears.
Rick , what ended up working best for me was staining with a rag . I just put on a latex glove and got a scrap of towel , dipped the rag in the stain and then pulled the lumber through it much the same as wiping a dipstick when checking your oil . I had good control over how much color was put on . It takes about 3 pieces of lumber to become a certified expert
I would think that with soaking them you may get more color than you want , you will use more stain and you may find that you will still have to wipe them anyways . I used minwax stain for mine . The color is Jacobean . Look at LynnB 's thread also , he got some nice color using an alcohol/ink wash .
R
roofintrash
Guest
That doesn't sound too bad. I already picked up the stain you used so may give it a shot today. I'm going to use wood ties also and think I'll dunk them in the stain in a screen strainer then blow them off with a blow gun. Time to break out the gloves.
Thanks.
Thanks.

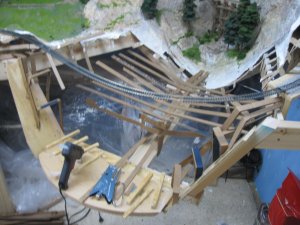
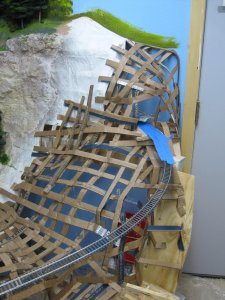
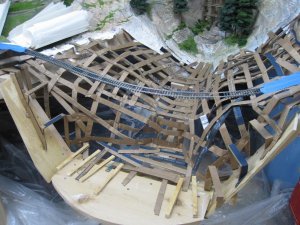
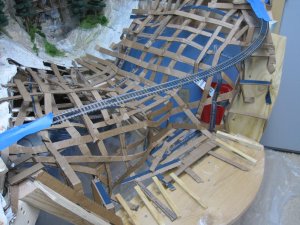
After that is was start throwing plaster coated paper towels at it . This is a very messy process so I had to make sure plastic was down first .
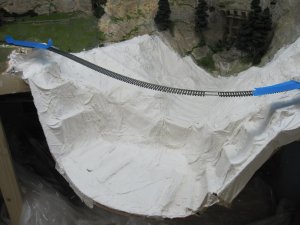
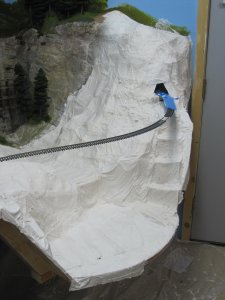
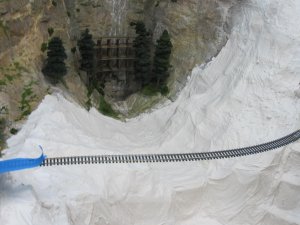
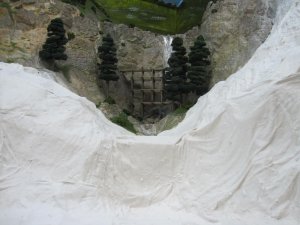
While rough , you can start to see how I envision the terrain looking like . There is a small waterfall right in the middle that will be framed by the trestle bents.
While rough , you can start to see how I envision the terrain looking like . There is a small waterfall right in the middle that will be framed by the trestle bents.
Hawkesburytrain
Well-Known Member
Jim, this is looking fantastic.
Well thought out.
Come on, put the trestle in place so we can see how it looks....lol
Well thought out.
Come on, put the trestle in place so we can see how it looks....lol
Lynn , you are right . I had never got to this point on my old layout so its is not just something new but also very enjoyable . It is really satisfying to have a vision in your mind and see how close you can come to making it .
Here you go Lloyd , I was not sure it would still fit either It just took some minor scraping to go back into position . I do have a lot more filling to do on the bottom of the bents , but I need to do that also to form the streambed .
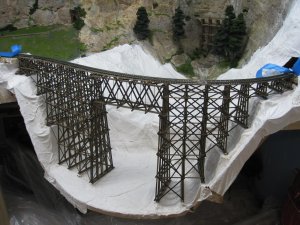
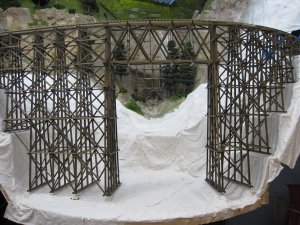
Here you go Lloyd , I was not sure it would still fit either
It just took some minor scraping to go back into position . I do have a lot more filling to do on the bottom of the bents , but I need to do that also to form the streambed .
Something of a masterpiece, I would say. Some great photo/video shots to be had. The changes in radius and direction are quite stunning.
Affiliate Disclosure: We may receive a commision from some of the links and ads shown on this website (Learn More Here)