Weekend photofun 25 26 27 July 2008


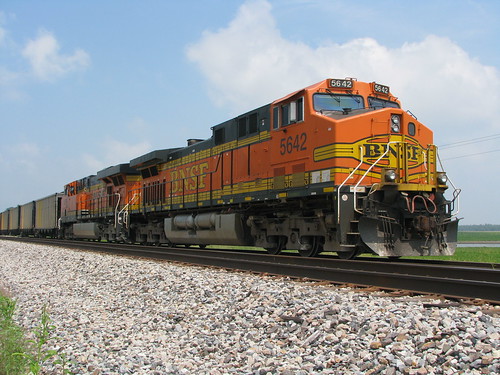
If you look close you can see that this is my newest creation. The AAR trucks are a dead giveaway. The B unit has AAR trucks also.

P1010037.jpg
 
looks nice Jeff! I like your cardboard container idea, it's a great way to populate an intermodal yard.

Tom: no pics showed when I looked...
 
Nice stuff all 'round!
Guess I'm a little late...
I caught the Fuesrt Matthes switcher idling alongside the warehouse:
 
Carndell, nice weathering on the Y6b and nice scene with the trestle over the river with canoeists.

Tom, nice train as usual. I can actually remember those B&O trailers when they were in service on those 40 foot flats. Seems like just yesterday but it must be near 50 years ago now. :eek:

Jeffrey, you've now created two Frankensteins. :)

Rico, that 70 tonner looks lonely.

Still working on the last touches of my NKP caboose. It never fails that you see something that looks like crap when you take pics. Hopefully I'll get the problems fixed by tonight. :mad:
 
Here's some recent Scenery I've begun. I'm doing the "base" with Plasti Kote Fleck Stone spray paint. Works great, and creates a good beginning texture.
 
Josh, what is the stuff on top of the foam? Kind of looks like plaster cloth, although I don't know why you'd use plaster cloth if you have foam.
 
I didn't get a whole finished with my layout but I did do some railfanning this last week. here are some catches.

2712684984_53909094a7.jpg

2712685014_0b28ea872e.jpg

2711847245_9fab3f4793.jpg
2712685072_fcbe9f89cc.jpg
 
Josh, what is the stuff on top of the foam? Kind of looks like plaster cloth, although I don't know why you'd use plaster cloth if you have foam.
Actually, it IS plastic Cloth, topped with the Fleck Stone. :eek:

Funny story. I ran out of foam, so I built the slopes for the Underpass with paper & left over plaster cloth (had almost 2 rolls!). I'm liking the stiffness the plastic cloth adds to the modules, so I'm using it in the more scenic'd areas (I.E. hilly), and around the edges of the modules (helps keep the bolts from tearing through. Remember there is no wood in the modules.
 
Mike, nice shots of the BNSF. They sure keep their track and right of way in good shape out there.

Josh, I thought it looked like plaster cloth - I just missed the part about you spraying it with the stone paint. Pretty good way to conceal the plaster cloth and add some texture at the same time.

Jeffrey, that would make a good scene with a couple of painters on scaffolds working on the engine.
 
Yeah, works well. One issue with the way the plate cloth has some left over open holes, but some dirt with glue over the fleck stone will work to mast any holes. On top of that there will be allot of static grass, as this is California I'm modeling.
 
The FT is as done as it's gonna get and the F7-B needs just a spot of paint on the diaphrams. Wish the decals were better but this new printer is a piece of crap!


P1010052.jpg


P1010053-1.jpg


P1010054-1.jpg


P1010055.jpg


P1010056-1.jpg


P1010057-1.jpg
 
Actually, it IS plastic Cloth, topped with the Fleck Stone. :eek:

Funny story. I ran out of foam, so I built the slopes for the Underpass with paper & left over plaster cloth (had almost 2 rolls!). I'm liking the stiffness the plastic cloth adds to the modules, so I'm using it in the more scenic'd areas (I.E. hilly), and around the edges of the modules (helps keep the bolts from tearing through. Remember there is no wood in the modules.

Just a refresher......I did a thread a long while back using this fleck stone stuff on road beds...here is the link..

http://www.modelrailroadforums.com/forum/showthread.php?t=5637
 
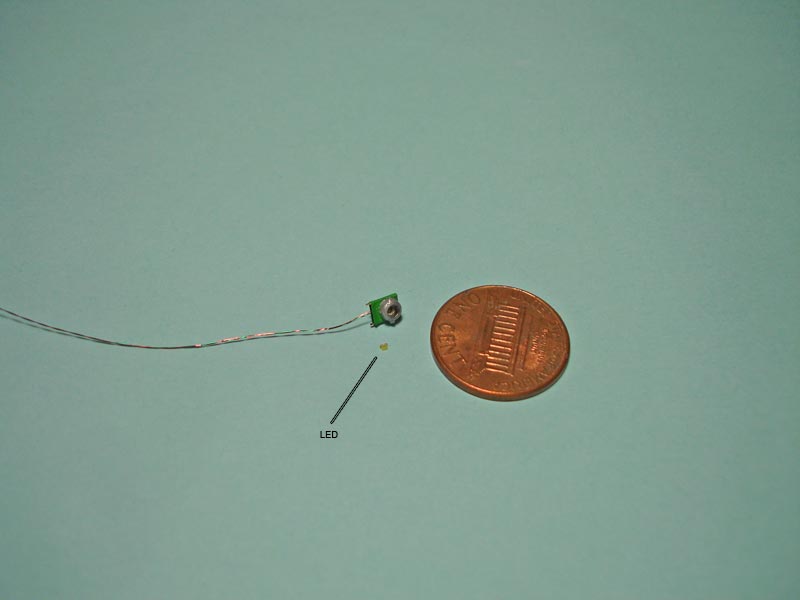
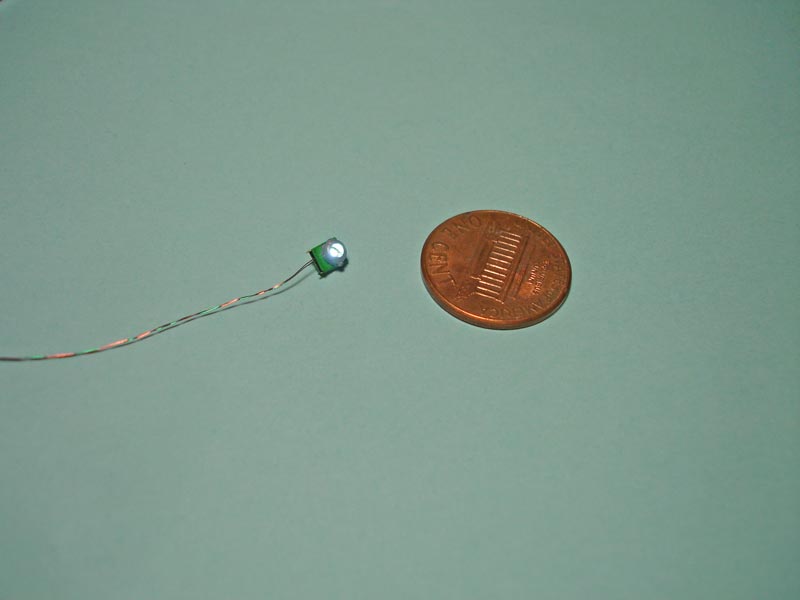
This next project is something that I'm really excited about, I added an Ngineering LED to a Railflyer exact scale ditch light housing, and it works perfectly. I was sure I'd never be able to do this, but as it turns out, it's really not that difficult with the right equipment and a little patience.
ditch_light_3.jpg


ditch_light_1.jpg


Chris

I did not know that such LEDs existed, so small. Are these commonly found and are they 12 Volts or they are less and connected to a decoder?
 
I solved my decal printing problem. By designing the decal at a larger font size, say 12 instead of 6, then printing it with the printers scaling set at 25% I get nice crisp decals (I have one that says 'DIESEL FUEL ONLY' that's so small I need a magnifying glass to read it) with no fading of blurring. And this is on a cheap HP inkjet printer.

P1010062-1.jpg


P1010066.jpg
 
Last edited by a moderator:
Much better looking decals on that second run, Jeffrey.

Maxi, those LED's are 5 volts so you'd have to use a dropping resistor in line with the bulb for 12 volts. You'd need something along the lines of a 300 ohm resistor to get a bright light and not have the resistor get too hot. The bulbs are available at www.ngineering.com.


Back
Top