Help Me Plan My Layout


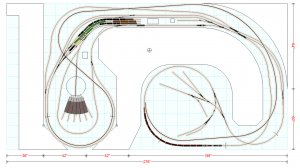
Bob, looking at your last plan, and assuming they are 12" squares in the graph, then you have allowed 20' as the length of the layout. The measurements of the room that Greg showed back if Page7, post #67 works out to 22'5", give or take.

I haven't bothered showing the along the wall staging, as there is nothing to design. You put in as many parallel tracks as you have room for, and connect to them to the main layout at the upper left. It is definitely needed, and important, but not something that has to be including in my design doodles.

While the plan is to scale, it's still only a schematic. Nothing shown in "cast in concrete", it's just the overall concept. Need more aisle width? Shrink down the peninsula a bit and tighten up the curves. I think the inner one is at 32" right now, it could easily be shrunk to 29, and that would give you 6 inches less width. The roundhouse is a pure guess on my part and I've drawn it big. It may end up smaller, but he said "big engines".

Here's my concept of how this will play out for Greg.
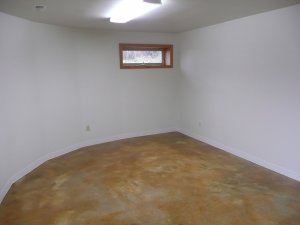
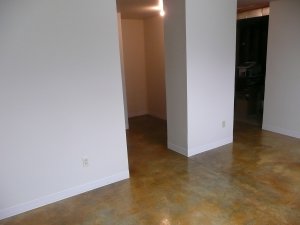
I'd start with the staging on the left, make it as wide as you comfortably can. Then lay out the two "bubbles" and connecting benchwork, using butcher paper on the floor (normally I'd just use chalk, but he just did that gorgeous floor and I wouldn't want it to leave any marks). Then, once you've got that done, look at the aisle ways. Are they comfortable? Do you have enough room? Once you like it, the benchwork gets built.

Then you look at my sketch, which is just that, a sketch, and do one of two things:
1) Say "This guy's an idiot! I want the yard over THERE, not here!" and totally ignore what I drew.
2) Say "OK, I like this idea, let's try and go with something along those lines." You draw in the curves first, as they're pretty much locked in. Then you lay out the yard tracks using switches to see what fits. Then you look at the space left and put whatever you want wherever you want it. The sidings and even the alignment of the main tracks are purely rough ideas. Also, as mentioned, they would look better with some gentle curves and twists. So, once you pencil out where the switches go, get creative, do what you want. The fact that I drew a 37.81 inch radius curve with an angle of 87.92 degrees is meaningless.

Without an actual and accurate measurement of the room, my plan is only good for a guide. So why bother doing it at all? Well, because it's too easy to draw stuff that won't fit, especially switches. So while they may not go exactly where I drew them, the amount of space they'll take up is pretty close, and that's useful in the planning stages.

Double level staging as you have suggested would also have distinct advantages space wise.

Yes, and it's easy enough to do. Have one come off the lower level and one come off the highline. You'll probably only get 6 inches or so of height, but for a shallow track that's just staging, it will work. (Yeah, I know, when something on the back track in the bottom derails, he's going to be grumpy, but hopefully it doesn't happen too much. If you have enough height, maybe the top can go on a 1 x 12 designed to be removable.

I like the addition of the extra hi-line, it creates new visual elements and reinstates in a better manner, my bridge (or more bridges) across the yard/s, but in a better location. (top marks for that :p).

Cool, thanks, glad you like it.
 
What I find myself gravitating to is this option with an elevated High Line.

View attachment 56410

It has some good switching options for changing the route, the roundhouse, a town site, and wide curves. I think it would be a fantastic layout in the space I have.
With this one, the main service track for the yard as well as the yard lead have become part of the main line.

I think I would also recommend integrating the roundhouse more using it like a turnout on one side to get to an ash pit, a coal tower, and water.
 
For some reason the attachment is now accessible and I am able to see the picture. What would be the advantages of this layout over the one on post #111? I am thinking single level here too.

No advantage. You got to see the design process as I was doing it. The -concept- was that the track around the walls would allow enough height difference for there to be two levels in the center peninsula. But, it doesn't work because the math just doesn't pan out. The run just isn't long enough to get a decent elevation difference. Having 6 or 8 inches between staging tracks is one thing, having it (or even 18 inches) between two levels of layout is totally different. The only real answer other than a grade that's far too steep, is a helix. With your passenger trains, you need on that's 30 or even 36 inch radius. Pretty soon you have a room full of helix with a bit of train layout around it.

There would be one neat feature of that one, you could do a junction on the end of the center, which would look neat and give you an alternate route. But aside from that, not much else. I'd suggest staying with what you have. I am going to play with that one a bit though, as it could have two tracks on different levels (but on the same benchwork) which could be interesting. However, due to the wide radius curves, it's pretty limited on what you can do, so I'm going to say the current plan is a much better concept.
 
Last edited by a moderator:
With this one, the main service track for the yard as well as the yard lead have become part of the main line.

I think I would also recommend integrating the roundhouse more using it like a turnout on one side to get to an ash pit, a coal tower, and water.

That's why I drew the latest plan with double track. It allow you to switch the yard while also running trains.

Using the turntable as a switch was rarely if ever done. The track to the left of roundhouse, using a switch off the roundhouse lead, could be used for that. It could also easily be two tracks wide to allow space for a couple of engines.
 
If I was getting something to make it easier to stand on concrete, I would choose rubber work mats, the kind with holes through them. Screws, plaster, and wood chips are tough on carpets. The work mat could be hosed off and the bits vacuumed off the concrete floor.

For display I would hide the mats and roll out rug runners.
I agree to that, just counting the number of times I've dropped small parts/screws on the floor :eek:
 
Well yes it will 'cause of the extra width to accommodate the two tracks. If you determine that a certain radius is the minimum, then that will be the inner track and the outer will therefore have to be a larger radius.
I understand that, but it has to be even bigger separation of the dbl tracks if long passenger cars or articulate locos are going to run on it.

More to my question was how advantageous, or is there really, much need for the double track helix. Wouldn't this really just be needed if you planned on running trains both up and down at the same time?? (hoping not to have the layout area consumed by a helix)
 
Last edited by a moderator:
I understand that, but it has to be even bigger separation of the dbl tracks if long passenger cars or articulate locos are going to run on it.

More to my question was how advantageous, or is there really, much need for the double track helix. Wouldn't this really just be needed if you planned on running trains both up and down at the same time?? (hoping not to have the layout area consumed by a helix)


Helixes have long expanses of track inside, and it takes the train quite a while to travel up them. At our local club we have indicators on the panel so you can tell your train is still moving in the helix, otherwise you wait and wait and start to wonder what happened to it...

While a helix itself is big, roughly 7 foot in diameter if you 36" radius track and then add in the supports etc. adding a second track doesn't increase it much. The only increase is twice the spacing between the tracks. Let's say you use 3 inch spacing to be generous and make sure you have plenty of space. That means you increase the diameter by 6 inches. Not a big difference on something that's already 7 feet wide. That first number is why helixes aren't common on home layouts. But if you do have the space, typically in a large basement, finding the extra 6 inches for the increased flexibility of two tracks often isn't a big issue.

And, to answer the question you asked. No, you don't have to do double track. You can easily do single track, and even make it part of the operations. For example most major tunnels are single track. On the BNSF transcon line near Seattle they have Cascade Tunnel, a 7.8 mile long single track bore. Not only does it have just one track, the ventilation system needs some time to pull in fresh air after each train. This causes congestion and delays, but there's no real alternative. Since you're likely disguise the helix as a tunnel anyway, it would be easy enough to say "Oh, that's so and so tunnel, and it's only single track. It can only accommodate 3 trains per hour as well..."
 
Bob, looking at your last plan, and assuming they are 12" squares in the graph, then you have allowed 20' as the length of the layout. The measurements of the room that Greg showed back if Page7, post #67 works out to 22'5", give or take...

Well, my overall drawing is about 6 inches too long then. Depending on what he does on the left side, he should be able to trim a bit here and there and make that up.


0321-1.jpg
 
Small Changes Make Big Changes...

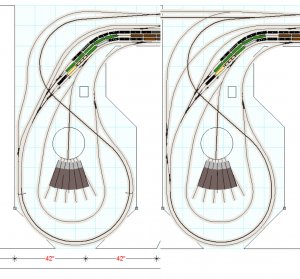
Here's an example of why my drawing is only a rough schematic.

I wanted a crossover where the Highline left the lower level so that it could be accessed from either track. Ideally, I wanted it to also connect to the alternate route that goes towards the upper left corner (and probably through a tunnel if he creates a hillside there.)

I did two things. I decreased the radius of the inner curve to be 30", as it had been 32. I also re-aligned the track a bit going into the yard.

I created the crossovers using #8 turnouts, which are a good choice for long engines and passenger trains, especially on a crossover track. That's good but they take up a lot of room. See how far the second track has to swoop out now? That's not all bad, in fact I kind of like it, but it's sure different than what I had before.

0321-2.jpg 0321-3.jpg
 
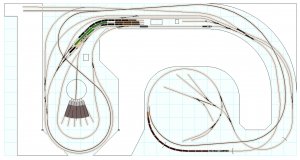
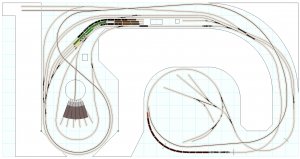
And... yet ANOTHER variation. I like this one a lot, even though the change is subtle. I now have the two main tracks back together, giving it that double track look I was going for. I changed up the yard a bit, and now it has a nice symmetry to it and more importantly, the yard tracks have become longer. You could take the extra length off of the other end if you liked, making more room for the station or maybe a freighthouse.

0321-4.jpg
 
Using the turntable as a switch was rarely if ever done. The track to the left of roundhouse, using a switch off the roundhouse lead, could be used for that. It could also easily be two tracks wide to allow space for a couple of engines.
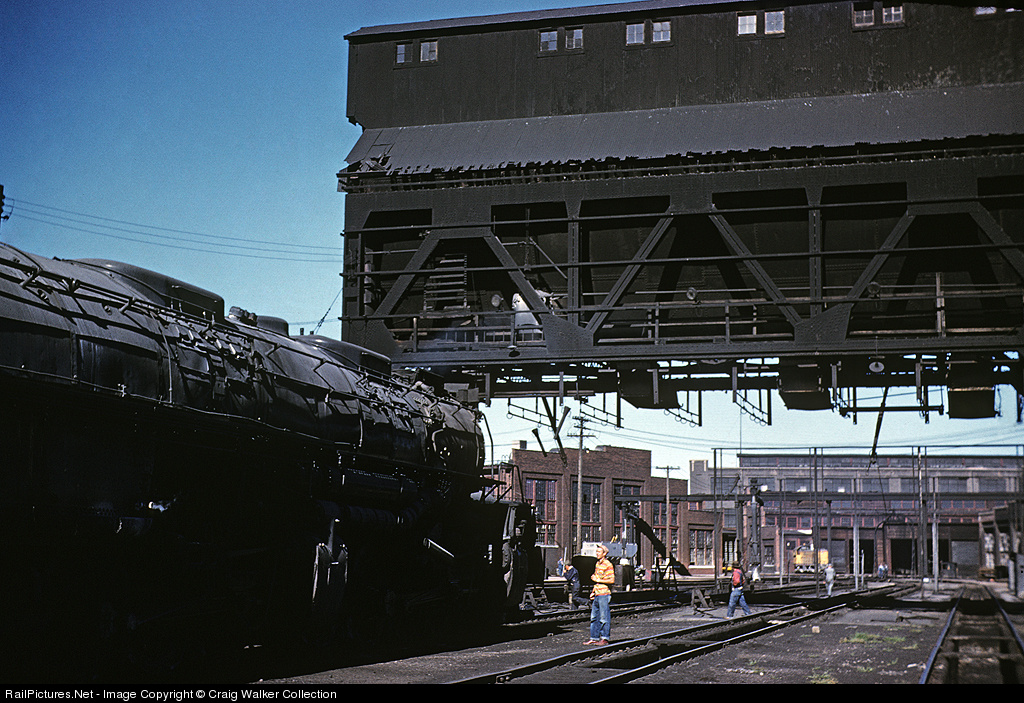
Huh! Every major roundhouse complex I know of does this. Just for one classic example the ubiquitous coaling tower in Cheyenne (five tracks) feed directly into the turntable instead of using turnouts.
Rail Pictures.net photo below.
7003.1328164484.jpg
 
Last edited by a moderator:
Well, yes, but I meant doing it as the only route to the coaling towers and/or water which is what I thought you were implying. Having tracks off of the turntable to it makes sense, but from what I recall, you can also get there from the other end via regular switches.
 
And... yet ANOTHER variation. I like this one a lot, even though the change is subtle. I now have the two main tracks back together, giving it that double track look I was going for. I changed up the yard a bit, and now it has a nice symmetry to it and more importantly, the yard tracks have become longer. You could take the extra length off of the other end if you liked, making more room for the station or maybe a freighthouse.

View attachment 56443

Very nice. This one has lots of routes to choose from. I like the idea of having a double level staging area using the highline for the top level access and the main level for the lower access. As I look at the layout it has the ability to have trains run on the lines in the opposite direction depending on the route chosen. Because of this ability there is no real need for a wye section. You can turn the train around without one.

Here's my concept of how this will play out for Greg.
I'd start with the staging on the left, make it as wide as you comfortably can. Then lay out the two "bubbles" and connecting benchwork, using butcher paper on the floor (normally I'd just use chalk, but he just did that gorgeous floor and I wouldn't want it to leave any marks). Then, once you've got that done, look at the aisle ways. Are they comfortable? Do you have enough room? Once you like it, the benchwork gets built.

Then you look at my sketch, which is just that, a sketch, and do one of two things:
1) Say "This guy's an idiot! I want the yard over THERE, not here!" and totally ignore what I drew.
2) Say "OK, I like this idea, let's try and go with something along those lines." You draw in the curves first, as they're pretty much locked in. Then you lay out the yard tracks using switches to see what fits. Then you look at the space left and put whatever you want wherever you want it. The sidings and even the alignment of the main tracks are purely rough ideas. Also, as mentioned, they would look better with some gentle curves and twists. So, once you pencil out where the switches go, get creative, do what you want. The fact that I drew a 37.81 inch radius curve with an angle of 87.92 degrees is meaningless.

I appreciate the input on the process of building the layout too.

Definitely option number 2. The challenge for me will be how I can follow the plan without messing it all up. But with enough paper, cardboard, and drawing material I bet I can pull it off. The process will not be fast, but I will get there in the end.
 
Very nice. This one has lots of routes to choose from. I like the idea of having a double level staging area using the highline for the top level access and the main level for the lower access. As I look at the layout it has the ability to have trains run on the lines in the opposite direction depending on the route chosen. Because of this ability there is no real need for a wye section. You can turn the train around without one.

There are several reversing loops in this plan, and you could easily add one more by connecting the two tracks in the lower right corner. I'd suggest considering that as well. The good news is that they give you lots of options. They do present a bit of wiring challenge. What system you use will determine how you handle them. I presume you'll go DCC, I certainly would. They're not too bad to set up, but you do have to plan for them.

Definitely option number 2. The challenge for me will be how I can follow the plan without messing it all up.

Here's the good news! You CAN'T mess it up. It's your layout. Whatever you build will be the right answer. Whether or not it ends up like mine (I'm sure it won't match exactly, maybe not even close) won't matter a bit. You build what you want, that's all that matters.
 
There are several reversing loops in this plan, and you could easily add one more by connecting the two tracks in the lower right corner. I'd suggest considering that as well. The good news is that they give you lots of options. They do present a bit of wiring challenge. What system you use will determine how you handle them. I presume you'll go DCC, I certainly would. They're not too bad to set up, but you do have to plan for them.


Here's the good news! You CAN'T mess it up. It's your layout. Whatever you build will be the right answer. Whether or not it ends up like mine (I'm sure it won't match exactly, maybe not even close) won't matter a bit. You build what you want, that's all that matters.

I will look into making the connection of those two segments of track.

Yes, DCC. That is a whole topic in itself. I have a general understanding of it. But the reversing loop scenario is still a bit of a mystery although I have watched a couple of youtube videos on it. I will have to figure out which vendor to choose and what size of power supply I will need, what type of loco controls, if I want the switches to be DCC controlled, etc.

I'm sure I will make more than my share of mistakes, but that is part of the process. I will have to make sure the track is laid correctly before I move on to scenery, so I don't have to tear that up to fix track problems.
 
Basement is finally done.

The windows took me forever. I needed a radial arm or chop saw with a nice miter feature, but I only had a table saw. That made the angles on the millwork very tricky and with quite a bit of sanding on the angles to get them to line up.

Cove Base1.jpg

Cove Base 2.jpg

window3.jpg

Bob, I am going start laying out the track with butcher paper on the floor. How much room should I allow for the turnouts? Did you choose #6 turnouts? Once I get the general track plan laid out on the floor then I can start building the benchwork.

Thanks,

Greg
 
Looking very professional despite mitering difficulties, an advantage that you don't have to deal with actual doors getting in the way. For turnout templates go to this site where you can print them off http://www.handlaidtrack.com/Fast-Tracks-Printable-Track-Templates-s/11.htm In the April Model Railroader Magazine, Pelle Soeberg discusses modifications that can be made to manufactured turnouts to get them to fit in with your track plan.
 
Looking very professional despite mitering difficulties, an advantage that you don't have to deal with actual doors getting in the way. For turnout templates go to this site where you can print them off http://www.handlaidtrack.com/Fast-Tracks-Printable-Track-Templates-s/11.htm In the April Model Railroader Magazine, Pelle Soeberg discusses modifications that can be made to manufactured turnouts to get them to fit in with your track plan.


Toot,
Thanks for the compliment, and the link for the templates, very helpful. :)
 
Should'a mentioned too, your quirks look very accurate and even as well.

Oh if nothing else I am quirky. LOL I had to look up an alternate definition of quirks. The cove base installation was easy as it is vinyl and I only had to do a little scoring and shaving on the back side of the corners with a knife to make them work.


Back
Top