Help Me Plan My Layout


In a normal yard ladder the first one is always opposite to get the track diverging away from the primary. Then each one that follows is opposite to put the next tracks parallel to it.

In this case, notice that the track toward the next turnouts is more curved away from the first track. I always let the departing leg of the turnout match the natural flow of the track. As shown in the original picture, there would have to be an "S" curve in the opposite direction to make the first straight track parallel with the others.


If I follow what you are saying, you are still suggesting I should flip that first turnout......
 
Hopefully this diagram will make clearer what the Horseman is trying to explain...

Notice how in the top diagram, all the turnouts are left-handed; while in the bottom, the turnout from the main track is right-handed.

Can you see how much more "natural" the bottom ladder flows?
 
Hopefully this diagram will make clearer what the Horseman is trying to explain...

Notice how in the top diagram, all the turnouts are left-handed; while in the bottom, the turnout from the main track is right-handed.

Can you see how much more "natural" the bottom ladder flows?


Yes, very good illustration. I get it now.

Thanks guys, I appreciate the help. I will flip that turnout. :)
 
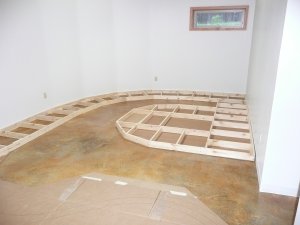
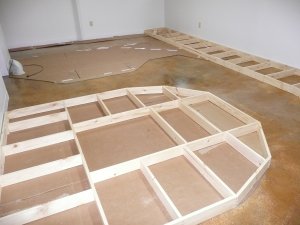
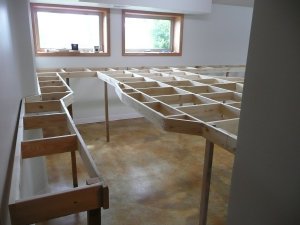
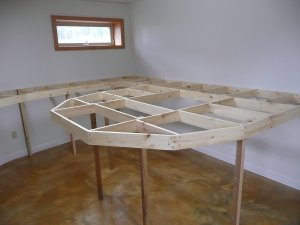
Got started on the benchwork today. Our basement is very dry, and our climate is on the dry side so I went with 1x4 Pine as the primary material. I will top it off with 1/2 inch plywood. There are several sections, so I won't have to lift all of it at once. There is also an opening for a hatch in the peninsula.

Benchwork1.jpg

Benchwork1a.jpg
 
Great work and fast. You will be passing me soon.I have to finish the outside projects now and my carpenter is getting ready to start on the rest of the basement.:(:roll eyes:

Can't wait to see the track work
 
Excellent! Looking great!

Great work and fast. You will be passing me soon.I have to finish the outside projects now and my carpenter is getting ready to start on the rest of the basement.:(:roll eyes:

Can't wait to see the track work


Thanks guys,

Eric, I don't think I will be catching up anytime soon. The weather is starting to get nice, and we spend a lot of time out on the water. But I will do what I can until we head outside to enjoy the warm summer season. I am watching your progress too. I am thinking about track and turnout choices. I noticed you went with Peco flex track and turnouts. Do you need any special tools for creating nice symmetrical radii with your track? I like how you used sheet cork for the yard and standard cork road bed for the other trackage.

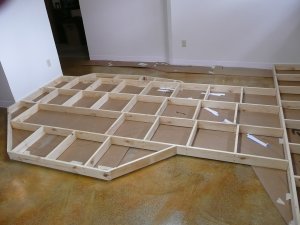
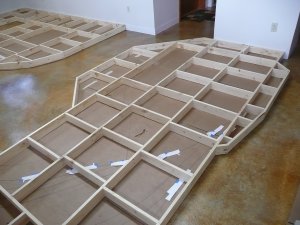
More benchwork, the staging area, and installing the legs come next.

Benchwork1b.jpg

Benchwork1c.jpg
 
[
QUOTE=gjohnston;422701]Thanks guys,

Eric, I don't think I will be catching up anytime soon. The weather is starting to get nice, and we spend a lot of time out on the water. But I will do what I can until we head outside to enjoy the warm summer season. I am watching your progress too. I am thinking about track and turnout choices. I noticed you went with Peco flex track and turnouts. Do you need any special tools for creating nice symmetrical radii with your track? I like how you used sheet cork for the yard and standard cork road bed for the other trackage.

More benchwork, the staging area, and installing the legs come next.

I really like the PECO track ( Code 83) I am using also PECO switches, much better than atlas. I am using some Walthers switches too. The track lays down so much better and I am sure I will have less derailment problems. I bought some Ribbon Rail radius gauges and made a trammel or as I say " a large compass" . Don't forget , eyeing your track work is a must too. I have been using rolling stock that I know, on my old layout , derailed easy to test areas. So far no problems. I think Peco is worth the money
 
Just a thought, I noticed you have built the frame within the base boards (we call 'em "skirtings" down here). Are you going to attach them to the walls? Or is it going to be free standing, with legs all around?
 
Just a thought, I noticed you have built the frame within the base boards (we call 'em "skirtings" down here). Are you going to attach them to the walls? Or is it going to be free standing, with legs all around?

The plan is for it to be free-standing with legs all around. But if it has too much movement I can anchor it to the walls if I have to.
 
[

I really like the PECO track ( Code 83) I am using also PECO switches, much better than atlas. I am using some Walthers switches too. The track lays down so much better and I am sure I will have less derailment problems. I bought some Ribbon Rail radius gauges and made a trammel or as I say " a large compass" . Don't forget , eyeing your track work is a must too. I have been using rolling stock that I know, on my old layout , derailed easy to test areas. So far no problems. I think Peco is worth the money


Thanks for the info. I am leaning toward Peco track and turnouts. The Ribbon Rail gauges look like the tool to keep the track radii consistent.
 
The plan is for it to be free-standing with legs all around. But if it has too much movement I can anchor it to the walls if I have to.

It will also, seeing you have built the frame on the floor, give a bit of give and take when lifting the sections up and joining them together. Had they been made to fit the walls, you might have found tight places when raising them. Much easier to place packers as necessary if needed.
 
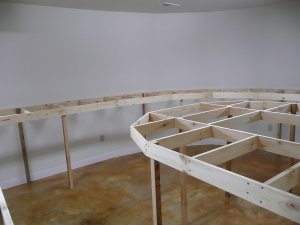
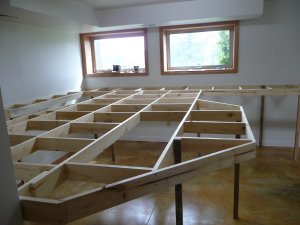
Another day working on the Rail Road. Got the benchwork off of the floor. It sits about 42 inches high. It seemed to be a good compromise between reachability, viewing, and leaving enough room to get underneath. I will add some bracing to the legs, and secure it to the wall in a few places to eliminate any wiggles. Amazingly enough it is level. :)

Benchwork_Elevated1.jpg

Benchwork_Elevated2.jpg

Benchwork_Elevated3.jpg

Benchwork_Elevated4.jpg
 
Looking great!!

Question: Are you going to keep the walls white, use a backdrop, or pain the walls sky blue?

Suggestion: Do yourself a favor and drill holes to run power lines through the frame NOW while the bench work frame is uncovered. It is much easier at this stage of the game then it is after you get the decking on the frame (ask how I know...).

Thanks,

I think I will use a backdrop...... eventually. Good tip on drilling the power line holes. I was going to cover the whole top with plywood, but have decided to cut my roadbed out of plywood and lay it on top of the benchwork. That way most of the benchwork will still be open and accessible from the top.
Good thinking on doing the cookie cutter subroadbed instead of table top. Wishing I had done that when I had the chance.

Sent from my SAMSUNG-SM-G930A using Tapatalk
 
When choosing plywood, avoid the softwood varieties, they will absorb atmospheric moisture more readily and go for the ones with more plies in whatever the thickness is, may cost more, but the payoff is in not so much, the weight carrying ability, but much more importantly for model train track, it's stability (how much it will deform (sag/twist) between supports). Also never put the joins between the sections of your subroadbed (because you will need to splint them underneath with another piece of ply) where there will be a vertical transition curve at the bottom or top of a grade.


Back
Top