Necrosaro420
Member
Couldnt find alot of good info on google so im gonna ask here. After I lay my roadbed, should I ballast it before, or after I lay the track down?

")
It looks pretty good for a test run. Couple thoughts - will you be using roadbed? and how will water and glue affect the dirt? I'm wondering if the dirt will dissolve. Be sure to run a rather strong magnet through the "ballast" before getting a loco near it. Little bits of iron and motor magnets don't play well together.
Thanks Jon,
You raised some excellent points which I didn't even begin to consider!
Just now passed a magnet over the track and not much came up, but certainly enough filings to bugger an engine for sure. I'll give it a try spraying some glue just to see what happens... probably just make hard mud! It'll be fun to see what happens.
Greg
Depends on the size used. WS makes different sizes. I use the medium on my HO layouts but others tend to use the fine grind.If anyone is using the Woodland Scenics ballast, let me know your opinion...
I think that the ballast is too large for HO, but it might just be me
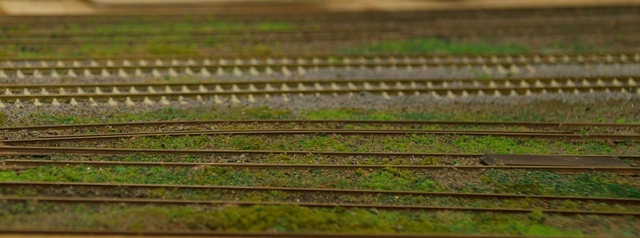


My 11 step method (for HO - using commercial "pre-fabricated" track)
1 - Lay track bed (I'm using cork, but experimenting with 3mm MDF)
Ross McConchie
Canberra, Australia
In the US, MDF (Medium Density Fiberboard) is NOT water resistant. I do not know if the same is true where you are. And as long as you are aware of the limitations it will probably work but could be noisy.
