Weathering Rolling Stock, a Continous thread

ModelRailroadForums.com is a free Model Railroad Discussion Forum and photo gallery. We cover all scales and sizes of model railroads. Online since 2002, it's one of the oldest and largest model railroad forums on the web. Whether you're a master model railroader or just getting started, you'll find something of interest here.


Over 2 months since my last post here. But, I feel the best I have since before the Covid invasion of 3/2020. After surgery, the blahs and 2 years of being as safe as possible from Covid, Terry and I in June did catch the virus. Not too bad but I have had lingering affects, but good now!

Back at the bench this week. Three main pieces of rolling stock are being worked on:
A201820F-37A5-408C-A01E-AB4E3AA64B47.jpeg


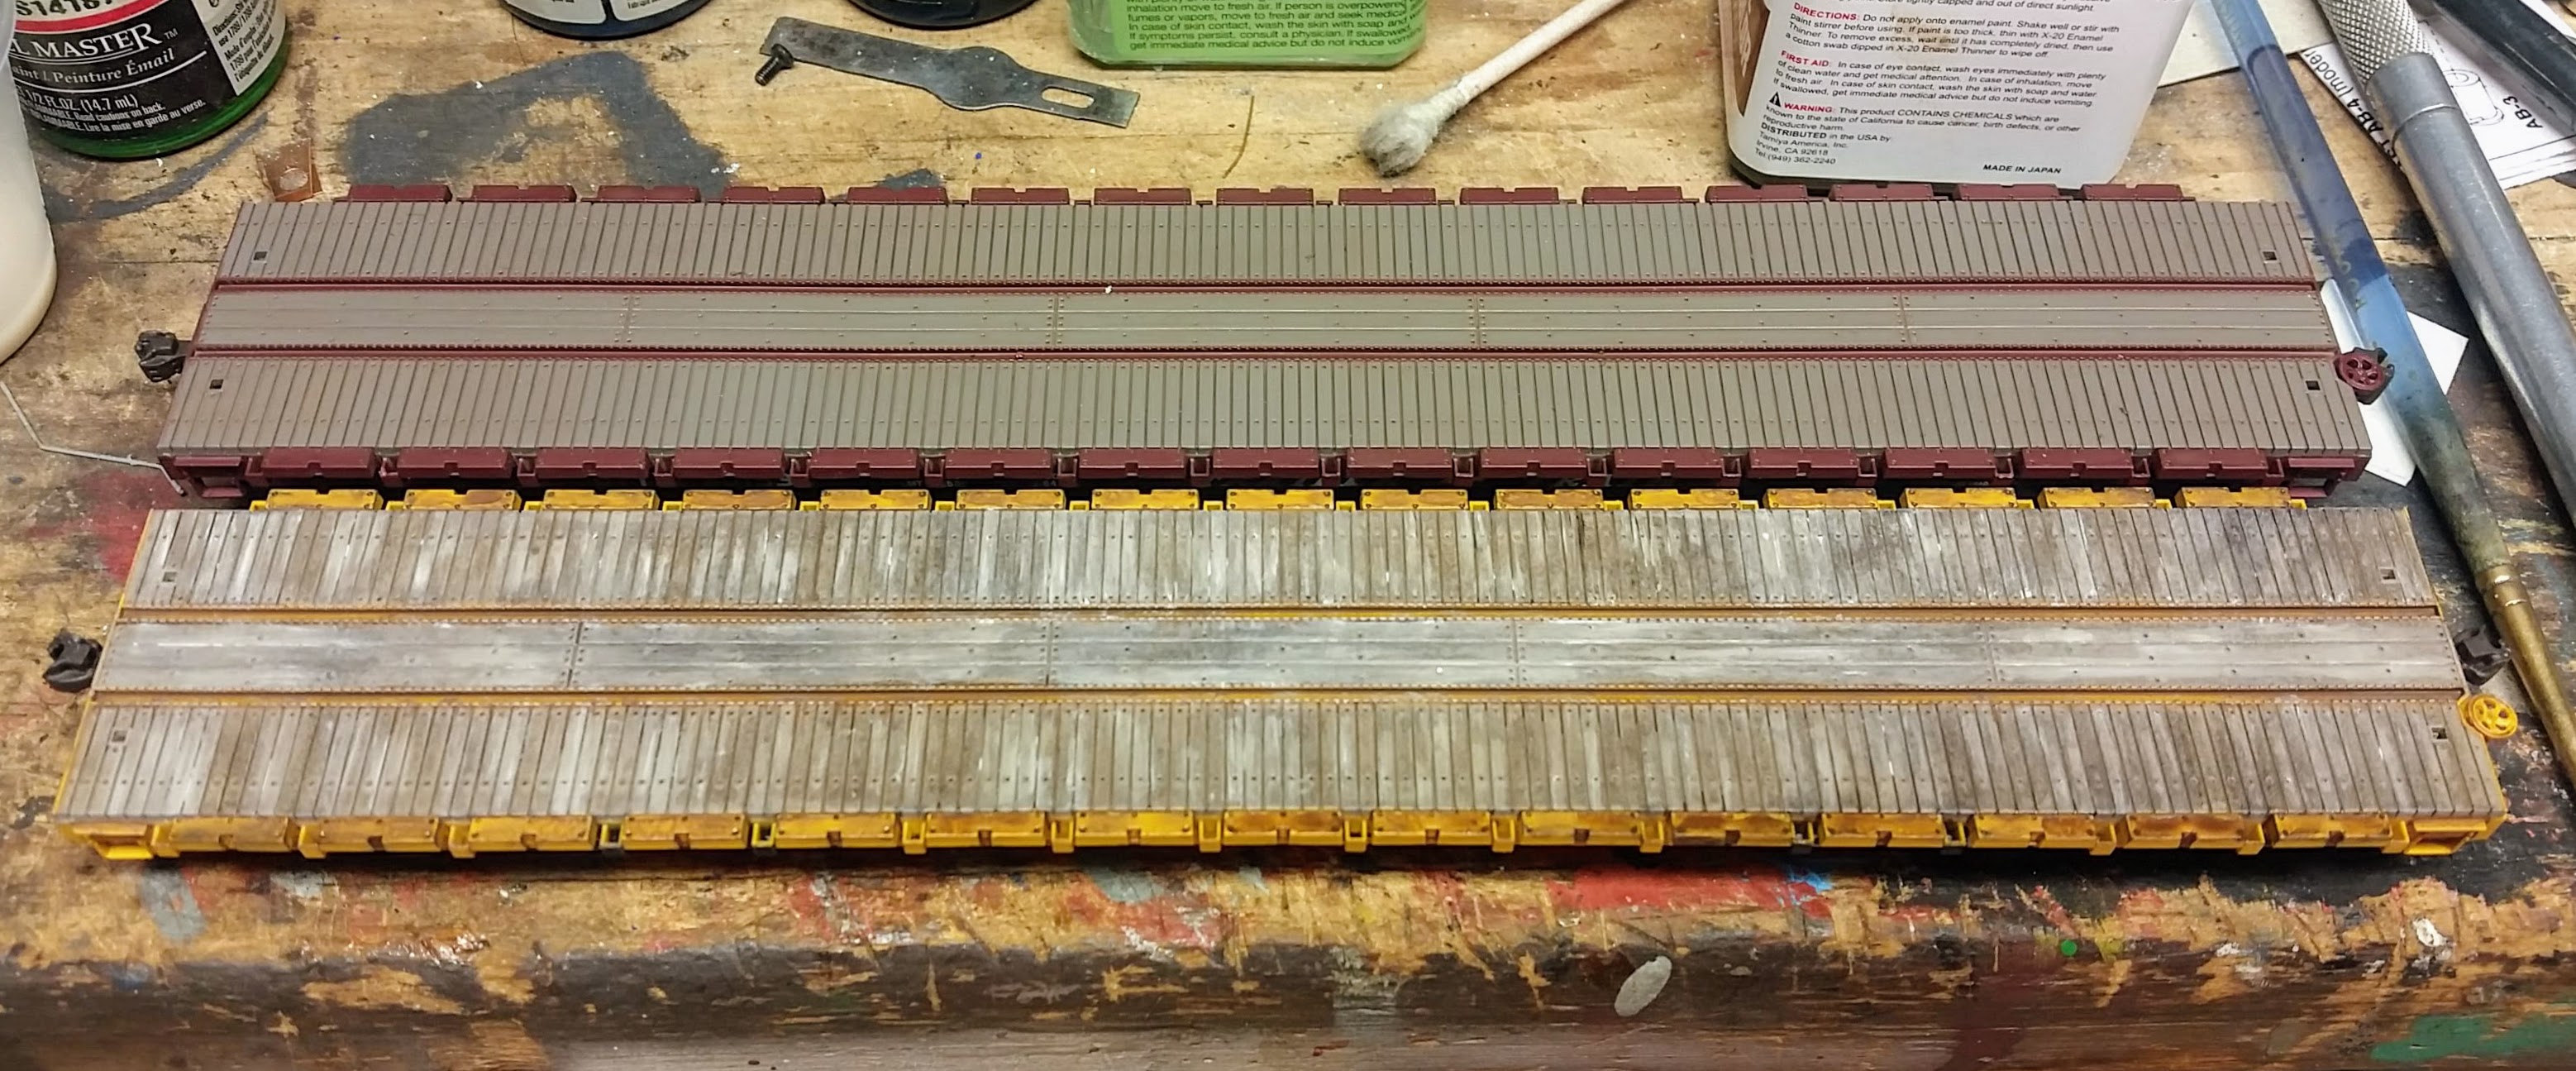
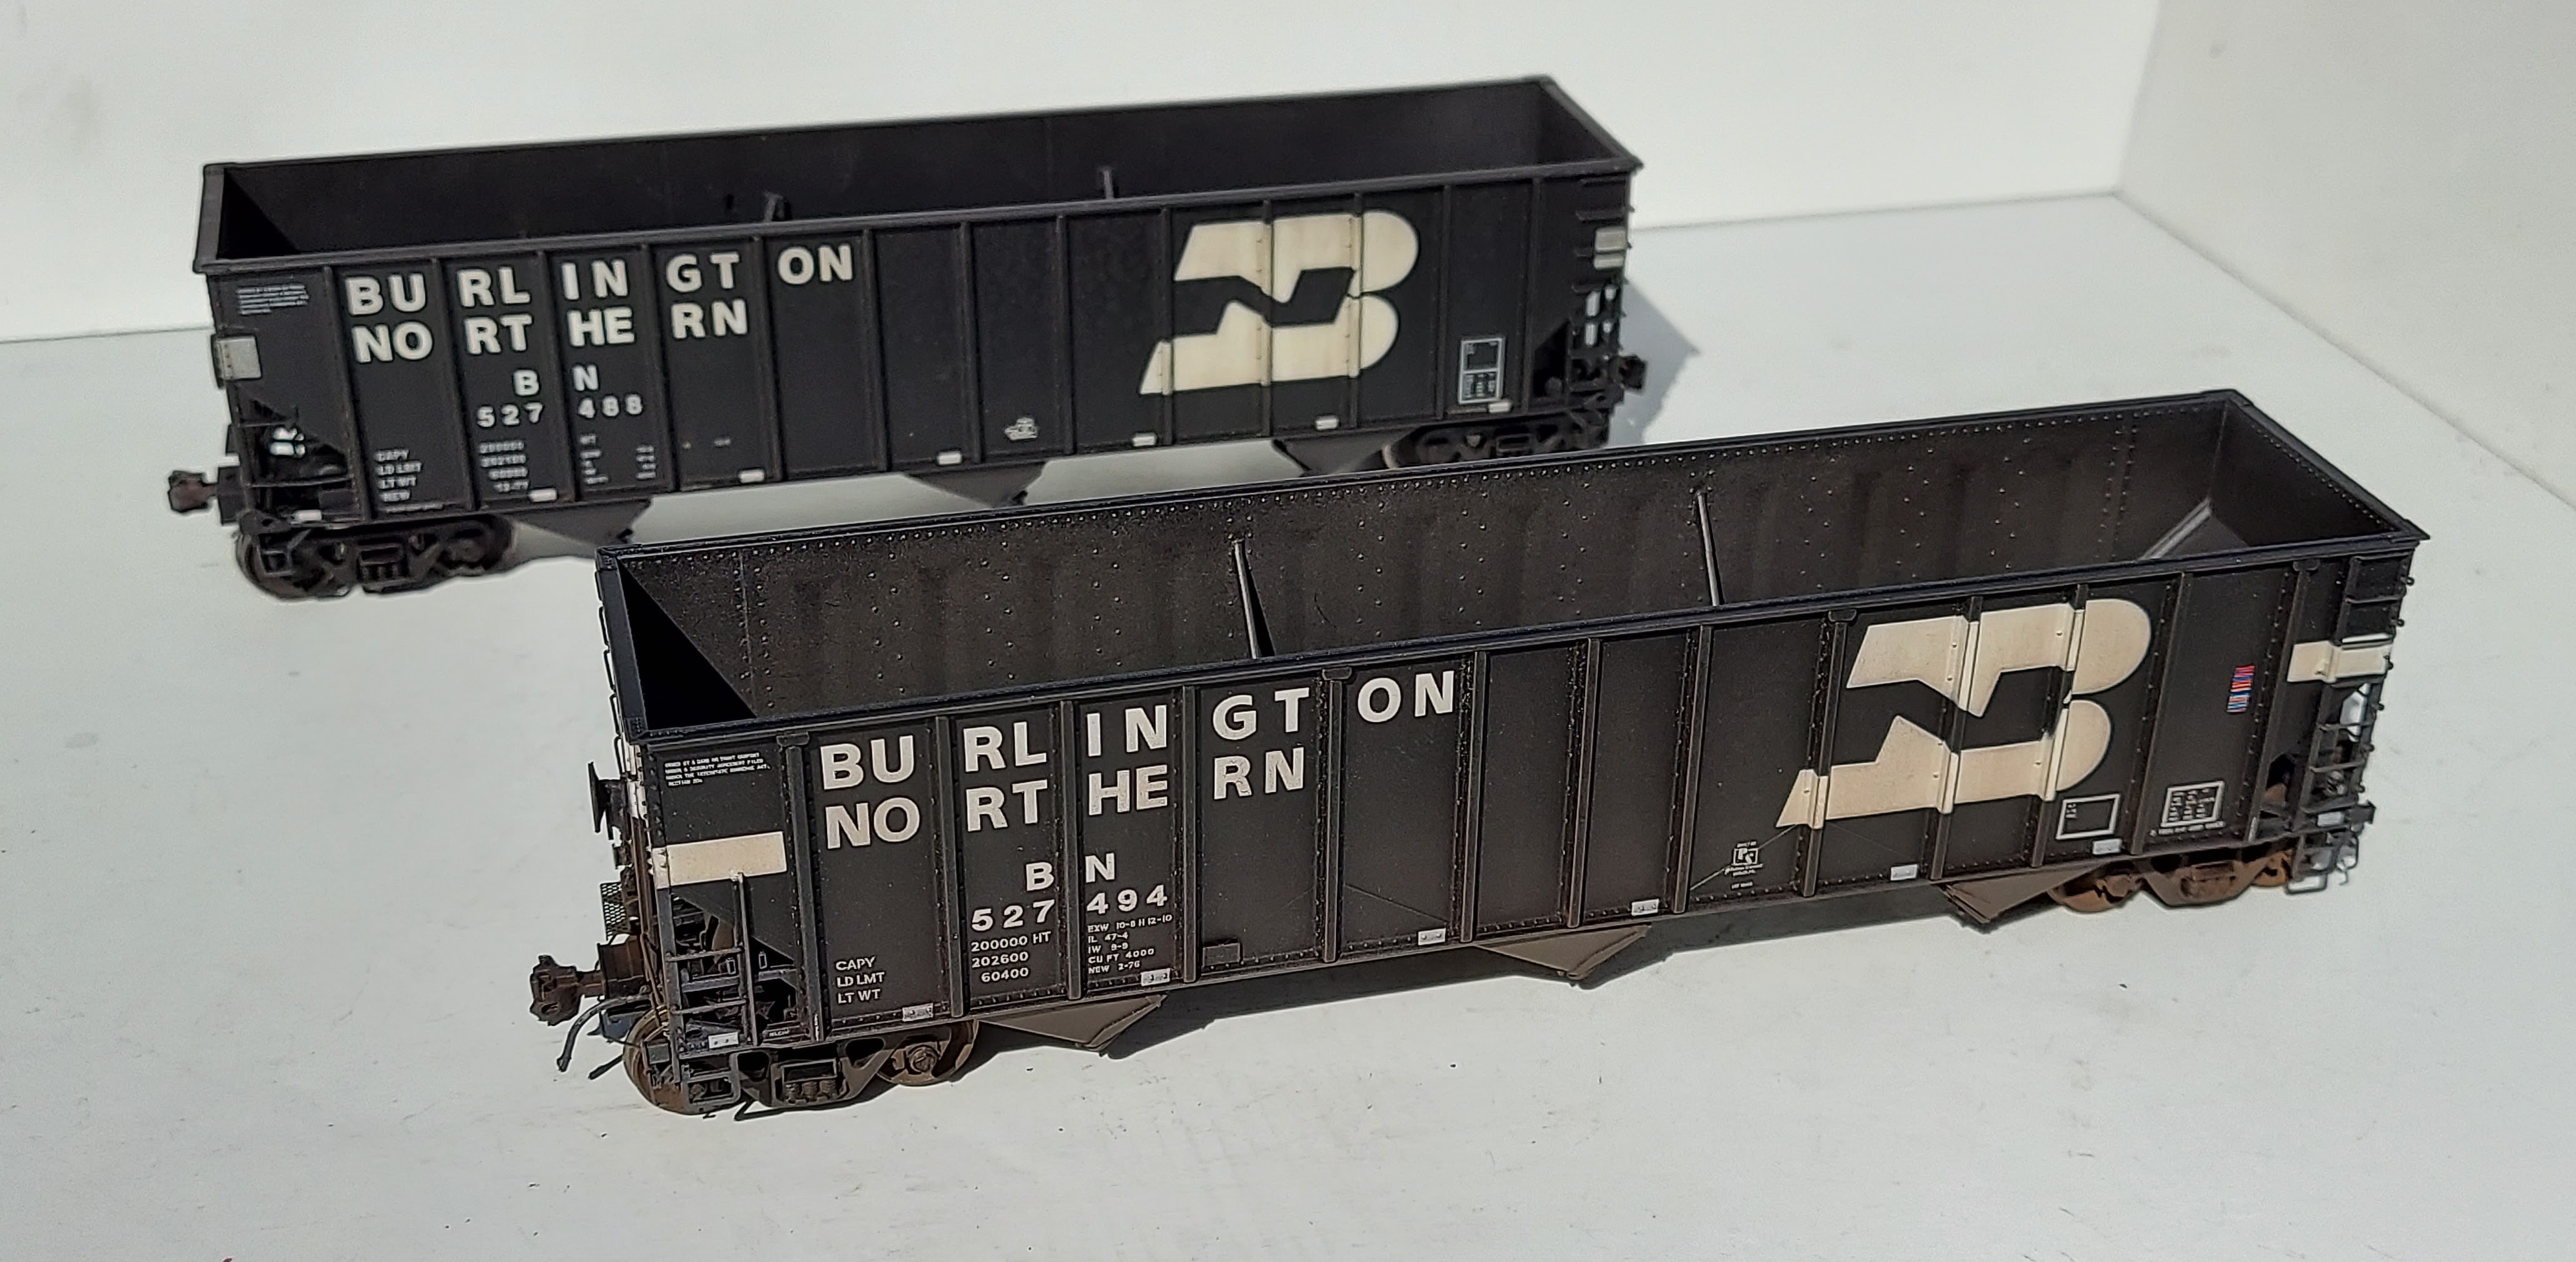
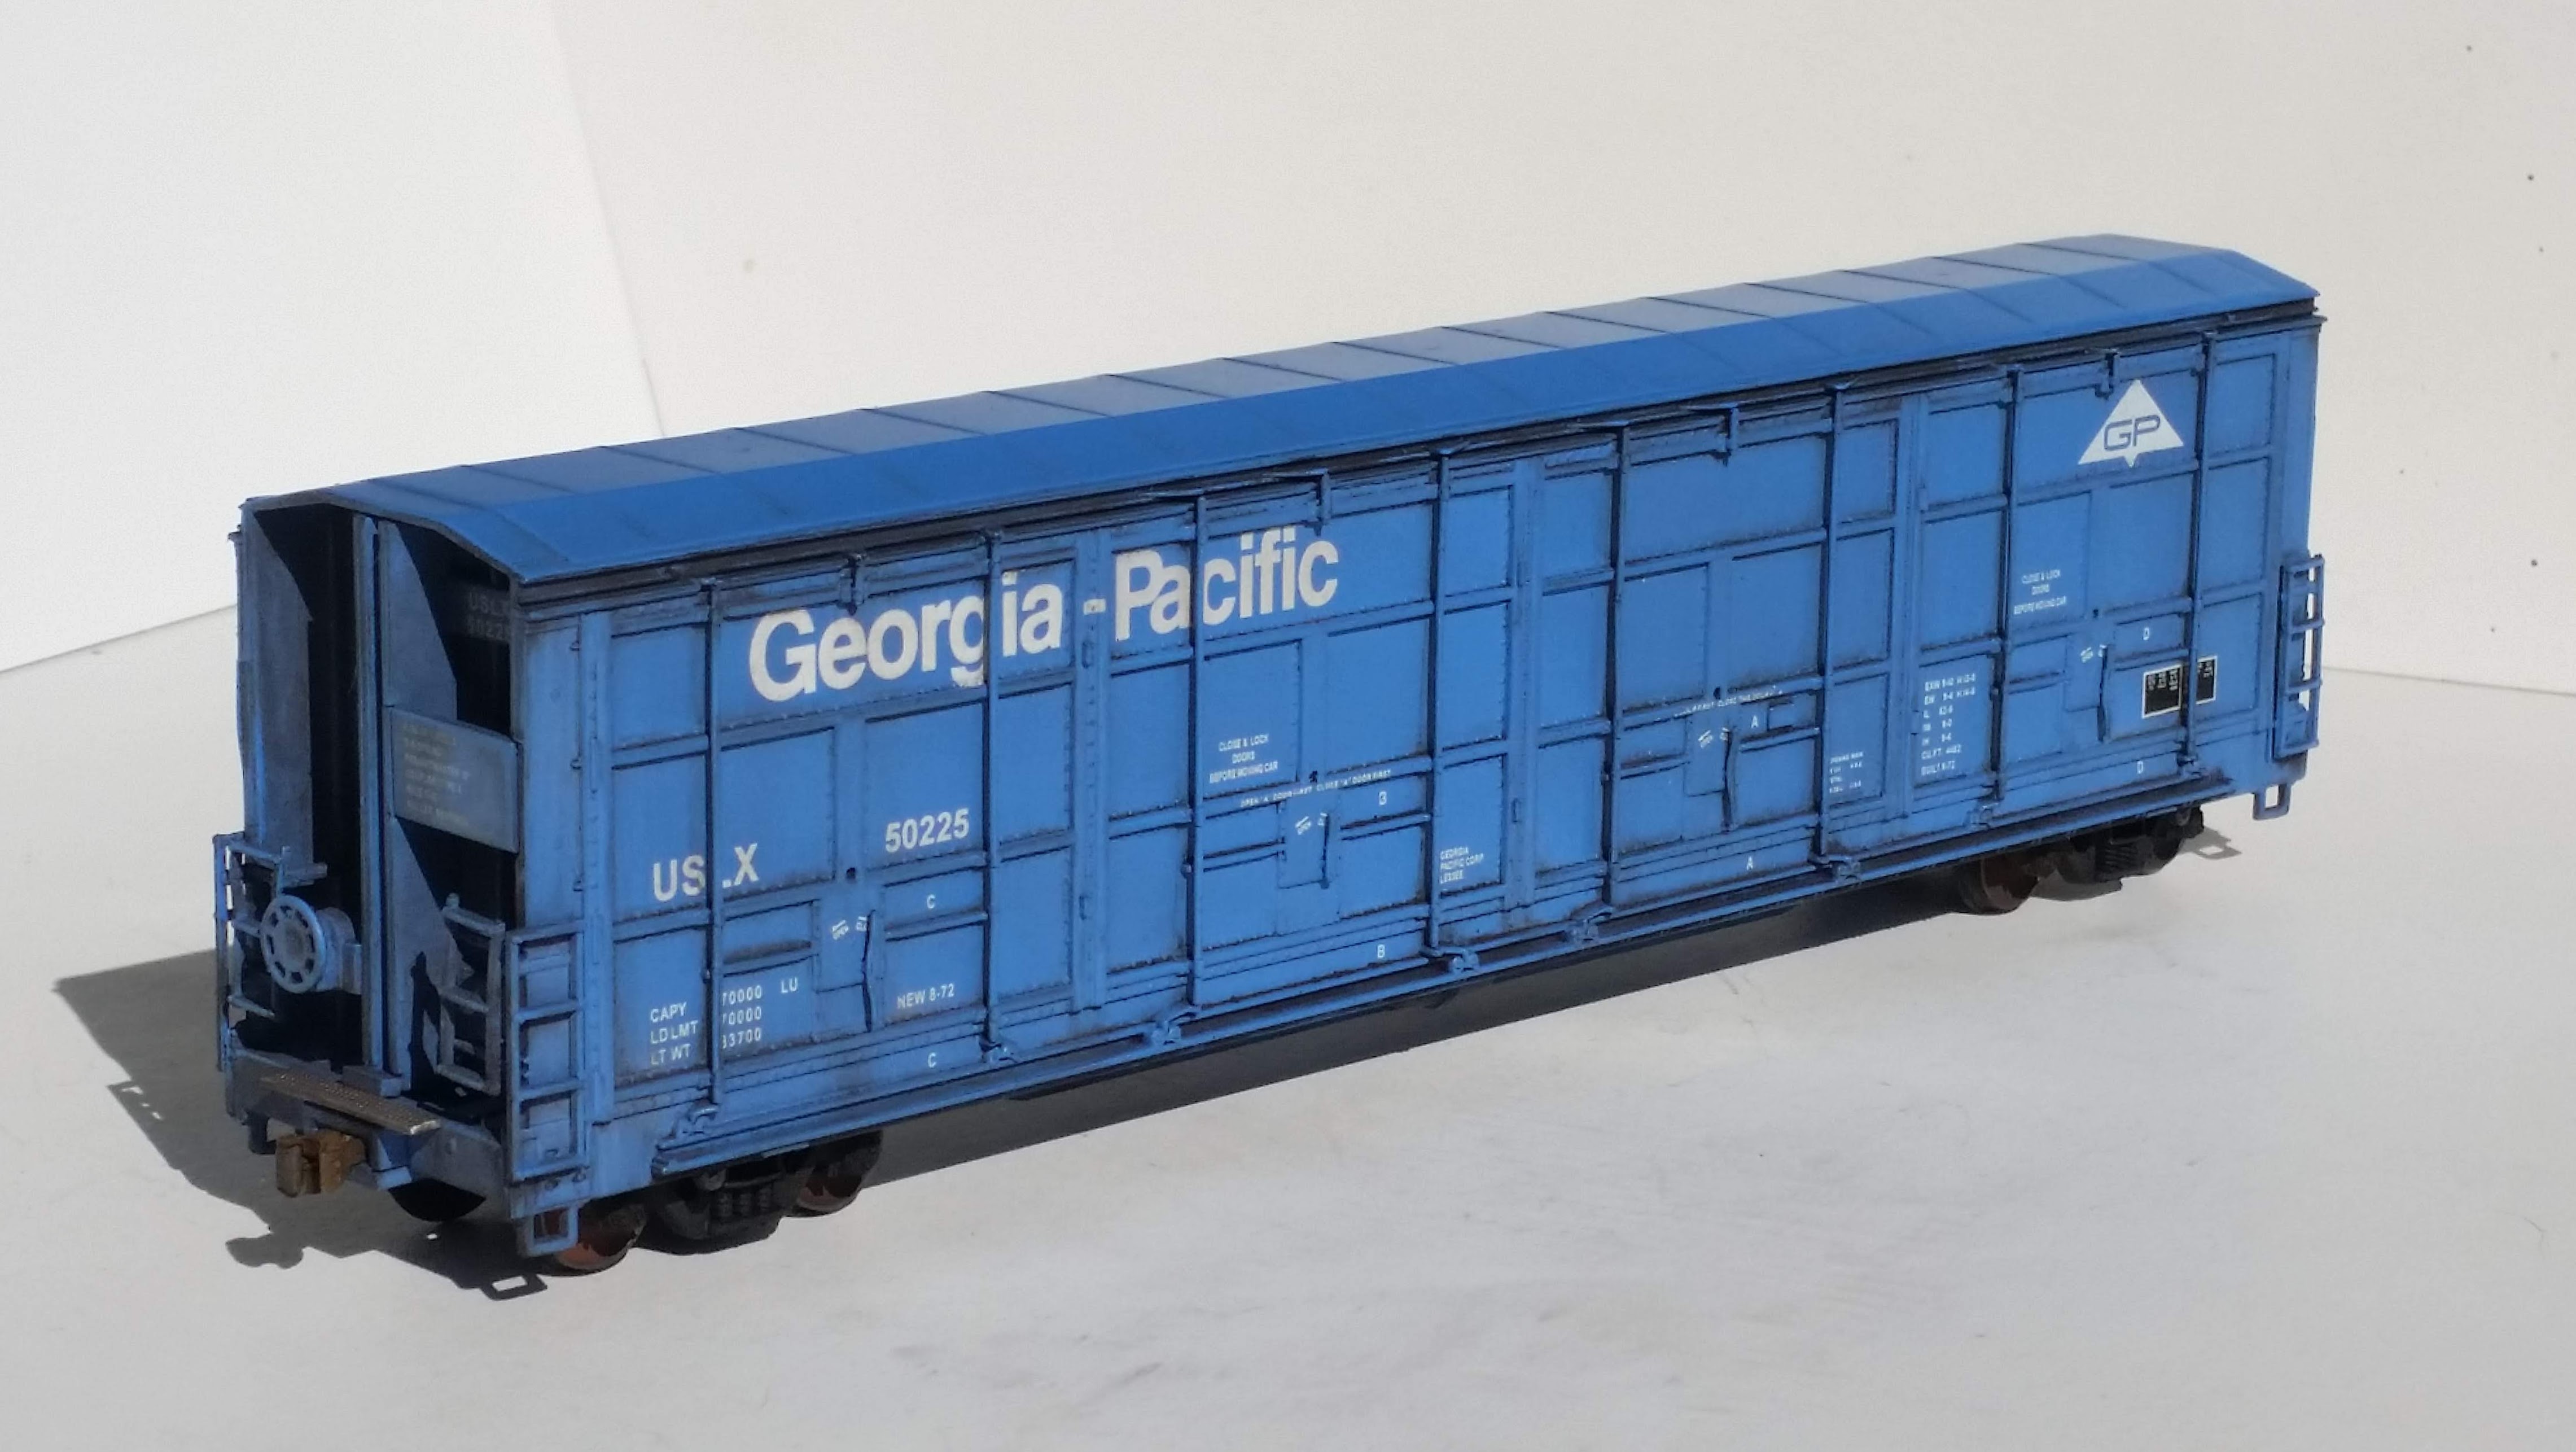
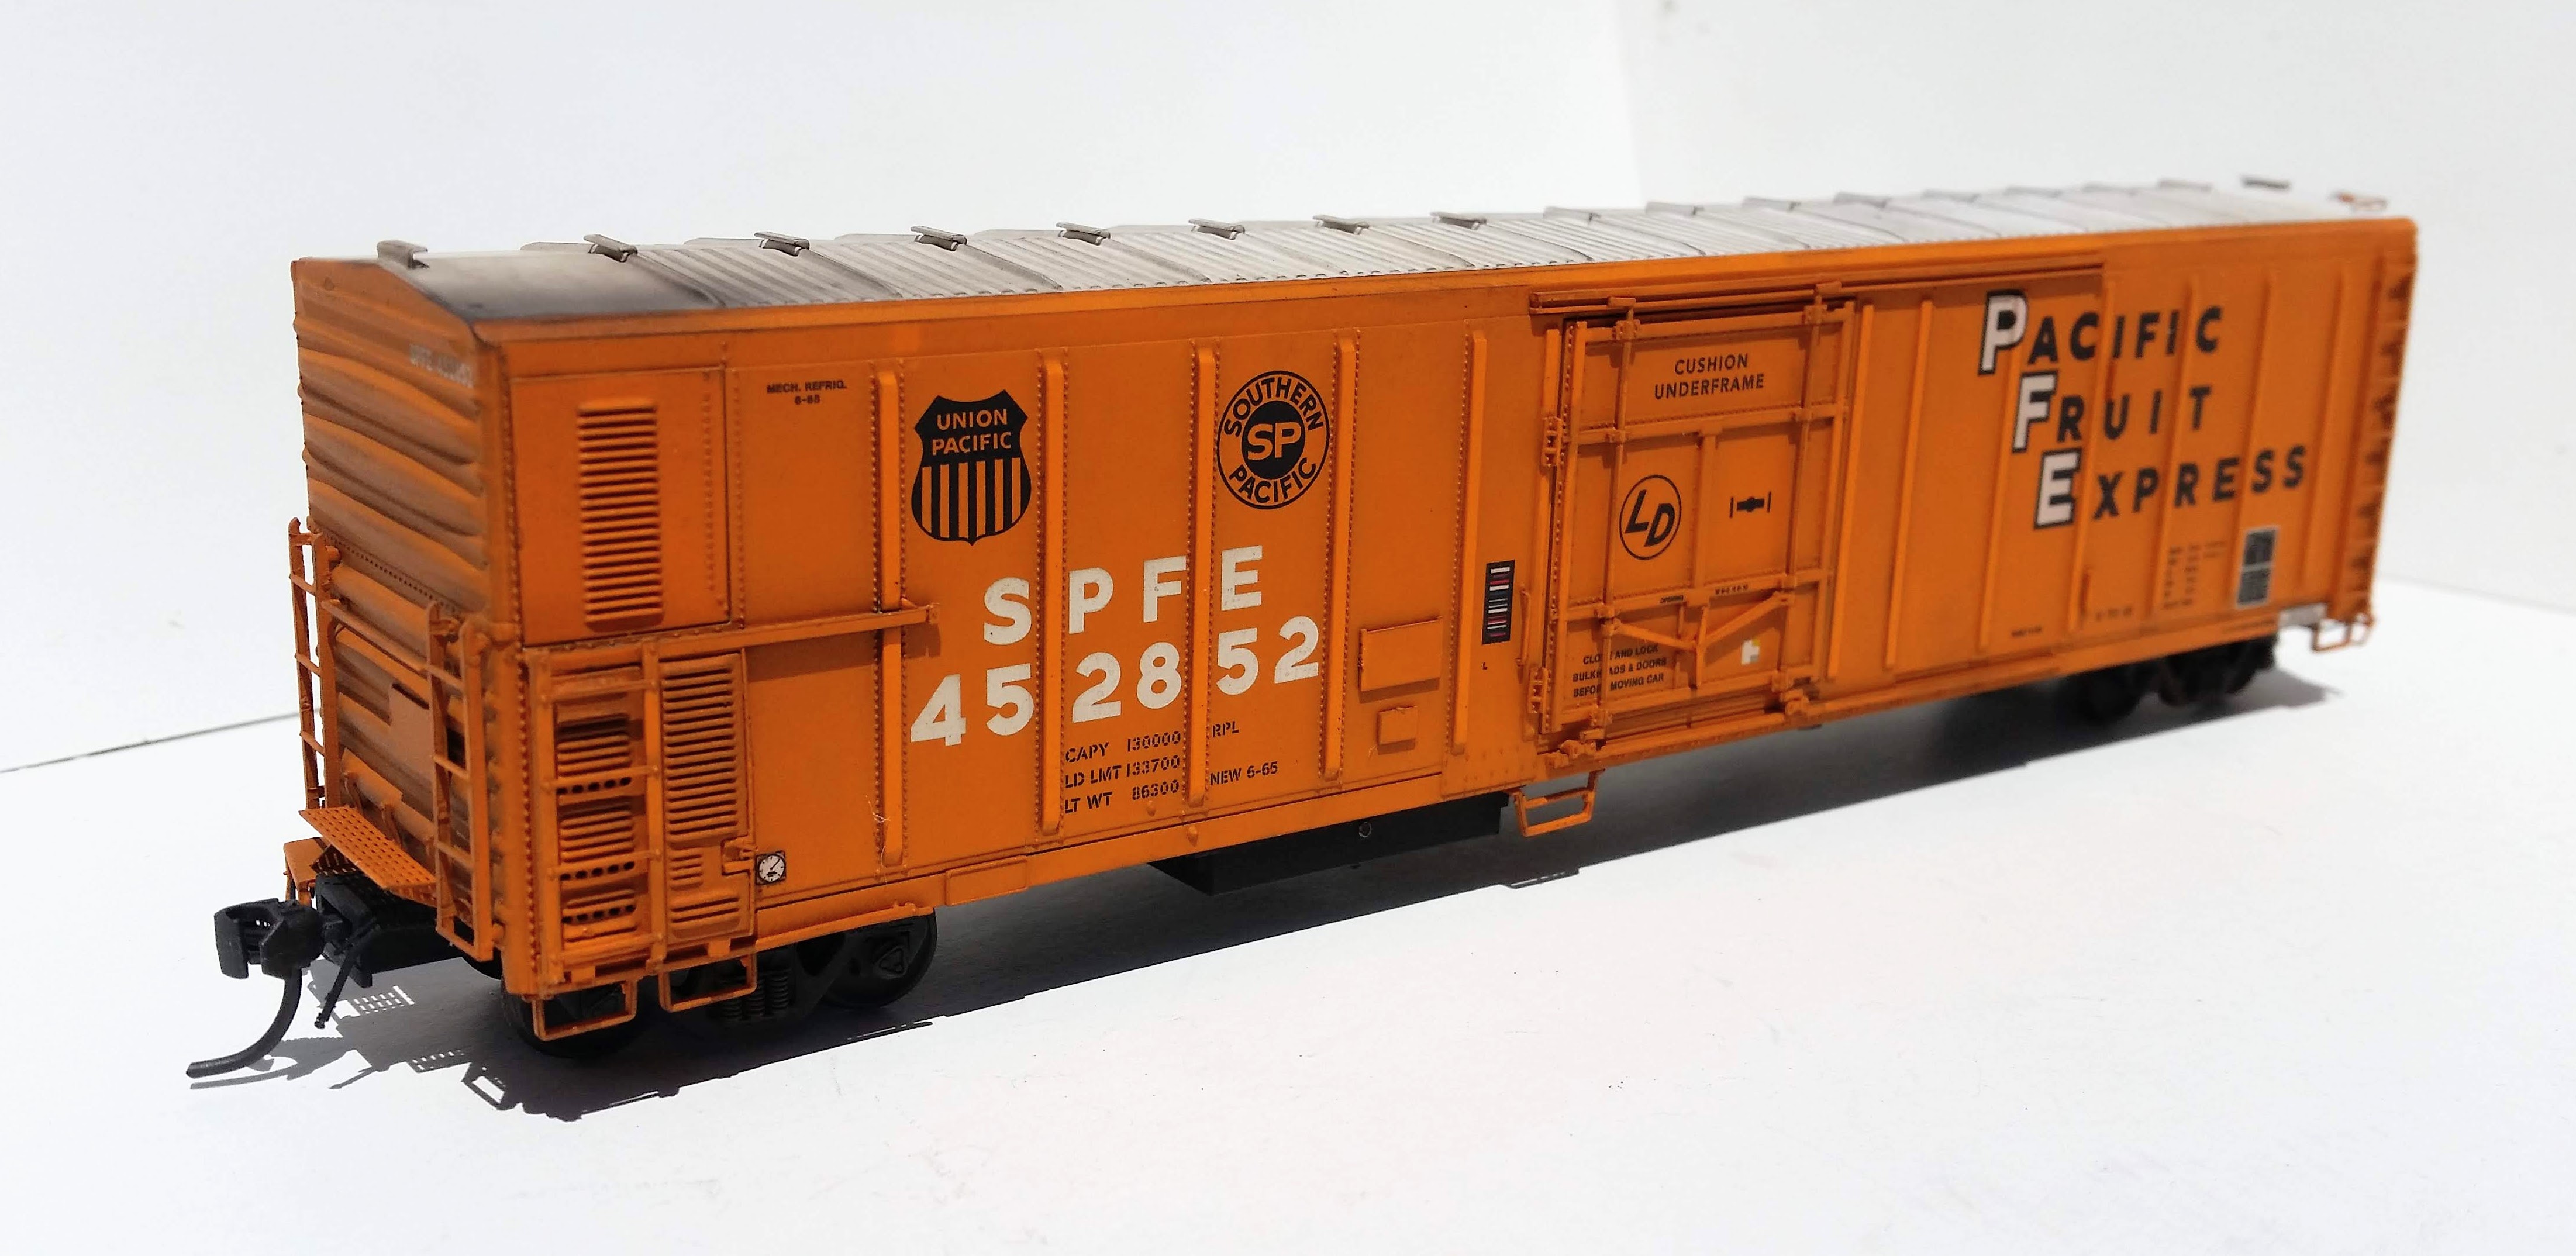
The 2 box cars, I will check what brand, but they and the covered hopper by Tangent for Home Shops LLC were faded last week using the Tamiya X-21 base.

Done today were the roofs of the 2 box cars and one side of the Covered hopper. All three done with Vallejo Air, burnt umber applied as a wash. 3 drops of burnt umber to 33 or 35 drops of tap water.(yes, 10-1 but I was adding until it felt right)

I applied clear water to the top of the car applying enough to puddle. Then I dab the burnt umber wash onto the roof. The car roofs shown had this done 4 times and in the picture they are still wet but drying! The roof with be showing the rusting effect started but it will not be one of my rustbucket type roofs. The picture is 1 hour, (I use timers, remember) after the last application. So I will check after dinner.

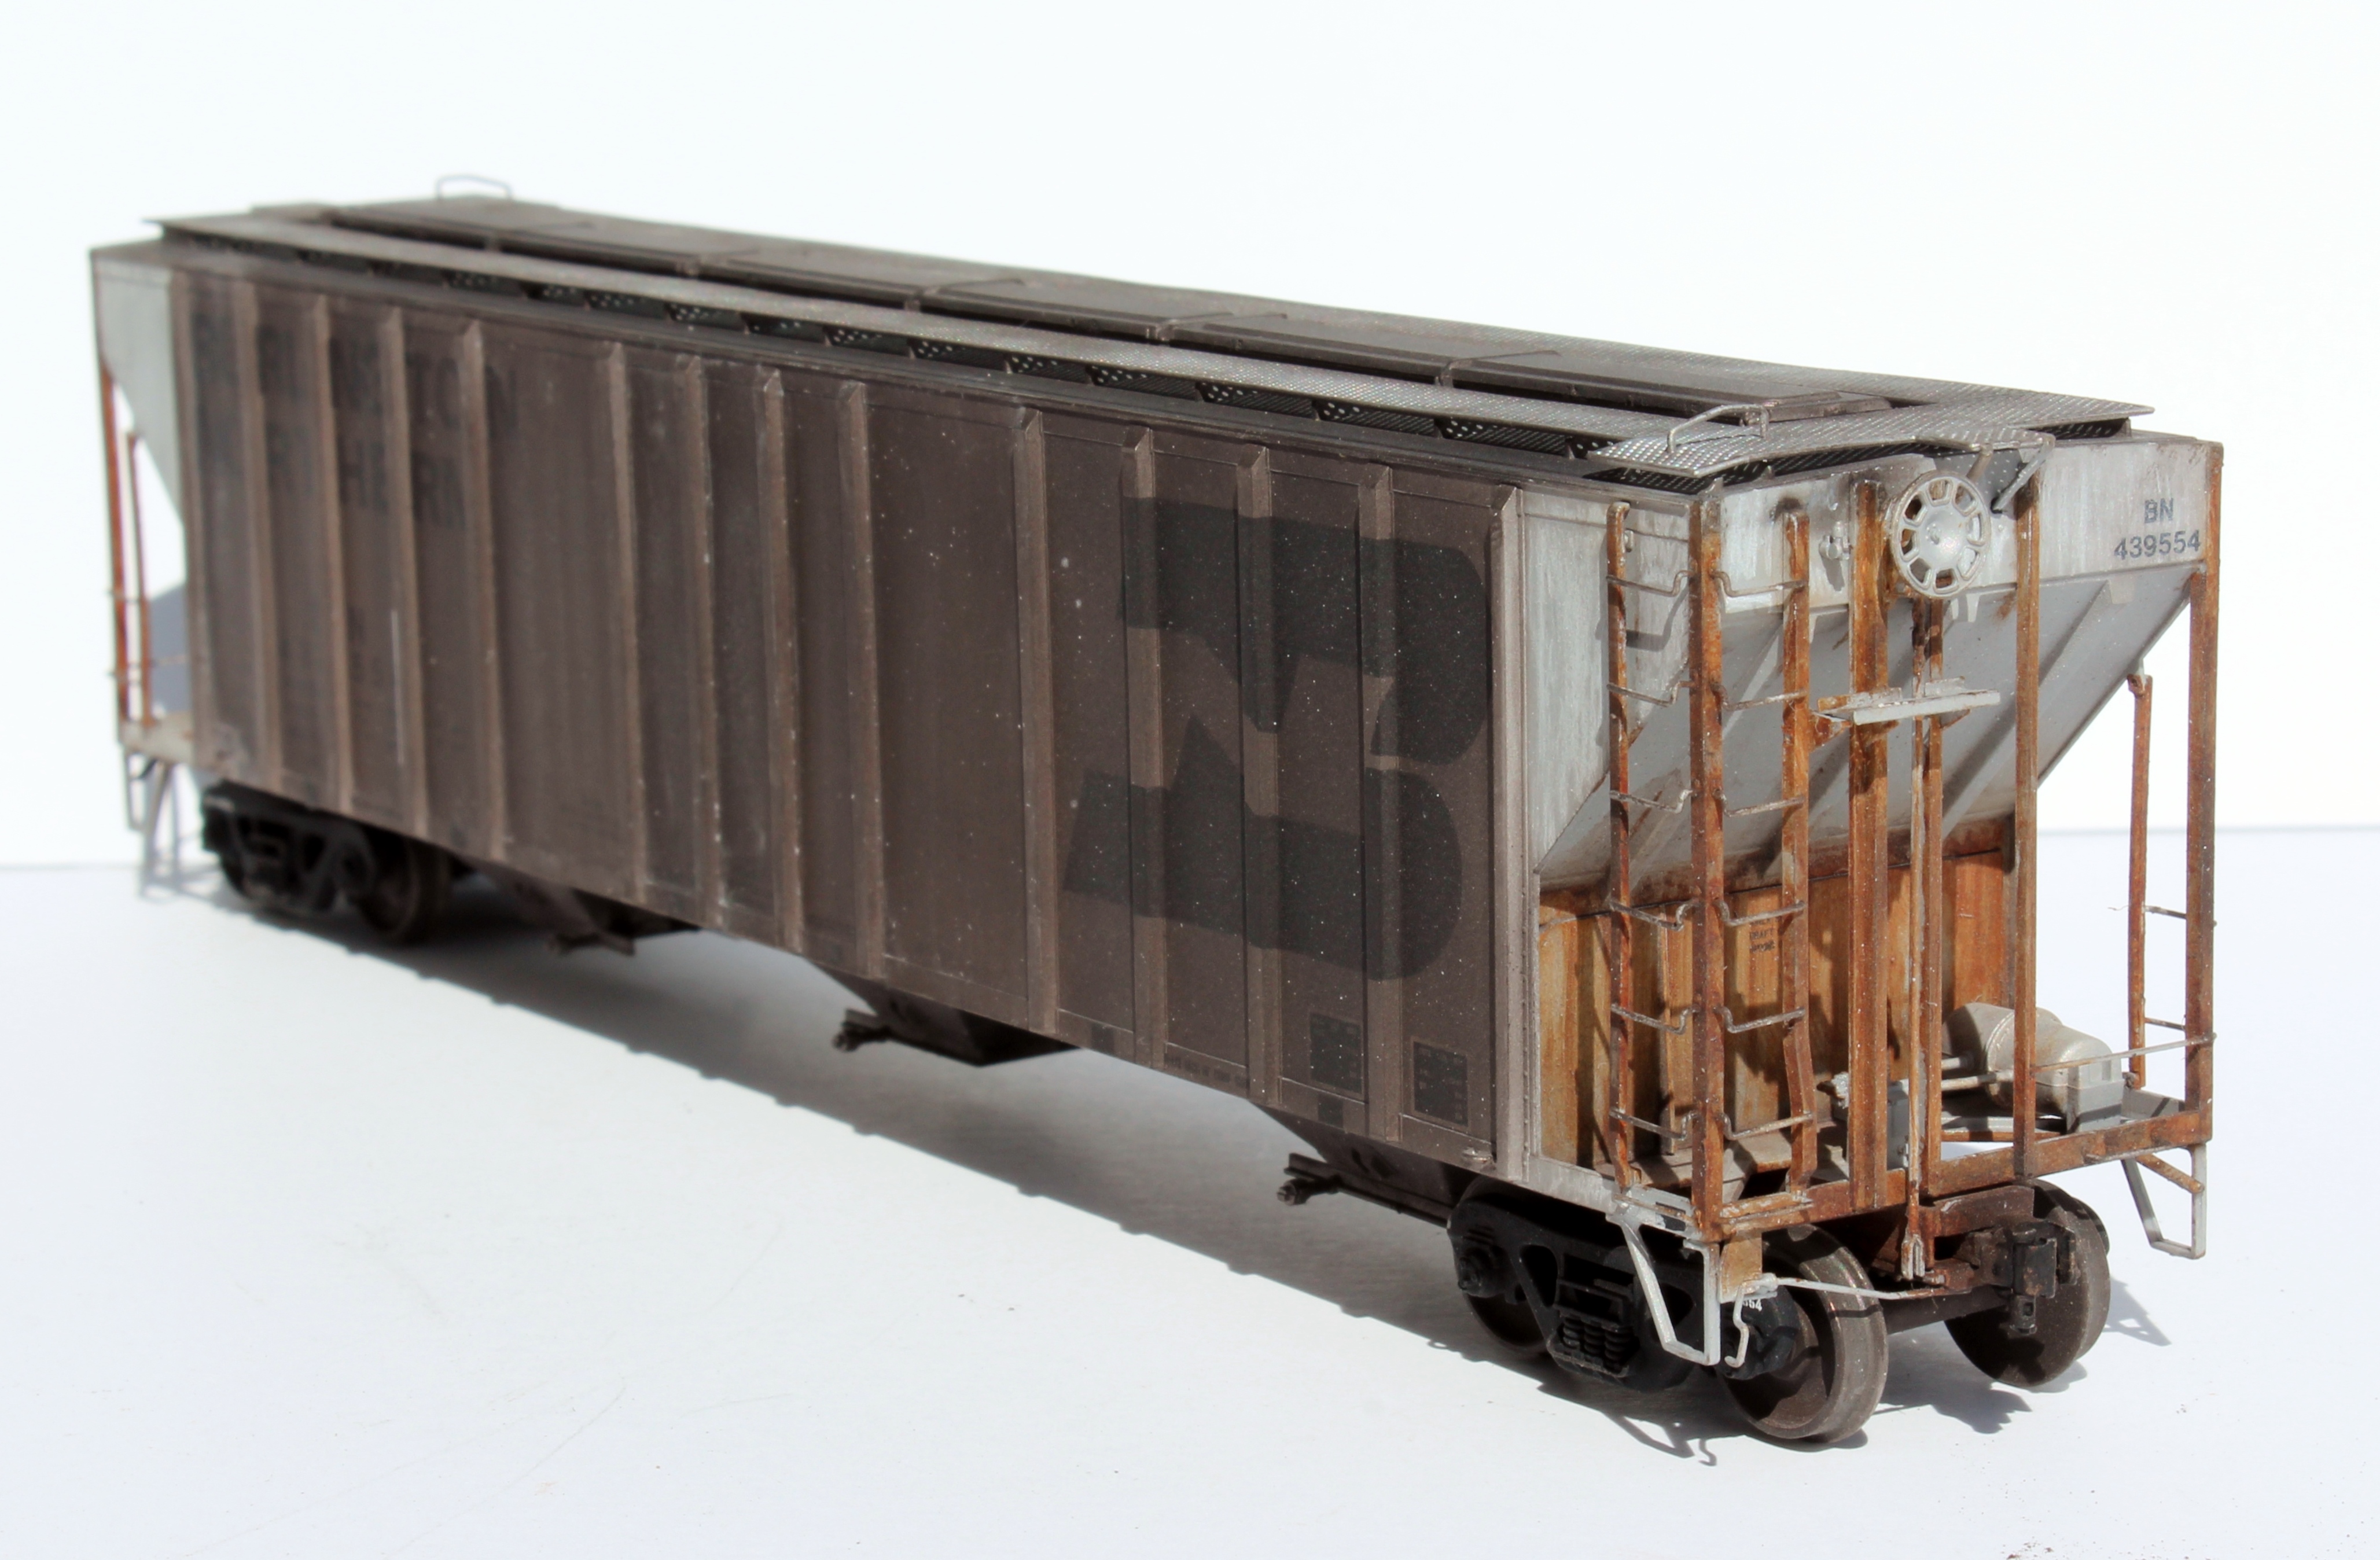
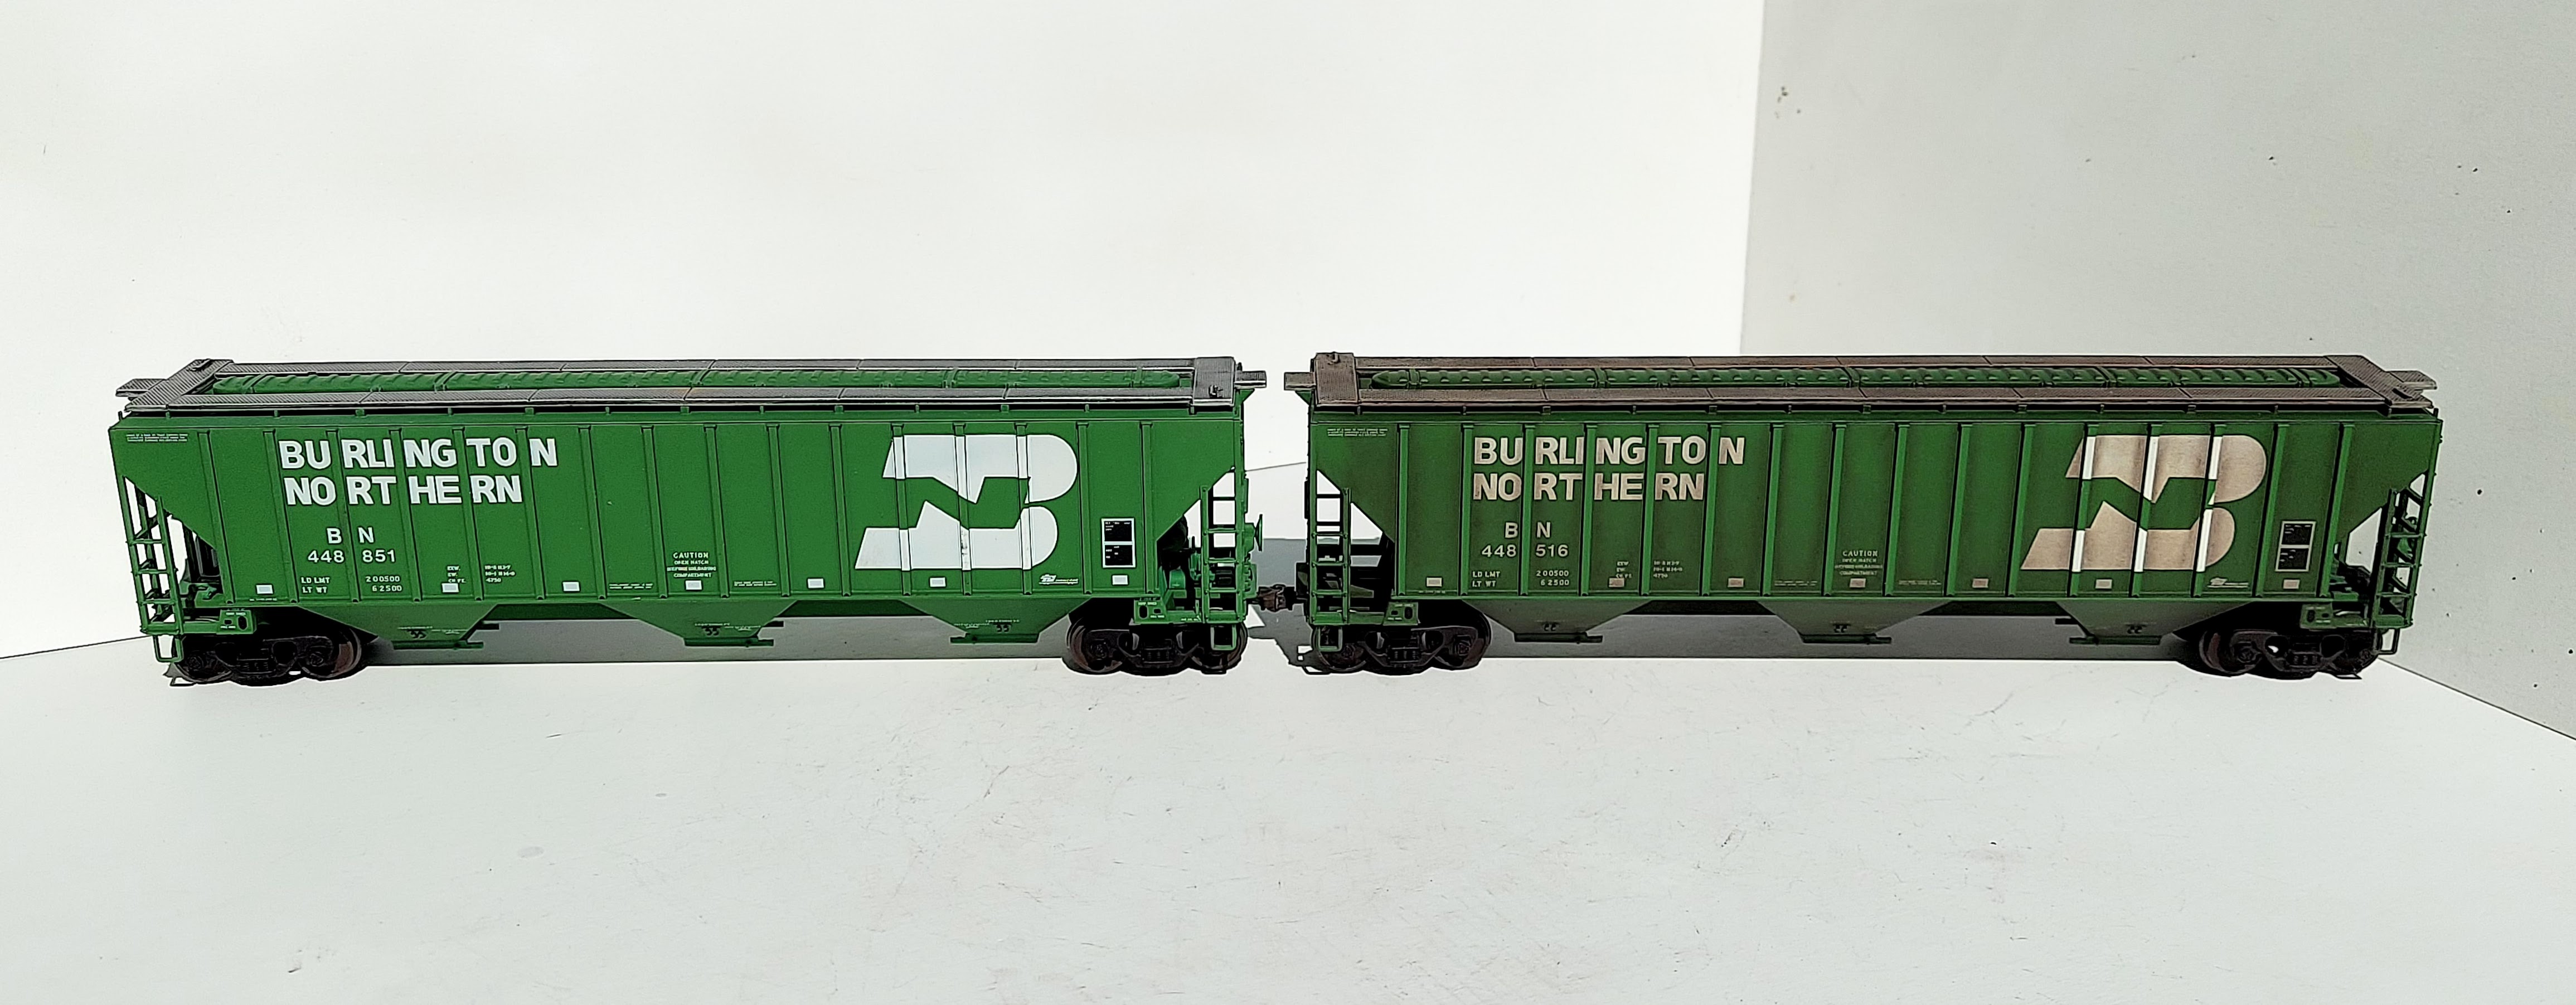
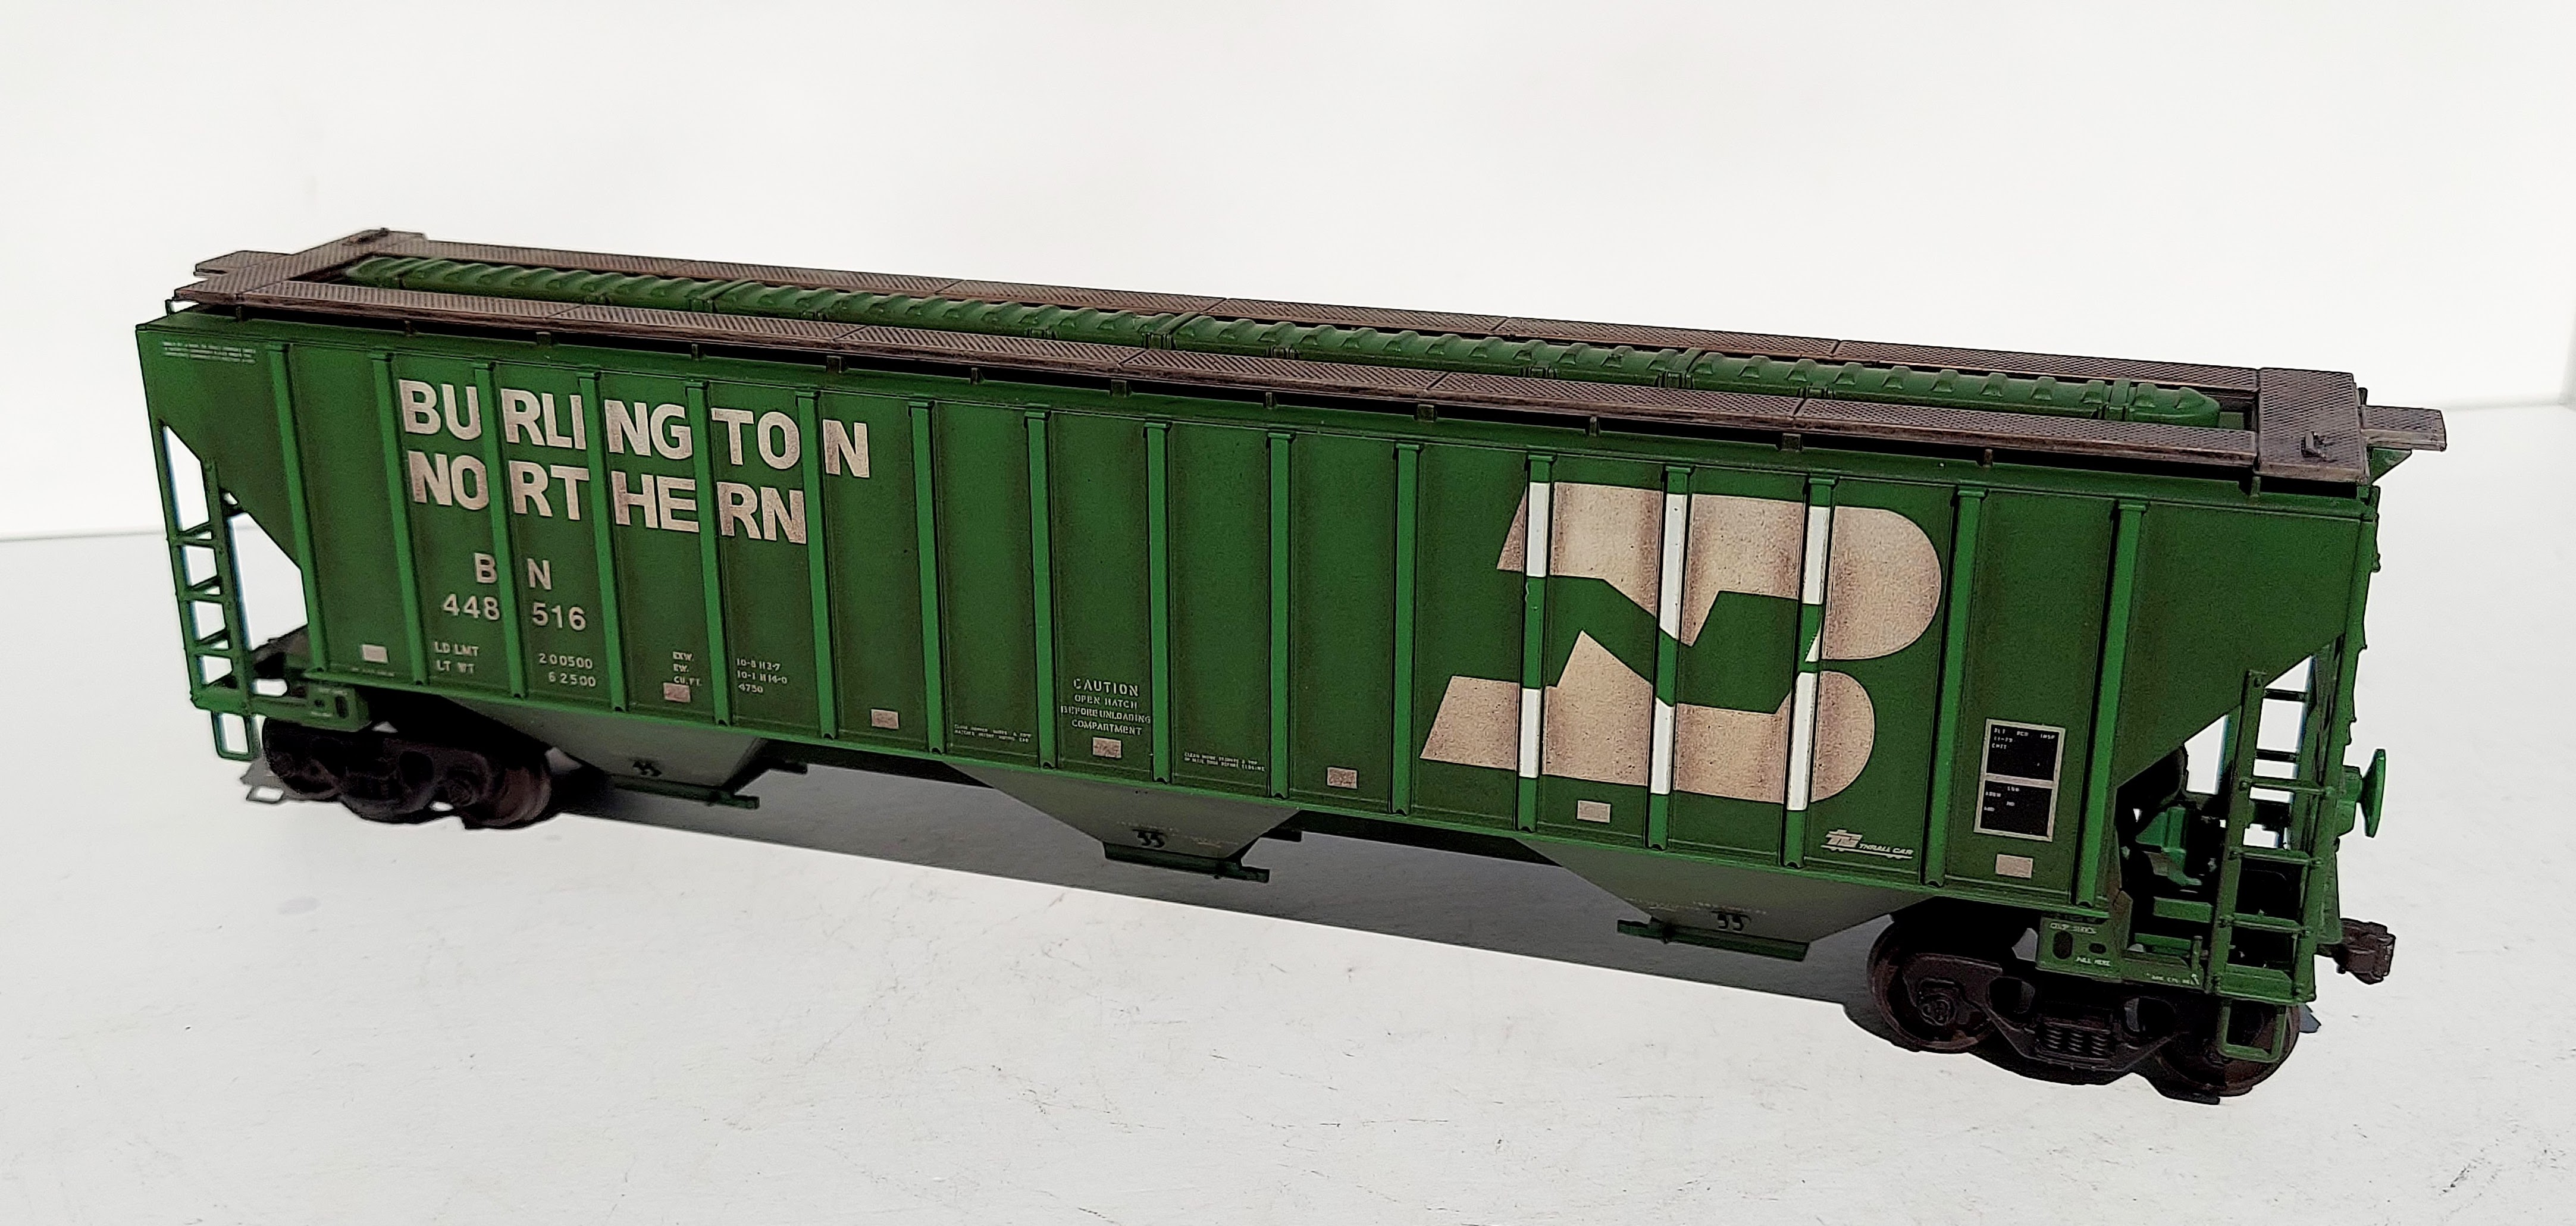
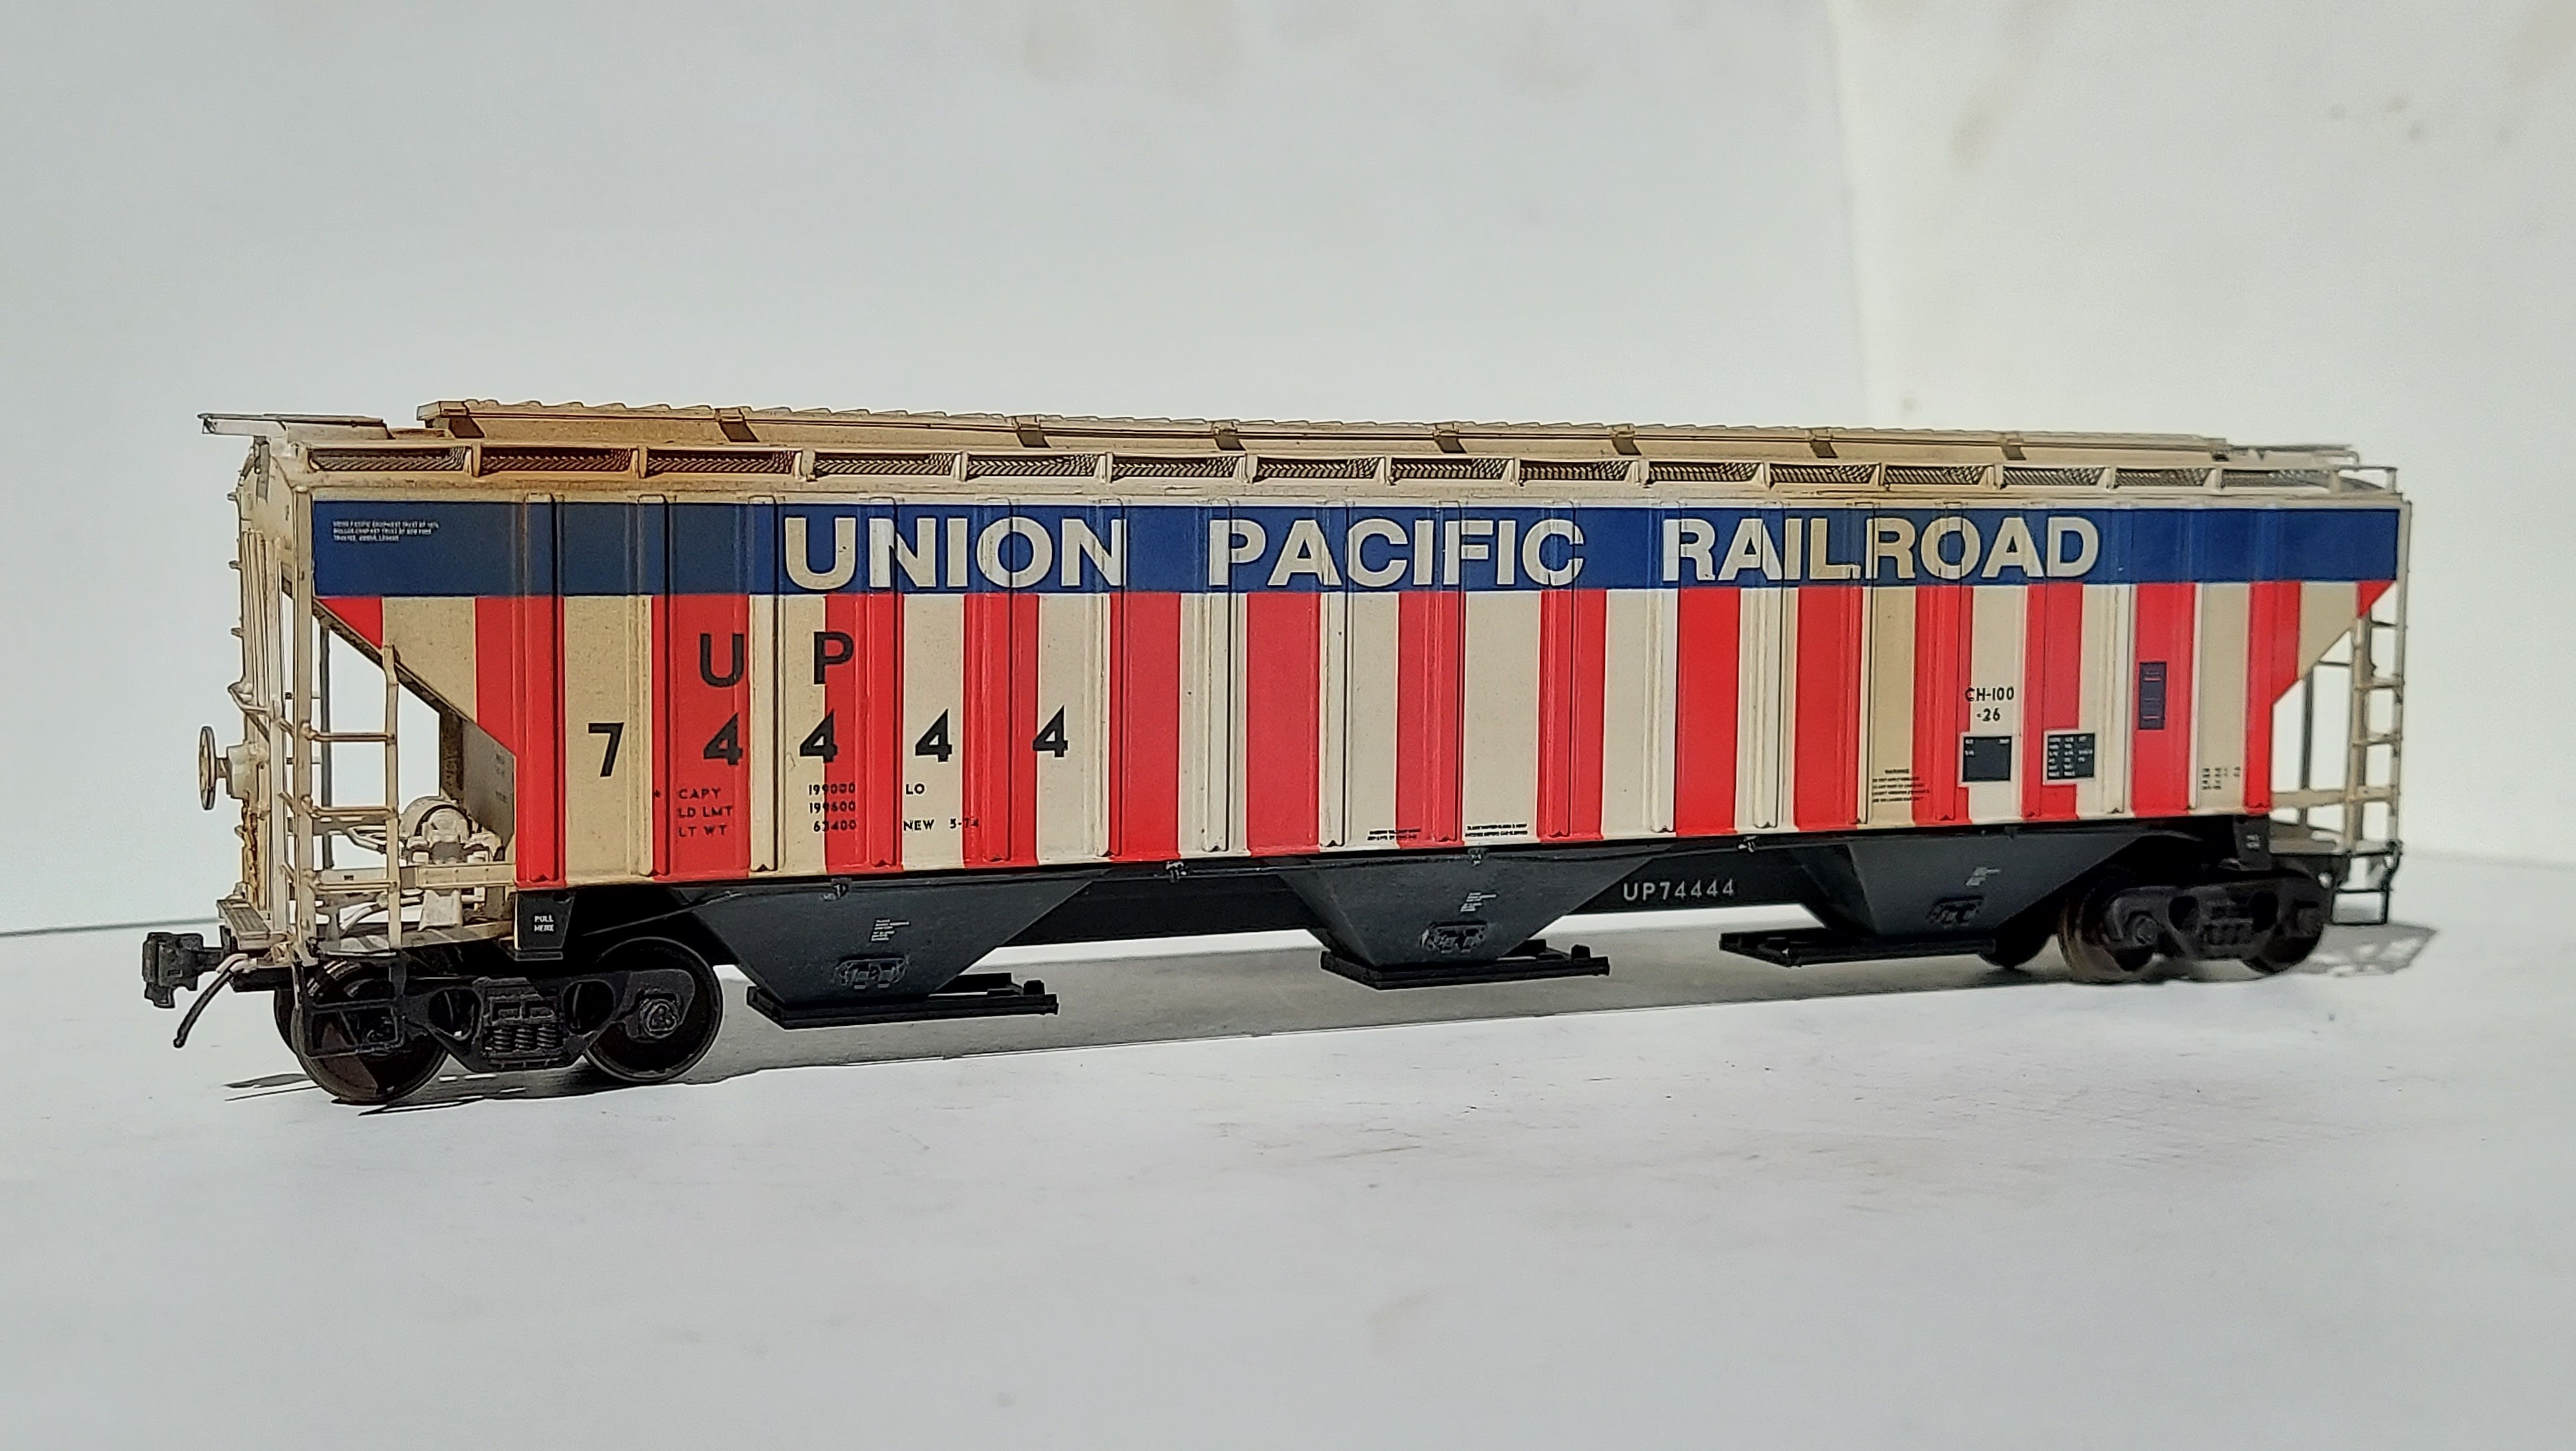
The covered hopper is as I mentioned a Tangent car done in the Michigan Interstate free lance theme of my friend Greg McComas of Fort Worth, Texas. Check out the free lance cars at Home Shops LLC. They can be found at

HomeShops.net
B6583CC9-F270-4F12-B6A8-9A44DB473B58.png


Working with the same Vallejo Air burnt umber wash I did much the same to the sides of the covered hopper as to the roofs of the box cars but with a lighter touch and only 2 applications. Water 1st and while still wet apply the wash. I applied the wash letting it run down the sides but wicking the puddles at the bottom sill. The car in the picture is slightly damp.The build date on this car is 1994 and I model roughly 2005 to 2015 so this will be a light to light medium weathering. Rust on the roof edges with some rust streaking but again a light rust along the car ribs

Glad to be back. Please hop in with constructive criticism, helpful tips and absolutely show some of your work.
 
Last edited:


Well it’s not after dinner as I am being told our company I was unaware were coming for dinner will be here at 7. So pictures now.

The box cars are Walthers Mainline and are nice cars purchased back in 2/2022 at the MadCity Train show in Madison, Wi. Still a touch damp and won’t be looked at until 10pm or tomorrow.
8818230C-6F38-42A4-A8DE-561C2A9123A3.jpeg

I am not unhappy with the effect but the center of the roof needs some additional action.
C8DF4B85-1E65-44E1-8281-C9A0A691F007.jpeg

I am almost happy with the side of the covered hopper. The center panel to the left of the logo needs to be cleaned up as it is too much streaking for the light effects I am looking for.

Touch up is easy. A just barely damp brush, of 70% Isopropyl Alcohol, almost dry brush style, will clean the sides off. Same for the roof but I may leave the roof as is and add some pan pastels to blend the roof together.
 
Lol, it was sarcasm (too early in the morning…..lol) I meant there was nothing to critique on your excellent work…..lol
Thanks. It was early!

Grandson has a hockey game in 19 minutes so no weathering tonight.

TomO

Edit: 2 hours later, grandson had a goal and 2 assists, the last assist on the tying goal with 4 seconds left. No overtime in summer league hockey
 
Last edited:
I have practiced with oils but not a lot. Or should I write, not to my satisfaction. By placing the oil dabs on a piece of corrugated cardboard or a thick paper towel you wick off the linseed oil. By doing that I have read you create a quicker drying time, instead of 2-3 days maybe 24 hours. Still plenty of time to work the oil paint. I can speed that 24 hours up by using the dehydrator but have not played with that. Also, not matter how long oils have dried Mineral Spirits will still make them workable.

TomO
Hi Tom,
I use Winsor + Newton oils thinned with blue lable Turpenoid to weather..
I started wicking off the oils with cardboard..but after a few cars I forgot/skipped this step and I don’t find it makes much difference in drying time..
Keep in mind these are very thin layers of oil paint…

I use Rustoleum clear flat as a sealer within an hour or so of applying the oils…again it’s summertime and I’m working outside with the sun heating everything up…Rustoleum is almost like a instant fixer making the underlying oils permanent…the point of no return..

All my work now, I still classify as practice as I don’t believe I am happy with this technique yet…even yesterday I was watching YouTube vids trying to get pointers..

090A7EF8-E45E-4319-B70A-28ADE1D17EFD.jpeg
943BD98A-EF9D-424B-8180-83341544368D.jpeg
 
Hi Tom,
I use Winsor + Newton oils thinned with blue lable Turpenoid to weather..
I started wicking off the oils with cardboard..but after a few cars I forgot/skipped this step and I don’t find it makes much difference in drying time..
Keep in mind these are very thin layers of oil paint…

I use Rustoleum clear flat as a sealer within an hour or so of applying the oils…again it’s summertime and I’m working outside with the sun heating everything up…Rustoleum is almost like a instant fixer making the underlying oils permanent…the point of no return..

All my work now, I still classify as practice as I don’t believe I am happy with this technique yet…even yesterday I was watching YouTube vids trying to get pointers..

View attachment 149225View attachment 149226
Excellent work and thanks for showing it.

I used the last of my Testors DullCote #1260 spray cans and will not pay almost $10 per can when the LHS can get it. I have a spray booth and have started testing out the Vallejo matte varnish and I have some VMS matte and gloss I got within the month but have not even opened. The Kylon I have but even after warming the can up in water I get a splotchy spray pattern. Hopefully the airbrush will work out ok.

I am working with Abteiilung 502 oils from scalehobbyist.com on a couple older baby hi-cubes from Athearn in the 70’s. Not ready to use on my good stuff yet but getting closer.

you tube: I believe I have an Addiction to scale model weather videos. I don’t watch much TV but I do watch a few weathering videos almost every evening. There are some excellent content providers out there.

I like both your excellent pictures but that CP car is primo. Don’t be a stranger make sure you come back. I like gondolas:
54459A67-0099-4690-BFF0-27CDC88D2876.jpeg
91A802BC-10EA-4998-B537-07AB39FCB5EB.jpeg
FDC7AFF3-BD47-4A95-82B5-A4B9088D4FEF.jpeg


Tom.. very nice work..

I would use Testors Dullcoat but yes the spray cans are expensive…and often not available at the LHS…
I have the bottled Dullcoat but sometimes the airbrushed result is not what I wanted..
Krylon clear flat is better than Rustoleum clear flat, but harder to find…
Tamiya XF-86 Clear Flat is pretty good…
I have some ModelMaster, Vallejo, and PollyS kicking around here as well but it’s just easier with Rustoleum, Krylon or Tamiya
Price vs Result…I am ok with Rustoleum…pretty durable matte finish
 
I don't use oils very often, but sometimes nothing else will get the right effect for me. To create the worn wood effect I dabbed on white, raw umber and burnt umber artists oils straight from the tube without thinning. Then I used a soft brush to work the dabs along the grain of the wood to blend them and approximate the weathered wood look. I used a cotton swab to clean the oils off the "metal" parts of the car and limit the colors to the "wood" deck. Before and after with the factory painted deck in the background:

original.jpg

https://pbase.com/mecrharris/image/170663179

Usually I stick to weathering with powders, but I used some colored pencils to create the rust streaks and chalky white panels on this aluminum hopper. These cars weather strange where the aluminum bodies collect dirt and the steel components rust like crazy in later years. I was lucky enough to catch one on the RIP track at work several years ago so here's my take on it:

original.jpg
https://pbase.com/mecrharris/image/161312491

This represents my usual approach: powders and erasers. I use a pink eraser to clean the powders from areas that get rubbed clean, like the side stakes or ladder rungs, then control the amount and placement of the powders with a draftsman's cleaning pad (what we used to clean drawings back in the day before AutoCAD). Another before and after:

original.jpg
https://pbase.com/mecrharris/image/171102502

original.jpg

https://pbase.com/mecrharris/image/171102503

Same process on a coal hopper:

original.jpg

https://pbase.com/mecrharris/image/171194178

Yeah, I'm pretty much a one trick pony, but whatever works!

original.jpg

https://pbase.com/mecrharris/image/170687364

original.jpg

https://pbase.com/mecrharris/image/170668359

original.jpg

https://pbase.com/mecrharris/image/171457840
 
Last edited:
I don't use oils very often, but sometimes nothing else will get the right effect for me. To create the worn wood effect I dabbed on white, raw umber and burnt umber artists oils straight from the tube without thinning. Then I used a soft brush to work the dabs along the grain of the wood to blend them and approximate the weathered wood look. I used a cotton swab to clean the oils off the "metal" parts of the car and limit the colors to the "wood" deck. Before and after with the factory painted deck in the background:

original.jpg

https://pbase.com/mecrharris/image/170663179

Usually I stick to weathering with powders, but I used some colored pencils to create the rust streaks and chalky white panels on this aluminum hopper. These cars weather strange where the aluminum bodies collect dirt and the steel components rust like crazy in later years. I was lucky enough to catch one on the RIP track at work several years ago so here's my take on it:

original.jpg
https://pbase.com/mecrharris/image/161312491

This represents my usual approach: powders and erasers. I use a pink eraser to clean the powders from areas that get rubbed clean, like the side stakes or ladder rungs, then control the amount and placement of the powders with a draftsman's cleaning pad (what we used to clean drawings back in the day before AutoCAD). Another before and after:

original.jpg
https://pbase.com/mecrharris/image/171102502

original.jpg

https://pbase.com/mecrharris/image/171102503

Same process on a coal hopper:

original.jpg

https://pbase.com/mecrharris/image/171194178

Yeah, I'm pretty much a one trick pony, but whatever works!

original.jpg

https://pbase.com/mecrharris/image/170687364

original.jpg

https://pbase.com/mecrharris/image/170668359

original.jpg

https://pbase.com/mecrharris/image/171457840
Hey mr. One Trick pony, all those cars are superb. But those flats! I will send you my bulkhead flats anytime, that deck…just wow!

Thanks for sharing and explaining how you did it
 
At the bench for weathering. There are 2 box cars, 3 covered hoppers and a gondola that didn’t sell, plus a semi that needs more cleaning up then weathering. I have tried to be organized at the bench by working with a bunch of cars to weather. It is not quite working out. I thought by using the same fading base Tamiya x-21 base on all the cars would be efficient. The initial application is but cleaning one after the base dries is tedious enough for 1 car let alone with 6.
E2502EAC-22FB-46DB-8217-E6FCA44F2148.jpeg
9B4F323C-E5CC-4570-A1EE-CCB53D49FDFB.jpeg
0A3BBD6D-C9B0-482E-BCC0-5DF82CB0018F.jpeg


Using my Vallejo Air burnt umber on 6 cars gets old quickly after that 2nd car. So my solution, no more then 2 cars on the bench at the same time. The Michigan Interstate car is mostly done with the fading complete and many washes of the burnt umber applied. A few washes of a black should complete this car. The car when complete maybe the lightest weathering model I have done. The car was built in 1994 and it’s 2005 on the layout so there should not be a lot of rust spots or streaks but it has just started. Hopefully pictures tonight or Tuesday. I am finding the light weathering job to be as tough as the heavy weathering.

All the pictured cars have been done by hand brushing. All the cars above with the gondola being the exception are destined for my layout. The gondola if I add the safety stripes with be a keeper but gondolas with or without scrap loads are not selling online.

hopefully later!
 
Hi again from the weathering desk not to be confused with the Weather Desk
30964E15-98BF-4C44-A8E0-513CC89C85C6.jpeg

This arrived via the USPS and was received in trade for a weathered pulp car. Gold Line Walther’s coil car and much nicer then I was expecting
899EF631-0E1F-4C88-B195-92756792407D.jpeg

The closest prototype photo I could come up with was shot in 2007 so it fits my era of 2005 easily enough. It’s been here a couple hours and it already has its 1st fade coat


Affiliate Disclosure: We may receive a commision from some of the links and ads shown on this website (Learn More Here)

Back
Top