It has begun, sort of...


Several years ago, I caught the bug and built the basic table for a layout and pretty much ended up with a single large oval laid on a 9 X 6 framework consisting of 18" X 6 modules screwed together, at which point I began accumulating engines and rolling stock at an alarming rate with no real plan, most of what I bought was on a whim, bring it home, run it around the track a few times and box it back up and never actually progressed on the railroad. Train room became a catch all, the layout became a table for that purpose, other interests, running a business etc and several years later, fresh from a summer vacation out west to Yellowstone and back, I found myself looking at the door to the train room, and a couple weeks before Christmas, opened it. Several large tubs and bags to the garbage, and everything organized again, a ton of stuff put on CraigsList, and a trip to the hobby store tomorrow night and I am ready to turn this into a proper layout, a completely fictitious line based solely on how I want to play with my trains.

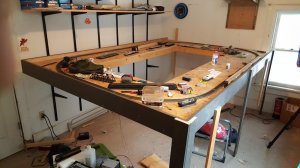
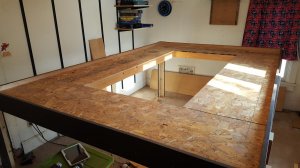
This is what I'm starting with:
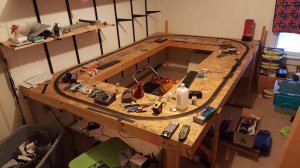
20160103_164148.jpg

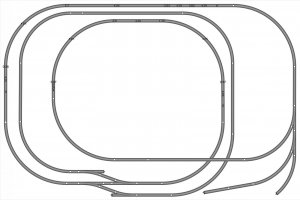
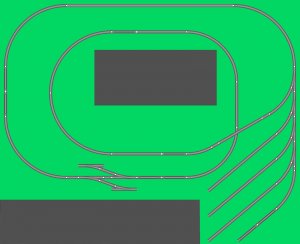
This is the first phase of the plan and the main line, the "yard" in the lower right hand corner is elevated at 4", there will be two ramps at 4% and an 18" bridge, should have more than enough NS sectional track to do it three times over:
final_a_prev.jpg
 
Glad to hear you are starting up again . There are lots of people on here with many years experience that are more than happy to offer any help you might need . This board helped me a lot . Good luck on your journey and remember , lots of photos.
 
Looks like a good start to a fun layout. And you nailed the philosophy of model railroading with this statement: "I am ready to turn this into a proper layout, a completely fictitious line based solely on how I want to play with my trains." Your layout, your rules!;)

I see you picked up a couple of Atlas Warren truss bridges. One thing I learned from experience: Mask off the glue points, then paint them BEFORE you assemble them. It will make getting the paint into the crevices much easier!
 
Yep, as said, you're well on your way! Looks like you got a good head start on many folks. Flyboy stated the number one rule here....."your railroad, your rules"! Have fun!
 
progress

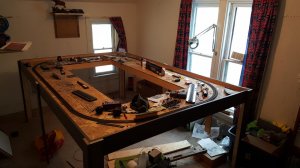
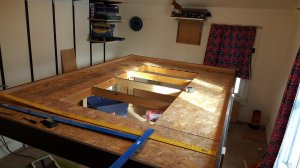
The original deck was built by screwing 2' X 6' sections together consisting of 1" X 4" and 3/8" OSB, which of course resulted in a fairly flimsy set up that needed lots of piers to level it up on the extremely out of whack floor. I had a stack of 1" X 6" and 1" X 4" painted brown for another project that's on hold till spring, so I embezzled it for this project. Screwed and glued the 1" X 6" around the edge straightening everything out in the process, made it significantly more solid as you can imagine. I had the original setting low, I know there was a reason at the time, but I'm taking the opportunity to be kind to my back and knees and raising it, top is at 42". I took a picture, I'm on coffee break, my goal is to have it ready to strip the old track before I have to go to a function.

20160107_124650.jpg
 
this old house...

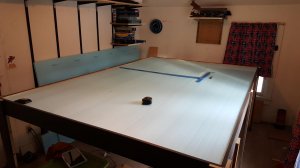
Got the legs on and it now sit's where it will stay permanently, temporarily leveled, I'll cut extensions to screw to the legs, and a band brace still needs installed. I have 2' or more of clearance on all sides. Now I need to clean the room thoroughly and get ready to start ripping up the old track and get foam down.One leg needed over 2" of shimming to get things fairly level, 100 year old house, well settled, and on it's last owner...

20160107_145654.jpg
 
Applying KISS principals, I nixed adding an extension to the table, mainly because it's already huge relative to the room, and it made things less complicated overall. Since I can now access all 4 sides easily, I'll eliminate the opening in the center altogether, gain real estate for other things and still keep the basic concept of where I'm going intact.

phase oneb.jpg
 
Looks like you have a great start.
A suggestion: You might want to write a history of your railroad. This was suggested" First thing I would recommend that you do is to take the above information, and write a "history" of the railroad and the location that it's in. Look at it like this, you're writing the history of the RR in the area you're modeling. It doesn't have to be fancy, or a college thesis, but something better than say a 3 line blurb. Name the places on the layout, and what they are, EX: The line originates in Williamsport, at an interchange with the B&O, traveling NE to Collinsville, taking the short rough route over the mountains....etc, etc. Now I have no idea about those locations, they're just two names of a couple of towns there, and you can even make up your own names.

After the history has been written, you can develop a "schematic" of the route by drawing it on to a map of Pennsylvania. I would also draw the route for a much larger area than you actually are going to model, so you can at least in the history if you want, talk about connections to other RR's, industries you supply that are off layout, etc. And then you can model interchanges or use staging to designate as those RR's, or industries that your RR serves, without having to actually model those industries.

Then I hope that with this "schematic", you'll actually "see" the track plan. If you do, it can almost draw itself at this point. You'll see where the mainline runs and you can then draw in branches or spurs that would serve small towns, online industries, etc. You can then start drawing in what you want onto the area you have available. Cherry pick areas from other track plans that fulfill what you want, or draw in your own. If you're familiar with the area, elaborate the tracks in an area that in real life, may only be a passing siding, or compress a another area that on the layout, you may only have room for a passing siding.

Lastly, don't be afraid to fail, and don't get frustrated. Don't be afraid to start over with the drawing of the track plan if something doesn't work. (I think I have about 25 renditions of my layout on the computer.) With the current crop of CAD programs out there that are free and easy to learn. It hurts nothing to save the old one and start a new one."
I really like this suggestion. I do not know how it will work for you but I put it on my list of things to do when I build my layout.
Richard
 
I'm not actually modeling a particular railroad, nor am I actually giving any attention to historical accuracy or railroad operations. It's a 9' X 6' table, my main focus is having fun running trains and playing around with DCC and computer control ultimately so when we move and I build something that will follow me to my grave I'll have a clue ")
 
I'm not actually modeling a particular railroad, nor am I actually giving any attention to historical accuracy or railroad operations. It's a 9' X 6' table, my main focus is having fun running trains and playing around with DCC and computer control ultimately so when we move and I build something that will follow me to my grave I'll have a clue ")
I understand, it was a suggestion only. I liked the idea and it sounded good to me. Please have fun with your idea. My layout is going to be more about die cast cars with a possible train or 2.
Richard
 
In the track plan in post #9, there are two unnecessary turnouts at the lower left. Just have the tracks curve in toward the turnouts.

Steve S
 
The turnouts in that one serve a purpose not illustrated, one goes to an isolated programming track, the other would go to a small yard. But I've scrapped that one, took too long to get my order, had time to stare and change my mind ")
 
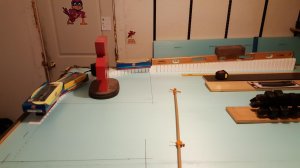
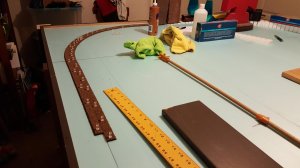
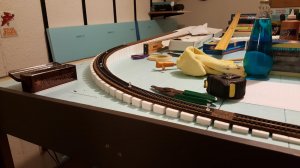
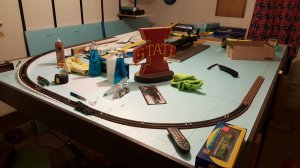
The radius on the incline is 24", Atlas #837. The whole layout will most likely be sectional since I have a boat load on hand and I plan on doing power feeds every 3'. As you can see, the track is a bit off from the bed, which is a bit off from the incline, combination of shadows and being anxious to get going. But it's close enough for government work, once the layout is fleshed out and ballast laid etc, you'll never see it and who cares if you do, it's about fun, not perfection.

20160111_195724.jpg20160111_231615.jpg20160111_231531.jpg
 
Last edited by a moderator:


Back
Top