You are using an out of date browser. It may not display this or other websites correctly.
You should upgrade or use an alternative browser.
You should upgrade or use an alternative browser.
Help Me Plan My Layout
- Thread starter gjohnston
- Start date
ModelRailroadForums.com is a free Model Railroad Discussion Forum and photo gallery. We cover all scales and sizes of model railroads. Online since 2002, it's one of the oldest and largest model railroad forums on the web. Whether you're a master model railroader or just getting started, you'll find something of interest here.
Thanks, my wife who is also my biggest critic suggested the change in plans. She said it looked good enough to her and to just apply a top coat and be done with it. I think she is tired of all of the dust and disruption going on. But it works for me.
Thanks for the complement, but I am a little out of your network for house calls. Good luck with your mudding.
Good tip, I did put 2x2 nailers behind the sheet rock on the ceiling around the perimeter.
Not too late at all. When I start laying track I can put the switches about where I want them before I secure them in place, (dry fit) and build around them. The plan is to put staging on the far left of the layout along the wall.
Affiliate Disclosure: We may receive a commision from some of the links and ads shown on this website (Learn More Here)
Very nice, but I would definitely block access to this room before the wife sees it again. I can see a whole house renovation looming.
Time to stake your claim in no uncertain terms. A sign which reads "Mine, all mine"
IronBeltKen
Lazy Daydreamer
Fill it up with benchwork before she has a chance to park any of her stuff in there.
Iron Horseman
Well-Known Member
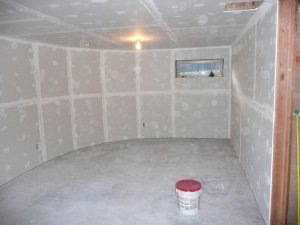
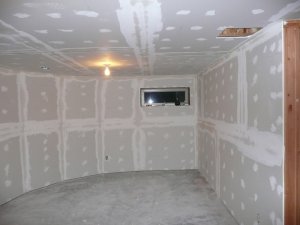
I've been curious this whole time, What is behind the curved wall? Staircase?Second coat of mud applied today. Moving right along.
santafewillie
Same Ol' Buzzard
Hey Iron Horseman, I wondered about that also. In another thread, Greg answered:
WillieYes that side of the house has a rounded corner that continues up from the basement to the upstairs dining room. The radius is 7 feet. The builders had fun wrapping the siding around the external wall. LOL
A few of these fellows were so helpful with helping you to plan yours, that I'm soon going to ask for suggestions for my new layout I hope to construct soon in my new 12x16 shed I am installing in the rear of the my long carport. I want to do around-the-wall with a peninsula, likely double-deck.I Iron Horseman and I came to much the same conclusions. This is my "take" on it

One of the things I have observed with multideck layouts, is it's best to keep the different levels at much the same width and not over about 24".. One of my clubs I think has made the mistake of going too wide on the bottom deck and narrower on the top one, meaning it's necessary to lean across the lower level to access to top one, with the dangers that presents.
I can fully appreciate that.
I've got a number of references to look thru more thoroughly including Tony Koester's book, and this PDF document by a fellow with a marvelous layout I visited in Southern MD
http://potomac-nmra.org/LayoutTours/Bob_Reid_2014/Pictures/album/index.html
PS: tried attaching a PDF, but it didn't seem to go thru?
Last edited by a moderator:
gjohnston
Slow Learner
Update:
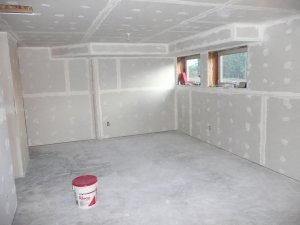
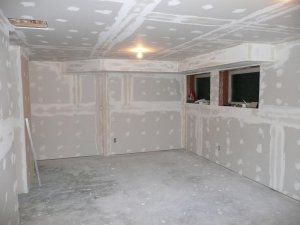
I put a primer/sealer coat on the basement this morning in preparation for texture, but it looked pretty good, so I decided to bag the texturing and just go with a top coat of paint. Then some trim around the floor, and windows, some floor treatment and I'll be ready to call it good an begin the benchwork.
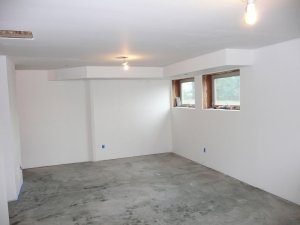
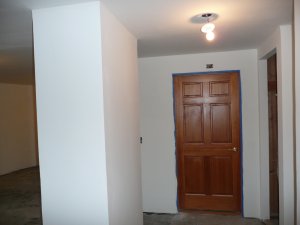
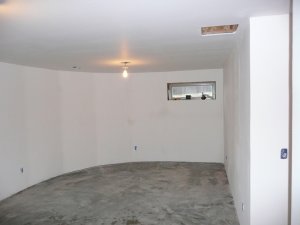
I put a primer/sealer coat on the basement this morning in preparation for texture, but it looked pretty good, so I decided to bag the texturing and just go with a top coat of paint. Then some trim around the floor, and windows, some floor treatment and I'll be ready to call it good an begin the benchwork.


Looking very good. And using just a standard top coat is all you need for a train room. (Hang on to that position)
gjohnston
Slow Learner
Looking very good. And using just a standard top coat is all you need for a train room. (Hang on to that position)
Thanks, my wife who is also my biggest critic suggested the change in plans. She said it looked good enough to her and to just apply a top coat and be done with it. I think she is tired of all of the dust and disruption going on. But it works for me.
Burlington Bob
Well-Known Member
Really nice work! Can you come over and finish mudding my room? I got tape and mud on about half of it when I got called to my present job and it's a night shift job so hasn't been much done til this outage is over.
flyboy2610
Loveably weird
I realize this is a bit late to be posting this, but if you ever have to drywall a room again, do the ceiling first. That way the drywall on the walls, butting up to the ceiling panels, will help support the edges of the ceiling panels.
A bit late to the party here, but two suggestions.
1) Use a track planning program and/or lay out your turnouts. (Switches). They ALWAYS take up far more room than you think they will. It's the downfall of most track plans.
2) I firmly believe all trackplans should have as much staging as possible. Yards are for switching, not train parking lots. Put a long staging track someplace, usually on a lower deck, where you can store full consists.
gjohnston
Slow Learner
Really nice work! Can you come over and finish mudding my room? I got tape and mud on about half of it when I got called to my present job and it's a night shift job so hasn't been much done til this outage is over.
Thanks for the complement, but I am a little out of your network for house calls. Good luck with your mudding.
I realize this is a bit late to be posting this, but if you ever have to drywall a room again, do the ceiling first. That way the drywall on the walls, butting up to the ceiling panels, will help support the edges of the ceiling panels.
Good tip, I did put 2x2 nailers behind the sheet rock on the ceiling around the perimeter.
A bit late to the party here, but two suggestions.
1) Use a track planning program and/or lay out your turnouts. (Switches). They ALWAYS take up far more room than you think they will. It's the downfall of most track plans.
2) I firmly believe all trackplans should have as much staging as possible. Yards are for switching, not train parking lots. Put a long staging track someplace, usually on a lower deck, where you can store full consists.
Not too late at all. When I start laying track I can put the switches about where I want them before I secure them in place, (dry fit) and build around them. The plan is to put staging on the far left of the layout along the wall.
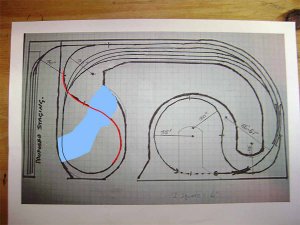
OK, so here's my first draft of the layout. I like you plan, especially the wide radius curves.
Two things bother me though.
1) The left side of your yard won't fit as drawn unless I miss my guess.
2) I really have a problem with the long diagonal bridge over the yard. Bridges are expensive (in the prototype) and the goal is to build one as short as possible. If I was designing that area in the real world, I've move the bridge to the left of the throat so I only have cross a single track. Granted, once in a while, you can't do it due to other constraints, mountains, cities, whatever. But it didn't set well with me.
So, I came up with a version that resolved both issues. The bridge is now the big sweeping red S curve. It crosses over the yard throat, so it's more realistic looking. The revised yard also gives you lots more space for the ladder on the left side.
The blue is obviously water, but not just a big lake. I'm thinking that area would be a city / harbor scene, sort of like the John Allen shot you posted.
See what you think?

Affiliate Disclosure: We may receive a commision from some of the links and ads shown on this website (Learn More Here)

