You are using an out of date browser. It may not display this or other websites correctly.
You should upgrade or use an alternative browser.
You should upgrade or use an alternative browser.
Dave's Layout v. 4.0
- Thread starter logandsawman
- Start date
BigGRacing
Aka. Gary Russell
Great job and I too look forward to the videos
logandsawman
Well-Known Member
Chris, Gary; thanks for commenting, I appreciate your interest in my project!
logandsawman
Well-Known Member
Thanks, Louis! Here is the latest progress on my layout, featuring the locomotives typical to my era (1900-1939) which are usually on the layout. This is a DC layout so when trains are parked the section of track is deactivated with a simple toggle switch, allows independent movement of trains without too much complexity:
You will notice the little 0-6-0 does a few hiccups but manages to keep its stride. That loco stays on the track real well but needs to be worked more to get the kinks out.
The Varney does very well for a 50+ year old model. The newest loco, the Walthers, is my best performer.
Dave LASM
You will notice the little 0-6-0 does a few hiccups but manages to keep its stride. That loco stays on the track real well but needs to be worked more to get the kinks out.
The Varney does very well for a 50+ year old model. The newest loco, the Walthers, is my best performer.
Dave LASM
Smudge617
Well-Known Member
Thanks Dave, nice to see so much of your layout too.Thanks, Louis! Here is the latest progress on my layout, featuring the locomotives typical to my era (1900-1939) which are usually on the layout. This is a DC layout so when trains are parked the section of track is deactivated with a simple toggle switch, allows independent movement of trains without too much complexity:
You will notice the little 0-6-0 does a few hiccups but manages to keep its stride. That loco stays on the track real well but needs to be worked more to get the kinks out.
The Varney does very well for a 50+ year old model. The newest loco, the Walthers, is my best performer.
Dave LASM
logandsawman
Well-Known Member
THANKS for watching Chris and glad you enjoyed the layout tour as well!
logandsawman
Well-Known Member
Some layout progress over the weekend, the crossing grade in front of the new buildings was roughed in with some hydrocal:

This scene is a partial reconstruction of the prototype, the street/parking area crosses the track in front of the diner/grocery store. The track went right across Highway 61 and was pretty much buried in the roadway barely visible except the crossing sign and unless there was a train present.:
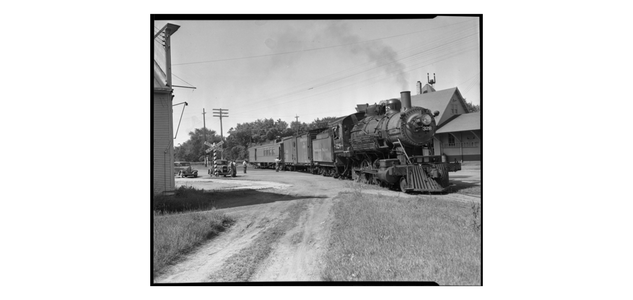
the grocery store shows here. Location of the sign seems to be on the wrong side of the tracks, however the trains moved slowly through here, as well as the traffic. It appears as though they loaded passengers right in the street here. Photo is from the Northern Pacific Historical Association web site.
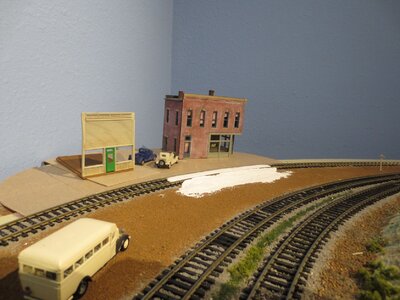
above, the blue tape has been removed and the hydrocal sanded down. The hydrocal will be painted also some fine sand applied to try to make it look like a road
Also, took the SW-1 apart and added an operator, also did lube work as it was disassembled"
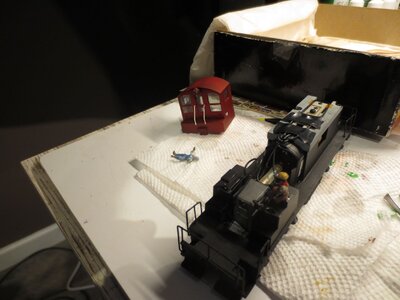
The operator is in the cab, also put the other man on back holding on
I spent most of the weekend working on my Wife's bathroom project, I needed hydrocal to fill a hole so took the opportunity to get this track work done at the same time!
Dave LASM
This scene is a partial reconstruction of the prototype, the street/parking area crosses the track in front of the diner/grocery store. The track went right across Highway 61 and was pretty much buried in the roadway barely visible except the crossing sign and unless there was a train present.:

the grocery store shows here. Location of the sign seems to be on the wrong side of the tracks, however the trains moved slowly through here, as well as the traffic. It appears as though they loaded passengers right in the street here. Photo is from the Northern Pacific Historical Association web site.

above, the blue tape has been removed and the hydrocal sanded down. The hydrocal will be painted also some fine sand applied to try to make it look like a road
Also, took the SW-1 apart and added an operator, also did lube work as it was disassembled"

The operator is in the cab, also put the other man on back holding on
I spent most of the weekend working on my Wife's bathroom project, I needed hydrocal to fill a hole so took the opportunity to get this track work done at the same time!
Dave LASM
santafewillie
Same Ol' Buzzard
I'm just catching up with this thread after it got buried among all of the others! Great video Dave, you've done a lot of work quite quickly.
logandsawman
Well-Known Member
Thanks Willie! seems like slow motion to me, guess that is because I look at it every day and progress is so incremental.
logandsawman
Well-Known Member
One of my projects was getting some operators in my locomotives, here is the result of Saturdays efforts with my SW-1 and Varney steam loco:

The operator in the SW-1 is barely visible but at least we can see the cab is not empty.

I had to cut the legs off both the engineers to make them fit.
These guys have been on several layouts: that is one thing that always gets salvaged, the people.
Dave LASM
The operator in the SW-1 is barely visible but at least we can see the cab is not empty.
I had to cut the legs off both the engineers to make them fit.
These guys have been on several layouts: that is one thing that always gets salvaged, the people.
Dave LASM
logandsawman
Well-Known Member
I made some weekend progress on the grocery/gas building by Chooch, first I had to make the munts for the big picture windows:
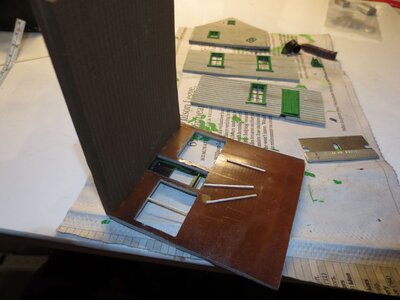
Today I did lots of this kind of stuff, where I would glue a few things then wait an hour or so before handling, giving the glue some time to set. For this project, all the glue is Gorilla brand, however used JB weld to reinforce it in several places where I didn't think it would show
After getting the picture windows done, I glued all the sides together getting ready to make the roof sections. They included templates for this, I painted theunderside of all the sections, as well as the interior of the building, which will be lighted

Getting to the home stretch for this project, the interior has been painted also put together the porch roof also the supports. The corbels have been attached and a narrow trim piece on top of the false front, will be a trim piece up there as well,
Hard to see in the photo but I glued a couple women inside the right window also a small table on the left side, light will be coming out of the floor towards the back of the building
leave a comment if you like... Dave

Today I did lots of this kind of stuff, where I would glue a few things then wait an hour or so before handling, giving the glue some time to set. For this project, all the glue is Gorilla brand, however used JB weld to reinforce it in several places where I didn't think it would show

After getting the picture windows done, I glued all the sides together getting ready to make the roof sections. They included templates for this, I painted theunderside of all the sections, as well as the interior of the building, which will be lighted
Getting to the home stretch for this project, the interior has been painted also put together the porch roof also the supports. The corbels have been attached and a narrow trim piece on top of the false front, will be a trim piece up there as well,
Hard to see in the photo but I glued a couple women inside the right window also a small table on the left side, light will be coming out of the floor towards the back of the building
leave a comment if you like... Dave
leave a comment if you like... Dave
goscrewyourselves
I'm the one
Dave, just catching up with your thread - lots to catchup on as well 
logandsawman
Well-Known Member
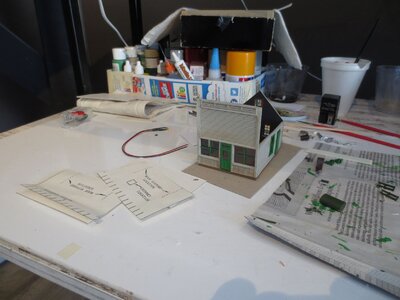
I have a few pics of the buildings I have been working on, finally got the grocery store on the layout with some of the scenery around it...
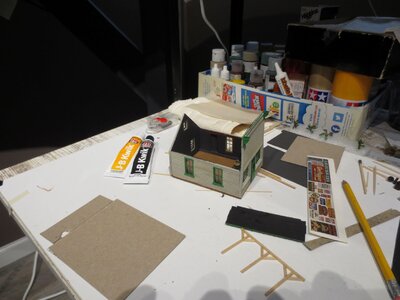
I have the interior painted, used JB weld around the floor to make sure light does not bleed out, roof sections are cut
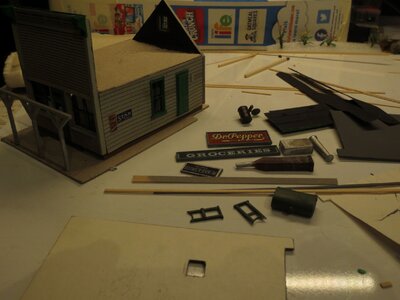
I put a ceiling in place, used JB weld on the end seams, otherwise adhered with gorilla glue to the wall sections, the sign boards are just reinforced cardboard with a wood edge, oil tank, other details ready to assemble...
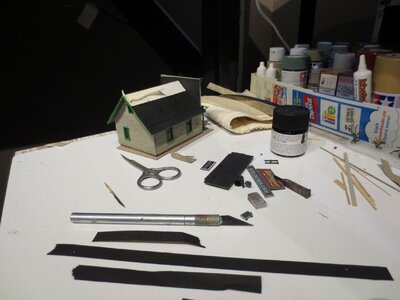
For tarpaper I have some paper towels with flat black spray paint, cut into scale 3' wide strips, being applied bottom up. I used gorilla glue to adhere the tarpaper as it adheres almost instantly and is really strong. Note porch section will be applied last so I don't mess up with handling

The building is complete and on the layout. Scenery left to do otherwise I like it! Will be some people around also a couple cars. The hotel/restaurant still not detailed, have some scenery areas to complete there otherwise thinking on the backdrop...
my next layout project will be the Rivarossi tank loco followed by a sandstone engine house.
Tony, Christain, Smudge; I appreciate the comments!
Dave LASM

I have the interior painted, used JB weld around the floor to make sure light does not bleed out, roof sections are cut

I put a ceiling in place, used JB weld on the end seams, otherwise adhered with gorilla glue to the wall sections, the sign boards are just reinforced cardboard with a wood edge, oil tank, other details ready to assemble...

For tarpaper I have some paper towels with flat black spray paint, cut into scale 3' wide strips, being applied bottom up. I used gorilla glue to adhere the tarpaper as it adheres almost instantly and is really strong. Note porch section will be applied last so I don't mess up with handling
The building is complete and on the layout. Scenery left to do otherwise I like it! Will be some people around also a couple cars. The hotel/restaurant still not detailed, have some scenery areas to complete there otherwise thinking on the backdrop...
my next layout project will be the Rivarossi tank loco followed by a sandstone engine house.
Tony, Christain, Smudge; I appreciate the comments!
Dave LASM
Smudge617
Well-Known Member
I like that, one day I'll be as good as you doing this, but I'll probably in the ground waaayyyyyy before then.I have a few pics of the buildings I have been working on, finally got the grocery store on the layout with some of the scenery around it...
View attachment 162551
I have the interior painted, used JB weld around the floor to make sure light does not bleed out, roof sections are cut
View attachment 162553
I put a ceiling in place, used JB weld on the end seams, otherwise adhered with gorilla glue to the wall sections, the sign boards are just reinforced cardboard with a wood edge, oil tank, other details ready to assemble...
View attachment 162555
For tarpaper I have some paper towels with flat black spray paint, cut into scale 3' wide strips, being applied bottom up. I used gorilla glue to adhere the tarpaper as it adheres almost instantly and is really strong. Note porch section will be applied last so I don't mess up with handling
View attachment 162556
The building is complete and on the layout. Scenery left to do otherwise I like it! Will be some people around also a couple cars. The hotel/restaurant still not detailed, have some scenery areas to complete there otherwise thinking on the backdrop...
my next layout project will be the Rivarossi tank loco followed by a sandstone engine house.
Tony, Christain, Smudge; I appreciate the comments!
Dave LASM
goscrewyourselves
I'm the one
Very impressive building mate! 
logandsawman
Well-Known Member
Fixing up the little Rivarossi tank loco turned out entirely different than what I imagined. First I ran into this problem, the numbers and insignia for PRR were raised letters, and did not want to come off with the finger nail polish remover which is my go to:
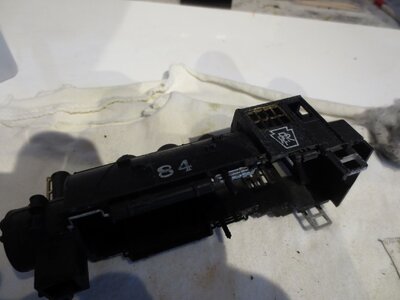
Above, after rubbing with a generous coat of fingernail polish remover, barely scraped the paint. Then, when I turned it over to do the other side there was some sort of reaction with the cotton cloth and it left a little pattern on the plastic
after some thought, what about a little heat, maybe scrape off the offending numbers. My original plan was a road decal where the PRR is and a number where the 84 is
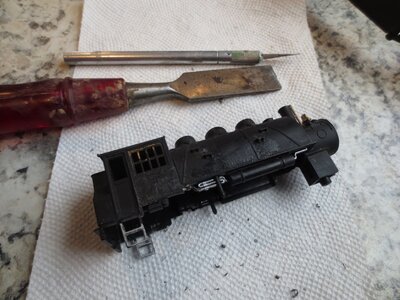
I heated the chisel up on the gas burner then worked gently to scrape the numbers and letters off, then decided to make it look like a beat up loco and go with it
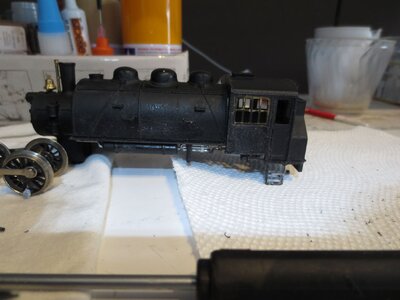
here is the other side. the impression of the cotton cloth was smoothed out some with the hot chisel, also decided to do a little additional distress. I cut off the bell and put a metal one on as well. Also, added some weathering powders and coated with Testors dull coat

now it is on the track. It runs very well. Still need to get the couplers to the correct height, on back I used an overset, will have to get one for the front as well, unless I can make the coupler pocket higher...
Tony, Chris ... THANKS for leaving comments above!!
Next project is going to be a scratch built engine house, fashioned like the sandstone one that rested at the Quarry in the early 1900's. The quarry was a Sandstone quarry, the engine house was built out of the native rock.
Dave LASM

Above, after rubbing with a generous coat of fingernail polish remover, barely scraped the paint. Then, when I turned it over to do the other side there was some sort of reaction with the cotton cloth and it left a little pattern on the plastic
after some thought, what about a little heat, maybe scrape off the offending numbers. My original plan was a road decal where the PRR is and a number where the 84 is

I heated the chisel up on the gas burner then worked gently to scrape the numbers and letters off, then decided to make it look like a beat up loco and go with it

here is the other side. the impression of the cotton cloth was smoothed out some with the hot chisel, also decided to do a little additional distress. I cut off the bell and put a metal one on as well. Also, added some weathering powders and coated with Testors dull coat
now it is on the track. It runs very well. Still need to get the couplers to the correct height, on back I used an overset, will have to get one for the front as well, unless I can make the coupler pocket higher...
Tony, Chris ... THANKS for leaving comments above!!
Next project is going to be a scratch built engine house, fashioned like the sandstone one that rested at the Quarry in the early 1900's. The quarry was a Sandstone quarry, the engine house was built out of the native rock.
Dave LASM
The Locomotive (steam) turned out very well - I like the "weathered" look!
Layout is looking great, DAVE.
Layout is looking great, DAVE.

