Dave's Layout v. 4.0


Fixing up the little Rivarossi tank loco turned out entirely different than what I imagined. First I ran into this problem, the numbers and insignia for PRR were raised letters, and did not want to come off with the finger nail polish remover which is my go to:

View attachment 162681

Above, after rubbing with a generous coat of fingernail polish remover, barely scraped the paint. Then, when I turned it over to do the other side there was some sort of reaction with the cotton cloth and it left a little pattern on the plastic :mad:

after some thought, what about a little heat, maybe scrape off the offending numbers. My original plan was a road decal where the PRR is and a number where the 84 is

View attachment 162682

I heated the chisel up on the gas burner then worked gently to scrape the numbers and letters off, then decided to make it look like a beat up loco and go with it

View attachment 162683

here is the other side. the impression of the cotton cloth was smoothed out some with the hot chisel, also decided to do a little additional distress. I cut off the bell and put a metal one on as well. Also, added some weathering powders and coated with Testors dull coat

View attachment 162684

now it is on the track. It runs very well. Still need to get the couplers to the correct height, on back I used an overset, will have to get one for the front as well, unless I can make the coupler pocket higher...


Tony, Chris ... THANKS for leaving comments above!!

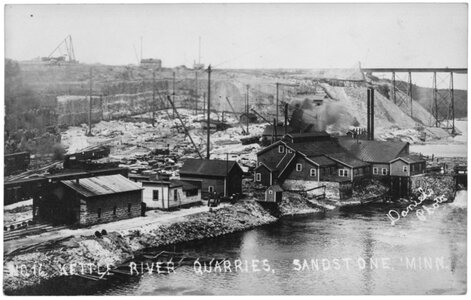
Next project is going to be a scratch built engine house, fashioned like the sandstone one that rested at the Quarry in the early 1900's. The quarry was a Sandstone quarry, the engine house was built out of the native rock.

Dave LASM
Love the distressed look, not sure I could use the hot chisel tho'
 
This little loco has been a pleasure to work on, although not at all what I was expecting.

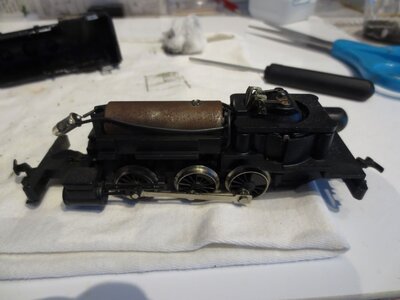
The removal of one screw was able to get me to this place in the lubrication/reworking process:

loco 5.JPG

For small steam, this engine had a huge motor (is vertical, which is a new one for me) motor on right, weight on left, old light works

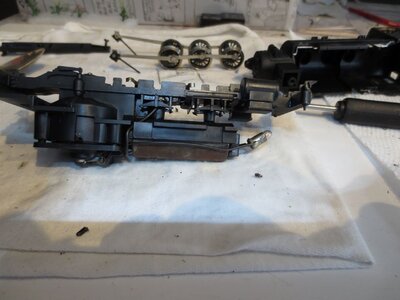
Take out another screw and the entire thing is accessible: (only two screws hold everything together)

loco 4.JPG

This motor is sealed and no visible flywheel. This old relic has broken in nicely and is now featured on my layout.

Tom, Sherrel, Chris -- Thanks for the compliments and following along!!


Dave
 
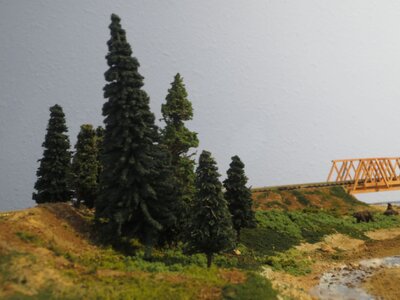
I finally got around to getting these Grand Central Gems on the layout, they came from Walthers a few weeks ago but other projects got the best of me

trees 3.JPG


Wife suggested I put them here, at first I balked then realized that was a good place for them, these all came from the same place, 2 different sizes

trees 2.JPG

above...here I just added a few more trees, there were already some from 2 differrent mfgr's now 3 different types, the main difference is the colors are slightly different, and some are several years older so bumped around in transit.

THANKS for looking and Gary, Chris thanks for being faithful followers...

Dave LASM
 
I finally got around to getting these Grand Central Gems on the layout, they came from Walthers a few weeks ago but other projects got the best of me

View attachment 162762

Wife suggested I put them here, at first I balked then realized that was a good place for them, these all came from the same place, 2 different sizes

View attachment 162763

above...here I just added a few more trees, there were already some from 2 differrent mfgr's now 3 different types, the main difference is the colors are slightly different, and some are several years older so bumped around in transit.

THANKS for looking and Gary, Chris thanks for being faithful followers...

Dave LASM
That the trees are from different manufactures and are slightly different shades plus different types of tree's actually works, make it far more realistic to the eye, and the buildings are pretty good too.;)
 
I made some weekend progress on the grocery/gas building by Chooch, first I had to make the munts for the big picture windows:

View attachment 161955

Today I did lots of this kind of stuff, where I would glue a few things then wait an hour or so before handling, giving the glue some time to set. For this project, all the glue is Gorilla brand, however used JB weld to reinforce it in several places where I didn't think it would show

View attachment 161956

After getting the picture windows done, I glued all the sides together getting ready to make the roof sections. They included templates for this, I painted theunderside of all the sections, as well as the interior of the building, which will be lighted

View attachment 161957

Getting to the home stretch for this project, the interior has been painted also put together the porch roof also the supports. The corbels have been attached and a narrow trim piece on top of the false front, will be a trim piece up there as well,

Hard to see in the photo but I glued a couple women inside the right window also a small table on the left side, light will be coming out of the floor towards the back of the building

leave a comment if you like... Dave
Dave that’s a nice little building, but, there’s something doesn appear quite right about the doors installed , is it possible you installed the doors on the wrong side of the framing?
 
Nice work on the steam engine , the Rivarossi is suppose to be an excellent running engine . The trees look great, along with the buildings. Have you ever looked into making furnace filter trees? I like to make them and blend in some cheap dresses up trees with them.
 
Nice work on the steam engine , the Rivarossi is suppose to be an excellent running engine . The trees look great, along with the buildings. Have you ever looked into making furnace filter trees? I like to make them and blend in some cheap dresses up trees with them.
Thanks Lynn, seems true the Rivarossi is getting all the train time at present!

I have made hundreds of trees, also have a couple videos out on how to make trees. Sometimes, I like to buy them. I will be putting some of these on the layout:


I think these are the best product for making hardwoods:


Not sure if I will be buying a box of Super Trees since I don't think I have room for that many.

THANKS, Lynn, for commenting!!!

Dave
 
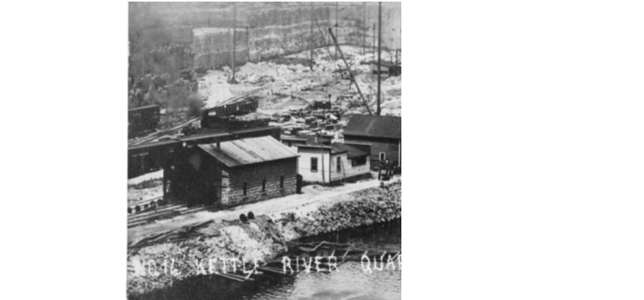
Today I got motivated to get going on the Engine House, my next project. Here is a pic of the prototype, this is the one located at the Kettle River Quarry in Sandstone, MN:

Engine house area.png

This is part of a larger picture which names the source. The engine house shown in the bottom left has two stalls, I only have room for one will also put in an accessory building presumably for railroad business. Northern Pacific rail cars are seen in this busy spur.

Sandstone quarry circ 1910.jpg

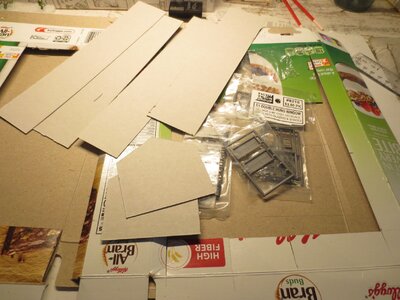
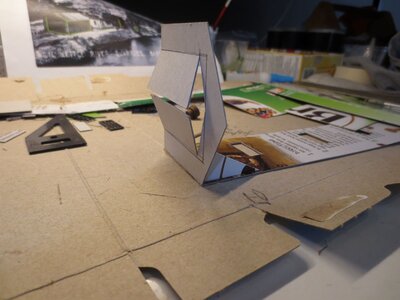
Above, shows the wider scene. I started by picking a size, checking the dimensions with a couple steam engines, then cutting the parts out of cardboard to create a mockup.

For the actual model, walls will probably be a chooch product. The roof is standing seam galvanized, like in the pic, I already purchased that material,

cardboard pieces r.JPG

I glued the walls. The roof will not be attched and probably be finished as part of the final project. The wall sections probably not be used for anything but planning (unless I repurpose)

glueing r.JPG

I put down dry sieved sand and glued down with Woodland Scenics Scenic Cement (water white glue):

gettint the foundation.JPG


I will be removing the engine house and adjusting the sand and glueing that down. Today looking to order the wall materials and also this week planning on figuring out a little support bldg like in the top pic.


Leave a comment if you like, thanks for looking!

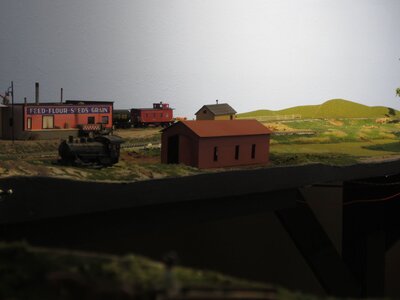
This shot of activity around Wyoming for fun after running trains last night:

Wyoming activity.JPG

Dave LASM
 
It is going to look awesome Dave, real sand from your backyard?
Thanks, Gary. The "dirt" I use is actual Class 5 gravel road building material which has been sifted with a kitchen colander then a finer coffee strainer.

That is after it is air dried (this gravel has been sitting in a pail inside my Suburban for a year. It is also used if I get stuck I can sprinkle it under my tire for traction. Luckily, haven't had to do that)
 
I decided to put a coat of paint on the engine house, will be waiting for Chooch stone product which the walls will be fabricated from:

engine houes.JPG

(this is a mock up, however the removable roof will probably be used, after covered with the standing seam galvanized roofing)

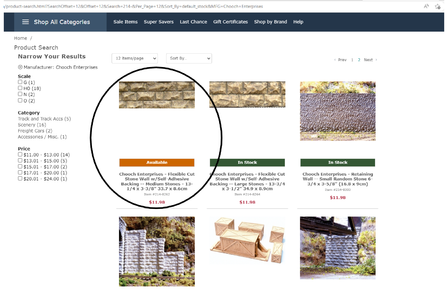
I ordered this for the walls:

stone wall.png

had to search some sites to find it available, knew I saw it somewhere last year when I was planning the layout.

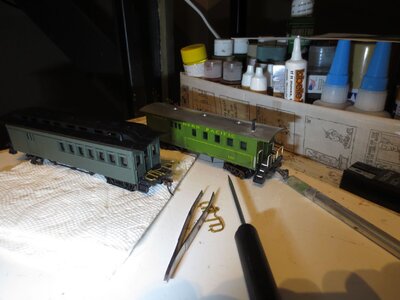
In the meantime, decided to work on the new combine car. My old one is a mantua and is an earlier version (earlier era) and I was never happy with it. The new one is a Bachmann, however I feel they really skimped on the railings and details.

One redeeming quality, it was easy to disassemble so I will be weathering it and making new handrails:

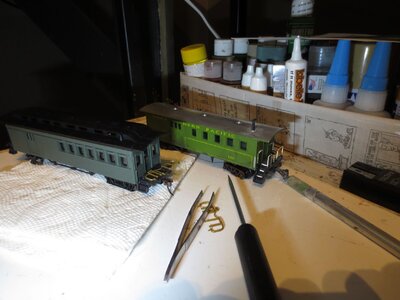
combine proj 1.JPG

Mantua model on the right, bachman on the left, plastic handrails were easy to remove

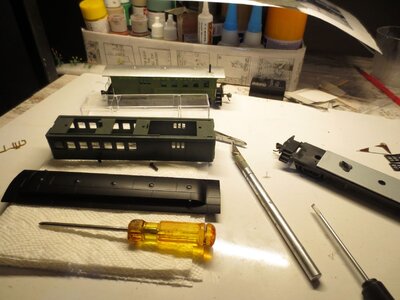
combine proj 2.JPG

a couple tabs on the bottom and two screws on the inside. Will tone down the roof with water/white wash mixture. Walls need treatment as well, and make new handrails, new chain, not sure how I will be handling th truss rods.

Dave LASM
 
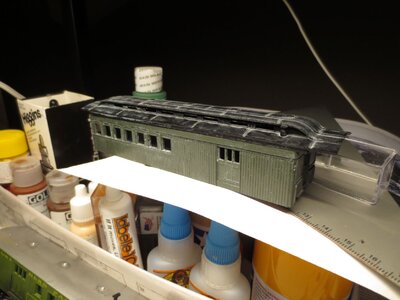
I have been applying some coats to the combine car I am trying to tone down, here is after a couple applications of white wash and then india ink/water/alcohol.

Not sure if it is "done" may tweek it a bit. However, Thanks to TomO weathering suggestions just a brush coat of dk. brown on the trucks helps a lot:

The before pic (front car with railing off)

combine car before.JPG

I brushed on a couple coats of white wash followed by india ink mixture. The model is directly below a flourescent white light so lighting somewhat abnormal:

combine car in progress 1.JPG

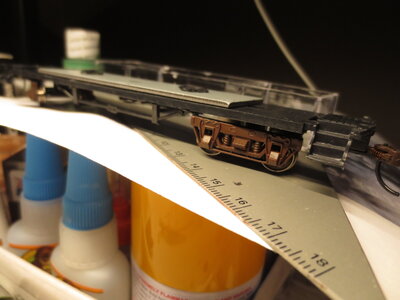
Here are the trucks with just the paint:

IMG_3218.JPG

I may do some rubbing on the white water drops to fade them a little. This is supposed to be a dull, sun faded version of the car.

Still a ways to go but having some fun with this one.

Dave
 
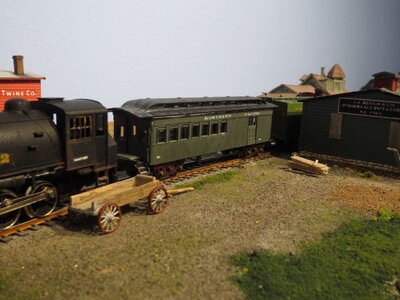
I got the decals on the combine car that I am fixing up a little, also put it back together just waiting to get the new railing done:

combine w decals.JPG

maybe overdid the roof a little

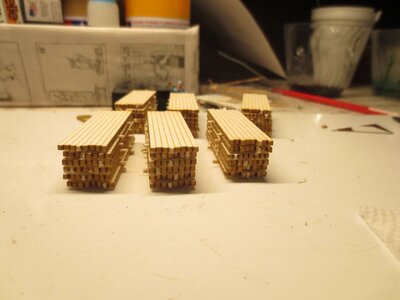
Also, got the little project with the lumber stacks:

lumber stacks 2.JPG

The one kit came with enough materials for these 6 stacks. You had to use your own materials for the stickers otherwise not much extra work other than glueing and a little filing. I don't think these are made from wood but some type of fiber a little like felt

Here I put them under the shed at the sawmill site, also added a little sawdust:

lumber drying.JPG


Still room in this scene for more details. We'll see

Dave LASM
 
Landscape materials applied around the new buildings, also crossing modeling the "tracks-buried-in-road" completed. Sifted dry gravel is used, glued with Woodland Scenics Scenic Cement. Pins hold down cardboard base while drying. Some grass and shrubs applied on the perimeter:

new bldgs with crossing.JPG


also some activity unloading/loading barrels at the freight house:

unloading freight.JPG


Dave LASM


Back
Top