
Weekend Photo Fun May 1-3

ModelRailroadForums.com is a free Model Railroad Discussion Forum and photo gallery. We cover all scales and sizes of model railroads. Online since 2002, it's one of the oldest and largest model railroad forums on the web. Whether you're a master model railroader or just getting started, you'll find something of interest here.


Lookin good guys! I'm nowhere near a finished layout... still working on expanding my N scale Southern.

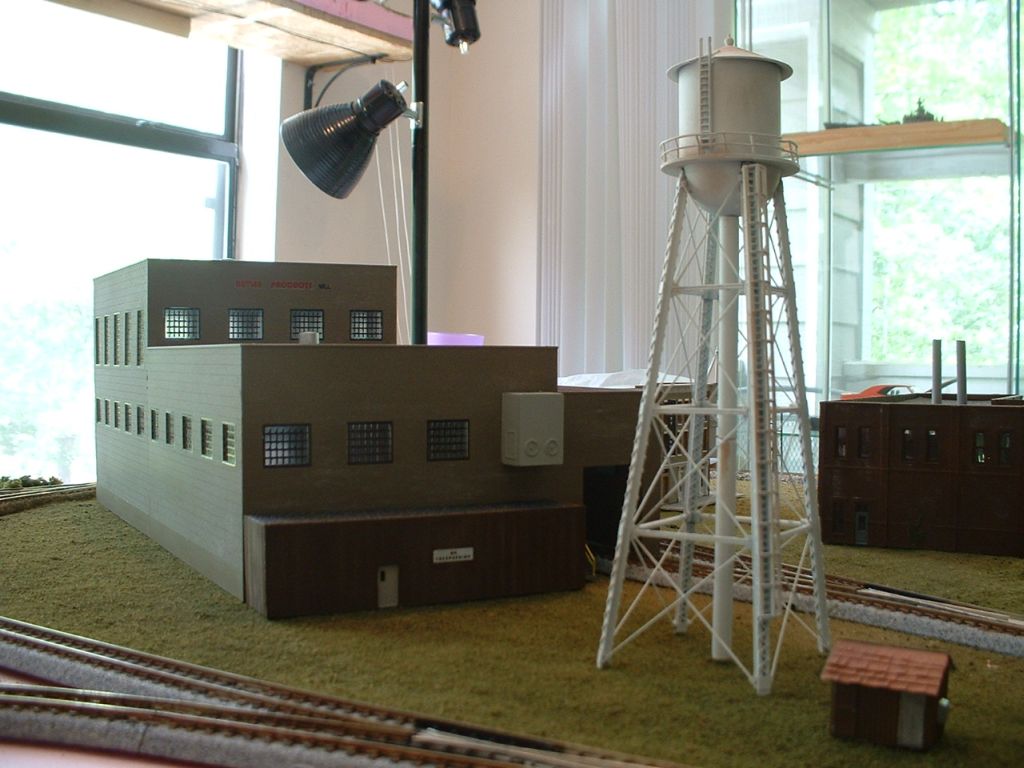
Here's a little progress I made this weekend - finished the main cotton mill building, along with the water tower and pump house. On the little pump house, I tried my hand at shingles for the first time... I'm happy with the way it came out! :)
3498163430_f47ba9d443_o.jpg


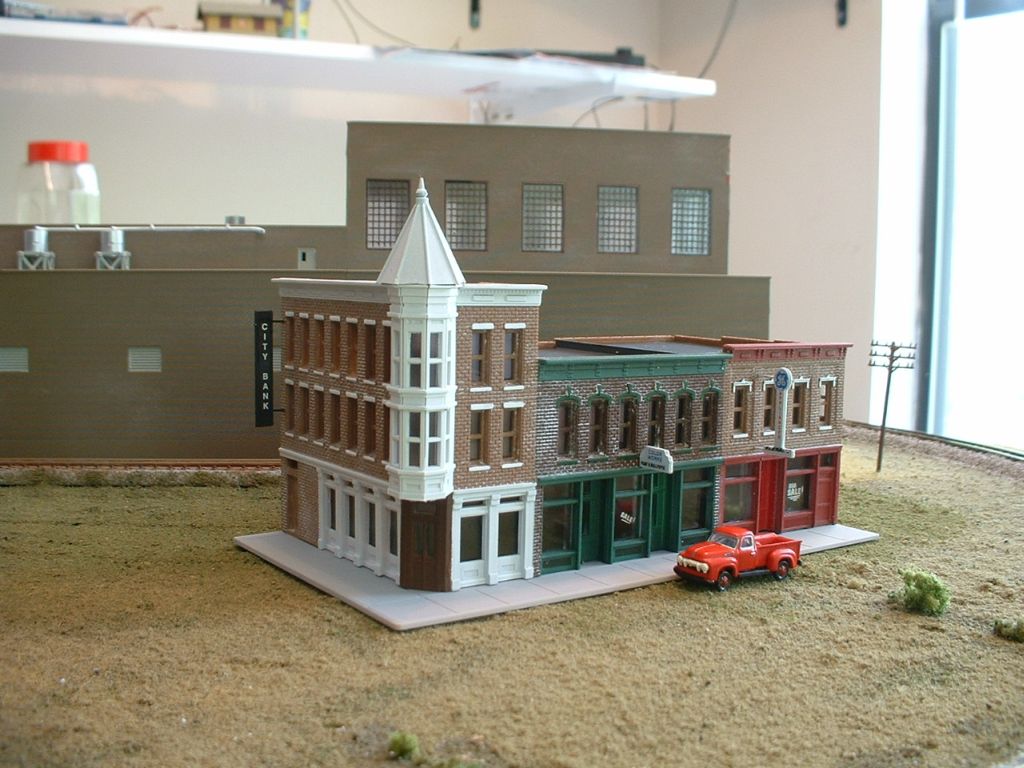
As well, finished my merchants row - still working on the roads and all for the town there.
3498163500_27ccf8e840_o.jpg


Kyle
 
Just curious.
What do members here use for lighting? I'm practicing with a new camera under Compact Florescent lights and the pics look quite different.
Thanks

The only stupid question is the one you don't ask ;)

This depends on your camera, but look and see if you can adjust your white balance. My camera has a setting for flourescent lighting. Any digital SLR worth what one costs will, and the nicer point & shooters should, as well. If all else fails, RTFM. (Read The Freakin' Manual!) :D


And now for a few photos of the latest "Stuff I shouldn't have bought but did anyway!"

Anyone get themselves one or two of the new Walthers/Proto E-7s yet? I did. They run and sound sweet! Here's a couple of pics:
3quartershot.png


FrontQuarter2.png


BulldogNose.png


SideDetail.png


They sound as good as they look too. The startup sequence is awesome, and they (QSI) got the Twin engine sounds down. Way easier than playing with the reverb on a Tsunami

I also picked this up on *-bay: A really nice Key GS 4. Already configured for sound, all I have to do is drop in the speaker & electronics. Runs like a watch right out of the box too, at least on the test track.

GS4frontquarter.png


SideView2.png


Sideview1.png


TenderSide.png


Of course I'm broke now:eek:, but what the heck, you can't take it with you! :D
 
And now for a few photos of the latest "Stuff I shouldn't have bought but did anyway!"

....


TenderSide.png


Of course I'm broke now:eek:, but what the heck, you can't take it with you! :D

I have sort of a strange request regarding the tender, could you (or someone else w/ a Daylight tender) measure how far above the rail the 4 silver stripes are at the rear of the tender?
 
Last edited by a moderator:
I use natural light when I can:
http://www.modelrailroadforums.com/forum/showpost.php?p=126437&postcount=6
but often use flourescents. Assuming you are using digital, it is a matter of setting the white balance. Different light sources have different colors and digital cameras can compensate for that. I just leave mine on automatic and it does a pretty good job. If you mix light types it is very hard to get the photo to look right. The highlights will be one color and the shadows another. There is lots more to it but that is a start. Maybe if you showed an example of what you are getting someone could offer more suggestions.

Here's a couple of shots of a newly acquired GP40
001.png

002.png

003.png

005.png

006.png
 
Here's a couple of shots of a newly acquired GP40
....

Those don't look too "off" to me. The first one with the flash is sort of washed out like using the flash makes model photos look. When taking model photos I use aperature priority and set it to the smallest (highest number) aperature to increase the depth of field. To compensate that can make the shutter speed as long as a couple seconds which makes handholding the camera impossible. If that is the case, I use the timer. Compose the shot, set the timer and set the camera on something so nothing moves while it is taking the photo (or use a tripod). Digital cameras also usually have a macro function somewhere which allows it to take close ups. Without the macro my camera won't focus closer than about 4 feet. With it on it focuses as close as 10mm. It is usually a little flower icon. Practice usually helps the photos get better also. My favorite part about digital is you can see right away if what you are trying worked or not and you can make adjustments right away and try again.


Another project finished tonight, she's on her way up to Mass. for Mark to put into service. An old dirty, rusty, nasty PRR ice breaker. Here's the prototype:

PRR194796-H21C_0_preview.jpg


And here's the finished model:

100_3913.jpg
 
Very nicely done. I can just see that breaking up the icicles hanging from bridges, tunnel portals and signal bridges as well as canternary lines.
 
Nice work, everyone.

Kyle, your cotton mill building looks great. Niice job on the shingles too. They're not bad once you get the hang of it.

Alan, Key made some fantasic model and were always good runners. The paint job looks...well, really professional. :) That E unit doesn't look quite right though. Is the coupler box supposed to stick that far out of the pilot?

HB, If you don't have a tripod, get one. Jack the aperture up to something like f/8 and do a time exposure of something like 1 to 2 seconds. That will give you the depth of field you're missing in some of your pictures. Don't ever use a flash. It washes out all the details and background. As Paul said, experiment with different setting to see what does best on your layout. I'm not very good but I'll bet I've taken hundereds of different shots before I found the settings that made shots look halfways decent.

Jerome, you always come up with the stangest rolling stock. I'm actually surprised the hopper looked that good considering the beating it must have taken. You have 100 SW's? I wonder if there's a group for SW addicts, like AA? :D

Jeffrey, I see what you're trying to do with the covered hopped but it looks like it has measles. Can you use your weathering mix on a brush to create come streaking on the sides?
 
Thanks for the Feedback UP2CSX and KJD
My 300 buck point and shoot doesn't have adjustable fstops so I dug out my wife's Maxxum 5D and tripod. I played a bit with the settings and here's what I have as of now. Light level still alittle dark. Fstop varied between 10 adn 18 with 2 to 2.5 second shutter. ISO set to 100. I can't seem to get the brightness I want. Possible ISO to 200?
PICT0043-1.png

PICT0036.png

PICT0048.png

PICT0047.png
 
Last edited by a moderator:


Affiliate Disclosure: We may receive a commision from some of the links and ads shown on this website (Learn More Here)

Back
Top
