
You are using an out of date browser. It may not display this or other websites correctly.
You should upgrade or use an alternative browser.
You should upgrade or use an alternative browser.
Weathering Rolling Stock, a Continous thread
- Thread starter TLOC
- Start date
ModelRailroadForums.com is a free Model Railroad Discussion Forum and photo gallery. We cover all scales and sizes of model railroads. Online since 2002, it's one of the oldest and largest model railroad forums on the web. Whether you're a master model railroader or just getting started, you'll find something of interest here.


Ok, I must ask the obvious question:
How does one weather with a dog’s privates?
The small paint sticks are the dogs dodahs
But if you wished to paint with your dogs privates? I would suggest you warm your hands first, and have a treat nearby.


I love Jazz’s heavy textured weathering
Thanks for the compliment. My current issue has been complete lack of interest in anything modeling. But I’ll be back.
I have settled on applying a gloss coat to the area the decals are going and let it dry and cure 48 hours. I know that’s a long wait but I now get better results than the old over night wait time. I use Micro Solve and Micro Set per the instructions. Lining up decals I thought was magic, what it is having enough solvent applied to adjust them and then lightly touch a bath/toilet tissue to a corner of the solvent to wick away the excess solvent. Then lightly pat dry.
I use a sharp scissor to cut as much film off as possible. I use a stainless steel pick to position but a wooden tooth pick will easily substitute. I use as above toilet paper sheets and occasionally a needle if I’m having issues straightening out the numbers and letters. Most of all, have patience which I have very little of but it really does help to be slow and methodical
After I’m satisfied a matte clear coat, let dry then weathering
Your picture progression though shows great improvement
Wait…wuz you suggesting tuh do it while they’s still ON the dawg???
Dang, I done ruined three good breedin’ dawgs tryin’ tuh do it t’other way!!!!
And none o’ my dern dawgs will come tuh me when I cawl now!!!
When I model my dawgs, I model gals…no balls necessary…..
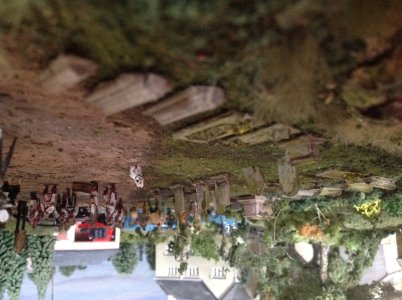
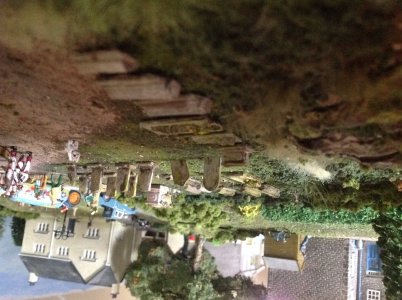
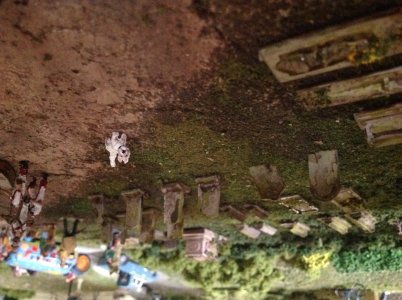
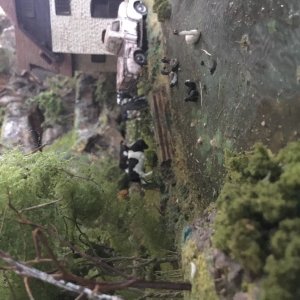
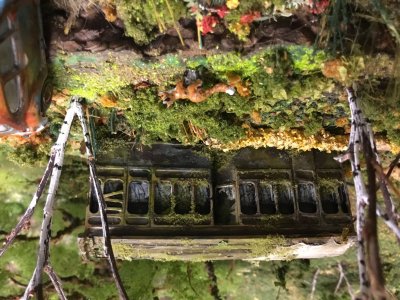
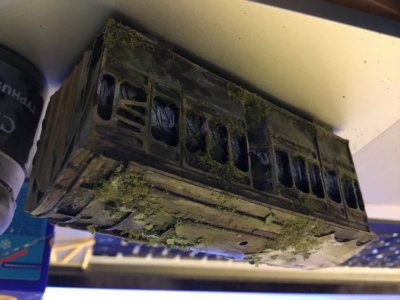
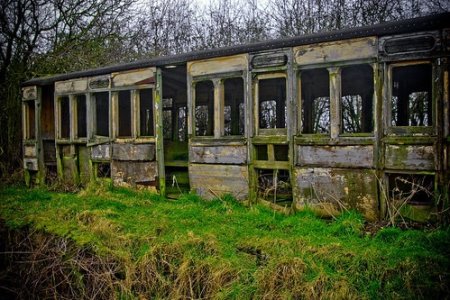
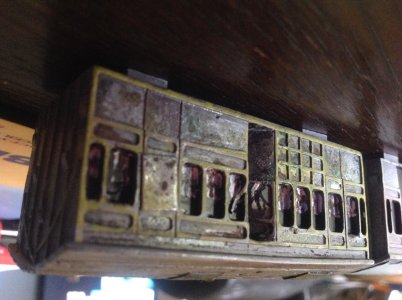
TLOC sorry no wagons, but I weathered a gravestone or two GRINS doggone those dawgies is upside down again…..runs…..ducks….oooh ducks! Yes no better not… ….nag hi am already in the dodahs (is this not where this nonsense all started…pokes tongue) .lwelllllll I have more thumbnails ducks birds geese….ohh an a weathered coach, you only have rolling stock…this is um a broken down resin coach….but but I weathered it….l
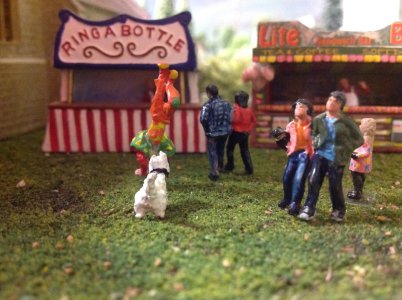
Oh and ducks (more ducks) as here’s an incoming empty weathering paint pot…….cackles madly (come on it is Halloween month……oooh now there’s a theme I could warm to…..clicks heels…no red shoes…..and heads for modelling room…l
Asking on FB they said to not clear over the lower decal layers, just do it all at once, and that's seemed to work ok. The positioning is the issue, not the adhesion.
Finished all the numbers finally and starting on the weights and such. The lettering is so small I can hardly even make out what I'm cutting on the sheet. Other than the top one in the picture, I don't hate how its turning out.


Affiliate Disclosure: We may receive a commision from some of the links and ads shown on this website (Learn More Here)
- Status
- Not open for further replies.
Jaz avalley
Station cat
Dogs dodahs = dogs ball ocks which in the Uk is a good thing. I use mine regularly for small detailing.Ok, I give up…Is that good or bad?
Jaz avalley
Station cat
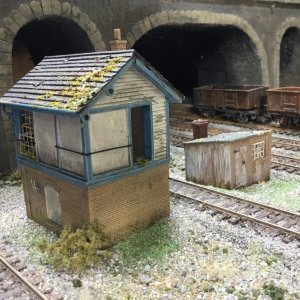
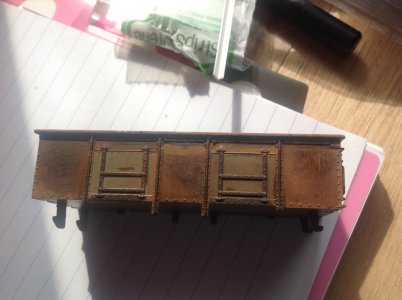
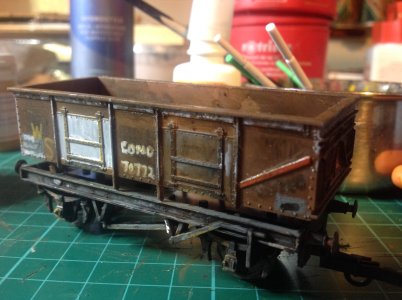
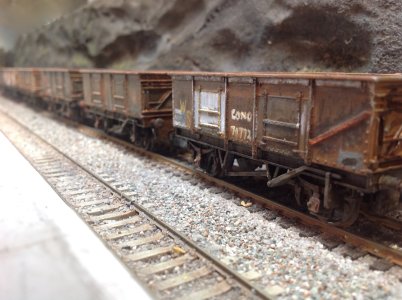
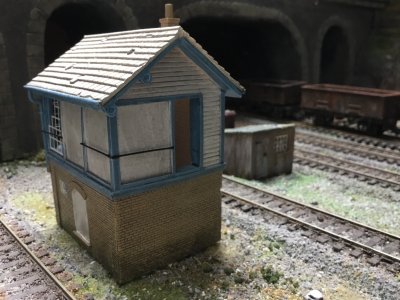
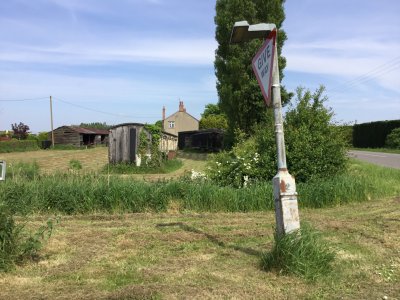
Subtle,moi? I wanted to show the signalbox, but it is not rolling stock, but there is rolling stock in the background, so a quick rerun,
weathered rolling stock ta dah!
I used those brushes on the signal box, and on the rolling stock, but much was kids paint brushes cheap and cheerful, although you might need to pluck off loose bits of brush!
And yes it is true I tend to be a bit ott, TLOC can do a lovely light finish, perfect for items that have not been running forever, completely removing that plastic toy finish. My kit tends to have taken heavy wear. His work much more often prototypical. And as he said on an another thread much of his work is as per instructions for customers. I just love teasing him. his work is gorgeous.
weathered rolling stock ta dah!
I used those brushes on the signal box, and on the rolling stock, but much was kids paint brushes cheap and cheerful, although you might need to pluck off loose bits of brush!
And yes it is true I tend to be a bit ott, TLOC can do a lovely light finish, perfect for items that have not been running forever, completely removing that plastic toy finish. My kit tends to have taken heavy wear. His work much more often prototypical. And as he said on an another thread much of his work is as per instructions for customers. I just love teasing him. his work is gorgeous.
Attachments
Last edited:
C&OMtnMan
Well-Known Member
Dogs dodahs = dogs ball ocks which in the Uk is a good thing. I use mine regularly for small detailing.
Ok, I must ask the obvious question:
How does one weather with a dog’s privates?
Jaz avalley
Station cat
LMAOOk, I must ask the obvious question:
How does one weather with a dog’s privates?
The small paint sticks are the dogs dodahs
But if you wished to paint with your dogs privates? I would suggest you warm your hands first, and have a treat nearby.
Jaz avalley
Station cat
And wear running shoes just in case
moonlighting_racer
Active Member
A little embarrased to post these since wow they photographed terribly. Patch out WIP. You can see the decal technique improving a bit as we go down the line. The individual numbers and letters are so hard to keep aligned though, even the lightest touch moves them. I can only stand to do about 10 letters at a time so progress has been slow. Freelanced but based on a bunch of ex-CR cars. Still need a few more decals, powdered and painted. Any tips for this besides "get the reporting marks custom printed?"

TheXModelRailroader
RANK AMATEURS OF THE MODEL RAILROAD FORM FOUNDER
Hey guys. I have been watching this thread, love the work here! I go two steam locomotives I plan on weathering, but wanted to ask if anyone had any advice on doing so. In this case, dry brushing with acrylics. Any advice is appreciated!
migalyto
Well-Known Member
Don't know if you have seen this thread. It is a wealth of knowledge as well.Hey guys. I have been watching this thread, love the work here! I go two steam locomotives I plan on weathering, but wanted to ask if anyone had any advice on doing so. In this case, dry brushing with acrylics. Any advice is appreciated!

This is to go along with the rolling stock thread. Engines will be the topic here. Information, tips, and how to are welcome. Everyone does weathering different, no right or wrong.
- CambriaArea51
- Replies: 500
- Forum: Painting, Detailing and Weathering

TheXModelRailroader
RANK AMATEURS OF THE MODEL RAILROAD FORM FOUNDER
No I did not. I will check it out! Thanks!Don't know if you have seen this thread. It is a wealth of knowledge as well.
This is to go along with the rolling stock thread. Engines will be the topic here. Information, tips, and how to are welcome. Everyone does weathering different, no right or wrong.
- CambriaArea51
- Replies: 500
- Forum: Painting, Detailing and Weathering
TLOC
Well-Known Member
Tease away, I can handle it. Personally I have a very heavy weathering brush and it takes restraint on my part to do light to medium. That’s why for me photos are so important.Subtle,moi? I wanted to show the signalbox, but it is not rolling stock, but there is rolling stock in the background, so a quick rerun,
weathered rolling stock ta dah!
I used those brushes on the signal box, and on the rolling stock, but much was kids paint brushes cheap and cheerful, although you might need to pluck off loose bits of brush!
And yes it is true I tend to be a bit ott, TLOC can do a lovely light finish, perfect for items that have not been running forever, completely removing that plastic toy finish. My kit tends to have taken heavy wear. His work much more often prototypical. And as he said on an another thread much of his work is as per instructions for customers. I just love teasing him. his work is gorgeous.
I love Jazz’s heavy textured weathering
Thanks for the compliment. My current issue has been complete lack of interest in anything modeling. But I’ll be back.
TLOC
Well-Known Member
Decal work for me was always an adventureA little embarrased to post these since wow they photographed terribly. Patch out WIP. You can see the decal technique improving a bit as we go down the line. The individual numbers and letters are so hard to keep aligned though, even the lightest touch moves them. I can only stand to do about 10 letters at a time so progress has been slow. Freelanced but based on a bunch of ex-CR cars. Still need a few more decals, powdered and painted. Any tips for this besides "get the reporting marks custom printed?"
View attachment 241515
I have settled on applying a gloss coat to the area the decals are going and let it dry and cure 48 hours. I know that’s a long wait but I now get better results than the old over night wait time. I use Micro Solve and Micro Set per the instructions. Lining up decals I thought was magic, what it is having enough solvent applied to adjust them and then lightly touch a bath/toilet tissue to a corner of the solvent to wick away the excess solvent. Then lightly pat dry.
I use a sharp scissor to cut as much film off as possible. I use a stainless steel pick to position but a wooden tooth pick will easily substitute. I use as above toilet paper sheets and occasionally a needle if I’m having issues straightening out the numbers and letters. Most of all, have patience which I have very little of but it really does help to be slow and methodical
After I’m satisfied a matte clear coat, let dry then weathering
Your picture progression though shows great improvement
Last edited:
C&OMtnMan
Well-Known Member
LMAO
The small paint sticks are the dogs dodahs
But if you wished to paint with your dogs privates? I would suggest you warm your hands first, and have a treat nearby.
Wait…wuz you suggesting tuh do it while they’s still ON the dawg???
Dang, I done ruined three good breedin’ dawgs tryin’ tuh do it t’other way!!!!
And none o’ my dern dawgs will come tuh me when I cawl now!!!
Jaz avalley
Station cat
You,tart……..sniggersWait…wuz you suggesting tuh do it while they’s still ON the dawg???
Dang, I done ruined three good breedin’ dawgs tryin’ tuh do it t’other way!!!!
And none o’ my dern dawgs will come tuh me when I cawl now!!!
When I model my dawgs, I model gals…no balls necessary…..
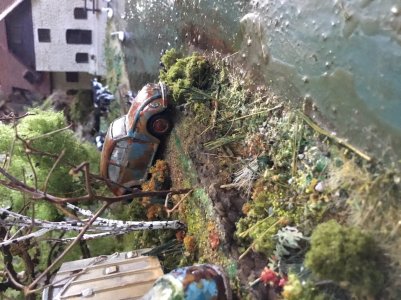
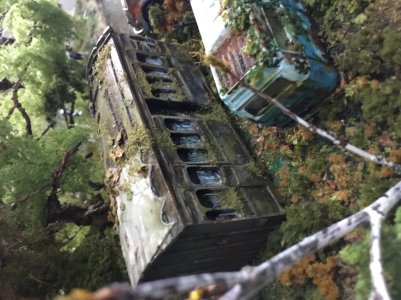
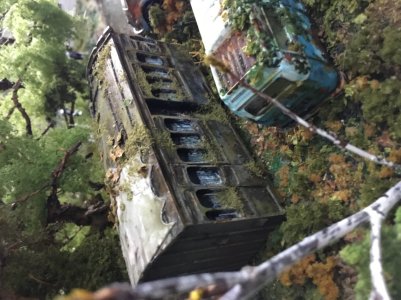
TLOC sorry no wagons, but I weathered a gravestone or two GRINS doggone those dawgies is upside down again…..runs…..ducks….oooh ducks! Yes no better not… ….nag hi am already in the dodahs (is this not where this nonsense all started…pokes tongue) .lwelllllll I have more thumbnails ducks birds geese….ohh an a weathered coach, you only have rolling stock…this is um a broken down resin coach….but but I weathered it….l
Oh and ducks (more ducks) as here’s an incoming empty weathering paint pot…….cackles madly (come on it is Halloween month……oooh now there’s a theme I could warm to…..clicks heels…no red shoes…..and heads for modelling room…l
Attachments
Last edited:
moonlighting_racer
Active Member
Yeah I'm learning less is more with solvent, in fact this morning I was having issues with the micro set evaporating before I got the decal where I wanted it, so I probably swung too far in the less direction. I have been using Q-tips instead of TP, but even pressing them directly down often moves the decal slightly. I should try TP, its probably more absorbent. I adjust them with my pointed tweezers, but they occasionally tear the decal (my sheet of Fusion COTs panels seem particularly delicate, but the Fusion numbers I can absolutely manhandle).Decal work for me was always an adventure
I have settled on applying a gloss coat to the area the decals are going and let it dry and cure 48 hours. I know that’s a long wait but I now get better results than the old over night wait time. I use Micro Solve and Micro Set per the instructions. Lining up decals I thought was magic, what it is having enough solvent applied to adjust them and then lightly touch a bath/toilet tissue to a corner of the solvent to wick away the excess solvent. Then lightly pat dry.
I use a sharp scissor to cut as much film off as possible. I use a stainless steel pick to position but a wooden tooth pick will easily substitute. I use as above toilet paper sheets and occasionally a needle if I’m having issues straightening out the numbers and letters. Most of all, have patience which I have very little of but it really does help to be slow and methodical
After I’m satisfied a matte clear coat, let dry then weathering
Your picture progression though shows great improvement
Asking on FB they said to not clear over the lower decal layers, just do it all at once, and that's seemed to work ok. The positioning is the issue, not the adhesion.
Finished all the numbers finally and starting on the weights and such. The lettering is so small I can hardly even make out what I'm cutting on the sheet. Other than the top one in the picture, I don't hate how its turning out.
Jaz avalley
Station cat
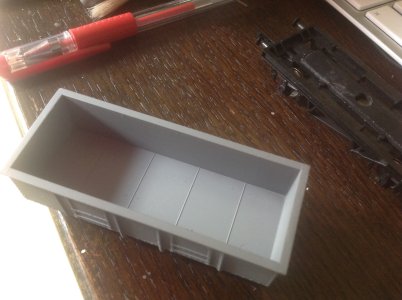
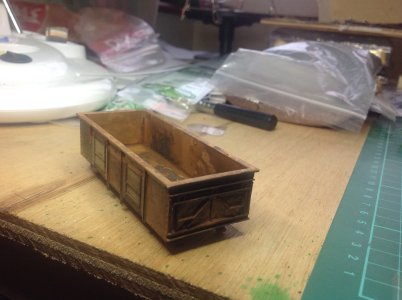
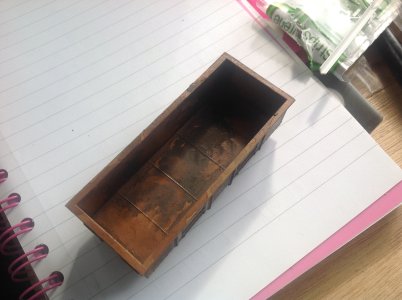
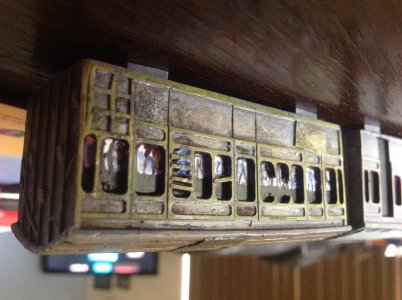
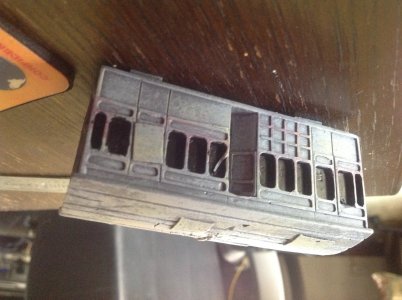
Weathered rolling stock…..there is a lot of interpretation here….taps lips with finger…
Reference I assume they used the first for their resin model - Hornby
This are occasionally seen in gardens or fields, slowly getting worse for wear
And weathering of said ‘rolling stock’ the reference matter has no wheels either!
No please for plastic for windows or glue so I painted the sky line and bushes
May not be typical of the thread, but hard to argue I am actually off topic….winks
FYI still on Halloween, going to go suggest it in the coffee shop..scoots off in case of flying pots of paint..
Edit….rats I fogot my photos are drunken fall over tikes…..fyi I am sober as a judge just in a frivolous mood
Reference I assume they used the first for their resin model - Hornby
This are occasionally seen in gardens or fields, slowly getting worse for wear
And weathering of said ‘rolling stock’ the reference matter has no wheels either!
No please for plastic for windows or glue so I painted the sky line and bushes
May not be typical of the thread, but hard to argue I am actually off topic….winks
FYI still on Halloween, going to go suggest it in the coffee shop..scoots off in case of flying pots of paint..
Edit….rats I fogot my photos are drunken fall over tikes…..fyi I am sober as a judge just in a frivolous mood
Attachments
TLOC
Well-Known Member
When I started masking some of my Wisconsin Interstate diesels last week I had a Walther's Mainline 60’ yellow high cube that I never had time to get to. Since I mainly was concentrating on the diesels I wasn’t thinking about pictures. But over in Tom’s ((CambriaArea51) great Weathering Engines a Continuous Thread it was in the background of a unit I was fading and taking pictures of the process. I received a text yesterday asking why I wasn’t posting the yellow TBOX


Well here is a better picture

The roof is rusted and needs some touch ups. The trucks, wheels, front and rear panels are weathered as are the couplers. The body sides have a white/thinner fade with just a drop of yellow added to it. There is a slight grime wash applied and some rust added. Don’t worry JAZZA I will pool the dirt and rust along the sill of the car. I decided after the initial washes to add graffiti and hopefully this weekend I will get a couple on the sides. The finish weathering will happen a day or so after the graffiti cures. I will take pictures from here out
But I’m back at the bench with my own equipment and it feels good…
Well here is a better picture
The roof is rusted and needs some touch ups. The trucks, wheels, front and rear panels are weathered as are the couplers. The body sides have a white/thinner fade with just a drop of yellow added to it. There is a slight grime wash applied and some rust added. Don’t worry JAZZA I will pool the dirt and rust along the sill of the car. I decided after the initial washes to add graffiti and hopefully this weekend I will get a couple on the sides. The finish weathering will happen a day or so after the graffiti cures. I will take pictures from here out
But I’m back at the bench with my own equipment and it feels good…
TheXModelRailroader
RANK AMATEURS OF THE MODEL RAILROAD FORM FOUNDER
Hey guys!
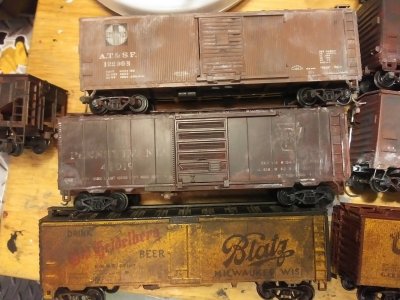
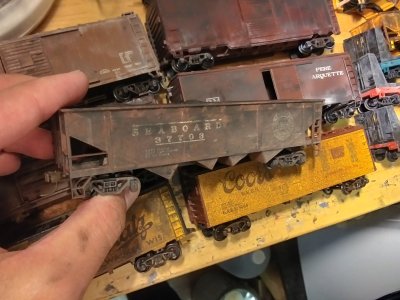
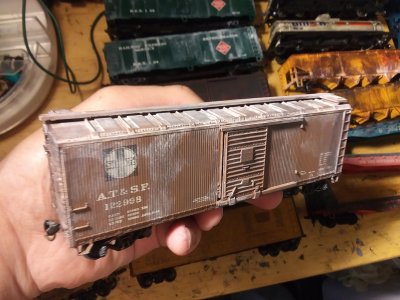
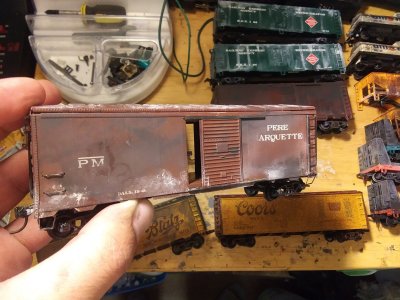
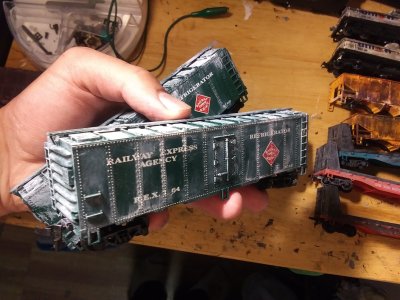
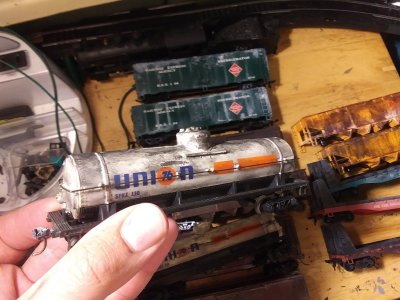
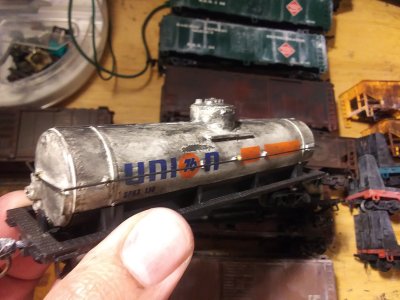
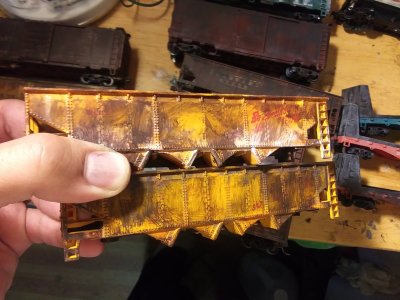
I batch did some rolling stock yesterday. I am, petty proud of everything (Although, I would like to improve on the yellow hoppers).


I batch did some rolling stock yesterday. I am, petty proud of everything (Although, I would like to improve on the yellow hoppers).
TheXModelRailroader
RANK AMATEURS OF THE MODEL RAILROAD FORM FOUNDER
Some more images.
Attachments
-
 20251015_074510_HDR.jpg540 KB · Views: 88
 -
 20251015_074519_HDR.jpg414.3 KB · Views: 86
 -
 20251015_074533_HDR.jpg524.9 KB · Views: 83
 -
 20251015_074547_HDR.jpg610.4 KB · Views: 83
 -
 20251015_074622_HDR.jpg532.8 KB · Views: 79
 -
 20251015_074647_HDR.jpg502.6 KB · Views: 87
 -
 20251015_074657_HDR.jpg488.4 KB · Views: 90
 -
 20251015_074712_HDR.jpg527.6 KB · Views: 76
traiNscale
Well-Known Member
howdi everyone
its time, to start! (for me)
So i bought this Walthers Box Car at the convention some weeks ago.

iam not 100% shure if its this one, but i know its a yellow one
so.
what i want to do, is give the whole car a light fade, after that some graffiti rust and dirt.
i have a question now, i first should wash the complete car right?
then ad a clear Matt coat? or just a normal clear coat?
after that i would try to add a fade in a lighter yellow with the airbrush, after that the dirt, rust and stuff i would add with brushes.
why am i asking this?
because i need a help for the absolute first step.
thank you
Cheers
marco
its time, to start! (for me)
So i bought this Walthers Box Car at the convention some weeks ago.
iam not 100% shure if its this one, but i know its a yellow one
so.
what i want to do, is give the whole car a light fade, after that some graffiti rust and dirt.
i have a question now, i first should wash the complete car right?
then ad a clear Matt coat? or just a normal clear coat?
after that i would try to add a fade in a lighter yellow with the airbrush, after that the dirt, rust and stuff i would add with brushes.
why am i asking this?
because i need a help for the absolute first step.
thank you
Cheers
marco
- Status
- Not open for further replies.
Affiliate Disclosure: We may receive a commision from some of the links and ads shown on this website (Learn More Here)