New Layout for LASM

ModelRailroadForums.com is a free Model Railroad Discussion Forum and photo gallery. We cover all scales and sizes of model railroads. Online since 2002, it's one of the oldest and largest model railroad forums on the web. Whether you're a master model railroader or just getting started, you'll find something of interest here.


Tanks, Lynn; I got some tips from the latest MR magazine (page 56) on how to take better layout photos too, I slowed the ISO to 100 and put the camera on a tripod, used the shutter timer and got a much more crisp photo as well.

I wish I could set the f stop as well and then would be able to get more of the field into focus.


David , did you do anything special to the bed before your pour? It really came out nice and glossy , wish mine had come out like that.
 
David,

Your water looks perfect and does compliment the layout, all you need is a little fisherman or something to cap it off ;)
 
Thanks, Tony, thinking about the man in a boat;


Jim, as far as the prep work :
David , did you do anything special to the bed before your pour? It really came out nice and glossy , wish mine had come out like that.


I did fiddle with the bottom of the pond for several days:

1. First I painted the plywood (pond/stream bottom) with black wash, diluted black acrylic paint. It sat like this for over a year.

2. I wanted the water have a blue green hue to it, so I tried dulling the black with some spring green wash. Put it on sparingly and it ended up having the effect of just fading the black down.

3. I decided to use a very light coating of sheet rock taping compound in the center (deepest) area. I applied it with my finger, I wanted to get rid of all the grain of plywood that was sticking through and also create a better base for the coloring.

4. I left the edges black and faded black (without sheet rock mud) to get the effect of very shallow water where the mud was showing through.

5. After the coating began to dry, about 30 minutes, I used a brush and dabbed it up and down in the sticky sheet rock compound to create some rough texture to the pond bottom.

6. The next day I mixed up a wash with the spring green acrylic and light blue. I painted this on the sheet rock compound.

A few days later I got around to mixing and applying the envirotex, which I purchased at our local hardware store.

Another note: They specified that the liquids be warm to the touch before mixing, also their mixing instructions were very specific and I took a lot of pains to follow them. Everything is a little colder in our house (usually) so we had to make some changes prior to the pour.
 
Last edited by a moderator:
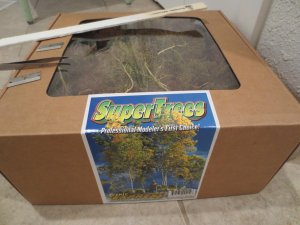
Thanks, Lloyd, for the feedback; Some pic's of some new Super Trees added to the layout over the weekend. The box cost about $26.00.These are natural weeds that are assembled and built by the purchaser, very realistic branching and shapes; can be made to look like a couple different species if you are creative:


They come in a box like this, a bunch of weeds! I already took 11 out of here and it looks like enough for 25 or so more

Scenic Trees 003.jpg


I treated the bark to look like Basswood for the fuller models and Birch for the tall airy ones

Scenic Trees 001.jpg


Here is how the area looked with the old trees:

Scenic Trees 004.jpg


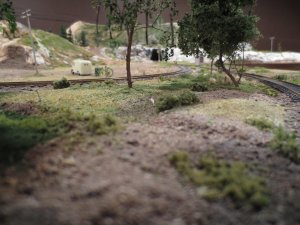
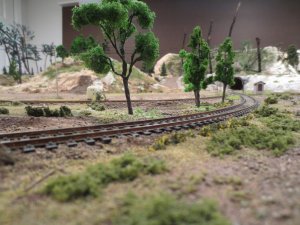
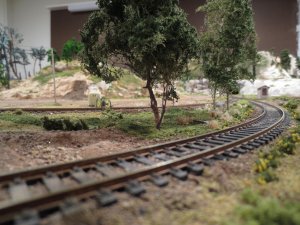
This is after adding the new trees, also worked on the ground cover some:

Scenic Trees 005.jpg
 
Dave tremendous difference. It is indeed worth it for foreground trees and bushes to use supertrees. As usual excellent modeling work and craftsmanship! Thanks for posting!


THANKS Chet, Yannis; Jim here are the steps that I took, I found them pretty easy to make and did 11 at once.


Very nice Dave those trees look good . How did you make them?

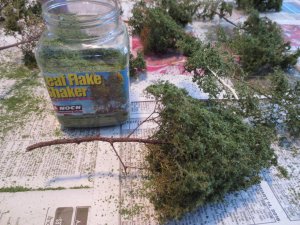
1) First I went through the box and pulled out some of the weeds and found some that were fairly symmetrical, which was just about every one

2) I stripped off some of the bottom branches and trimmed the base, also pulled out some small "stray" leaves that are on the stem

2a) soak the trees in (5:1 diluted concentrate) matte medium for 2 to 3 minutes, then gently shake them out tapping on newspaper.


3) I painted the trunk and branches with a brush and acrylic paints. The manufacturer sprayed his with a spray paint can.
I put on a coat of (brown) paint and built up the trunk sprinkling with fine clay particles that I got from my yard last summer
I did this several times with the brown trunk ones. The birch I just used a couple coats of Antique White and added some small black markings.

*i used the narrower trees as aspens or birches, and the wider ones as Linden (basswood), which has a rough darker bark color and wider crown.


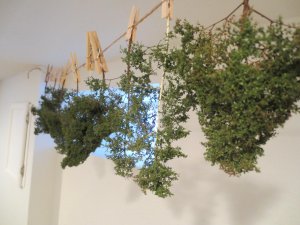
(after the hair spray, I hung them up and misted them with Scenic Cement (woodlands scenics) to further adhere the leaves
Scenic Trees 002.jpg

4. After the trunks and branches were pretty dry, a couple hours, I used hair spray and sprayed the "branches" a bunch and added the flakes and repeated that until the branches looked good. (The manufacturer used spray paint to color the leaves, however I think they looked fine out of the package.)

I let them hang for a day and sprayed them the next day with a mist of Scenic Cement to further adhere the leaves.


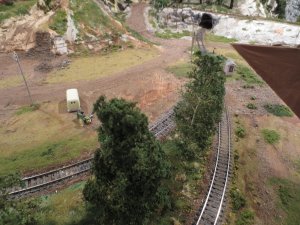
I drilled holes in my plywood to accept the stems and planted them with a dab of CA cement, also added some fine ground cover around them.

Here are a couple more pics, I think the leaves and branches are very realistic:
Scenic Trees 008.jpg

Scenic Trees 006.jpg
 
Last edited by a moderator:
Hey David, we sure think alike.
I have on my list of things to buy later those same trees.
Glad you're using them first, that way I can follow your every step...lol

You've done a major change to the look of your layout and it came out perfect
Love it.

Question: How many trees can you do with one box?
 
I missed a step in the tree prep posted above, I first was instructed to soak the trees in (5:1 diluted concentrate) matte medium for 2 to 3 minutes, then gently shake them out tapping on newspaper.

Not quite sure the reason for this but I followed the instructions in this case. It did add a day to the tree making process.
 
Thanks for the info Dave. I might give them a try for some trees smaller than the sage brush trees. The scenes really look great. Instead of a layout, you might end up with a work of art.
 
THANKS Lynn, Chet: for an update I called Backdrop Warehouse yesterday and they are putting my backdrops in the mail so hopefully be INSTALLING this weekend!!! everything pretty much on hold until then.
 
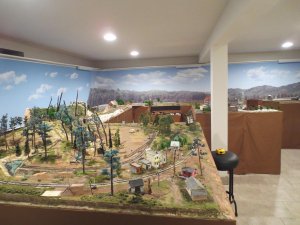
Well, the backdrop went up last weekend. Here are a couple pics of the installation and a couple of the finished product:


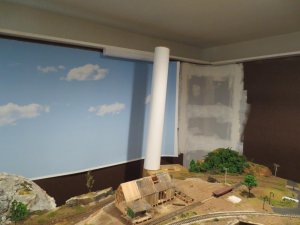
Here I have just rolled out one section. I left the end 12" free so I could cut an irregular transition:

aa project 009.jpg

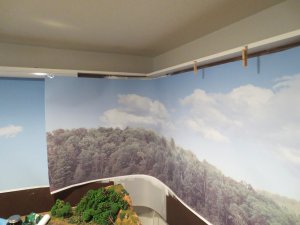
Here the second sheet is going up. Hangers hold it up while I position it. These wrap around the cove corner:

aa project 016.jpg


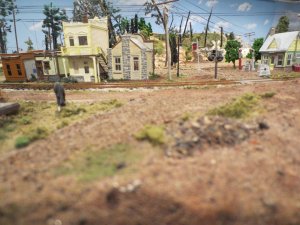
Here are a couple of the installed backdrop. I will be adding transition scenery:

aa project 027.jpg

aa project 026.jpg

I have a couple youtube videos on my channel showing the whole process.

THANKS for looking!


Affiliate Disclosure: We may receive a commision from some of the links and ads shown on this website (Learn More Here)

Back
Top