DSD's Layout Progress Thread

ModelRailroadForums.com is a free Model Railroad Discussion Forum and photo gallery. We cover all scales and sizes of model railroads. Online since 2002, it's one of the oldest and largest model railroad forums on the web. Whether you're a master model railroader or just getting started, you'll find something of interest here.


I have been putting a lot of thought into the lift out or drop down sections and think they are doable.

The biggest issue is that you are connecting two "solid" areas with a moving piece. Due to even very subtle shiftings of either section of bench or even subtle changes in the cement floor, even 1/16" on each side would combine to a 1/8" possible gap or closure.

My solution is to not totally adhere all the track leading up to the gap on one side by using flex track and a nearby curve (which you have) to either bring the track slightly closer or move the tracks slightly apart.

Maybe not an original idea, but maybe something that hasn't been considered.

lasm
 
That sounds like a good idea, LASM.

The lift-out is months away, I think, so I'll give myself plenty of opportunity to experiment. (Again, a good reason not to run all those staging tracks across the lift-out!)

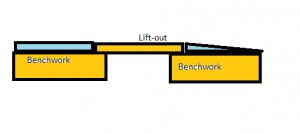
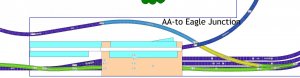
The space that the lift-out covers is fairly narrow, barely 18 inches wide. I'm initially thinking that the lift out itself will be something like two feet, so that it will rest firmly on the benchwork on either side -- in helps that all of the track running across it will be above grade level at the lift-out itself.

Sort of like this:
Liftout idea.png
 
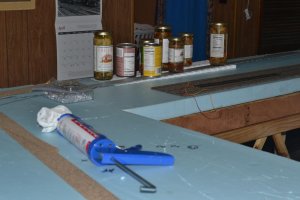
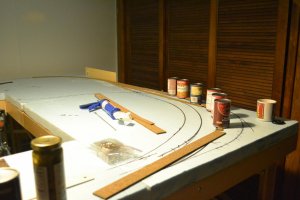
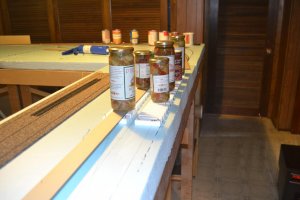
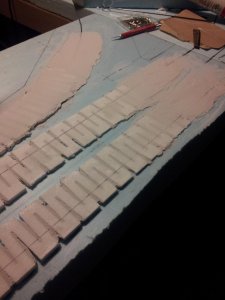
Finally getting around to posting a few pictures. Nothing much at all.

I'll skip the ones I have of just the bare foam being weighted down by file boxes :)

WR+LSRyCo- 052.jpgWR+LSRyCo- 055.jpgWR+LSRyCo- 058.jpg
All of this is in staging areas. It's moving a bit slowly because DairyStateMom needs her cans of beans back :)... On the other hand, we finally found a use for all those jars of pickled mushrooms that a dear relative sent a few years ago. DSM and I love mushrooms, but pickled ones, not so much...:)
 
Last edited by a moderator:


Looking good, Erik. One thing good about taking your time is there is ample opportunity to think and rethink the plan and process.

lasm
 
Section 5 (this one: http://www.modelrailroadforums.com/forum/attachment.php?attachmentid=43062&d=1397924558&thumb=1) is the smallest section of the five (or 4, if you count sections 1 & 2 as a single section, which they are now). But it's in some ways the most complicated. There's hidden staging trackage, a visible climbing grade, a two-sided backdrop, and, some day, a segment of branch line leading further up a grade.

I've been working on that section (along with the hidden area on Sections 1-2) first, and what's taken me a while to work out is how to make the backdrop work with everything else going on.

I think I've finally got it -- an assembly of blocks of insulation foam.The small two-sided backdrop will probably be insulation foam, too. What I wanted to work out was 1) how to hold the backdrop in place (while still making it removable); 2) how to make it work even though the surface under the backdrop would not be all one level, because one track will pass through the backdrop area. Also, I wanted to use only lightweight materials. Early ideas involved more framing, but I didn't want to glue framing on top of the foam that is the layout's primary surface.

I looked for lots of different products on the Internet (mainly various kinds of structural plastic), but in the end, I've hit on simply using pieces of mostly 2 inch foam. There will also be some 1-inch (or perhaps thinner) foam or maybe Foamcore or gatorboard.

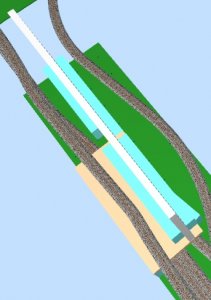
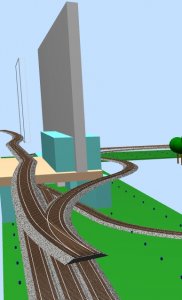
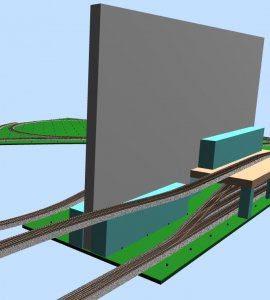
I've worked up the idea in SCARM and used the 3-D viewer. The blue blocks represent the 2-inch Insulation foam. The biggest challenge will be to make sure I cut it as square as possible.

The brown slab is either 1-inch foam or else gatorboard or similar product. (I'd prefer not to use MDF because of weight, but that's a possibility, too.) The big, vertical white slab [Actually it's mostly gray] is of course the backdrop. (I had to draw the backdrop in two sections in SCARM because part of it is cut 4 inches above the surface of the layout to clear the track passing through -- or rather, under -- it.)

So do you think this should work OK?

Engineering-Test-1-042414.jpg Engineering-Test-1-3D-1-042414.jpg Engineering-Test-1-3D-2-042414.jpg

Engineering-Test-1-3D-3-042414.jpg
 
Last edited by a moderator:
It's been a while since I've checked in with an update, so here goes... At a snail's pace, I've been putting down cork, buying a few more turnouts and switch machines for the initial trackwork, and beginning to work out things like fascia. I've generally been putting down the cork 3 feet at a time, but it seems like days and days, if not weeks, pass from one 3-foot stretch to the next. Between working 10-15 hours a day and the usual tasks of home-ownership and parenthood, the time just hasn't been there.

I've got just a bit more cork to put down and then roadbed for the staging area and loop will be completed. Then I will finally start getting some track down.

A lot of my attention right now is on the staging area turnouts. Those will all use Peco switch machines, so that also means wiring them up and constructing control panels. Just about all of the switches will be controllable from two different panels. I'm choosing to use localized mini-panels rather than one or two big master panels, and I've worked out the basic designs for the mini-panels.

A lot of the time I expect to operate solo, so everything needs to be controllable from inside the layout. From time to time, though, I hope to have a few other people in operating sessions, and figure one or two of the "jobs" are likely to be working with the staging area(s), so those people will need to be based outside the perimeter of the layout.

While constructing the panels, I'll also need to work on the wiring schematic for the turnouts. I will be using a dedicated AC power supply for that purpose. The turnout controls are SPDT spring return toggles. Since I'll have multiple controls for turnouts, I've decided to run every turnout machine feeder to a terminal block, then hook up the control toggle (or toggles, as in most cases) for the turnout to the terminal block.

The turnouts are Insulfrog, so I'm pretty sure I don't have to do anything else in wiring them.

If this part goes well, I will seriously consider just using the Peco machines for all the visible turnouts as well. But I'm still looking at various manual control alternatives for the visible turnouts, so that's a decision yet to come.

Although I can see the progress I've made, it feels like it's too boring to bother posting pictures. And besides the layout is pretty cluttered right now with the various tools and bits and pieces required for the work. Maybe after I get some track down...


Nice update Erik.

If you are using the Peco switch machines, then why don't you use the Snap-IT stationary decoders, then you can control all those turnouts using your throttle. Its so easy to use. Hit the Accessory button, then select 1 or 2 (Normal or Reversed).

This is what I use on my layout. I control all 27 switches on my layout doing this. No manual controls, no control panel wire up and operate. Easy as apple pie.
 
Nice update Erik.

If you are using the Peco switch machines, then why don't you use the Snap-IT stationary decoders, then you can control all those turnouts using your throttle. Its so easy to use. Hit the Accessory button, then select 1 or 2 (Normal or Reversed).

This is what I use on my layout. I control all 27 switches on my layout doing this. No manual controls, no control panel wire up and operate. Easy as apple pie.

Thanks, Michael -- I looked into that, but I'm put off by the expense per turnout. My LHS owner isn't too keen on them -- and he even sells them -- but it sounds like you've had really good experience with them. I might give it a little more thought.
 
Thanks, Michael -- I looked into that, but I'm put off by the expense per turnout. My LHS owner isn't too keen on them -- and he even sells them -- but it sounds like you've had really good experience with them. I might give it a little more thought.

Ya they are kind of expensive if you need buy a lot of them, but its worth it. All mine having been working perfectly no issues, for more than 4 years now.
 
Control panels design

I've decided to stick with localized control panels for turnouts. Whether all turnouts will be electrically controlled remains undecided for now, but the first ones to go in will have to be, so that's where I'm focused.

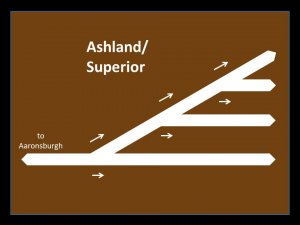
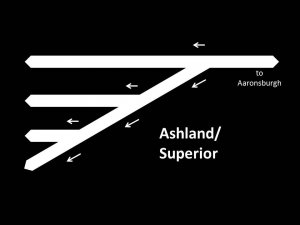
I've come up with a series of mini-panels that will be about 5 x 7 inches each. The maps for each one have been designed in PowerPoint (an idea I came across the other day on another train forum). I've already had them printed out as snapshots at the local Walgreens, but that was really a test run. I may see if the local MinuteMan printer could do something similar.

The pix will be mounted on 1/8-inch Masonite that will be framed with corner molding to give a finished look. I have some clear contact paper that I will put down on top of the pictures and before the frame is attached to further protect the board. Then the SPDT momentary toggles used for the switch controls will be installed in the appropriate points on the diagrams.

So right now I'm just dealing with an aesthetic question.

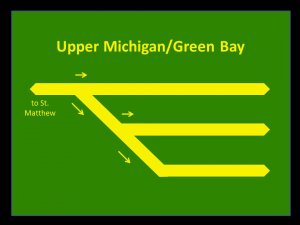
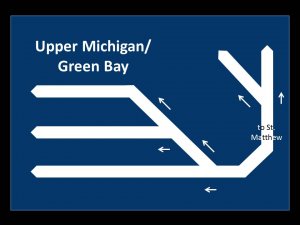
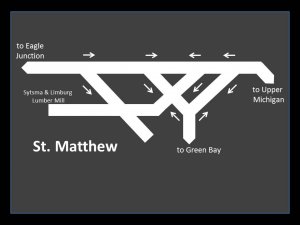
Below are several different color schemes I'm considering. For those where you can see a black border, that represents the corner molding. I would probably keep the corner molding frame black, because then I wouldn't have to find paint to match the color of the map backgrounds assuming that they are other than black.

Any opinions as to particular color schemes? The black and white is simplest, although the photo printing seems to slightly discolor the white on the smallest letters. I haven't done photo prints of the other color schemes yet.

And I could make the colors anything I want at all... I will probably be asking a pro artist (I know a couple) for their thoughts, too.

One idea I have is to pick colors that represent the likely colors of the RR's structures (stations, mainly) but I haven't chosen those yet, and once I do, I might not like the combination for letters on background.

I have 3 designs shown, and will add 2 more on the next posting

1.

Slide2.JPG

2.

Slide3.JPG

3.

Slide4.JPG
 
On further reflection...

While those maps will be part of the final design, I've decided to delay implementing them (And when I do I'll probably go with straight white on black).

In the meantime, I'm going to get some pegboard and make temporary panels from it. When I do make the final panels I want to make them all at once, and since some of the track configurations aren't completely firmed up (St. Matthew and Aaronsburgh mainly), it would be premature to make them all. With the pegboard panels I can simply add individual switches as needed.
 
Ya that design of the panels looks great, but I agree don't install them until you get all the trackwork completed. I guarentee you things will change.
 
[.

I've come up with a series of mini-panels that will be about 5 x 7 inches each. . Then the SPDT momentary toggles used for the switch controls will be installed in the appropriate points on the diagrams.

So right now I'm just dealing with an aesthetic question.

Below are several different color schemes I'm considering.

]

Looks like a good idea to me.

I am thinking, for your color schemes it looks like Packers, Vikings, and ?

lasm
 
... for your color schemes it looks like Packers, Vikings, and ?

lasm

LOL. The Packers one I realized after the fact. I hadn't thought about Football teams for the others. But Vikings would be purple, I think, so Blue and White would have to be the Colts, I guess. But I think I'll just go with a straight white on black. However, the decision to make some temporary panels will buy me some additional time to make these more complex aesthetic decisions. :D


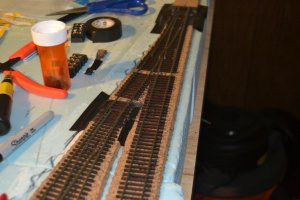
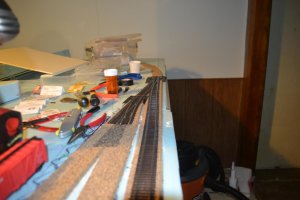
First track in at last!!!

Ugly as sin, but it's going to be hidden anyway, and it is smooth and kink-less as near as I can tell!

Uploaded 2014-08-18 182.jpgUploaded 2014-08-18 192.jpg


Affiliate Disclosure: We may receive a commision from some of the links and ads shown on this website (Learn More Here)

Back
Top