DSD's Layout Progress Thread

ModelRailroadForums.com is a free Model Railroad Discussion Forum and photo gallery. We cover all scales and sizes of model railroads. Online since 2002, it's one of the oldest and largest model railroad forums on the web. Whether you're a master model railroader or just getting started, you'll find something of interest here.


Nothing like the right tools for the job.
Picked up a 1.5-inch diameter spade bit yesterday, along with other blades for my hand saw -- which, incidentally, uses reciprocating saw blades for Sawz-alls and their equivalent. (It's a little fussy, though, because although the base of the blades seem identical, not all of them properly seat in the handsaw's mechanism.)

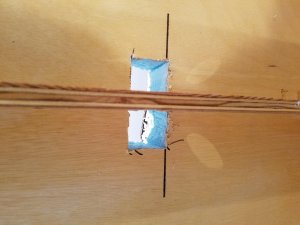
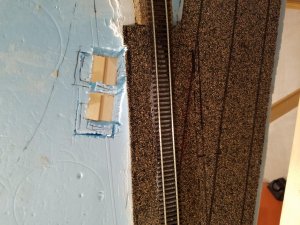
Today I cut out two more riser holes and did the entire job in less than 15 minutes -- first cutting the 1.5 inch circle, then carving out the corners in no time w/ the new saw blade. First the tools:
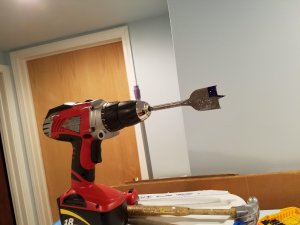
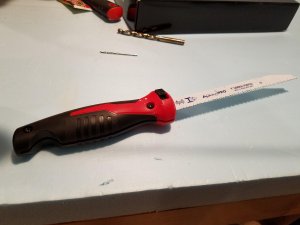
20160428_110248.jpg 20160428_110332.jpg

Then the results:

20160428_110207.jpg 20160428_110156.jpg.

It went so easily that I'm thinking seriously of going back to the plan of using mostly wood risers instead of -- as I was just thinking the other day -- stacking up and gluing foam in some places. But we'll take it a step at a time and see how it goes.

(Added)...
Now, in the ideal world, I would have never had to do this -- As I think I have noted before, if I were to build these sections all over again, I would have probably made them open-topped, or at the very least cut in the riser spaces before attaching the foam. Chalk it up to a combination of learning as I go and designing as I go...
 
Last edited by a moderator:
You could get one for $29.00 at Harbor freight that you'll be hard pressed to kill. Ive been literally beating the crap out of one for 6yrs now and it just wont die lol

I was going to suggest this as well. I am glad that you made the post .. I have been thinking about getting one of those and wondered how it would hold up - that's pretty cheap!
 
I have to say this hand saw handle that uses the reciprocating saw blades is a nice gadget, especially for closer quarters where you need the kind of control that's more difficult with power equipment. Yeah, it's a little more work, but not as much as you would think. Mine is from Milwaukee Tools; I'm not sure if anyone else makes this kind. But it is fussy about which blades will lock into the handle properly...and why that is is a mystery to me. I've examined the back end of working and non-working blades against each other and can't detect an iota of difference. Now when I buy new blades for it I take it to the store to be sure they'll fit.

I will cut one more riser hole in this section this weekend, then move on to the other section that will require risers. I think I will then rough cut some temporary risers and just clamp them in place for later planning.

I also hope to run bus wires in each section this weekend, but I'm not sure I'll get to that...

BTW, look for a question from me in the wiring forum later today or this weekend about some bus wire details...

Sent from my SAMSUNG-SM-G930A using Tapatalk


That saw handle looks like a good gadget, something I totally forgot about. Glad you found a reasonable solution!
 
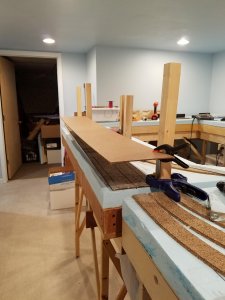
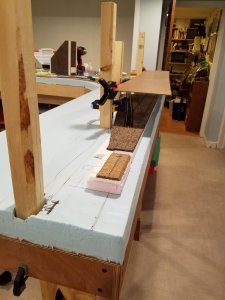
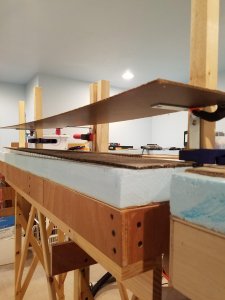
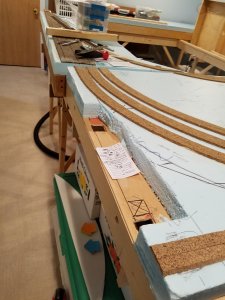
Today I finished the riser holes on the first of two sections that will need them. And just to get a general idea of what I'm doing, I roughed out the basic concept, clamping 2x2s in each hole. Then I clamped some angle braces to the 2x2s and then set a piece of scrap Masonite on them to get a sense of how the upper level support will work. A lot of disclaimers here:

1) The stand-in risers now are a LOT higher than the real things will be. Also, I didn't take any time to square them up when I clamped them -- just eyeballed it. When the real risers go in, I'll make sure they're straight up and down, then screw them to the cross-members that are underneath the surface.

2) The angle braces I used are probably smaller than I will use for the real deal.

3) And I won't be using 1/8 inch Masonite for the subroadbed on the upper level. I will probably use 1/2-inch plywood, but I'm not sure yet.

On this section, the upper level is part of the logging branch that will be the last part of the layout built. But I wanted to get the holes made for the risers now, while it was easy to turn the section on its side to work on it.

Some pictures:

20160430_164508.jpg 20160430_164502.jpg 20160430_164514.jpg


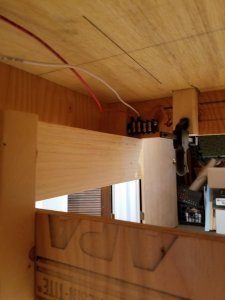
Oh, and since I had the section on its side to make the riser holes, I also ran the bus wires for it.

20160430_164646.jpg

Added:

Another thing that's not shown -- I think I'm probably going to run a 1x2 rail across the tops of the risers, with the upper level subroadbed actually resting on the rail as well as the angle braces. But all that is a ways off...
 
Last edited by a moderator:
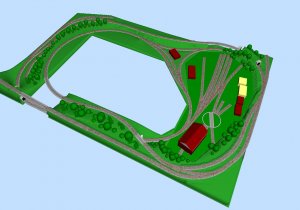
Looks like you've been busy, but you're making progress. How much more benck work do you have to build before starting track work?
 
Looks like you've been busy, but you're making progress. How much more benck work do you have to build before starting track work?
I just need to poke riser holes in the section immediately adjacent to this one, which I hope to be able to finish next weekend. That and put in the power bus wires for the other sections, which is maybe a 10-minute job.

Sent from my SAMSUNG-SM-G930A using Tapatalk
 
You could get one for $29.00 at Harbor freight that you'll be hard pressed to kill. Ive been literally beating the crap out of one for 6yrs now and it just wont die lol

Hi Rick,
I too was going to say something about the HFT saws they have. Do you recall what AMPs your saw is as they have many options but I think I wouldn't need the best one but maybe a little more than the 6 AMP saw.

UPDATE: The 6 AMP saw should be all I would need, right.
I wanted to say you are getting a lot done. The layout is looking good.

Dave
 
Last edited by a moderator:
Hi Rick,
I too was going to say something about the HFT saws they have. Do you recall what AMPs your saw is as they have many options but I think I wouldn't need the best one but maybe a little more than the 6 AMP saw.

UPDATE: The 6 AMP saw should be all I would need, right.
I wanted to say you are getting a lot done. The layout is looking good.


Dave

http://www.harborfreight.com/power-...-rotating-handle-reciprocating-saw-62370.html

This is the one I have and have really given it a beating. I was going to go the Milwaukee route but couldn't justify the price for a tool I'd abuse all the time. To my surprise,I can't seem to kill this one,and believe me,Ive tried.


Thanks Rick, I'll have to go get me one. I can tell you I've been happy with the HFT store in my area and the cheap stuff I can get there. Not bad for my armature needs.

Dave
 
Hi Erik,

You are really going to town on the layout! Way to go! Nice update!

Thank you, David -- Incidentally, I am still going to do a backdrop. After some more cogitating I finally came up with an approach that I think will work well, and that I'll be able to easily execute even after I am further along on the layout itself.

Basically, it will call for hanging foam core sections on the wall itself, using Command Adhesive picture hanging products. Because the reach from outside to wall nowhere exceeds 2 feet, I will be able to put them in later with little or no difficulty. I've made sure the layout is about 2 inches out from the wall in the two places where it's closest to the wall, so that should make it pretty easy to slip the backdrop pieces behind the layout. The foam core pieces will be framed on the backside with 3/16-inch-thick moulding that is about 1-1/4 inches wide. That should give it enough support, and by painting it on front and back, I hope to keep the foam core itself from warping. I will need to paint the backdrop sections initially in my garage, and it's not quite seasonable enough to do that, yet. But having to wait on that won't slow me down on further roadbed, wiring and track-laying.

Oh, and Chet/Montanan: I actually do have one other bit of benchwork that I forgot to mention -- the triangular segment that will make it possible to put in the full the reverse loop/wye configuration, as shown in this most recent iteration of the plan:

WR+LS-2014-09-03.jpg

But even that won't slow down a lot of the other track-laying, which is rapidly moving up on the agenda.
 
Like the wye, a clever touch.
Thanks.

Last night I detached the big 3x8 section and flipped it on its side so I could mark the locations for risers.

They're going to be about 2 feet apart. (That's the distance between the underside crosspieces in that section. Mostly they will be in pairs, one on each side of a crosspiece. I've calculated the necessary total length for each, so while the section is turned up I will probably attach the risers for real on this section.

Don't know if I will get to the risers themselves this weekend, though. It will be enough to cut the holes and also string the section's bus wire, I think. But I will be eager to move forward on them asap. I have enough extra 2x2 for the job, so all I need to do before installing them is cut them to length.

Now is when I wish I had a miter saw or a table saw to do the cuts quickly and precisely, but I'll probably settle for using my circular saw and maybe make a simple jig to keep things uniform.

Then there's the 3x8 section itself. One other thing I really should do while it's on its side is cut through the cork already laid on it so I can separate it back into 2 3x4 sections.

I'm really eager to get all the above-mentioned pre-tracklaying work on this big section finished, because I can't move forward on anything else until it's done. In fact, I had to rip up a stretch of flex track this AM that just happened to cross the separation point between the two 3x4 halves of this section. Oh well...

Now going dark on the forum here until tomorrow morning or I'll never get those work deadlines met. One of the drawbacks of having my basement office right next to the train room. In fact, I keep the lights off in the train room just to remind me that I'm supposed to be working!
 
Last edited by a moderator:
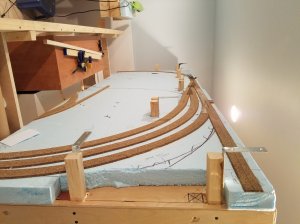
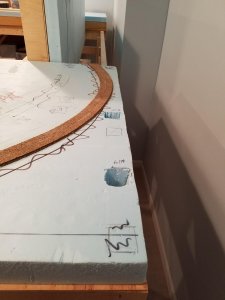
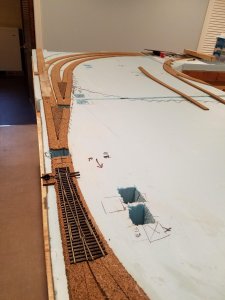
Today I finished all the riser holes in the remaining sections that will require them:

20160507_142314.jpg 20160507_142319.jpg 20160507_142325.jpg

I ran some more bus wire, but didn't get as much of that done as I had planned because I need some more terminal blocks and didn't have time to pick any up today. Next step will be getting more of those to finish the bus wire, and cutting the risers so I can install them now instead of having to later.
 
This weekend I managed to install all the risers on the larger double section. The only other place where I'll need them will be on the smaller section that attaches to it on one end, and that can wait.

(The picture is actually sideways -- I have the big section on its side to make installing the risers easier and also finishing the bus wiring there.)

20160612_143807.jpg

I've also put the new AR-1 reversing unit where it will go on the underside. Next step will be to run more bus wire underneath these sections, both for the regular part of the line and for the reversing section. Some of that configuration is going to be a little complicated -- the main bus wire here will serve portions of the main other than the reversing section, but also will serve the yard, so I want to give thought to how I will most effectively array that. Also, I need some more terminal blocks, so I'll probably deal with that this weekend.

And, I will need to string wire controlling the turnouts. Some of the turnouts will be controllable from two different spots, meaning extra wire...

That brings up a question...

I'm using Peco machines in most spots on the layout. But I'm not sure that I will want to do that in the yard area. I guess I'm thinking mainly that it's going to be fairly crowded with a lot of wire if I do that.

Ground throws are one option, but I'm put off by their oversize look. (I'm actually using two Caboose Industries ground throws in the hidden trackage, for very specific reasons -- My logic is that they will mostly be positioned for regular running, and only thrown to the opposite track in very specific operational circumstances. Also, even thought they're in the hidden section, the ground throws will be completely accessible from the side.)

Two thoughts I have would be

1) use the CI ground throws but mount them on the control panel and use either choke cables -- either from RC aircraft or some made by CI themselves, or...

2) use the Hump Yard Purveyance units -- essentially the same idea.

I can see pros and cons... either of these approaches would be less expensive than even a bunch of Peco machines (and way less expensive than Tortoise or its competitors) and there's less wiring.

At first I was thinking that the choke cables required for either solution would also be as challenging to install as wiring would be, but then it occurred to me -- I think instead of running the choke cables underneath the layout, I could cut channels for them in the foam just under the track so that I don't have to go back underneath the layout.

The third option would be to bite the bullet, go with the CI ground throws and overlook the size issue. I know plenty of people do that and I certainly don't criticize their choices.
 
You might look at using CI "N" scale ground throws if the size is too bothersome. I know of a few that use them, the only drawback is that they have to be precisely mounted. Note that the ones that I know that use them have a plywood base instead of foam; I don't know if that makes a difference.

Willie
 
I like the Humpyard Purveyance controls. I used choke cables over 25 years ago for a couple of turnouts at a couple of hard to reach turnouts. I recently looked at the price of choke cables (or throttle control cables) and the Humpyard controllers were actually less expensive and everything you need for them is there.


Affiliate Disclosure: We may receive a commision from some of the links and ads shown on this website (Learn More Here)

Back
Top