Weekend Photo Fun 9-12/9-15


jeffrey-wimberly

Dr Frankendiesel
This last week has been a busy one for me. I had several projects to work on. The first of these was get a Bachmann GP40 body onto an Athearn GP60 frame. While the frame required very little modification the Bachmann body needed quite a bit of surgery. For some reason known only to them, Bachmann had the couplers mounted to the body instead of the frame. The mounting pads for these couplers had to be carefully removed. The mounting tabs that the screws that held the body to the frame also had to be removed. After all this was done it was a simple matter to spread the sides of the body slightly so that it would hold onto the frame through tension. First photo shows how it looked after the body was fitted, second photo shows the unit after painting and light weathering.


P1010061.jpg


P1010079-1.jpg


The next project was to rebuild some old Bachmann hoppers. These were made for Talgo trucks with truck mounted couplers. I installed new trucks and added body mounted Kadee #5 couplers.


P1010083.jpg


P1010089.jpg


P1010097.jpg


The easiest project was rebuilding an old Mehano caboose. All I had was the caboose body with a useless frame. I pitched the frame (it's now buried under a bunch of plaster) and installed an Athearn frame and a pair of roller bearing trucks with nickel-silver wheels and body mounted Kadee couplers.


After assembly
P1010092.jpg


And after a run through the paint shop.
P1010096.jpg


There were also two gondolas to rebuild. These received Talgo trucks with Kadee couplers.


P1010105-1.jpg


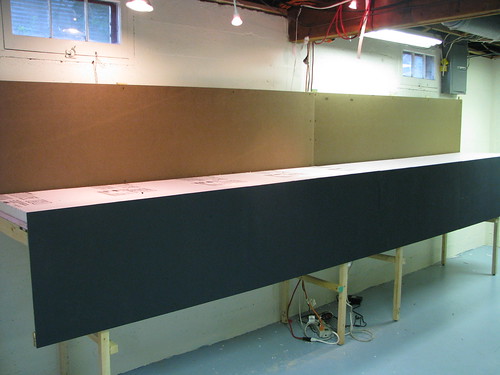
And lastly, pouring the plaster for the new section. It'll look much better when the scenery goes in.


P1010115-1.jpg


P1010116.jpg


P1010111.jpg


That's it for this week.
 
Hi all: Here's a few shots of Pennsylvania wild life.

Black bears.

P1020119-1-1.png


White tail deer.

P1020121-1.jpg


Raccoons doing what they do best, scattering garbage.

P1020123-1.jpg


A large copperhead scrambling for cover.

P1020139-1.jpg
 
Yeah, you sure know how to set 'em up, DJ. More great scenery! :D

Here, a USRA 0-6-0 trundles across the Seneca Falls trestle taking a weekend excursion around for a look at the scenery.

C-train-at-trestle.png
 
Last edited by a moderator:
Thanks Steve and Crandell: Crandell, it looks like you are becoming an expert at photography! That is scene is just beautiful. It could be used for a picture post card. I also like the border. Did you borrow that technique from Jarrell?
 
Nice photo's everyone. Gramps, those dang raccoons. They used to scatter the garbage all over my yard no matter what kind of can I used. I think I've seen that same copperhead down by the Alabama River. :eek:

Crandell, very atmospheric shot. Really nice depth of field and focus. Maybe one day I'll get all that figured out. :)
 
Here is me getting some more flooring done on the new train room. The first photo was taken by my daughter, she is really getting good at the 'ol point and click.

DSC01155.jpg


The second is just a progress shot. Would have gotten finished but the weather is not working with me at all. Rain, Rain, Rain. And if you have ever done hardwood flooring of any sort, it's just not practical to saw indoors, that fine dust covers everything. So, will just have to wait for the sun.

DSC01173.jpg
 
Jim and DJ, thanks for your positive feedback. Grampy, yes, Jarrell and I are corresponding, he indulging me and giving me tips (for which I am understandably grateful), and me trying to produce images that show substantial improvement. Between Jarrell and RRCanuck on the other forum, those two add smoke, tweak settings, and in Jarrell's case, he puts a nice border on them. Both persons will also delete obvious shadows on the backdrop that detract from the image. I only have FastStone, which has inner masks, but no borders of the nature you see.

Jim, the secret seems to be lots of light, but the gee-whizz trick is to get it aimed right. I am still fiddling with it. Along with lots of quality lighting, you have to set your iris to about the smallest size it will go on your camera, possibly up to f-8 or so. To compensate, you need more light, but you will probably also have to adjust your shutter speed to keep it open longer. Your manual may say how to do that, but it will surely be in M or manual mode. In automatic, the camera does as it is programmed to do. Once you can manipulate those two settings, timing and iris, you can go back and forth taking pictures and downloading them until you begin to get pleasing images. it takes a lot of back and forth to the computer, remembering what you changed each time. But, as a general rule, keep your camera as far away from the scene as you can. Try for 18" as a minimum, but sometimes it just can't be.

-Crandell
 
Wow, nice picture Crandell. I hope nobody minds if I continue to share my progress shots. I have my backdrop mounted and mudded. It's ready for the final coat of paint. I haven't decided what else I'll add to the backdrop yet. At least I'll have blue sky if nothing else. Sorry for the bad lighting. I haven't bought new light fixtures yet.

newlayout002-1.png


This is what's going in the lower portion of the the bench work. I think it may be a while before I can do a loop de loop.

redjack1.png
 
Last edited by a moderator:
Great start for the weekend everyone!

I made some progress on my layout this evening. It's gettin there.
2852248126_fd3b3226c0.jpg


the trackplan
2668403204_c0233b79ce_b.jpg
 
Looks like we have a few of use in the beginning stages of our train layouts!

Gramps, that bear to the far right looks WAY pissed off! I like that copper photo the best. Where did you get that snake, you make it???

Just come clean Selector, you scanned in a post card... you know it, we know it... :D

Jeff, hoppers, sweet.
 
Great start to the weekend folks! I have been replacing all the gross looking over sized Caboose Hobbies ground throws with tortoises and will be placing scale Details West throws with targets later. Here is one of the mounted torti:

TortiYard01w.png


It has a remote throw on it that was made from some leftover material from the commercial remote mounts. I used a piece code 100 rail to connect the tortoise to the throw lever attached to the switch points.

TortiYard02w.png


I have installed a dozen machines in the last couple of weeks 10 of them in the yard. Here they are with all the wiring and DPDT Toggles attached.

TortiYard03w.png


TortiYard04w.png


The last photo shows the completed fascia board with the DPDT Toggles in place. There is one more toggle to be mounted on that board, but I am fresh out of tortoise machine for the moment. I need 3 more to complete the area.

FasciaAtYard01w.png
 
Last edited by a moderator:
Hi Jeff and Ray: Jeff, that bear isn't po'd, he's just waving "HI" to the camera. Hey Ray, I know what you're going through, it was just 6 mo. or so, I was installing torti in my yard. I could only do a couple a day, then I had to take a break and do something else. But, if you work steadily, pretty soon they're all in. Nice job! Oh, I almost forgot, the copperhead snake. It's one of those curly leaves that you have to pluck off of Super Trees. I had a few that I missed when I painted the trunk and branches, and I thought, aha, that looks kinda like a snake.
 
Last edited by a moderator:
Loco, thanks for your kind remarks. They complete my circle. :)

Ray, I have enjoyed your images lately. You are a busy fella, and you are doing very...well....enviable work. I have thought of using Torti and feel I will have to get a couple for my most remote turnouts...the ones used most often but that are still mechanically actuated. But what I see in Grampy's and everyone else's images are attention to detail that I am just beginning to appreciate. I knew of their value all along, but when you mentioned Details West targets and switchstands, I realized that it is a stark example of basics that are missing from my images...well, the layout, really. All this to say that I look to you, all contributors, for examples and for stimulation. While I can enjoy some success from week-to-week, your own work is what I use as anchors. I thank you for that.

-Crandell
 
I finally finished assembling an O scale resin station that I've been messing around with for way too long. Summer kept on interfering!
 
Thank you Crandell and Grampy! Grampy that is great with the snake. I love it when someone sees something totally unrelated to what they are doing and makes it work for the scene. Crandell I am trying to get that part of the layout up to the standard that I want for the NMRA Achievement Program Certificate for scenery. I find that as I look at the requirements and look at my layout, there is so much that I've done that I thought was "good enough" back when I did it, but just doesn't make it for me anymore. The work by Bob Boudreau, Grampy, you, and so many others here have inspired me to look at the detail of a scene and have raised the bar for my concept of "good enough".

Besides that, I'm having more fun and taking some real pride in my work these days!


Back
Top