So many great contributions, so
little time (for me to comment meaningfully on every single one of them).
Jerome, I've got to say that your first weathering job looks much better than
my first! Takes lotsa practice and experimentation, but eventually even I hope to do as good as Aggro with mine.
Steve - Your yard area is coming together quite nicely! Was it my progress shots of the IronBelt receiving yard that you're referring to? One of the things I learned later was, that latex paint is like glue once it dries. So I hope your trackwork is positioned the way you want it, otherwise loosening it will be a royal pain...!
John T - how do you manage to squeeze so many into that shed of yours? It always looks alot larger than it is, coulda' fooled me!
 Josh
Josh, that BNSF unit is a masterpiece! Did you print any of those decals yourself?
Smoke, nice weathering on that Dark Future unit!
Jim - ditto on your reefer!
Max, I think your boxcar is quite convincing!
Brad, the Katy's green/yellow livery was always my favorite! Do you by any chance have a model of their F7 A-unit-turned-B with the painted-over windshield?
Ray - you've given a whole new meaning to the phrase "Give a man enough rope..." That scene sure looks like a moonlit night, it's gonna take me a lot of time to get my own layout primed for nighttime scenes.
GrandeMan - glad to see you finally taking some
model pix with your XTi for a change <LOL>!
Jeffrey - how you planning to finish up that PA1 snout? Don't keep us in suspense...
Crandel - always enjoy viewing your Western PA countryside scenes!
John P - that warehouse looks great! Is it a 'wall unit'? I'm looking at doing something similar.
If I missed anybody I apologize - it's just getting so durn late (11:45pm EST) and I haven't been getting enough sleep lately. Besides, I've got some of my own pix to share this week...
First, a brief history: When I finished building my model blast furnace 5 years ago, I duplicated the Walthers kit components exactly - simply increased their dimensions by 50% to achieve
true HO scale. What I didn't realize at the time, was that Walthers made a major mistake in how they connected the piping to their gas washer. First, a shot from the "archives" (the gas washer is the cylinder in the middle, with two circular catwalks near the top):
Walthers had the intake positioned at the top, with the outflow pipe immediately below it. But on prototype gas washers, the intake is always toward the bottom (after all, hot gas rises - it needs to flow from the bottom to the top to get the particulate matter sprayed out of it!) Fixing this blunder seemed like a daunting task, then recently it dawned on me that I didn't need to hand-cut the curved piping segments like I originally did - I could use Plastruct (well,
duh...)! So a quick visit to the Plastruct website, and 5 days later I had everything I needed to correct the Walthers Error.
Here's a shot of the unpainted parts in their destined locations:
Just like doing bodywork on an automobile, it's tough to get the repaint colors to match exactly with the original. Oh well, at least prototype blast furnace mills are being continually repainted so their colors don't always match either.
Here's an overall view. Sorry about the dark shadows, I just didn't have enough time to setup extra floodlights to keep any unwanted silhouettes off the 'sky':
Here's a closeup. The new pipes are mostly hidden form view. Nada problem, it's preferable to having the incorrect ones stick out like sore thumbs!
...and that's it for me, for tonite. Merry Christmas y'all!

 even though I'm using the right colurs
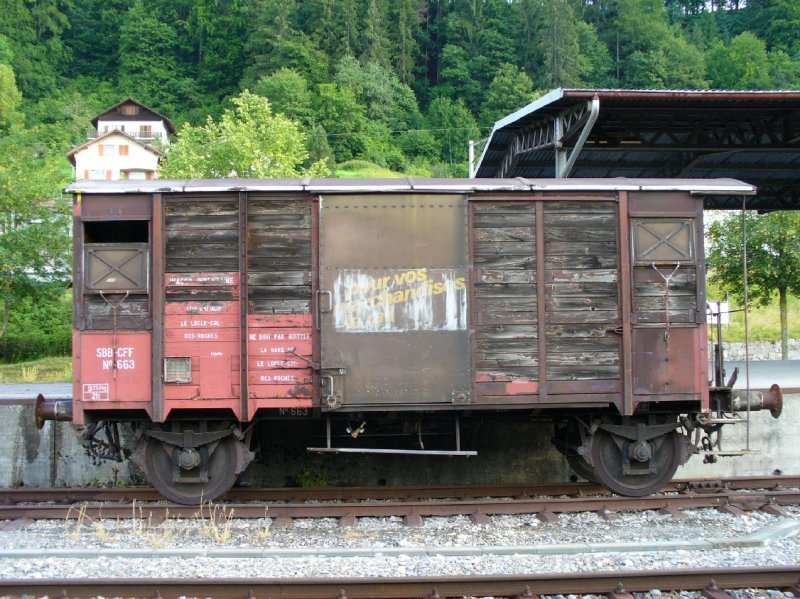

 .
.") Whatever it is, it really looks to me like you've got it down pretty good. If you look at your rusted roof and then look at the door of that car, it looks to me like a pretty even layer of a lighter color rust than what you have on the roof. Try thinning that roof rust mixture down even more and using it on the door.
Whatever it is, it really looks to me like you've got it down pretty good. If you look at your rusted roof and then look at the door of that car, it looks to me like a pretty even layer of a lighter color rust than what you have on the roof. Try thinning that roof rust mixture down even more and using it on the door.


