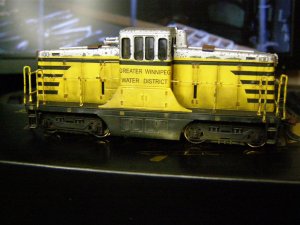
Painting a GE44 tonner - How crazy should I go?....


I'm *trying* to model the whole thing! OK, not the entire line, but what I consider the "highlights". Thanks for the pix! Are you from around there?

I do the annual VC Hillclimb (affectionately known as "the Ferrari races" by the locals) every year and started out with an HO slot car track that would be scenicked appropriately. Then I thought it would be cool to add "a little loop of RR" and the grade crossing at Goldhill. Then the wheels fell off and I decided to spray some paint instead......

The whole (somewhat sorry!) tale is in my "8x4 to 10x7" thread in the layout design forum; http://www.modelrailroadforums.com/forum/showthread.php?t=20027

It seems to have "disintegrated" into something of a pissing contest, but I guess that's better than being ignored ;)

Thanks again for the pix,
Cheers,
Ian

I live in Winnemucca,I took those pictures in Oct. of 2009,we (wife and I)went to Virginia City, to ride the train and tour the town. We took the first train of the day, and were the only ones on it. On the way back, we were offered a cab ride (to stay warm).I took pictures from the cab of the area.
 
Ian,
Looks like you are staring down the rabbit hole you'll never recover from - detailing! The A-line wipers are real nice and you will be glad you updated them.
One other comment on paint removal. You can use Pine Sol cleaner to remove paint as well. In fact I think it's easier then alcohol. A few points about using it. 1 it's easier so be warned it will melt plastic if you leave a model in it over night (trust me). 2 wear rubber gloves. Skin will dry right off your hands if you don't.

Please post photos for us to see your progress.

Dave
 
These little guys are fun to model. I just did this one and swapped out the handrails by cutting out the originals and drilling out the original stanchions to accept .125 wire. If you havent taken off the cut levers or whatever they are supposed to be, leave them on. They are a real pain to try to put back on later. The 4 little posts are metal, by the way. So you can't cut them off very easily, either. Also a small black sharpie works great for doing the black weatherstripping around the windows. Just make sure to do it before you put the glass back in or you will end up doing it like I did. With a small brush. Have fun with your project. I did.
 

Attachments

  • Ron's pics1 1158 (Large).jpg
    Ron's pics1 1158 (Large).jpg
    107.8 KB · Views: 214
Ian,
Looks like you are staring down the rabbit hole you'll never recover from - detailing! The A-line wipers are real nice and you will be glad you updated them.
One other comment on paint removal. You can use Pine Sol cleaner to remove paint as well. In fact I think it's easier then alcohol. A few points about using it. 1 it's easier so be warned it will melt plastic if you leave a model in it over night (trust me). 2 wear rubber gloves. Skin will dry right off your hands if you don't.

Please post photos for us to see your progress.

Dave

Pine Sol doesn't seem to harm the Atlas shells although it does something chemically to the paint (I used Polly Scale) so that if you don't get it all off, it will never come off again! :eek:
 
Hey,

Firstly, thanks to all for the comments, suggestions, pictures & encouragement - It really does help!

As has been said, this little guy makes a great "playground" - Even if I mess it up completely it's still a fun project! [More than can be said for track plans ;)]

Anyway, given the encouragement, heres a couple of shots of it ready to go in the paint booth [OK, in my case that's outside in the yard!]

The last is a shot I took of a fridge magnet someone gave me - I'm thinking get it into Photoshop (OK, in my case that's The Gimp 'cos I'm cheap!] "flatten" the colors and eventually print it onto some decal paper - That then becomes the herald on the cab. Again, I'll report back with progress.

Cheers,
Ian
 
BTW, I forgot to mention - The pix from Ghosttrain suggest it doesn't have any wipers! So, I cut 'em off and will go with that :)
 
Looks like your making good progress. I've brought out the 5 yellow ones I'd had sitting on the shelf for a year now. I'll take them to work tonight and get them all apart. Who knows what I'll paint them up as. LOL
 
.... I'll take them to work tonight and get them all apart....

I want a job like that :)

It's definitely yellow!....... One more coat & I reckon she's done.

BTW, and FWIW, I come from a model car background - In that world, the "blemish" under the handle of the LH door would be a *disaster* - Probably warranting a re-do!...... :eek:

Not here! :)

Cheers,
Ian

Ian, what color was the shell after you stripped the paint? Was it black like the athearn shells? I put my B & O shell in the 91% and the decals/paint came off in about a minute, but the rest of the dark blue color doesn't seem to budge...

BTW, your paint job looks pretty good, that blemish will disappear with a little weathering!
 
Ian, what color was the shell after you stripped the paint? Was it black like the athearn shells? I put my B & O shell in the 91% and the decals/paint came off in about a minute, but the rest of the dark blue color doesn't seem to budge...

Hmmm.... It's the first time I've stripped factory paint - But it was definitely black - The 3rd pic in post #3 is the best view I've got. I also bathed it for about an hour - The silver came off easily, but the black definitely took longer to soften (and thence "scrub" off) - Maybe leave it longer? [YMMV, no liability assumed, keep away from children and all other disclaimers apply of course ;)]

Are you seeing the red moldings that hold the infamous "hinges"? If not, my guess is there's still paint on there.....

BTW, your paint job looks pretty good, that blemish will disappear with a little weathering!

I'll *highlight* it with a little weathering! :)

Cheers,
Ian
 
Hmmm.... It's the first time I've stripped factory paint - But it was definitely black - The 3rd pic in post #3 is the best view I've got. I also bathed it for about an hour - The silver came off easily, but the black definitely took longer to soften (and thence "scrub" off) - Maybe leave it longer? [YMMV, no liability assumed, keep away from children and all other disclaimers apply of course ;)]

Are you seeing the red moldings that hold the infamous "hinges"? If not, my guess is there's still paint on there.....


I'll *highlight* it with a little weathering! :)

Cheers,
Ian

Hmm, I guess I'll leave it overnight. Tried scrubbing with an old toothbrush after about an hour, and the blue is really hanging on, maybe I shouldn't have made that crack about the "boring" B & O blue...

Hopefully an overnight stay in the alcohol won't do any harm, if so I'll have a reason to go to the local train show in a couple weeks. ;)
 
The GE 44-tonners, depending on the production run, came in many different colors. They molded them in yellow, red, and green plastic. Those were mostly the dual-motor versions. The did that so that they didn't actually have to paint them and therefore won't mask any of the details with paint. (the rest of the decorations were pad printed on)

Later productions with the single motor (both Spectrum and Bachmann Blue Box) were molded in black plastic. The current Bachmann 44-tonner has been demoted to Bachmann Blue Box (I don't know why, the details are decent). The early Bachmann Blue Box locos were DCC ready with a plug equipped, the later and current production Bachmann Blue Box locos have DCC on-board (made by Lenz)
 
...The last is a shot I took of a fridge magnet someone gave me - I'm thinking get it into Photoshop (OK, in my case that's The Gimp 'cos I'm cheap!] "flatten" the colors and eventually print it onto some decal paper - That then becomes the herald on the cab. Again, I'll report back with progress.

That turned into a project!.... I know more about The Gimp now than I did earlier today! The green isn't quite right, but I know how to change that now - And it'll change when printed I'm sure.

Anyway, the attached scales down pretty well [the decal wants to be ~1/2" sq!]

So, I can get a lot of duplicates across the decal paper - Sweet :)

But, the decal paper is a "one-shot" deal (it has to be sealed after printing), so I want to fill up the whole sheet - It.s 5.5" x 8.5" (thanks!) and I have both clear and white sheets.....

I guess I'll do the herald at a few scales. I also have a couple of tenders that need white lettering..... I think I can do that with black borders - We'll see......

If anyone's still reading (?), any recommendations for "page layout programs" that'll eat png's or jpg's onto a "custom" size? I've tried "Presents" (sic) and The Gimp, but neither are really what I want.....

Cheers,
Ian
 
When I was still on a PC, I'd use Microsoft Picture Manager to resize stuff. Now that I'm on a Mac, I don't have anything that'll do it. I just post the picture in Microsoft Word, resize it there, and take a screenshot, which saves as a .png on the desktop. For a sheet of decals, just leave it in Word, and you can print up some lettering while you're at it. That's how I've done decals in the past. (You can right-click the image, format, size, and then put in exactly how big you want it to be. Make sure you tell it to keep proportions.)

Oh, and before you print on the decal paper, do a quick test on copy paper. If it all looks good, THEN put the decal paper in. :)
 
...Now that I'm on a Mac, I don't have anything that'll do it. I just post the picture in Microsoft Word, resize it there, and take a screenshot, which saves as a .png on the desktop......

Thanks! - I probably should have mentioned this is in Ubuntu Linux. Second choice is the Mac (which I'm surprised can't do it - hmm) and finally any Micro$oft "solution".;)

I'm making progress though- jpg's open (and scale nicely) in OpenOffice Draw. It also has "nice" text capabilities and I'm sizing some text out now - I forget how small this stuff needs to be!......

Any difference between using png's & jpg's quality wise for this I wonder? [I doubt it as we're "compressing" so much, but don't know?]

Oh, and before you print on the decal paper, do a quick test on copy paper. If it all looks good, THEN put the decal paper in. :)

:) "Hell yeah!"....... Of course the "bizarre" size of the decal paper means hoping no auto-scaling goes on - I'll get there. Thanks again for staying with me!

Cheers,
Ian
 
Ian, how much trouble were the front handrails coming off on yours?? I think the Chinese guy at the factory was getting high on superglue on the first one I did tonight!!!!
 
I was surprised that he was able to get the handrails off in one piece! I've noticed that the handrails on the Bachmann tonner locomotives (moreso the 70 tonner than the 44 and 45) are "welded" (cemented) onto the body and attempting to remove them usually breaks them.
 
Any difference between using png's & jpg's quality wise for this I wonder? [I doubt it as we're "compressing" so much, but don't know?]

Normally, I'd recommend a PNG, JPEG is a lossy format (loses info when you save it). If you're working and saving it a lot, it starts to degrade. PNGs don't do that. (They're much better for things like text and line drawings, where there isn't much "useless" info to chuck out).

Since you're shrinking them down so far, I don't think it'll matter. Do it in whatever format you've got it, and if they look good on the test sheet, that's all you need. :)


Back
Top