Long term project plan for N scale


dgrafix

Well-Known Member
Hi everyone,
I have been wondering for months exactly how i could fit a reasonably sized layout in my apartment. I have thought of everything from lowering it from chains (with fold out legs), folding down from the wall (not ideal for non glued stuffs) having shelves running round the room (with removable bridge peices, which would just annoy the missus and son). A set of modular suitcase-picnick table layouts that fold out and click together.

I was about to give up when i saw somethig on reddit. Just a baseboard looping back on itself and then running thin. I then realised it had been staring me in the face. A layout ABOVE my computer desk and running along a shelf above the sofa into a largely unused corner. 💡

This is obviously a lot of fantasy at the moment, i will just start with the outer and inner loops. However i was playing with potential configurations and realise a lot is possible on a narrow space..

So here is my "eventual layout" as i want tunnels a railyard, at least 2 ovals and a reversing loop for the hell of it, although i should maybe really hook it up to one of the main lines (might turn that crossrail into a z turnout for that instead.
west-end.jpg

west-render.jpg

West end showing trainyard and space for a water feature like a lake, river canyon or something (as i am building on top of 5cm foam which scarm is treating as height 0 so i can carve ravines etc...
east-render.jpg

East end, which will feature a (liftable for maintenence/recovery) mountain on some sort of mount.. magnets.. poles.. not got that far...
the middle bit.jpg

The middle bit showing the inner oval passing under the mainline across the reversing loop and then back again.. but this idea is still a massive WIP.

I plan to build it all in sections starting with the East end. and just having some plain running boards and reversing points as progress continues so i can play with it and test..

The whole affair is 5M long (16.404ft) and at the oval width from the back wall to the edge + "safety space" is 85cm (2.7 ft)
(ignore the baseboard width, that is wrong, it will be slightly slimmer and better angled than that.).

Love to hear any feedback you have, It is my first project in 30 years! I have done a bit of model work in the past but not been near a trainset in forever. Also first time working with foam for trains..
Ill post updates as i go :)
 
Are you able to squeeze in 15" radius curves on either end? I notice the East end has 3 curves. If you could keep your minimum radius to 11" I think you be a lot more happy than if you have to drop down to 9.75" radii.

I believe you can make concentric curves using 11", 12.5" and 15" radii. But 15" may be pushing it with an overall limit of 2.7 feet. If you could get just a couple more inches of space on the ends, the benefits would be huge.

I like the plan. It has lots of interesting features given your space constraints.
 
I like the plan,

Funny this is posted today as last night I thought of a similar idea with a loop on each end and multiple tracks through a narrower area to allow both continuous travel and some real estate to actually have the train run through and ops ability.

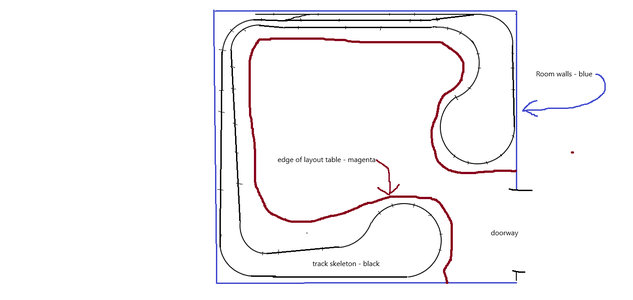
made this skeletal sketch of same idea except for a rectangular bedroom

track plan.png

I won't be changing my track plan but maybe make another level like this

Dave
 
Lol does a bit, if I ever get a bigger space I can put looops on the other side too lol.

The tunnels will have some engineering to recover and clean them, I have thought of that. The mountain base in the east side will be covered in trees to hide the "joint" but it will be liftable and held in place with some little magnets.
Not sure how I would do the center one though, maybe just make it much shorter or invent some sort of hidden door :/
 
Are you able to squeeze in 15" radius curves on either end? I notice the East end has 3 curves. If you could keep your minimum radius to 11" I think you be a lot more happy than if you have to drop down to 9.75" radii.

I believe you can make concentric curves using 11", 12.5" and 15" radii. But 15" may be pushing it with an overall limit of 2.7 feet. If you could get just a couple more inches of space on the ends, the benefits would be huge.

I like the plan. It has lots of interesting features given your space constraints.

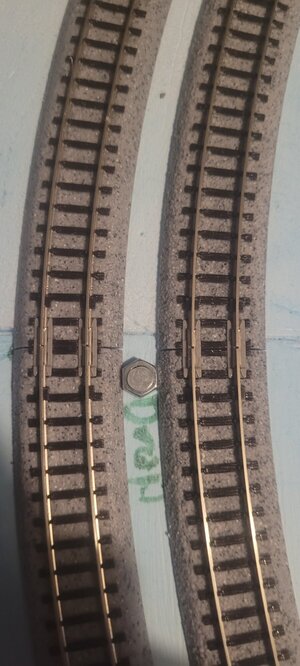
The curves are 345, 315 and 284mm
15" must be the 381s unfortunately my baseboard was just crudely tacked there to cut it up for the screenshots.. scarm's baseboard editor is hideous 🤣 took me 5 attempts and if you do much as sneeze you lose the plot and have to start again 😠.
But no with my unfortunate space restriction It would mean they would be tight up to the edge of oblivion. That lip won't exist when I finally get it up in it's corner. It exists now as I have not yet jigsawed it to fit.

315 and 348 are what my trains are designed for to run ok, but the 284s is mainly an after thought because I have the room.. but even if I can only use small trains on it then so be it. Though i have taken them through the outer curves at full speed (I set cushions all over the place for that one!!).
I have made my own very very gently superincline (two attempts. So far) which probably helps them a bit (that was really hard to do!) as for some wierd reason Kato does not do a double 345/315, but do a 315/284 superinclined double curve?!? 😵‍💫

This one works though with temporary track spacers as these things travel so fast the they will likely move the track without them
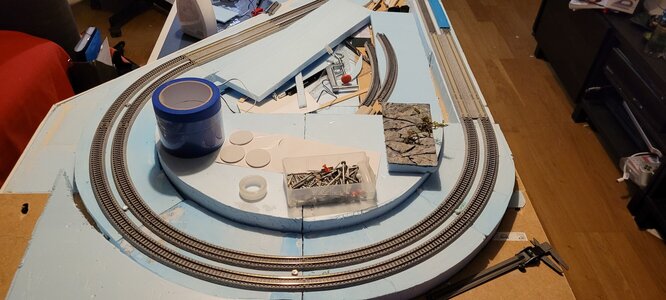
As you can see I have set the base for the curves already (only bit that can't be moved as to get the elevation curves and 3-4 mm incline (across that whole bed) it needed gluing so I could iron it out precisely.
 

Attachments

  • 20230514_220827.jpg
    20230514_220827.jpg
    264.9 KB · Views: 100
  • 20230514_220303.jpg
    20230514_220303.jpg
    345.7 KB · Views: 99
Last edited:
I like the plan,

Funny this is posted today as last night I thought of a similar idea with a loop on each end and multiple tracks through a narrower area to allow both continuous travel and some real estate to actually have the train run through and ops ability.

made this skeletal sketch of same idea except for a rectangular bedroom

View attachment 168580

I won't be changing my track plan but maybe make another level like this

Dave
It’s amazing how a similar plan in just a different orientation can be understood so much easier.
 
Hi everyone,
I have been wondering for months exactly how i could fit a reasonably sized layout in my apartment. I have thought of everything from lowering it from chains (with fold out legs), folding down from the wall (not ideal for non glued stuffs) having shelves running round the room (with removable bridge peices, which would just annoy the missus and son). A set of modular suitcase-picnick table layouts that fold out and click together.

I was about to give up when i saw somethig on reddit. Just a baseboard looping back on itself and then running thin. I then realised it had been staring me in the face. A layout ABOVE my computer desk and running along a shelf above the sofa into a largely unused corner. 💡

This is obviously a lot of fantasy at the moment, i will just start with the outer and inner loops. However i was playing with potential configurations and realise a lot is possible on a narrow space..

So here is my "eventual layout" as i want tunnels a railyard, at least 2 ovals and a reversing loop for the hell of it, although i should maybe really hook it up to one of the main lines (might turn that crossrail into a z turnout for that instead.
View attachment 168568
View attachment 168569
West end showing trainyard and space for a water feature like a lake, river canyon or something (as i am building on top of 5cm foam which scarm is treating as height 0 so i can carve ravines etc...
View attachment 168570
East end, which will feature a (liftable for maintenence/recovery) mountain on some sort of mount.. magnets.. poles.. not got that far...
View attachment 168573
The middle bit showing the inner oval passing under the mainline across the reversing loop and then back again.. but this idea is still a massive WIP.

I plan to build it all in sections starting with the East end. and just having some plain running boards and reversing points as progress continues so i can play with it and test..

The whole affair is 5M long (16.404ft) and at the oval width from the back wall to the edge + "safety space" is 85cm (2.7 ft)
(ignore the baseboard width, that is wrong, it will be slightly slimmer and better angled than that.).

Love to hear any feedback you have, It is my first project in 30 years! I have done a bit of model work in the past but not been near a trainset in forever. Also first time working with foam for trains..
Ill post updates as i go :)
Have you given any thoughts to structure placements?
 
Yes and no lots of ideas, but the track is probably the least flexable, unless the placements are rail related of course.
I would like to stick a station in but my train's canon sets are huge 10-20 units. Even with the 5 car maximum sets that I'm collecting that's a long station.
I might keep the HSTs as not having a station.. and build a station or so for the inner line which I will run my chibis and other trains.
 
Update..

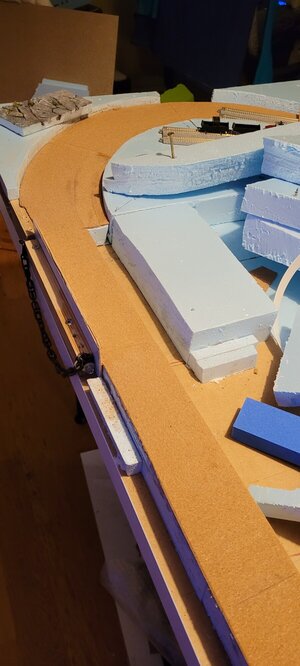
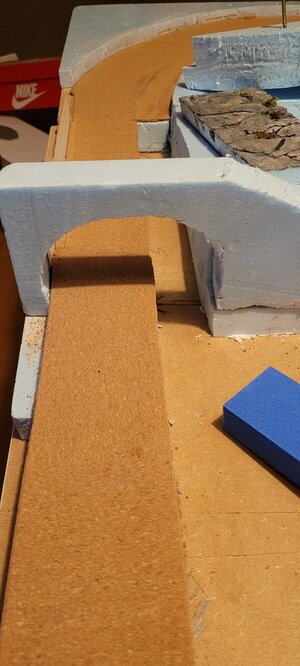
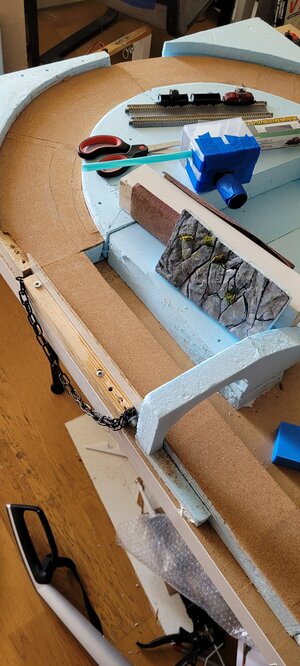
Got my cork bed down, even though I am using unitrack I still like cork, it provides an "earthen" surface to work from, is quieter and just looks nice.

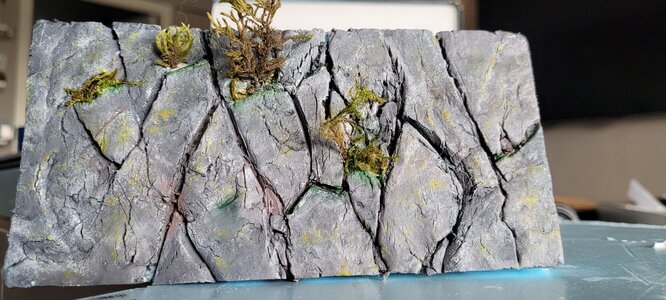
I also tried using foam for rocks for the first time and made a sample prove. I did it with just some random cuts with a craft knife and used a stone from the garden to press texture into it.
I had no primer or scenics, so some very old acrylic and moss from the garden had to do! So the colours look really odd.. But it's just an experiment 😁
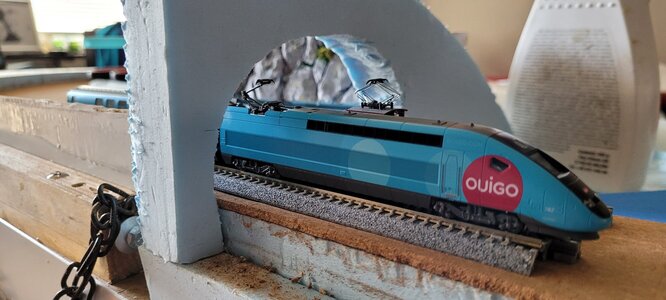
I also made a rough prototype for the 3 track tunnel after proving to myself they are really a thing.. although may go for the more canon 2+1.
In the picture you can see my TGV (which fresh arrived today.. yay) with my chibi loco on the "middle track" with their pantos raised to get an idea of how high it would have to be to be "structurally viable" (i am guessing here, i could make it more square if it looks better though)
Opinions welcome!!

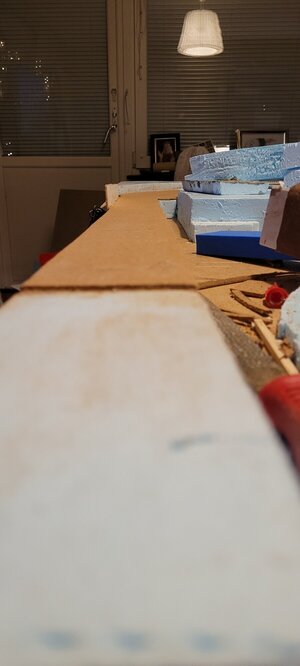
I also realise I made a horrible mistake by gluing my foam. I realise now it can actually be held perfectly well using screws until sure.. so to self.. please do that in future. It wasn't a disaster though I just had to do some more carving and filling.
 

Attachments

  • 20230520_000036.jpg
    20230520_000036.jpg
    171.7 KB · Views: 104
  • 20230520_001338.jpg
    20230520_001338.jpg
    251.6 KB · Views: 96
  • 20230520_000058.jpg
    20230520_000058.jpg
    366.7 KB · Views: 105
  • 20230519_171832.jpg
    20230519_171832.jpg
    286.2 KB · Views: 100
  • 20230519_172012.jpg
    20230519_172012.jpg
    405.5 KB · Views: 103
  • 20230514_142050.jpg
    20230514_142050.jpg
    469.3 KB · Views: 120
Last edited:
Your making great strides.

The rocks look great. I tried to do the foam route, but just didn't have the knack for it. I see you have it!
Thank you :)
The colors are all off though lol. I had no primer but the foam is cyan in color so i thought it might work but nah its too glossy and wierd.
As for how i did it, i made some random cuts with a craft knife to about half way down the block and then found a nice looking rock, put it on, put a flat surface on that and sat on it to get a rough texture (I call it a butt press :confused:). Then pressed a few large stones in where i wanted to be more detailed.
Its basically a dilute black wash first, then a grey painting, another black wash, then i tried to add some red for iron and did a dry white flash for details... although i messed that up. I then added some yellow for lichen which i like, but the green is not a natural one so not so happy there.
 
Last edited:
Project looks great so far. I'll be following your progress.

As for the inevitable mistakes you mentioned earlier, I am also an apartment modeler and I am new to the hobby. You can check out my build thread and perhaps that will help you avoid some 😁

Good luck!
 
I will :) Thanks.

PS: Acually i have already seen it... it was one of your pics that acually inspired me to screw my foam rather than glue it lol
Your proj is looking good :D
 
Last edited:
Thank you :)
The colors are all off though lol. I had no primer but the foam is cyan in color so i thought it might work but nah its too glossy and wierd.
As for how i did it, i made some random cuts with a craft knife to about half way down the block and then found a nice looking rock, put it on, put a flat surface on that and sat on it to get a rough texture (I call it a butt press :confused:). Then pressed a few large stones in where i wanted to be more detailed.
Its basically a dilute black wash first, then a grey painting, another black wash, then i tried to add some red for iron and did a dry white flash for details... although i messed that up. I then added some yellow for lichen which i like, but the green is not a natural one so not so happy there.
The vegetation you added growing out of the cracks really pulls it all together. I see some layouts that miss that detail.
 
The vegetation you added growing out of the cracks really pulls it all together. I see some layouts that miss that detail.
It was some moss from te garden although i have no idea how long it will say green. I plucked a load of it. I will hold this sample for a while but i am betting it will turn brown pretty quickly. Maybe i can dry it in the oven and then paint it :/
Or just buy some proper scenic stuffy.. but that is pretty pricey in comparison
 
I will :) Thanks.

PS: Acually i have already seen it... it was one of your pics that acually inspired me to screw my foam rather than glue it lol
Your proj is looking good :D
I work in construction. I got the three inch foam and long screws for nothing but I did also glue the foam :). I've already removed a couple of screws so I could carve the foam.


Back
Top