
You are using an out of date browser. It may not display this or other websites correctly.
You should upgrade or use an alternative browser.
You should upgrade or use an alternative browser.
Feb 29th Leapyear weekend photo fun
- Thread starter Steve B
- Start date
ModelRailroadForums.com is a free Model Railroad Discussion Forum and photo gallery. We cover all scales and sizes of model railroads. Online since 2002, it's one of the oldest and largest model railroad forums on the web. Whether you're a master model railroader or just getting started, you'll find something of interest here.


Nice. I think I spotted Zephyr's 86' RI Hi Cube in there along with your new ethanol cars.
I need to get with whoever is weathering those covered hoppers. They looked good too.

Yea Jim, it's just terrible to be laying "test track". I have some plans in mind to keep the engines happy. A few modifications will be in order here and there but, not quite time for it just yet.


Affiliate Disclosure: We may receive a commision from some of the links and ads shown on this website (Learn More Here)
Railphotog
Railroad Photographer
Working on the power line:

Bob--
Terrific photo as usual--and your tips on photography on your website are absolutely invaluable. Time for me to get out my Canon and try some of them.
One question, though--do you ever use the Zoom on your camera, or do you crop your images--I ask this because I've never considered myself much of a photographer, and sometimes I think I 'Zoom' when I could use a crop instead.
Tom
johntealon30
Member
New pet arrived from Shaw. Fitted a decoder, runs like a bag of spanners!!! Needs a bit more looking at me thinks.


But the big developement, I have given in to peer pressure and started to rebuild the container crane to allow for automation. So far I have sorted out transferring motion to below base board level, now I just need some linkages and motors, at the moment RC servo motors are looking good ? any other ideas welcome.
http://www.youtube.com/watch?v=kpWvHcbPT7w
Added some wire (couldn't get barbed, sorry)


Called in at my local station tonight and think the concrete fence posts should be a lot darker. That should be fun now the chainlink is on !!
John
RJR
But the big developement, I have given in to peer pressure and started to rebuild the container crane to allow for automation. So far I have sorted out transferring motion to below base board level, now I just need some linkages and motors, at the moment RC servo motors are looking good ? any other ideas welcome.
http://www.youtube.com/watch?v=kpWvHcbPT7w
Added some wire (couldn't get barbed, sorry)
Called in at my local station tonight and think the concrete fence posts should be a lot darker. That should be fun now the chainlink is on !!
John
RJR
Last edited by a moderator:
jeffrey-wimberly
Dr Frankendiesel
macjet
Member
Nice. I think I spotted Zephyr's 86' RI Hi Cube in there along with your new ethanol cars.
I need to get with whoever is weathering those covered hoppers. They looked good too.
suprduc
Member
Nice start to the weekend everyone. 
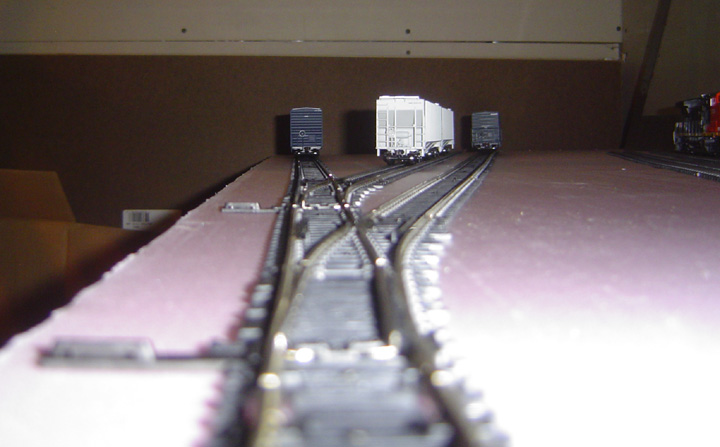
I had some things to pick up at Menards this afternoon to finish a home improvement project so I grabbed a sheet of 1.5" foam for my railroad too. I also had to stop down at the LHS for a few small things and the owner told me that a boxcar that I had ordered had arrived. After getting back home I started officially laying track for my freight yard......finally.
I still think that I will add one more turnout and a fourth finger for another line of cars in the freight yard. Maintenance garage will go where the Dash 9-44CW is sitting.
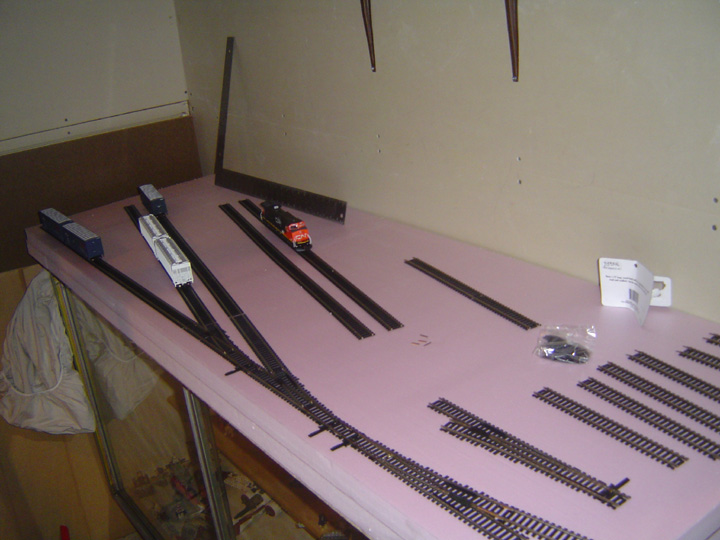
While I was looking through all of the new items to arrive at the LHS, I was informed that my third boxcar had arrived. I had picked up the Athearn RTR and one of the Atlas Trainman RTR cars last weekend.
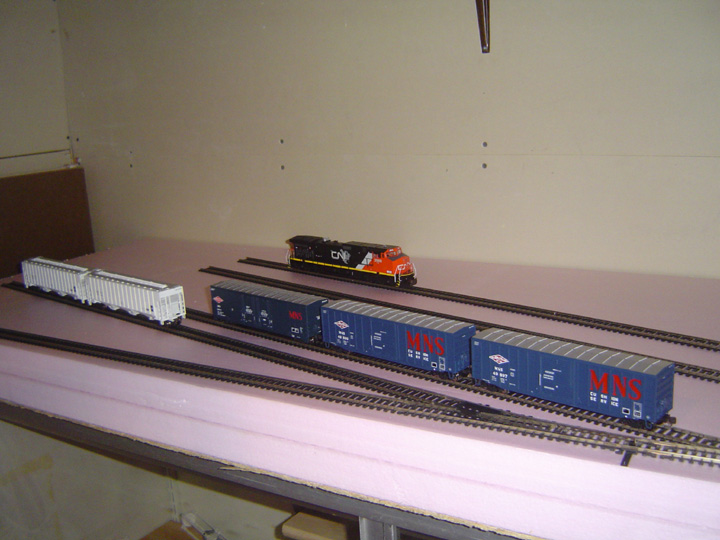
A look into what will be the freight yard.
I had some things to pick up at Menards this afternoon to finish a home improvement project so I grabbed a sheet of 1.5" foam for my railroad too. I also had to stop down at the LHS for a few small things and the owner told me that a boxcar that I had ordered had arrived. After getting back home I started officially laying track for my freight yard......finally.
I still think that I will add one more turnout and a fourth finger for another line of cars in the freight yard. Maintenance garage will go where the Dash 9-44CW is sitting.
While I was looking through all of the new items to arrive at the LHS, I was informed that my third boxcar had arrived. I had picked up the Athearn RTR and one of the Atlas Trainman RTR cars last weekend.
A look into what will be the freight yard.
Nice videos, MT. The engines and weathered cars really make for a realistic looking train, as does he sound.
Bob, nice shot and composition. It even looks like he's wearing a safety harness.")
John, "runs like a bag of spanners"...I love how you Brits describe things. I think I have a few engines like that too. The fencing looks good to me and the barbed wire looks close enough for the three foot rule. If need to darken up thepost, I'll bet a light India ink wash woud do without messing up the fencing.
Jeffrey, your shop crew can't complain they don't have enough light to work by, that's for sure.
Carl, oh, so now you've picked up some foam and are trying out some "test track". That complision is just awful, isn't it. The yard looks good but I hope you're planning a crossover track somewhere about the middle of the yard or you'll find out what a trapped engine means.
Bob, nice shot and composition. It even looks like he's wearing a safety harness.
John, "runs like a bag of spanners"...I love how you Brits describe things. I think I have a few engines like that too. The fencing looks good to me and the barbed wire looks close enough for the three foot rule. If need to darken up thepost, I'll bet a light India ink wash woud do without messing up the fencing.
Jeffrey, your shop crew can't complain they don't have enough light to work by, that's for sure.
Carl, oh, so now you've picked up some foam and are trying out some "test track". That complision is just awful, isn't it.
The yard looks good but I hope you're planning a crossover track somewhere about the middle of the yard or you'll find out what a trapped engine means.suprduc
Member
Carl, oh, so now you've picked up some foam and are trying out some "test track". That complision is just awful, isn't it.
Yea Jim, it's just terrible to be laying "test track".
I have some plans in mind to keep the engines happy. A few modifications will be in order here and there but, not quite time for it just yet.jeffrey-wimberly
Dr Frankendiesel
For those who wonder if my paper shipping containers are scale size, here's a comparison between a paper one and a plastic one purchased from a LHS.


I'll join in if i can find that picture from this week.
www.scratchbuildersguild.com for full build threads
www.scratchbuildersguild.com for full build threads


Selector
Well-Known Member
Nice images. Love the PFM 2-8-8-2 in the hills! RonP, I like your modelling a great deal. Nice. Jeffrey, I also like your first image...well done.
Here is a recent sighting at the Seneca Sub. A C&O H-8 was working its way up the ready track when I captured this image. Later, I saw it emerging from the natural portal at one of my favourite railfanning spots.


RonP, I like your modelling a great deal. Nice. Jeffrey, I also like your first image...well done.Here is a recent sighting at the Seneca Sub. A C&O H-8 was working its way up the ready track when I captured this image. Later, I saw it emerging from the natural portal at one of my favourite railfanning spots.
jeffrey-wimberly
Dr Frankendiesel
My accomplishment for this weekend is devising a means by which I could turn my layouts on when the room lights are turned off. As it turns out, the solution was very simple. I simply connected the layout lights power supply to a dusk to dawn spotlight fixture that I got from Wal-Mart for $8. Here's a short video showing it in action.
http://s136.photobucket.com/albums/q186/forum-1/?action=view¤t=MPG_0003-1.flv
http://s136.photobucket.com/albums/q186/forum-1/?action=view¤t=MPG_0003-1.flv
MLW
Active Member
....as for me? Beside being busy with everyhting else, I do manage to work a little on the layout.
Here's a sneek-a-peek!
Bewarned there's no groundfoam, no shrubs, no tall grass, no ground cover, no trees, no telephone poles, no buildings, no road, no..nothing
Except I am on the final stages of "ballasting" the tracks and doing touch up on weathering the rails and ties. After that all the rest will follow. So without further ado here's a few shot of where am at at "Chambly"
Cheerio

.
.
.
.
.

Here's a sneek-a-peek!
Bewarned there's no groundfoam, no shrubs, no tall grass, no ground cover, no trees, no telephone poles, no buildings, no road, no..nothing
Except I am on the final stages of "ballasting" the tracks and doing touch up on weathering the rails and ties. After that all the rest will follow. So without further ado here's a few shot of where am at at "Chambly"
Cheerio
.
.
.
.
.


MLW
Active Member
My attempt at making rocks. Picture is not that great, but basically this is simply the "pink foam" stuff, cut and roughen up with a knife and sand paper.
I then applied water based beige color on it, and while it was still wet (rather quickly actually) I applied a coat of dark grey water-based paint with a brush on it. While it dried it cracked and pitted and this is the result. Looks much better in "person so to speak".

I then applied water based beige color on it, and while it was still wet (rather quickly actually) I applied a coat of dark grey water-based paint with a brush on it. While it dried it cracked and pitted and this is the result. Looks much better in "person so to speak".
Affiliate Disclosure: We may receive a commision from some of the links and ads shown on this website (Learn More Here)