ModelRailroadForums.com is a free Model Railroad Discussion Forum and photo gallery. We cover all scales and sizes of model railroads. Online since 2002, it's one of the oldest and largest model railroad forums on the web. Whether you're a master model railroader or just getting started, you'll find something of interest here.
Here's another resin kit. Gonna need a lot of body putty on this one. Body is just an 11" PVC pipe. All the other parts are rough castings that will need a lot of sanding and fitting.
The second picture is the ends of the belly part CA glued and clamped to the PVC pipe.
KEN - Happy to see you building an occasional non-powered car for your RR.
You are what I refer too as a full round modeler - not just someone who runs trains?
Back in my modeling days - I enjoyed building rolling stock more than actually running trains
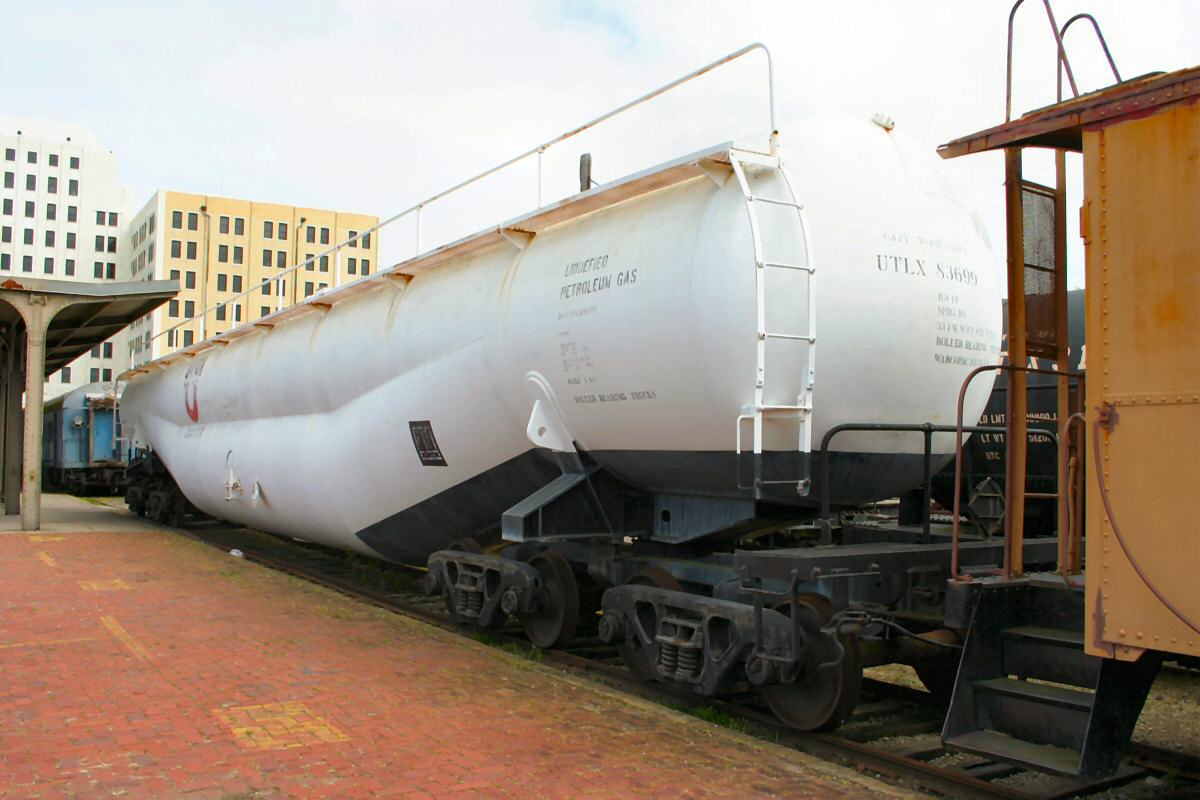
If I remember correctly that car was displayed at a museum in Texas, and subsequently got floated away in a hurricane flood they had down there,...then subsequently cut up and scraped.
Finished grinding down the components to make smooth contoures then added some body putty to fill in the gaps. I'll let that set up for a few hours then smooth it out with a file then sand paper.
The putty was pretty dry and didn't apply to the tank as easy as I thought it would.
The putty was very difficult to work. I thought it would be the consistency of wall plaster but it was more like wood putty. It doesn't spread on, it has to be pressed on.
Got some filing done on it today.
Did somemore sanding on the tank body. Very slow process. I'll have to buy some paintable body putty tomorrow. This putty just can't be smoothed very well.
That's lead beads imbedded in the body to give it weight.
I did some more sanding on it today. It needed some small dabs of filler but I didn't want to drive 35 miles to the hobby shop to buy it. I made my own with CA glue and baking soda. Just mixed a small amount that would fit in a bottle cap then dabbed it on the low points of the body.