ModelRailroadForums.com is a free
Model Railroad Discussion Forum and
photo gallery. We cover all scales and sizes of model railroads. Online since 2002, it's one of the oldest and largest model railroad forums on the web. Whether you're a master model railroader or just getting started, you'll find something of interest here.
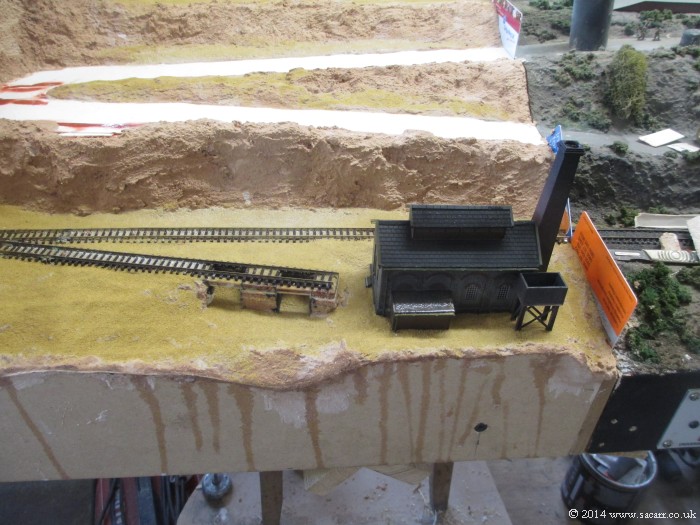
The Pump House was fitted next, and the ground texture blended into the styrene base. The ballast and other areas of finer texture were then done with fine sand attached with dilute PVA.
Standing back a bit, it is starting to blend with the previous section.
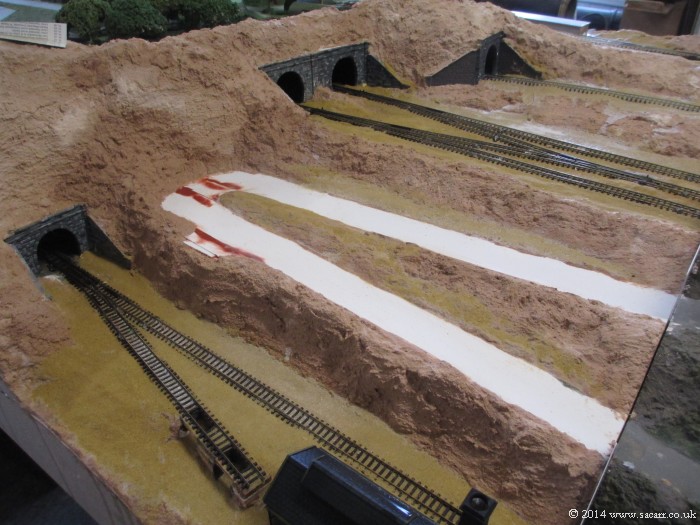
With the airfield now attached, the last track work could be added; the airfield sidings.
Out comes the earth coloured emulsion paint, and all of a sudden, it comes to life!
When that was dry, I mixed up a batch of foliage/PVA mix, and started "planting". The hedges and undergrowth look quite white here until the PVA dries.
Here's the start of the steel road bridge.
More copper wire/clump foliage trees. They take quite a while to make, even with a hairdryer speeding up the setting of the PVA glue, but do look pretty good once done, and they are cheap in materials. The best way to speed up production is to make ten or more at a time, so some are drying while you add foliage to the rest. By the time you're adding the first bits of foliage to the last trees, the first trees are dry enough to add more until the tree is filled out enough to look right.
Yesterday, the road was given a final sand and the road colour sprayed on. Holes were drilled for the trees and they were epoxied into the layout, and then further clump foliage added around the base to hide the epoxy.
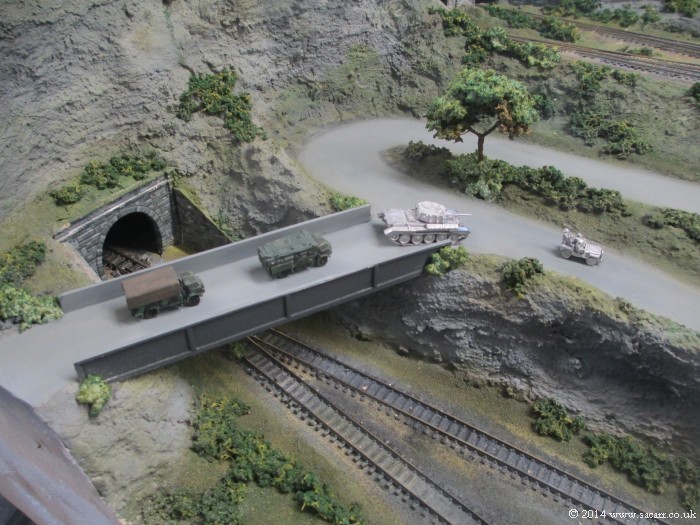
I also assembled this white metal tank kit. It was bought along with some of the first batches of vehicles some time ago, and I considered taking a mould to make more, but the intricate detail would have been a pain to cast, so decided against it in the end.
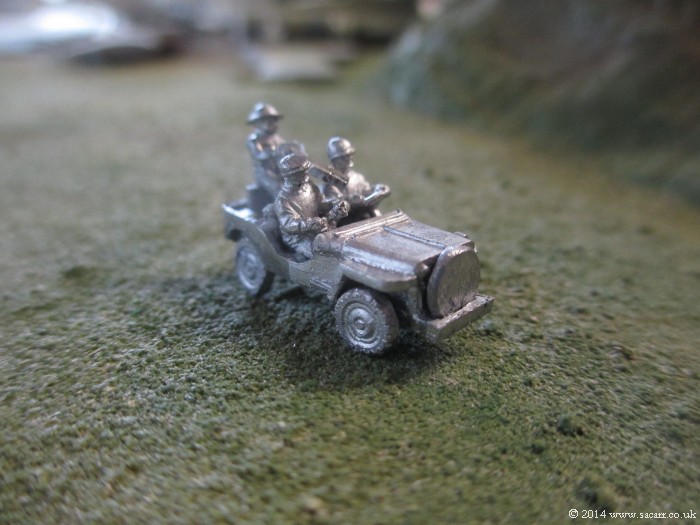
I also found an untouched Willys MB kit. This was modified a bit to resemble an SAS attack Jeep, with cut down bumpers, body handles and screen removed, the spare wheel in front of the grill and a gun mounted in the centre.
I think I'll add these vehicles in a small convoy crossing the road bridge.
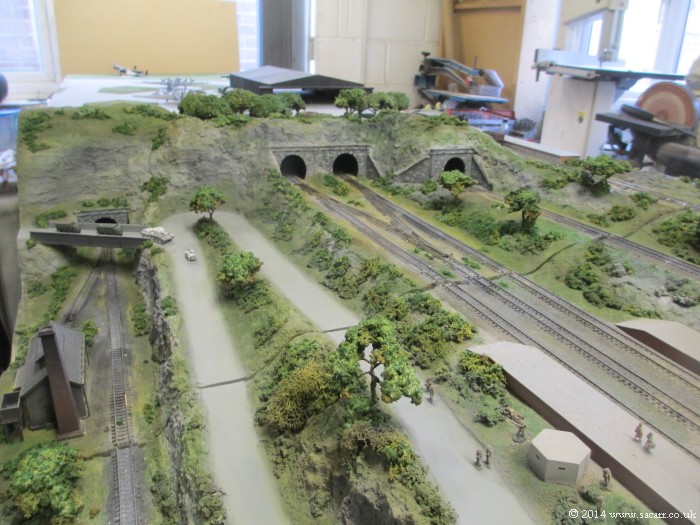
So by the end of yesterday, the join between the two sections was looking pretty good, with some colour blended across both sections. As seen in this picture, the boards are about 1/4 inch apart, so the join should fade pretty well once pulled together. I'll also probably add some additional foliage over the join once the layout is assembled at the owners house. This would easily pull away if the sections needed to be parted again.
Neat layout! I like that you've incorporated the military and trains into the layout
World War Two was a very interesting time for the British railway network. It put a huge strain on locos, rolling stock and the infrastructure, but it was also interesting in that many US locos were shipped here, plus thousands of flat and box cars. They were used on the UK network prior to the invasion and then were shipped to Europe as so much European rolling stock was destroyed by Allied air attacks. There's a Baldwin S160 loco in a local museum here, that was used in Leeds, in the North of England prior to the invasion. Everything was run down, pushed to the limit, temporary repairs and that makes things look more interesting on a model.
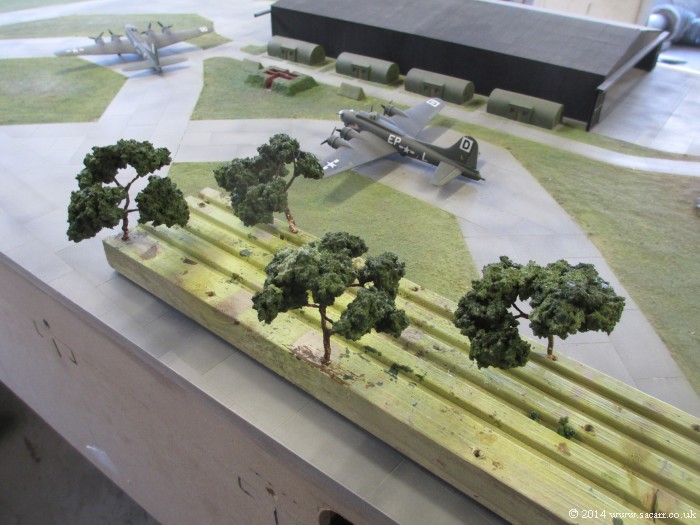
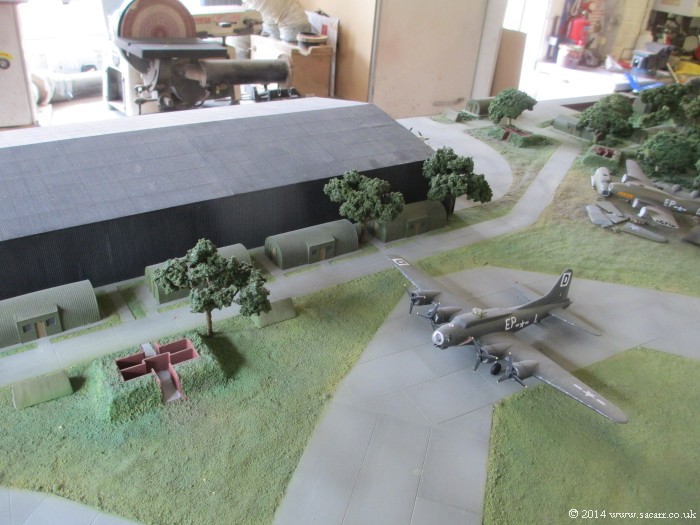
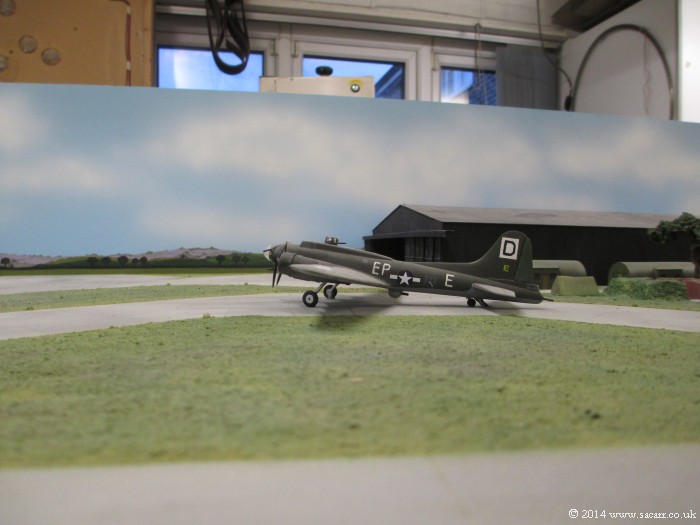
Time for more trees, this time for next to the hangar. It just felt like there was something missing here, so I added some trees aid camouflage the area further. As I've said before, natural camouflage was left in many place on many newly constructed airbases.
The white metal vehicles saw the start of their paint being applied at the end of June and then everything stopped for a while for a holiday. Before I went, I took a few photos around the section, some with rolling stock to bring the pictures to life a bit more.
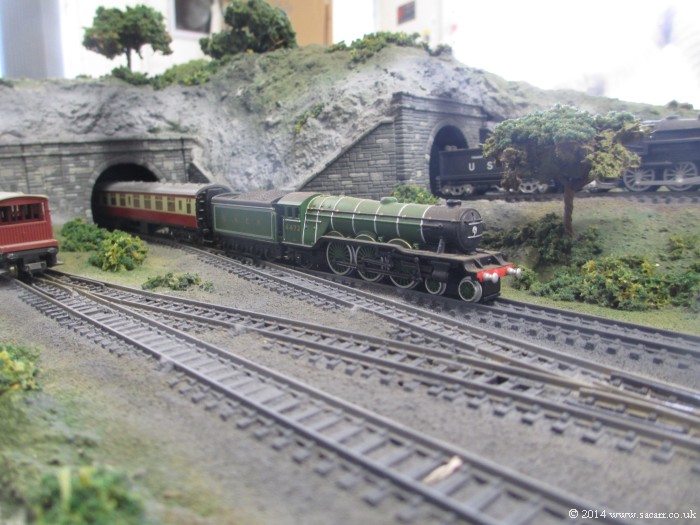
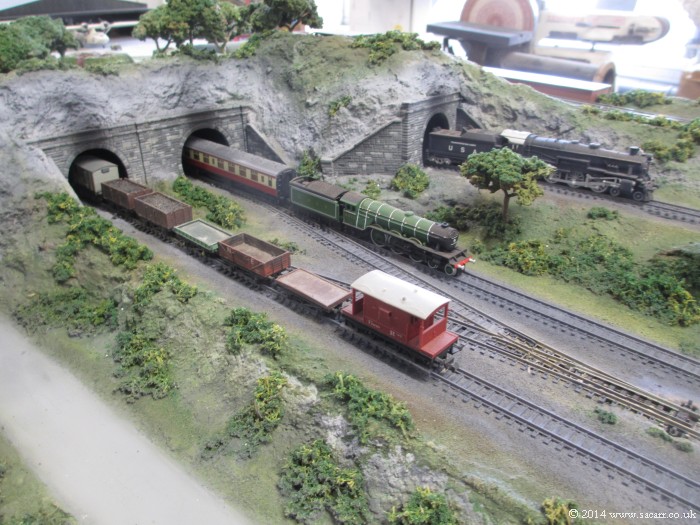
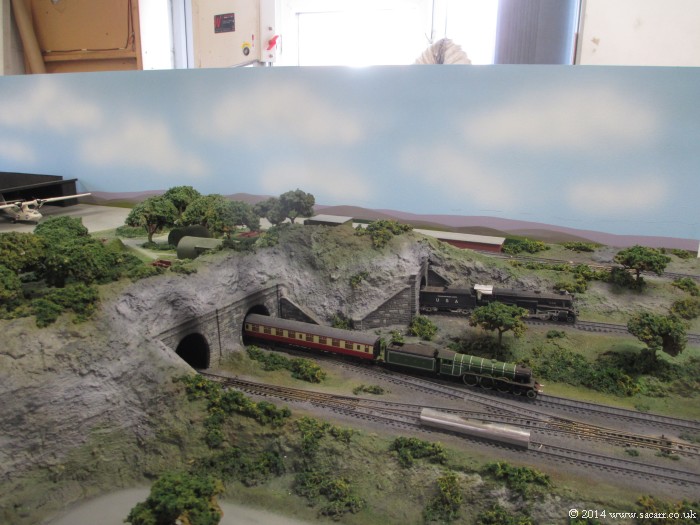
The two locos seen here are solid resin cast models, which will be used for dressing on the layout when complete. For now, they bring life and action to the images.
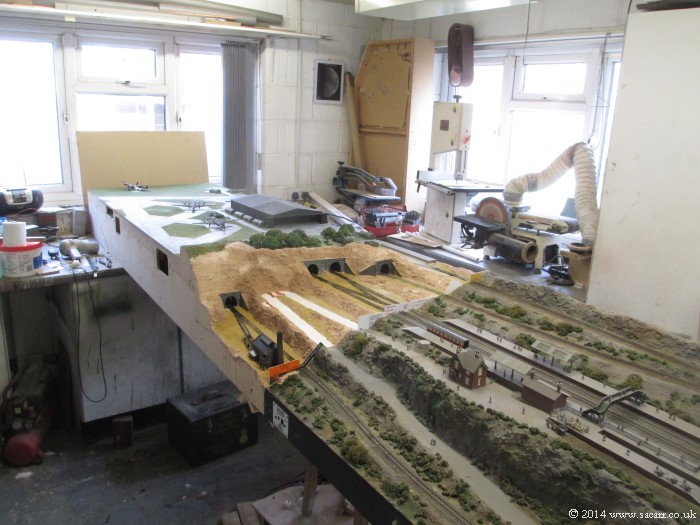
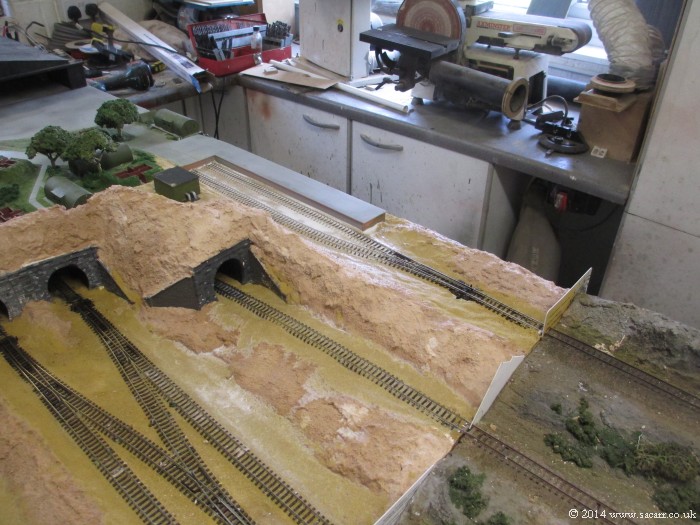
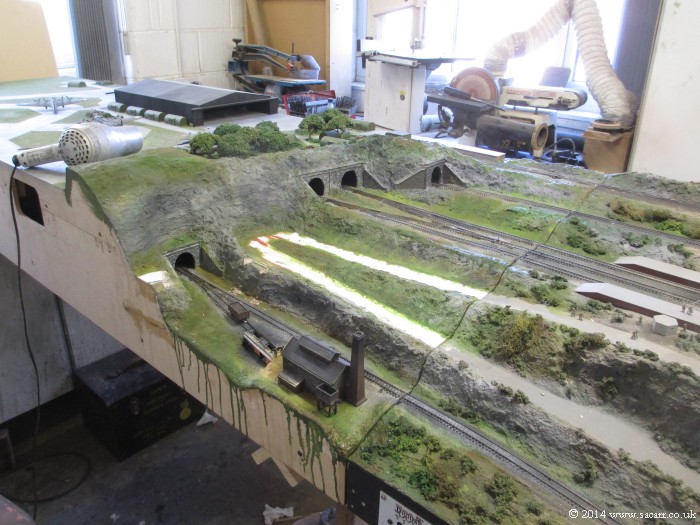
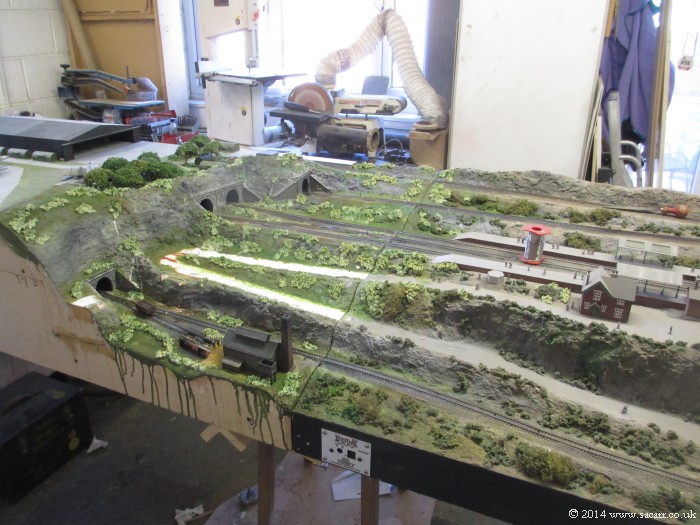
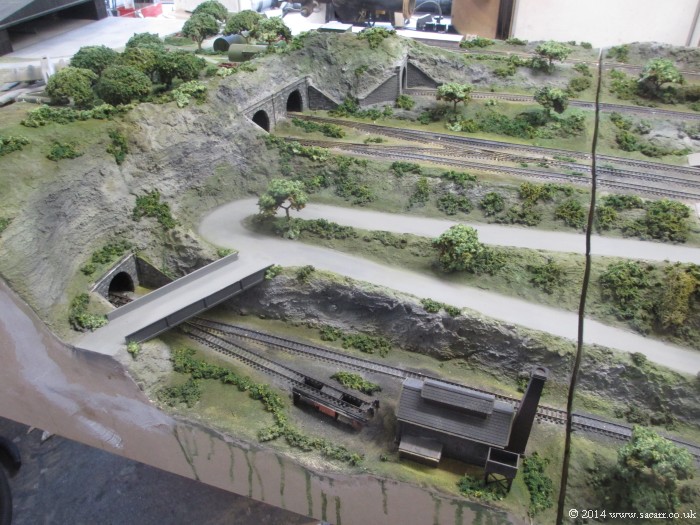
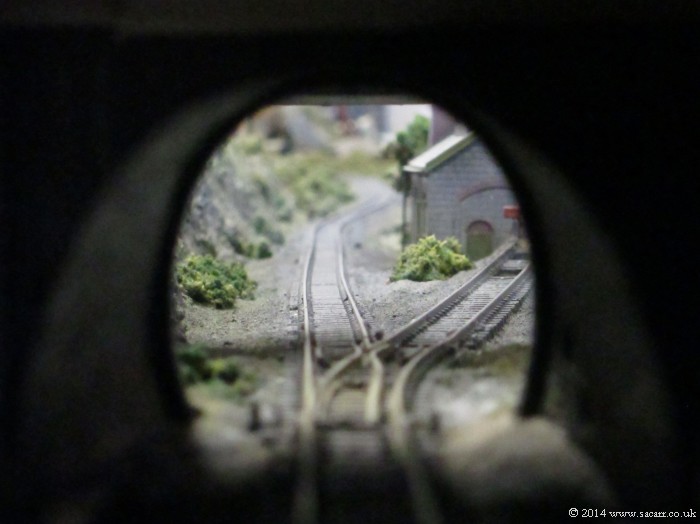
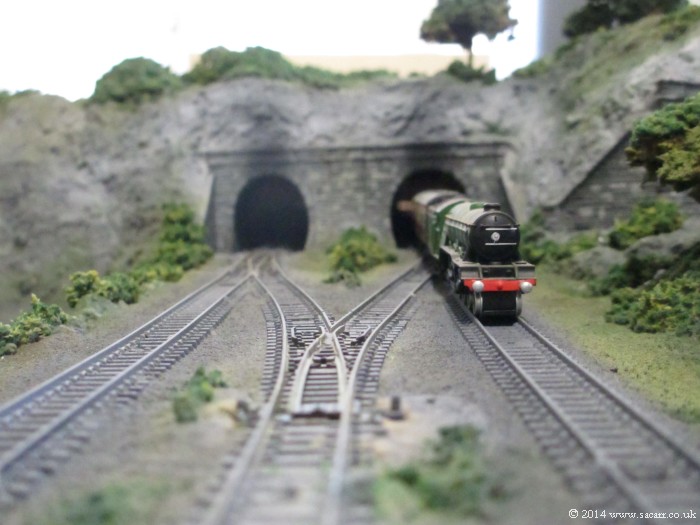
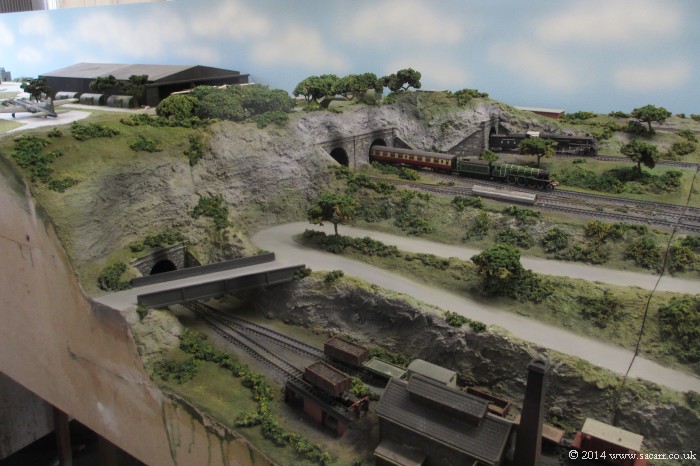
The last shot before I went away was a view down the main lines towards the tunnels.
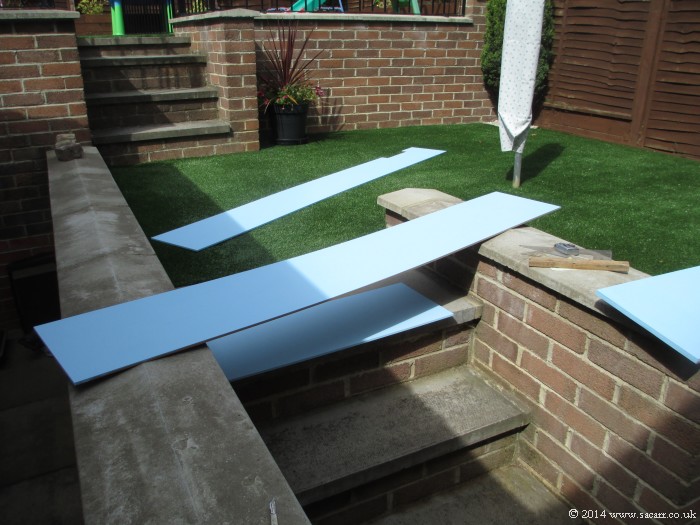
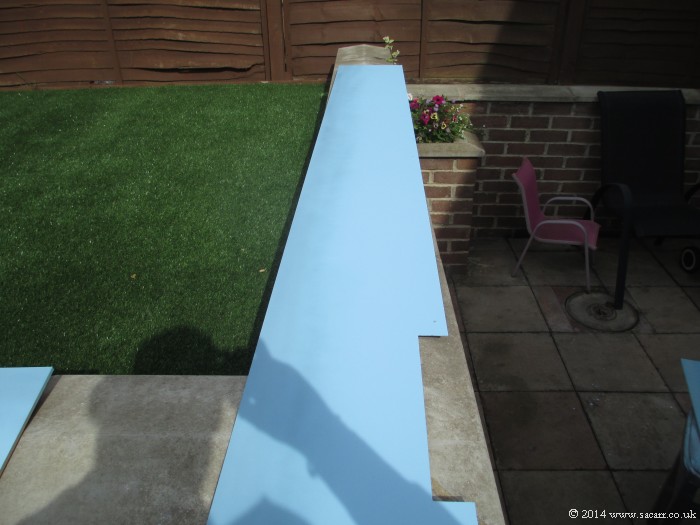
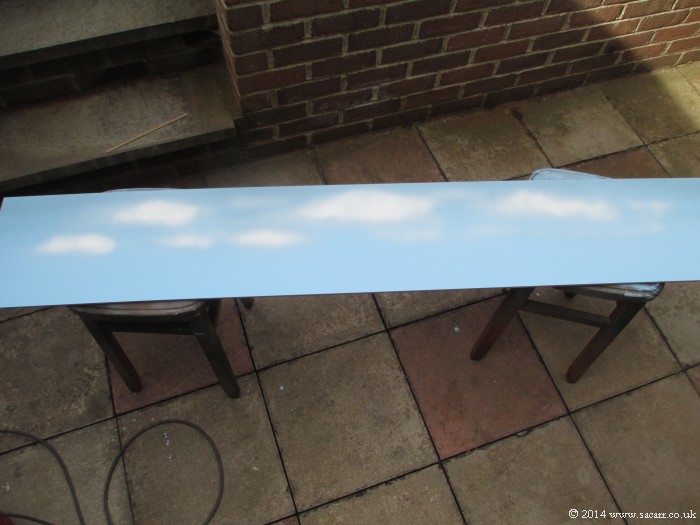
When I came back, it was time for backscenes. These are made from 6mm MDF, which was primed with two coats of thinned PVA woodworking glue, and then sanded. After that, I gave them three coats of household emulsion light blue paint, applied with a four inch glossing roller.
The backscenes were then screwed to the layout to mark out the board height and the height I wanted the painted scenery to rise to. Already, it transforms the look of the layout.
Back outside again, and the top three to four inches of the sky were sprayed slightly darker, as the sky always gets lighter towards the horizon due to more atmosphere to look through.
The airbrush was washed out and then filled with a creamy white for clouds. The emulsion was diluted quite a bit in order to allow it to flow through the 0.6mm nozzle on the airbrush, so it took several coats to build up the cloud density.
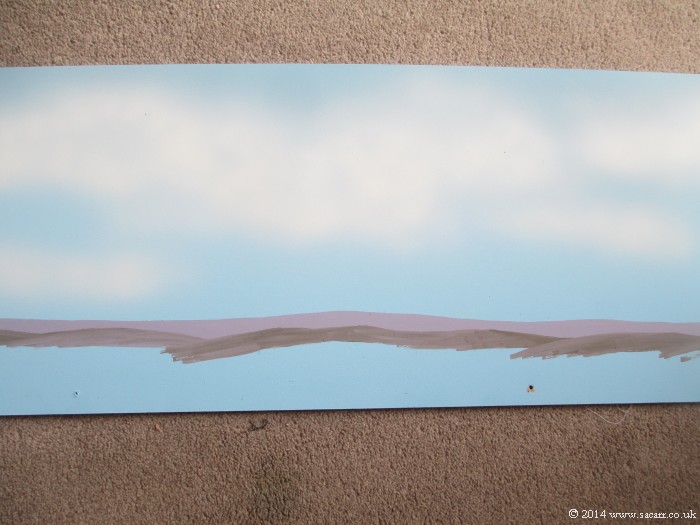
Once again, the addition of clouds transformed the look of the layout. The clouds were the most distant objects, so they were painted first. Next would come the distant hills, then middle distance then objects on the airfield boundary.
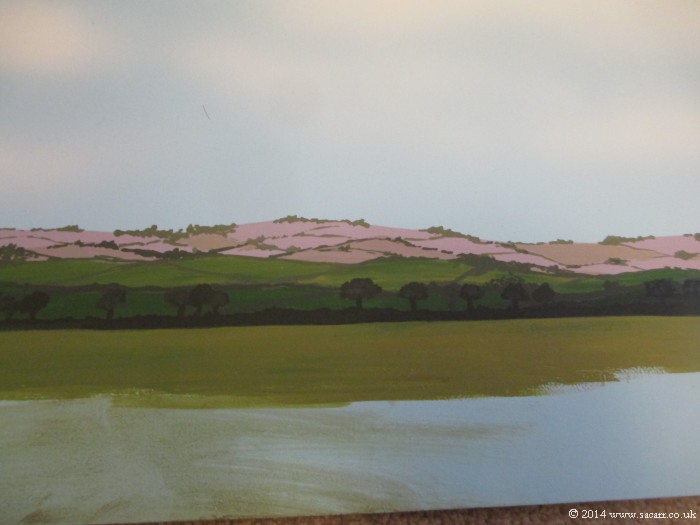
Using a colour photo of the English countryside as reference, I started with the distant hills, which were a purple/grey hue due to looking through several miles of atmosphere. The scene was then reattached to the railway, to check the height of the hills looked right against the rest of the foreground scene.
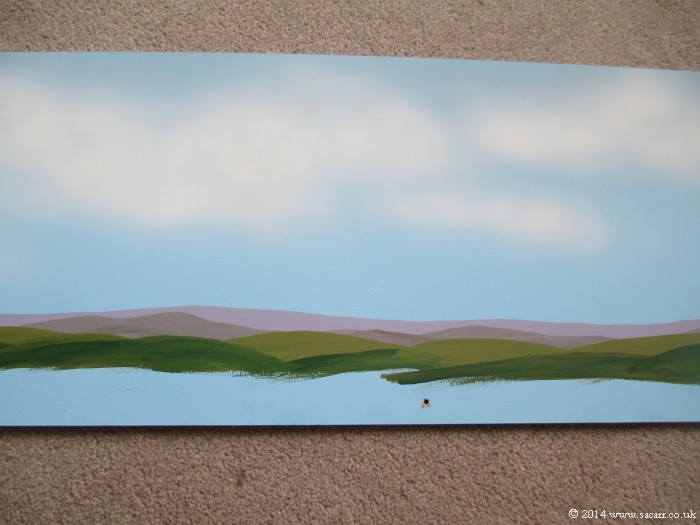
Middle distance hills came next, in varying shades of a medium green.
Once more, the scene was fastened to the railway to check how the backscene worked in relation to the foreground. Some areas were re-drawn and raised a little until they looked right.
Once I was happy with the heights, I began the hedgerows and trees to separate the fields. Using light shades in the distance, and darker as I worked towards the foreground.
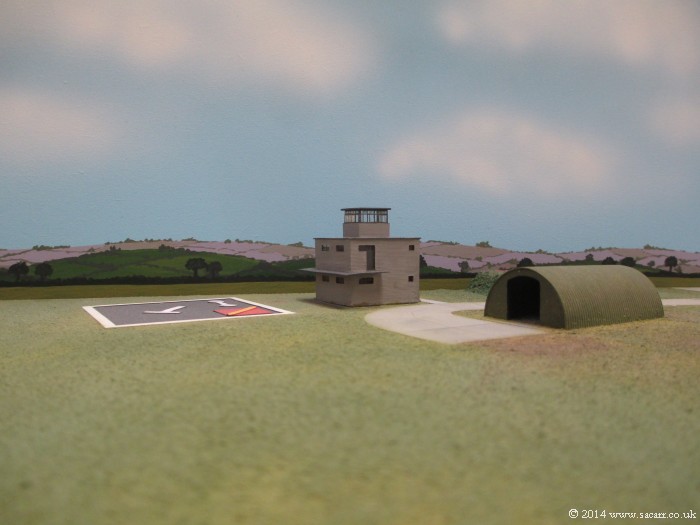
Behind the airfield platform, I painted some woodland up close. This would have some half depth trees fitted just in front of it, and possibly some texture added to the backscene itself.
I've never liked painting backscenes, but this was starting to feel really good.
Some of the distant fields would later be touched in with a few more shades, as it still didn't feel quite right.
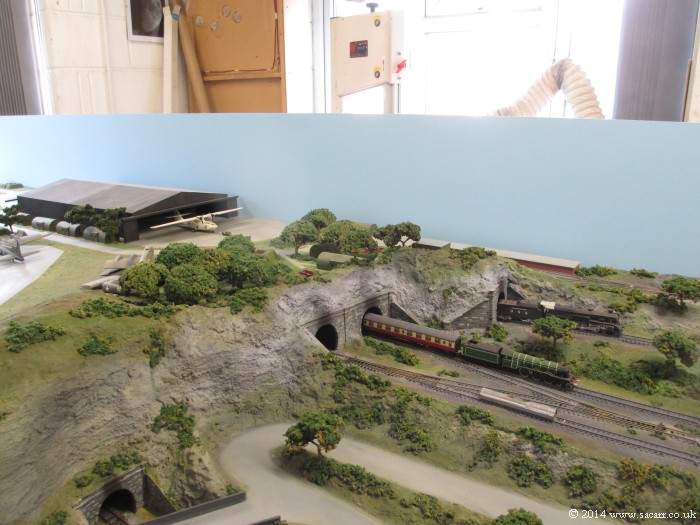
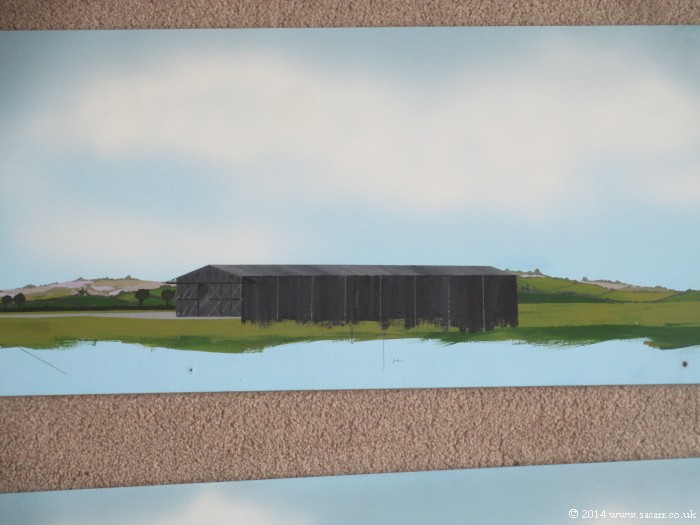
Behind the 3D hangar, I also painted a 2D version, along with some of the airfield perimeter track.
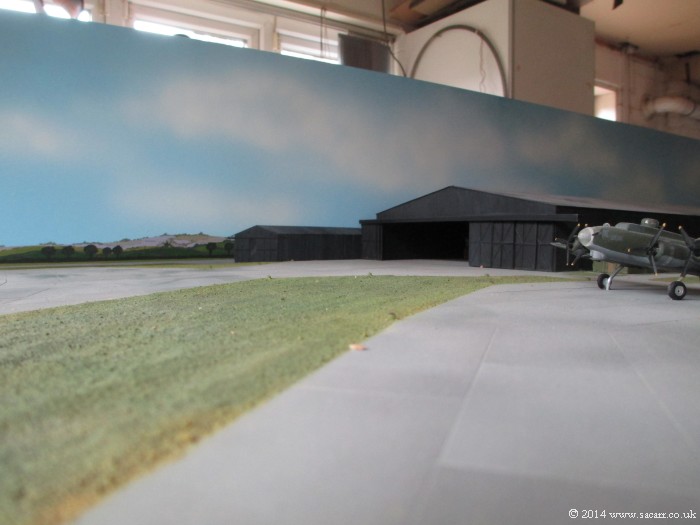
Here's the second hangar in place on the layout. I seemed to spend a lot of time fitting and removing the backscene to check how it looked, but I think it is a necessary step in producing a scene that works with the foreground.
When I was happy with the airfield scene, I joined the station scene along side to mark out the continuation of the hills. The painting followed the same process of distant features first, and lots of test fitting, adjusting etc. The boards were placed together for the painting of the hills that crossed the joint, and then separated for the rest, as each is eight feet long.
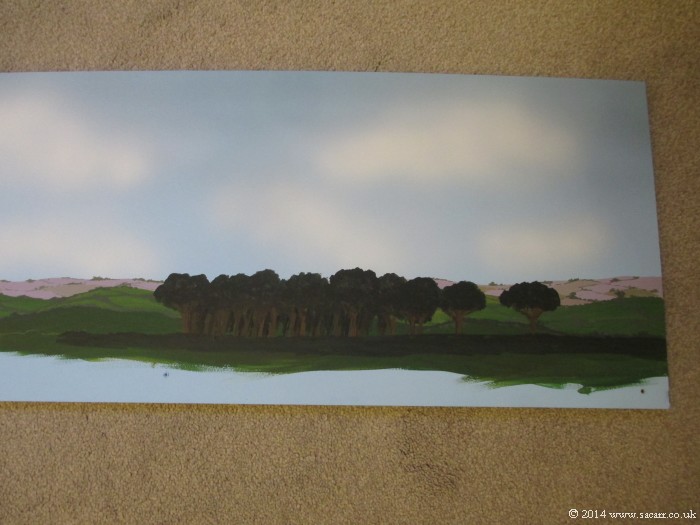
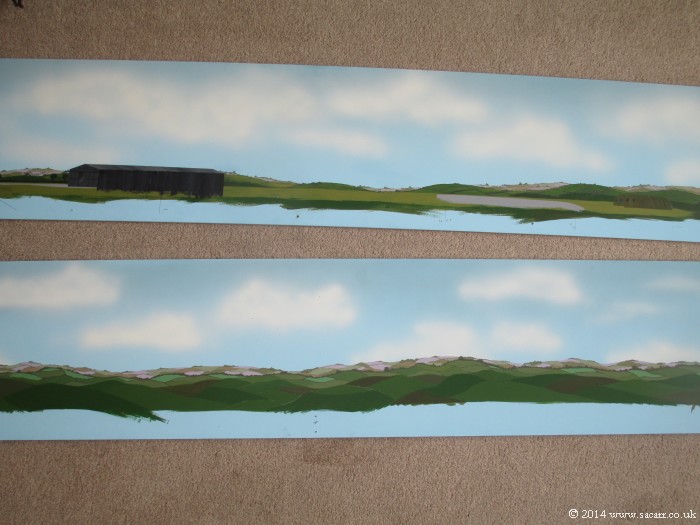
With the workshop full, my daughter's plastic painting mat was spread out in the lounge and the scenes painted there. The bottom scene here is still waiting for the hedgerows and trees to be added in the foreground.
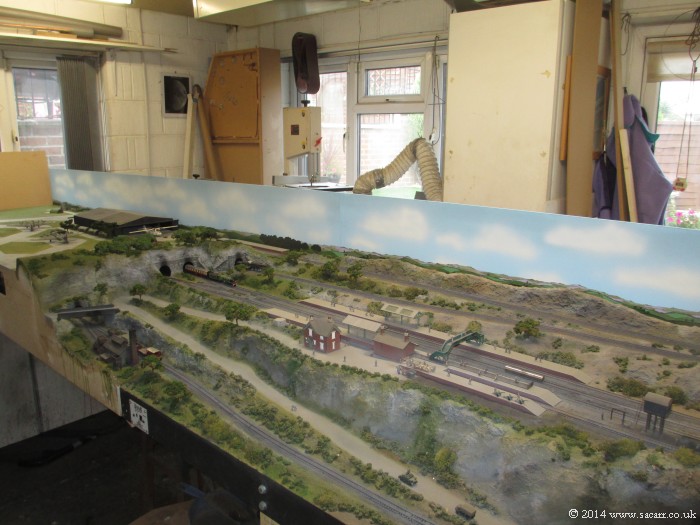
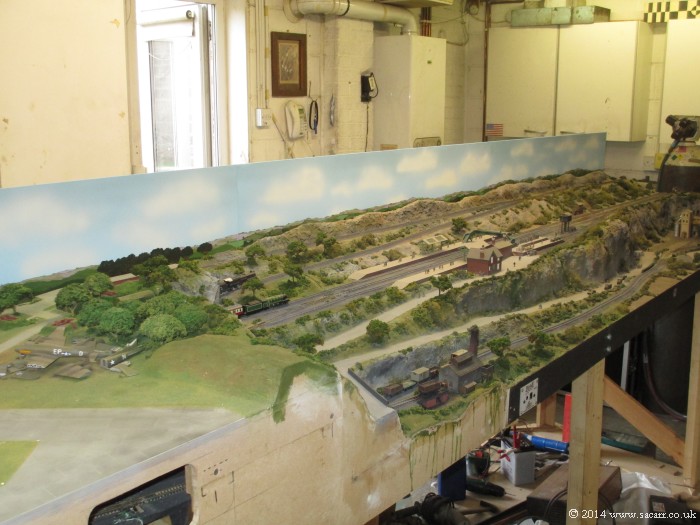
These last four pictures show the backscenes in place with the hills all painted. I've never considered myself to be particularly good with 2D art, but I'm very happy with the way these turned out. I did consider trying to paint some parked aircraft around the airfield boundary, but didn't want to mess up the scene if they all went wrong.

Affiliate Disclosure: We may receive a commision from some of the links and ads shown on this website
(Learn More Here)