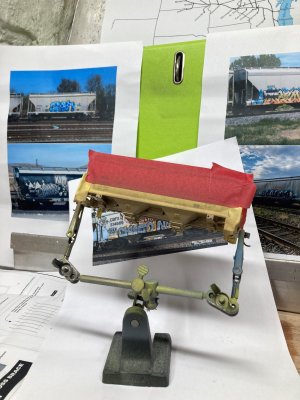
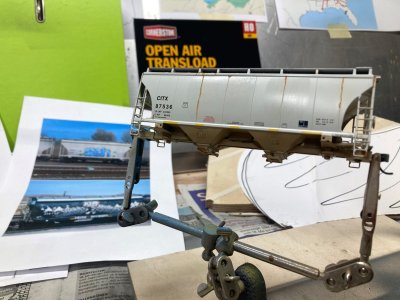
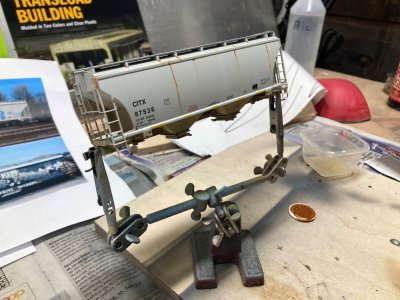
Weathering Rolling Stock, a Continous thread

ModelRailroadForums.com is a free Model Railroad Discussion Forum and photo gallery. We cover all scales and sizes of model railroads. Online since 2002, it's one of the oldest and largest model railroad forums on the web. Whether you're a master model railroader or just getting started, you'll find something of interest here.


Status
Not open for further replies.
Thank you. My air booth can handle almost any smell EXCEPT Testors Dull cote. I can wear a respirator instead of the Covid masks I use when spraying Arcylics

TomO

Maybe its a matter of sensitization for particular individuals, but I found the “aroma” of Tru-Color stronger than that of Dullcote.
 
Chris how do you like the Tru-color paints? I have never used them as they are solvent based and I have issues with the solvent smells. I have a client that is re-doing his locomotive roster and will supply the Tru-color paints he wants me to use. I’m not sure if I want to accept the commission.

I do like the Tru colour paints, it's the only ones I use when I need to do a complete repaint in a particular RR livery, those passenger cars I did are Tru colour, and a Conrail paint touch up, which I think is somewhere on this thread, but they do have a certain "aroma", similar to acetone I would say, but not as strong, but stronger than the Tamiya paints, (I literally have just done a "Sniff Test" 😁 ).

I think you and I discussed thinner use before - I’ve been gradually dialing down the amount of thinner I use, and been working more with dialing down the amount of paint I apply. I was getting to the point where the paint was so thinned, that it had a tendency run. Slowing down the application process wasn’t ideal, because the effect of applying another coat after drying was hard to discern.

As Tom, I think will agree, find something to use to check the paint flow, consistency and colour then adjust accordingly before you actually start to paint,

It played havoc with clogging my airbrush, however, and not just between sessions, but during sessions paint flow would stop, and a cleaning would be necessary.

True colour will do that, I find it also has a quick dry time, (I don't have a mini oven like Tom), if it was clogging then either you were releasing the lever but not keeping it depressed to allow air to clear the nozzle, If it was clogging while you were using it, likely your air pressure was too low, I turn mine up when I use Tru colour as it's slightly thicker than Vallejo paint.
 
Thanks Smudge615 and C&OMtnMan. I’ve used many cans of Testors DullCote over the years and after Covid (2021) all of a sudden I would get reactions to it. Coughing I could handle but the hives and stuff, nope not for me.

I just texted my commission and he understood my concerns but wants to use Tru-color. I may have lost a good client but my health is 1st priority.


I have had a few requests as to how I start my weathering processes. While I try to stay consistent with the process it’s not always 1-2-3 and away we go

This is a typical start up

1. Tag the box the car comes in with name and what is planned
on the car for James—weather, graffiti and tags. His full name
and address are on the other side of the box
IMG_5990.jpeg

2. Open, inspect and clean in warm soap and water
IMG_5537.jpeg

3. While drying I will bring out the items to be used, these go into a bin minus any thinners or brush cleaners
IMG_5993.jpeg

4. I always seem to start with the trucks and wheels sets. I take them off the car and put them in a cleaned yogurt container with the car info. These are a group of 3 Operator version from ST and the same owner so 1 container is fine. They are cleaned with 91% Isopropyl Alcohol scrupped with a toothbrush
IMG_5994.jpeg
IMG_5995.jpeg

IMG_5997.jpeg

5. While the truck frames and wheels are drying I will replace the couplers if asked. I don’t think a ScaleTrain diesel or freight car has ever gone out the door without me changing the couplers to a Kadee
IMG_5996.jpeg

6. A quick spray of VMS gloss varnish is added before decal graffiti is added
7. I add decal graffiti but not the tags as I will custom write them
8. After a few hours of drying I will spray Tamiya xf86 flat clear varnish on the car
9. I will the spray the fade color. Usually for me I use Tamiya but for these 3 cars I will use Vallejo Air 71.001 white thinned to 30%paint to 70% Vallejo airbrush thinner #71.161, 3 drops of paint 7 drops of thinner will do these 3 cars
IMG_5998.jpeg
10. After the fade has dried I will create a wash of mineral spirits and Abteilung502’s Burnt Umber and with a flat brush brush the sides and underside of the car.
11. I will spray the car again with Tamiya’s flat clear varnish
12. After the car drys I will take and dab the Abteilung502 into my pallet touch a brush to hinges and obvious spots rust may be
13. The top of the car and hatches will have AK rust and dark steel pigments. The hatches if replaced are usually fiberglass and I would touch them up with a wash of Vallejo USAF light Gray thinned with water
14. I will draw custom tags
15. If the client approves via pictures I will do a final spray coat of Tamiya flat clear

Steps 2 through 6 were done this morning as my plane is delayed till 6pm. Those steps for 3 cars took almost 1 hour and I don’t rush I just follow my procedures

 
Last edited:
hey @TLOC thnx again for this step by step, this helps me (personaly) a lot.

i started yesterday myself.
after the first try with thinning was not working that great, i gave it another try just with non thinned vallejo air color. those colors are nice i have to say.

i then tried my first rust wash color from AK. with a thin brush i added some rust stripes. first try was to thick so i try to wipe them away, what gave them a nice fade hahaha. next i will try to add a dark wash, then add graffiti and then another dark wash i guess.

003.jpg 002.jpg

001.jpg

iam learning step by step but its fun!
cheers
 
Vallejo Air I thin the few times I use it now for fading the car. That is the “for effect” that CambriaArea51 wrote about. Tom is very right that Vallejo Air is thin enough without thinner.

The CMO covered hoppers from Scaletrains have a grayish beige look to them. The 30% Vallejo white to 70% Vallejo thinner should give me the fade Coloring I want. We’ll see next week when I’m back at the bench.

Great streaks on that hopper Jay
 
Time to finish a project. 3 CMO covered hopper by Scaletrains sitting on the paper mill lead where security is fairly tight. They are waiting for the pulp hop to pick them up and deliver them to Paper Mill Yard. There I’m sure with less security they will at least get tagged

Actually the client now isn’t sure about the tagging but has definitely ruled out graffiti

IMG_6024.jpeg
IMG_6025.jpeg
 
Hi Tom -

I was anxious to get this billboard car done so dove in as a singular project. Changing out couplers was a real problem because of the way they assembled it, it was an ebay buy and the risk in buying was mine as they only had one photo posted.

For weathering this old timer, I did the dull coat followed by the white wash. I went over it with some india ink/alcohol/water and then some brown wash in a few spots. The trucks were the brown primer followed up with a little gray wash to get them a little dirty. I am pretty happy with this one, for being a somewhat low detail model with good lettering, fits my era perfectly:

weathering.JPG


Dave LASM
 
Hi Tom -

I was anxious to get this billboard car done so dove in as a singular project. Changing out couplers was a real problem because of the way they assembled it, it was an ebay buy and the risk in buying was mine as they only had one photo posted.

For weathering this old timer, I did the dull coat followed by the white wash. I went over it with some india ink/alcohol/water and then some brown wash in a few spots. The trucks were the brown primer followed up with a little gray wash to get them a little dirty. I am pretty happy with this one, for being a somewhat low detail model with good lettering, fits my era perfectly:

View attachment 191483

Dave LASM
It fits your era for sure. Subtle weathering, very nice


Hay Tom! Found a pix that might be interesting for ya. This is just out of Memphis. Cars are either headed to or from the refinery ( to right ). Interesting rust or chemical on the one.
IMGP0345.JPG


And if you just want to know where all those truck fuel tankers fill-r up, this is on the other side of the hiway:
IMGP0347.JPG


Later
 
Hay Tom! Found a pix that might be interesting for ya. This is just out of Memphis. Cars are either headed to or from the refinery ( to right ). Interesting rust or chemical on the one.
View attachment 191849

And if you just want to know where all those truck fuel tankers fill-r up, this is on the other side of the hiway:
View attachment 191850

Later
Thanks Todd. Interesting and very informative pictures.

I see white tanks cars very infrequently in So. Central Wisconsin as the closest tracks are like 5-7 miles and the WSOR mainly seems to come through Madison after dark. I have taken up train watching via YouTube. So thanks for the pictures showing those white tankers. I love the rusted one
 
Good morning advocates of weathering model trains! I haven’t forgotten to post it’s just I haven’t been really accomplishing anything to post a picture of
IMG_6165.jpeg
IMG_6164.jpeg


I did add safety stripes to the 🛣️2 new high cube 50’ boxcars with the intention of weathering them. Seems I got called out in a Facebook group that I inadvertently applied the stripes incorrectly. I needed to move them over 1 panel. So after applying them yesterday morning I removed them around noon and walked away.

I’m in no rush to accomplish anything. The next weathering commission unfinished is due in August. The 2 posted cars are for me, so definitely no rush. Any commissioned work that is due between next Monday and August are photographed, packaged up, labeled and will be invoiced the week before they are due to ship. I package them up so if I am gone the daughter or my assistant (not secretaries any longer) can ship them. Plus if anything happens to me the owners will get their equipment back finished or not. I tag everything when they come in

So, please post what you are weathering (if anything) or if you are on hiatus lets us know that too
 
Tom - been busy painting my little people and putting together the welding supply truck, however I did win (I love that word) a new box car on ebay and will get to that, maybe do a group of 4 or so, as soon as it arrives.

New box car.png

You read that right, this was $3.00 plus 7.00 shipping. Has KD's and fits my era. A little stretch to have this one in central MN but it will be on the layout all the same.

I desire to have some accomplishments for view Monday.

Dave LASM
 
Tom - been busy painting my little people and putting together the welding supply truck, however I did win (I love that word) a new box car on ebay and will get to that, maybe do a group of 4 or so, as soon as it arrives.

View attachment 192651
You read that right, this was $3.00 plus 7.00 shipping. Has KD's and fits my era. A little stretch to have this one in central MN but it will be on the layout all the same.

I desire to have some accomplishments for view Monday.

Dave LASM
Looking forward to seeing what you do with the EBay “win”
 
The humidity is high outside and the back deck was too sunny after 11 and the front porch didn’t have enough breeze. So go to the bench! I should have stayed outside!!!

I decided to change up my paint mix for wheels and trucks. I went black mixed with hull red at 50/50%.
71.057 vallejo air black
71.039 Vallejo air hull red

Looks pretty black, so brushed on straight hull red!

IMG_6176.jpeg
IMG_6177.jpeg
Definitely no reddish rust I normally see on trucks and wheels. So I will let these dry about 4 more hours and after the grandson’s hockey game I will hit these up with Vallejo Model Color’s burnt umber #70.941 hoping something shows up. I can always brush the normally used Vallejo Air burnt umber #70.040 if I don’t like it!

Have to play with mixes and colors for something different. It just doesn’t always work out!

I did the safety stripes on the 2 cars
IMG_6173.jpeg


and followed that up with Tamiya white #xf2 thinned with Isopropyl Alcohol at maybe 20% white, 5% flat earth #xf52 and 75% IPA mix
IMG_6178.jpeg
Compared to the older Michigan Interstate car on the tracks the car I just sprayed ( on the yogurt cup) is the fade I wanted! Success, feels good!
IMG_6179.jpeg
 
Last edited:
A little stretch to have this one in central MN but it will be on the layout all the same.

Not at all. Boxcars got transferred everywhere. I’m modeling the C&O railroad (steam era) in West Virginia, and I have Union Pacific and Bangor & Arostook boxcars weathered for it. Why? Because 1950s photos in the C&O Historical Society archives show cars from those roads there.

Coal hoppers, on the other hand, tended to stay much more on home rails.
 
Last edited:
…

So, please post what you are weathering (if anything) or if you are on hiatus lets us know that too

I’ve been in a period of acquisition since weathering my CSX locomotives. For future weathering, I have acquired:

2 C&O ARA (1930s era) 40-ft steel box cars, BLI
2 B&O 1950 50-ft steel box cars, Atlas
1 C&O 1890s-1905 wood box car, Athearn
1 40-ft wood reefer, billboard style, Borden milk, Atlas
2 C&O 70-ton hoppers, 1954-ish, 3-bay, BLI
4 C&O 70-ton hoppers, 1940s, 4-bay, BLI
 
I’ve been in a period of acquisition since weathering my CSX locomotives. For future weathering, I have acquired:

2 C&O ARA (1930s era) 40-ft steel box cars, BLI
2 B&O 1950 50-ft steel box cars, Atlas
1 C&O 1890s-1905 wood box car, Athearn
1 40-ft wood reefer, billboard style, Borden milk, Atlas
2 C&O 70-ton hoppers, 1954-ish, 3-bay, BLI
4 C&O 70-ton hoppers, 1940s, 4-bay, BLI
Nice, like to see how you weather these.


Status
Not open for further replies.


Affiliate Disclosure: We may receive a commision from some of the links and ads shown on this website (Learn More Here)

Back
Top