ModelRailroadForums.com is a free Model Railroad Discussion Forum and photo gallery. We cover all scales and sizes of model railroads. Online since 2002, it's one of the oldest and largest model railroad forums on the web. Whether you're a master model railroader or just getting started, you'll find something of interest here.
While this may not be a big deal for most of you, it definitely is for me. This afternoon I began to put in the wiring for the track.
It has been a slow start; having only completed about 1/3 the entire distance with the Ground Bus Wire, but it is a start. So far it hasn't been too bad to do; although, the easy part is done. From where I finished for today onwards is not going to be all that easy, access wise and that has been apart of my procrastination in doing this.
To explain - When I built the bench work I thought I was being smart by utilizing my ex computer desk. At the time, that seemed to be a good idea. Now, I am confronted with how to run the wiring between the bottom of the bench work and the top of my desk. Running the wire shouldn't be that bad; however, trying to get in to connect the feeders is going to be almost impossible, even though there are only 3 sets (perhaps 4) that are interfered with.
Anyway, here are a few shots of what I have accomplished thus far:
Wiring from the DCS 100 to beneath the benchwork:
Beneath the DCS 100 platform:
Wiring route:
That's it for now, tomorrow I will resume and see what happens.
Have started putting in some vegetation, tree's etc on the Lakeside of the layout. Have also made a small pedestrian crossing at the very end of the tracks for people to cross from the car park into the lake area proper. That is yet to be weathered etc, but is in place for effect.
The little crossing was made from 6" X 6" lumber for the supports and 2" X 10" lumber for the planking. The supports were then sanded down to rail level and the outsides sanded to accommodate the front wheels of an engine. Only other thing done was to sand the "front" portion of the crossing to an angle so the "arm thingy" from the coupler didn't jam against it.
Not too much and not too exciting, but it is progress.
Have also continued with the "wiring" and fighting with my desk, jig saw and drill to cut access points so I can attach the feeders to the Main Bus Wires. I have another two access holes to cut with a further 8' or 9' of wiring to run.
For the past couple of days, I have been doing more to the scenery of the layout and bringing the left side together with right side. Last night, due to having no power, I continued working on the scenery (under a Camping Light) and placing some of my buildings.
Here are a few shots of what I anticipate will be the final resting place of the buildings and the base ground cover:
Looks good. Looks like you've moved some of the structures you originally were planning on using in the town on the left end of your layout, and have moved them closer to the middle section of the layout. That should give you a little more flexibility when you start laying out the town with the remaining structures.
I noticed that in the first few pictures, there is a house that looks like it is on a hill, but it's not. And then in later pictures, the lattice is removed from under the porch so it is harder to see the angle, but the front step still seems to be leaning. My father would say that is his house - about 150 years old and leaning in every direction but the one they built it on!
I don't mean to criticize, rather just for the chuckle! Looks good nonetheless!
I noticed that in the first few pictures, there is a house that looks like it is on a hill, but it's not. And then in later pictures, the lattice is removed from under the porch so it is harder to see the angle, but the front step still seems to be leaning. My father would say that is his house - about 150 years old and leaning in every direction but the one they built it on!
I don't mean to criticize, rather just for the chuckle! Looks good nonetheless!
That was actually a "Haunted House" kit that Model Power made a few years back. The kit was purposely designed to look like it was leaning over as an abandoned house. Since the walls on the rest of the structure appear to be sound over all, I would agree that it would look better if it were level, built into a sloping lot.
The CSX Caboose was a "I need a caboose, any caboose" purchase and am glad I did buy that particular one. The Gas Station is a Built up (obviously) and I am yet to place all of the "extra's" that came with it. It should look good when finished and properly embedded into the layout.
Looks good. Looks like you've moved some of the structures you originally were planning on using in the town on the left end of your layout, and have moved them closer to the middle section of the layout. That should give you a little more flexibility when you start laying out the town with the remaining structures.
I have been in a quandary over the town area and what to put in it. I didn't want it to be "over populated" but "busy enough" to give the feel of a small American (possibly now Welsh) township. I will explain the "possibly now Welsh" thing later on as I move forward with the town planning. I can tell you one thing though, the town layout will NOT look anything like it did at the beginning
I noticed that in the first few pictures, there is a house that looks like it is on a hill, but it's not. And then in later pictures, the lattice is removed from under the porch so it is harder to see the angle, but the front step still seems to be leaning. My father would say that is his house - about 150 years old and leaning in every direction but the one they built it on!
I don't mean to criticize, rather just for the chuckle! Looks good nonetheless!
Jim is correct, it was a Haunted House that was on a lean. As the central portion of the layout is on fairly flat ground, the only way I could get it to sit properly was to cut of the lattice and level the bottom up as much as I could. Now, instead of being a Haunted House, it is just an abandoned one.
By the way, I didn't view your comment as being critical either.
Okay, thanks for continuing to follow this build guys, it is appreciated and means a lot to me.
When I placed the Station and the Gas Station on the layout, it was obvious that wasn't going to work in terms of the lay of the land. Something had to go UP, or something had to come DOWN! Nothing was coming down, so the land needed to go up to facilitate a Station car park and the right hand side loading dock.
This is what has been done so far:
General Overview:
All of the land has been "raised" so it is more or less level with the bottom of the Station and the bottom of the Roadbed .
If you look toward the left side of the picture you can see where the new plaster finishes. That is where the road from the Station will meet the main road for the town - I hope.
Left side of area:
Center section:
Right side:
You'll notice that the raised area runs back toward the track leaving a nice flat, solid, ground base for the houses.
I need to shape the retaining wall a little so it fits in better with the fall of the land. That will be done later this evening once the plaster has dried sufficiently so as not to be disturbed.
Those observant people will also notice that I have removed the raised platform and Station section. Leaving that in place was going to make it far too difficult to create a smooth transition from the main roads to the Station area. While it is not all that "realistic" I did add a narrow extension platform for effect and nothing else.
Last night I continued working on the scenery, mainly in the vicinity of the Station and the Gas Station. While it may not look as though a lot has been done, believe me, there has been leaps and bounds made in laying the ground work for the town and its character.
The main car park for the Station, well only car park, has been completed barring the ground cover. The road leading up to the Station has been put in place as well as the foundation for the main road from the Lake to the Township proper.
Where the road will exactly go, or how it will go, is still up in the air; however, if I can get the image I have in mind onto the layout, I think it will create some interest.
This layout has never been a period or area specific from the word go and as I have progressed with it I have made many changes as to its locality and character. Many years ago, I lived in Wales and spent a bit of time in a small village on the west coast called Fishgaurd. Fishgaurd is primarily a sea side fishing village and home to the Ferry's that cross the Irish Sea. The structure of Fishgaurd has always been in the back of mind and is what I am going to be basing my town upon. For anyone curious, Google Fishgaurd and you might get a glimpse of how Tootsville may appear
Just a couple more shots of the work done to the Gas Station and Station area.
Am starting to shape the main road into town but have put the first layer of ground cover down for the Station car park and access road. The surface is Woodlands Gravel that has to be "weathered" as yet. Next phase for this area is to put in the fencing around the car park and on the small platform extension as well as putting in some exterior lighting, at some point.
The Gas Station "may" get a fence around it, I don't yet and am in two minds if fencing it in may look too much.
The bottom front of the top down picture shows (I think) the road intersection opposite the Gas Station. That's about as far as I thought about the outer loop road.
Also not sure what to do with the space to the left of the Gas Station, if anything - decisions, decisions.
lasm,
Still haven't cleaned the layout off but will tomorrow so I can get some half decent shots of it in its entirety. The following shots will at least show you (remind you) where everything is situated though.
As you can see, it is a bloody mess. Makes me wonder how I manage to get anything done really.
Hey Tony what about putting a fenced in yard in the empty space for a tow truck to put cars for the gas station? It use to be common for small gas stations to have tow trucks. I worked at one when I was young.
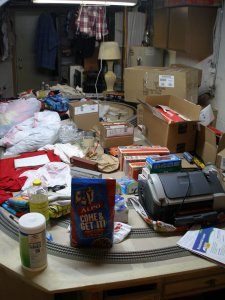
Ff you think you have a mess I have a picture to show you! This is what a layout should NOT look like!!!
Thanks for the idea and that could happen now ... I just ripped that entire section holding the Gas Station out back to the bench work. I don't know what happened, but almost 48 hours later and the damn hydrocal was still wet, soft and unsandable. Should have known better than to use it instead of the good old tried and true plaster of paris.
From the picture, looks as though you have a "Yard Sale" ... that package, Come and Get It. Got to be honest, I don't feel so bad about mine now.
General Comment,
Before anyone say's anything, YES it was mixed correctly per the "instructions", no nothing was spilt on it and yes the weather here has been in the 80's plus since I put it down
Resqnu,
This is the fun part - laying track and all is good, but boring, the scenery is fun and interesting and best of all, you get to a huge mess!
As for a DCC System - that's a no brainer in my opinion - NCE anything.
I did not want you to think you were the only one with a mess and I had to top yours!
Can you believe that mess has accumulated since the end of July when I put away my Bicentennial trains? I'll be back to running trains soon now because my boys are in school and I have more free time now, I have already made progress. I guarantee the BGR will be rolling by Halloween, sooner I hope but I don't like to make promises I may not be able to keep.
Believe it or not there is a train in there, I could have a where's Waldo kind of thing going!
Sorry to hear about your... stuff (I don't even know it is) but I know taking it up is not good.
This is a trial and error hobby, live and learn. I know you won't make any mistakes twice.
Looks like I'm going to have find a few more bits and pieces to add to the layout - not scenery, track or trains, just MESS!
Pulling things up is a pain but, as you said, some of it is trial and error and digging out the hydrocal wasn't a big deal, it was still wet so it came up easy and clean, not to mention that it now gives me the chance to review how things will fit in there. So I guess it isn't all doom and gloom