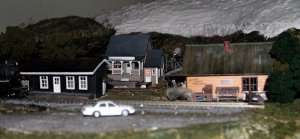
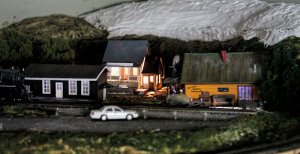
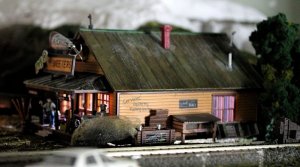
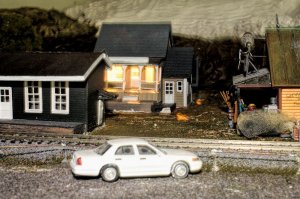
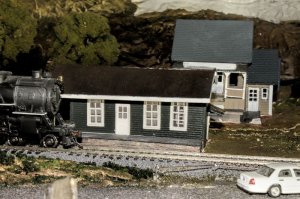
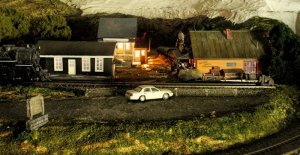
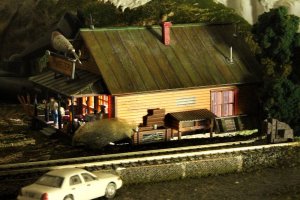
The wife's HO Atlas layout...

ModelRailroadForums.com is a free Model Railroad Discussion Forum and photo gallery. We cover all scales and sizes of model railroads. Online since 2002, it's one of the oldest and largest model railroad forums on the web. Whether you're a master model railroader or just getting started, you'll find something of interest here.


If you put a yellow light bulb in that fixture, you could have a good sunrise/sunset scene! I think the store looks great! All the clutter on the porch and around the side looks great but the guy leaning on the post really pulls together that scene.

I would put more trees on the hill, maybe with the tree line at the base of the hill. Some picnic tables in the area so people can enjoy the lake view from Lakeview!

Please don't take my comment as criticism! I really do like what it looks like! If it is left the way it is, it would be just as good in my opinion!
 
There is a prototype for everything if you look hard enough, just keep looking!

I probably have prototypes all over the layout but haven't realised it as I wasn't consciously intending to do any prototypical stuff. That being said though some things, such as the Depot, were based on a real stations, signs and so forth.

Actually it was simpler than that, just the car seemed to be driving on the left :p

I didn't see that myself. I just dropped the car on the layout and took pictures not really paying any attention to where on the road it was. Now I take a closer look, it does seem to be on the left - kind of emulates where I drive :)

If you put a yellow light bulb in that fixture, you could have a good sunrise/sunset scene! I think the store looks great! All the clutter on the porch and around the side looks great but the guy leaning on the post really pulls together that scene.

I would put more trees on the hill, maybe with the tree line at the base of the hill. Some picnic tables in the area so people can enjoy the lake view from Lakeview!

Please don't take my comment as criticism! I really do like what it looks like! If it is left the way it is, it would be just as good in my opinion!

No criticism seen in your comments what so ever bklynman01. I accept all comments and suggestions as just that. I had absolutely nothing to do with the store that you are talking about, that is a built up Woodlands structure that came the way it sits on the layout.

The hill hasn't been touched as yet, due to it needing more work and, to b honest, even at this late stage I haven't settled on how it should look or what might/should go up there. As such, it will be tree covered when finished, just not sure if there will be anything else up there as well :)

The area to the left of the general store will end up being a "picnic spot" as you suggested. I will possibly fence that section of with more grass and a few plants (maybe) than weeds and forest ground cover. Naturally, you can't have a picnic area without picnic tables and either a "fire pit" or BBQ near by. Decisions decisions!


General Store completed

Morning All,

Couldn't sleep again last night so I finished the renovations to the General Store.

Not too more was done other than a bit of touch up painting to emphasis the worn and weathered look and to "fix" the awful plastic roof on the veranda.

The paint work is "rough", but is suppose to be that way to give the impression of age, wear and a little bit of neglect over the years. Not too much is pristine in the neck of the woods :)

Initially I set about fitting commercial shingles, but found trying to cut them to fit around the "sign board" was too hard. Soooo, I cut my own shingles and stuck them on followed by a coat of Micro Mark grey weathering.

Lastly, I added a second light to the annex and located the wiring then glued it all together on the base board. While there are the signs to be added, the main re work is finished. Don't know if you want to call this the "Grand Opening" or not, BUT there is a week long "Sale" going on in it............

IMG_0485_zps127e12f7.jpg


IMG_0484_zps57ea73e8.jpg


IMG_0483_zpsa581b35f.jpg


Unfortunately, the photo's make the thing look reddish, which it isn't but hopefully they will give you the basic idea.
 
Last edited by a moderator:
All it really needs is a couple a Utes a barby on the go, few empty tinnies floatin' around, the shiela's flappin' their gums about god knows what and few blokes swingin' willow some where. Come to think about it ... just got an idea for the area next to where the general store is goin' :)
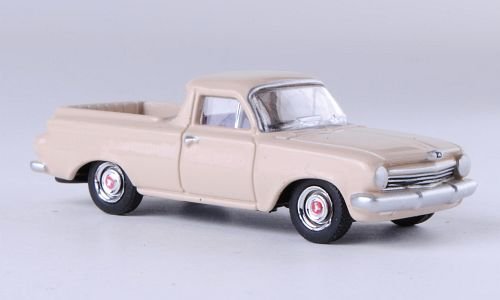
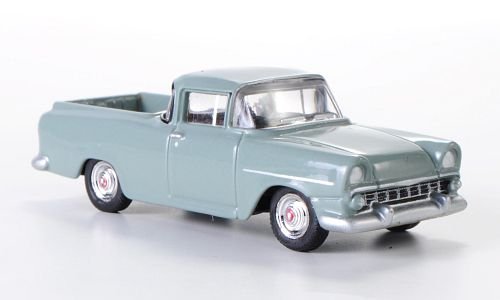
Needs a couple of Utes you say? Road Ragers makes a couple of 1/87 scale Utes, a 63 Holden Ute and a 1961 Holden Ute.

http://www.amazon.com/Holden-Utilit...=1407854558&sr=8-10&keywords=road+ragers+1/87

http://www.amazon.com/Holden-Utilit...=1407854558&sr=8-11&keywords=road+ragers+1/87


http://www.amazon.com/s/ref=nb_sb_noss?url=search-alias=aps&field-keywords=road ragers 1/87

http://cooeeclassics.com/catalog/index.php?cPath=32&osCsid=0dda40069d0b4e95fa3e73f5e41c9b1a


311uiQK2pTL.jpg


411EUwbx7eL.jpg


OH, and that General Store looks great. Nice work.
 
Last edited by a moderator:
Jim,

Thanks for the links, they do look first class! Only turn off is the price, not to mention the shipping cost. Not really looking for a Ute as such, but would have bought these had it not been for the price and needing other things that would take priority. By the same token, I will keep an eye on the site and when money permits, might just buy a couple for the layout.
 
Jim,

Thanks for the links, they do look first class! Only turn off is the price, not to mention the shipping cost. Not really looking for a Ute as such, but would have bought these had it not been for the price and needing other things that would take priority. By the same token, I will keep an eye on the site and when money permits, might just buy a couple for the layout.

Truckstop Models has some of the Aussie Road Ragers cars in stock, but not the Utes. Since Truckstop Models is in the US, shipping will be cheaper and the prices are a bit lower. You might want to check their site on occasion to see if they restock their inventory and bring in the Utes.
https://truckstopmodels.com/oscom/index.php?manufacturers_id=119
 
I've just been doing a search for a 1/87 model of the most iconic of all Aussie vehicles for you to add to that scene, but as far as I can find, no-one (can't believe it) has done it. I'm speaking of course of the van that put the rock & roll into commercial vehicles. The Holden Kingswood panel van, "Sandman". How could they not do that one.

Biante Models have 3 1/18th out or coming this year, limited editions.
 
Truckstop Models has some of the Aussie Road Ragers cars in stock, but not the Utes. Since Truckstop Models is in the US, shipping will be cheaper and the prices are a bit lower. You might want to check their site on occasion to see if they restock their inventory and bring in the Utes.
https://truckstopmodels.com/oscom/index.php?manufacturers_id=119

I'll definitely be keeping an eye out.

I've just been doing a search for a 1/87 model of the most iconic of all Aussie vehicles for you to add to that scene, but as far as I can find, no-one (can't believe it) has done it. I'm speaking of course of the van that put the rock & roll into commercial vehicles. The Holden Kingswood panel van, "Sandman". How could they not do that one.

Biante Models have 3 1/18th out or coming this year, limited editions.

The Sandman is legendary, it put the Beach in Beach Party, the Cruise in Cruising, the Rock in Rock and Roll and (without question) defined the "if this vans a rockin' - don't come a knockin" culture :)
 
Some advances...

Continuing to work on the "Lakeside" of the layout and have gotten 80% of completed. All three structures are in place with lighting and the ground cover and foliage is underway. I do have a couple of smaller buildings to be made and placed and they will be done in due course.

I have also done a little work on the far right front corner of the layout. Initially I didn't know what to do there due to the curtain; however have now begun filling the "void" with plaster to build it up to form a small embankment. I also looked at having a point of interest in that area so have put in a "smallish" now unused culvert that allowed water to flow from the lake. That underground stream was blocked in in the early 1990's for the sake of preserving the recreational focus of the lake.

An over view of the Lake end of the layout:

Lakesideprogress_zps04ba67ba.jpg


The culvert with the entrance blocked:

Culvert_zps9d5e5709.jpg


The culvert was made from lengths of scale 6" X 6" and the culvert sides were made using a stone Mold from Linka Molds which were cut to fit. Perhaps not the most exciting little piece of the layout, but perhaps something to draw peoples attention to that end of it.

PS: Excuse the pictures, I am still trying to come to terms with Helicon Focus.

For anyone interested, the first picture is made of 6 rendered photo's while the culvert picture is made up of 2 rendered photo's.
 
Last edited by a moderator:


A few more shots...

Sorry guys but I love this Helicon software ... you can blame HO Explorer (Jim) for this :)


Lakeview1_zps9a4c3ddf.jpg


Lakeview32_zpsf7f67a79.jpg


Lakeview31_zpsc3e183e0.jpg


LakeviewDepot2_zps2804d099.jpg


LakeviewDepot1_zps9208dcf8.jpg


Thats all and promise there will be no more unless there is something to show of the layout progress.
 
First Wiring ....

Evening Guys,

This afternoon I concentrated on my biggest fear ..."WIRING".

I decided to wire in my Lakeside Buildings, their lighting anyway. The Depot has two LED's, the General Store has two conventional lights and Skeeters has one LED.

I have run the power for the lights from my old Protech Power Supply to a 10 port Power Terminal. From there, I have run the Ground (black wires) from the lights to the power terminal and the Power wires (red) from the lights to a separate switch for each light and back to the power terminal from the switch. Basically, I can turn on or off any of the 5 lights in the area with room to add a further 5 lights if required.

Amazingly enough, they ALL work!!!

I will get some shots of that side lit when I figure out how to photograph the structures lit.

So, some lessons learnt, with respect to the use of LED's - or more to the point, the appropriate Resistor for each LED. The Depot is, as mentioned, by 2 LED's each with a 20K resistor. Skeeters is lit with 1 LED and a 1.5K Resistor and I can tell you, it looks MUCH better.

20K resistors certainly dim the lights, to the point where they are very difficult to see. The 1.5K resistor worked great giving off much more light and a more realistic light at that. In hindsight, using a 2.0 or 3.0K resistor might work even better but, I am happy with the Skeeters lighting as opposed to the Depot, which (for my point of view) is a shame.

Anyway, the lights are in, wired and they all work and that in itself is a bloody miracle :)
 
A few pictures...

Here are a few pictures; however, I don't think they really show the lighting properly. I may have to wait for my wife to get off her computer :)


IMG_0541.JPG

IMG_0542.JPG

IMG_0543.JPG

IMG_0546.JPG

More to follow .......
 
The remaining three:


IMG_0554.JPG

IMG_0555.JPG

IMG_0556.JPG


As said, due to the light from my wifes computer, you really can't see the Depot Lighting at all.
 
Tony, I like your scenes with the lighted buildings. I remember some of the original components from previous posts.

Nice job--lasm

 
Well, you can always make believe her computer is a football stadium just over the way a bit.

That would have to be one heck of a stadium mate :)

Tony, I like your scenes with the lighted buildings. I remember some of the original components from previous posts.

Nice job--lasm

Thank you lasm, I'm just surprised it all actually worked, albeit not all that great in terms of the brightness of the Depot Lights. The one thing this has done has been to raise my confidence to do the rest of the wiring. Hopefully that doesn't turn out to be false hope :)


Tony, that scene looks great!

For the lighting, with LEDs at least, try using a breadboard with the LED and a resistor to see how bright it is. You can easily change out the resistor to adjust brightness until you like it, then solder the two together. I guess the investment of a breadboard would be worth it if you have more of this coming in the future. I can always lend you one of the 3 I have until you figure your lighting out. And I have a hodgepodge of resistors to work from too. PM me if you're interested.


Affiliate Disclosure: We may receive a commision from some of the links and ads shown on this website (Learn More Here)

Back
Top