ModelRailroadForums.com is a free
Model Railroad Discussion Forum and
photo gallery. We cover all scales and sizes of model railroads. Online since 2002, it's one of the oldest and largest model railroad forums on the web. Whether you're a master model railroader or just getting started, you'll find something of interest here.
Nice pictures, great timing with the sunlight. Night shots look great too.
Sent from my iPhone using Tapatalk
Northern Pacific history enthusiast
Carey, Steve, thanks for checking it out. As far as the night shots, my lights were all wired when I put the stuff together (several months ago) but did not get around to attaching everything to the bus until last week.
Happily everything worked except lighting in one building, and since that was glued down pretty well I decided to just leave it.
Using the joint compound was something I picked up from the Forum, and I don't think it can be beat to make realistic looking cement. It only really shows up in the super close up, though.
Yes indeed, nice pictures
Questions:
Did you add any water to the mix or as is?
Did you pre paint the mix or painted it once dry or left it as is?
I'm asking cause I have to private roads leading to yards and one little town road to do
And lastly, why didn't you use plaster?
More pictures please...lol
Northern Pacific history enthusiast
Thanks for checking it out, Hawkes--
I added "some" water, about 1/2 cup per pound of compound or so, made it a lot easier to spread.
I am a proponent of painting after application. It gives a lot of lattitude to mix and experiment. It can be sanded off if it is colored to dark, and more can be added if it is too light. I used brown, gray, and or black acrylic paint, a few drops or more in 1/4 cup water; also tried india ink in there, can't remember what the final formula was.
I went over it about 3 times (3 separate applications) to fill in the cracks that inevetiably form and get it smooth, scoring the expansion joints after it is all dry.
This video shows how it looked when I was building it and at about 1:30 to 2:43 I am talking about the joint compound application.
[video=youtube;sV_MUEyAD-E]https://www.youtube.com/watch?v=sV_MUEyAD-E[/video]
Thanks for sharing
Here I am trying to make my road perfectly smooth with no bumps and cracks
That segment kind of made me realize that a road is not perfect, unless it has just been paved
Since my 2 private roads leading to the yards have been in existence for a long while, it needs imperfections
So I'm done spending days on sanding the same areas over and over
This is a non stop learning process
Thanks
Looking real good. A lot of projects, but it will be another area completed. Waiting for the pdate photos.
Northern Pacific history enthusiast
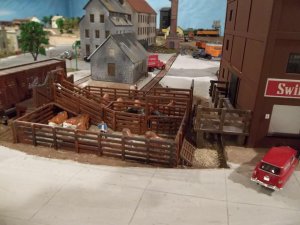
Thanks, Chet--In case you missed it, this is the same area after it was completed (same as in the video); The street where the Swift truck is parked is where I was working when I filmed;
The cattle pen is what I had to work around for almost 1/3 of the layout, all the surrounding buildings, track, and roads depended on that being correct!
Northern Pacific history enthusiast
Thanks for the kudos, S-C; I added some more people over the weekend, also putting together a temporary backdrop for my final 11 feet of wall space:
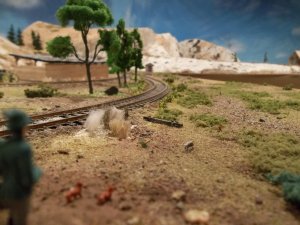
Here is a hunter, 3 dogs, and 5 rabbits: (they are all in the picture, good luck finding them)
I painted a new section of backdrop using acrylics; using a roller for the sky and sponge for the landscape, brush for trees:
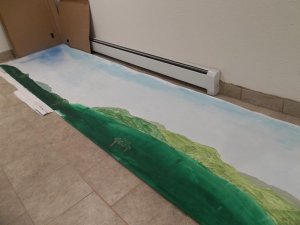
All of my backdrops are considered temporary until I come up with the $700 for a professional Backdrop Warehouse model!!!
Thanks for looking--
Northern Pacific history enthusiast
Here is a shot of the above backdrop section after applied to the wall:
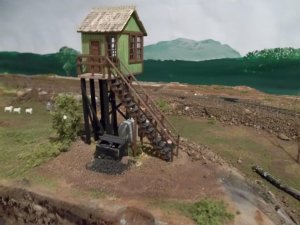
I don't think this is as nice as the spray painted tablecloth, but I have to do that during summer months outdoors because of all the fumes, may redo this section, or at least part of it, later.
I guess I see backdrop as a temporary thing at this point in the layout.
What do you paint them on? Paper? or Some other material?
Northern Pacific history enthusiast
Hey, Erik, nice to hear from you again--
This one is painted on paper that was long 3' x 8' sections and is glossy. They were posters so the other side is printed and the back was blank,
Most of my backdrop is spray painted vinyl tablecloth which came in a 4' x 100' roll.
Hey, Erik, nice to hear from you again--
Thanks, nice to be able to steal a minute and just drop by...
I've looked at some of your videos explaining your hump yard retarders a while back -- pretty clever. One thing I would like to see -- and you'd have to have a helper to do this -- is a very close up shot of the retarders themselves working (without a car present) so we can see how they actually go up and down when the levers are rotated. And the use of the threaded rod is really clever, too.
You might consider working up a short article about the whole hump yard retarder concept you have come up with and see if you can pitch it to RMC or MR.
I wonder if with some modification that threaded dowel concept could be used to control turnouts manually. I know there are a lot of approaches using choke cables and the like for turnouts, but this one seems like it would have potential as well...
Cheers..
Northern Pacific history enthusiast
Thanks for the input, Erik;
In the meantime, (a picture) I added another building to my 1930's business section of Grizzley Flats, this woodland scenics gas station. I really like these small cast buildings and they fit best (I think) when placed with others of the same style:
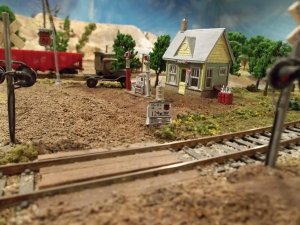
I think someone bumped into one of the pumps:
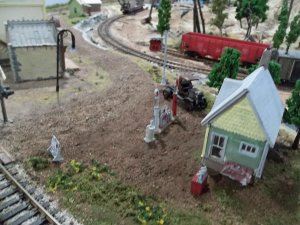
Thanks for looking---
Nice.... that reminds me, I'll have to look for a little garage
Keep posting
Northern Pacific history enthusiast
Chet, Hawkes--thanks for checking it out. I think I am out of room as far as buildings go, maybe have to make one small passenger platform then just be looking for more people and other details.
It's sort of nice to run out of room for buildings. I am probably to that point after a lot of years. Feels good. A couple of small one could probably added, but all of the major structures are up on my layout.
Northern Pacific history enthusiast
This video shows the whole layout with all the details, also the track drawing and where we are:
[video=youtube;lZ4OskKgv1E]https://www.youtube.com/watch?v=lZ4OskKgv1E[/video]
I still want to do a video of loading the logs with the jammer, I ordered some more workers so that one will be coming in a couple weeks.

Affiliate Disclosure: We may receive a commision from some of the links and ads shown on this website
(Learn More Here)



