ModelRailroadForums.com is a free Model Railroad Discussion Forum and photo gallery. We cover all scales and sizes of model railroads. Online since 2002, it's one of the oldest and largest model railroad forums on the web. Whether you're a master model railroader or just getting started, you'll find something of interest here.
Agree with all that has been said, darn nice work mate!
Have just been going back through this thread from start to finish, and am glad I did. Your bench work shots are a huge help to me in my latest venture.
If i learned anything from this layout this time, is to not do anything until the trackwork is done. Second, is get all the plaster work done before anything else. And Don't switch from one kind of track to another. I did some or all at the same time. Really not fun that way, but i got to this part anyway, in spite of my blunders....
I learnt that lesson the hard way as well. The N Scale build is going to be a "one thing at a time thing" ... the track work is going down first with NOTHING else being done until that is in and working properly.
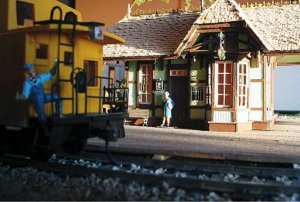
Just a bit of what Ive been doing in my spare time of little there has been with moving the daughter and new husband and renovating there house. I've been putting shingles on the scribed siding , I started using the cardstock using 3m tape to hold the shingles that came with the kit and scrubbed that plan and went with the scribed siding cut to the size of the 8 panels and dug out some campbell shingles. Took a bit to get the hang of it again but the shingles have been going down. I use canopy glue for this , I really like the small end for applying the glue, I then use the handled blade to manipulate the shingle rows.
I used this type of shingles on a couple of buildings and there has always been a problem applying them so they stay on straight. I will have to try some of that canopy glue.
I ended up using the watered down white glue applied with a small brush and add a small dab of CA glue at the ends (of each strip of shingles) and every so often to provide instant adherance.
Lynn , could you post some dimensions for your trestle bridge like lumber size and spacing? After watching your tutorial and HO explorer Jim's tutorial and seeing the great results of both , I just have to have me some bridges so my new expansion has a good setting for a couple ( how convenient huh? ) I will need to re-read those threads again a couple of times for certain , but I think its do-able for me. Thanks.
I used this type of shingles on a couple of buildings and there has always been a problem applying them so they stay on straight. I will have to try some of that canopy glue.
I ended up using the watered down white glue applied with a small brush and add a small dab of CA glue at the ends (of each strip of shingles) and every so often to provide instant adherance.
I tried several ways useing the cardstock following the lines appying to 3m glue to cardstock first etc , I found using the scribed wood with I believe has 1/16 lines it gives something to follow to keep them straight, I'm not saying to land them on the line but to put the shingles so they just come the slits on the lower rail and then use the scribed board lines as a guide to keep them straight. As for glue I apply just to the top edge of the shingle and lay it out. The canopy glue is sticky and grabs good drying pretty quickly. Buddy of mine uses just plain white glue but not watered down.
I tried several ways useing the cardstock following the lines appying to 3m glue to cardstock first etc , I found using the scribed wood with I believe has 1/16 lines it gives something to follow to keep them straight.
I ended up drawing lines every 1/4" to have a straight guide. I am a little surprised that the glue has stuck for 4 years or more. I tried a 3M spray glue product but on one building after 3 years the glue started letting go.
The texture turned out pretty rough on this one but that is ok:
Thank You---I used just some wash with water and a little black artist pigment. I might have put a couple drops of india ink in there too. I can't always remember what I did but this is one formula that I use. They also weathered quite a bit naturally because some sunlight was able to get into the room where this layout was.