
You are using an out of date browser. It may not display this or other websites correctly.
You should upgrade or use an alternative browser.
You should upgrade or use an alternative browser.
ledzeppelinfan1's Layout Journal...
- Thread starter ledzeppelinfan1
- Start date
ModelRailroadForums.com is a free Model Railroad Discussion Forum and photo gallery. We cover all scales and sizes of model railroads. Online since 2002, it's one of the oldest and largest model railroad forums on the web. Whether you're a master model railroader or just getting started, you'll find something of interest here.
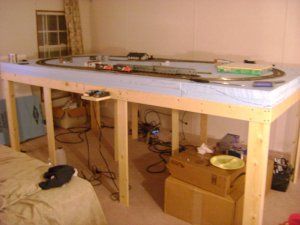
Okay there are some pics...I've cut and begun painting the scenic dividers that will divide the layout into 4 scenes...its scenery time!!! Lookin' forward to it. Will start with paving roads with joint compound and while that cures, I'll start working scenery on the corners, etc.
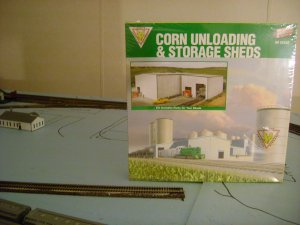
Wont be home much till tomorrow night. Might take my kit posted above to work (I love my job) and put it together after my client (patient) has gone to bed.
Questions are cool man, no problem. Yes, I am using woodland scenics. I am using the cheap acrylic paints from Wal-Mart (brown, obviously), WS Fine Turf soil, WS, Fine Turf Green Grass, WS Light Green Underbrush, WS Light Green Coarse Turf, and WS Green Clump Foliage.
I also picked up some of the Yellow and Purple flower stuff they have and a couple bags of field grass.
How big is your layout?
For cutting I am using a hand saw, a big serogated kitchen knife and some wire brushes...really im mostly using the knifes more than anything. I do have some sandpaper just in case.

Me too!!! The way I see it...building a model railroad is really like building a cake and the scenery is the icing. But that great icing job is meaningless unless the cake is good too. Trackwork is the cake, imo...bad track work will ruin the best scenery. Luckily, this time I think I'll have a good cake.
The more scenery gets done, the more inspired I get definitely.
Onto some other things real quick...
Tonight I was able to mount the the 'finally' finished backdrops!!! Well, I still need to mount one of them...but they look pretty decent compared to what I expected of myself. So after mounting them I ballasted a little bit of track next to a flat area I scenic'd last night and it looks so cool. I put a weathered cover hopper on it and I couldn't stop looking at that car sitting on a tiny bit of mostly finished scenery...and was deeply inspired.
ALSO...and this is really cool...in fact, I should have said this first...
My wife has deemed the house on the front scene of the layout to be 'our house' and will be helping me do the scenery for the house...so thats cool. She is really impressed with it all so far. Me too after the backdrops went up...
Additionally...I finally have come up with the context, story, or setting of the layout. It is the early 90's on the Missouri Central RR. I've done some watching of STL railfanning vids and it is quite common to see many road names and combinations of roadnames pulling trains in the STL area.
It is a 246 mile shortline that stretches from St. Louis to Kansas City.
(Strange tidbit...I came up with the 246 above out of thin air before I looked up how far it is to KC from STL...and low and behold I was a mile off. 247miles. Guess its meant to be)
Anyhow...the freelance layout picks up 20 miles east of St. Lous in Maryland Heights, MO (where I lived till I was 14) and heads east. This is the front long scene. It is a grain storage facility where grain is transfered from trains to trucks for further delivery. This is a very busy operation with several in-bound/outbound cars everyday. It is right across from what my wife calls our house. Wouldnt that be perfect!?!?! The scene measures 76 X 30 inches.
The next scene I model is in nearby mile Chesterfield (13 miles down the line from Maryland Heights). Its the first short scene (2x5 feet) going clock wise. It depicts the double main bearing through the woods to emerge and hug the edge of a steep hill as the double mains roll through some of St. Louis Countys more undeveloped wooded areas.
The back long scene is the smaller town of Union, Mo. The simulated distance traveled from the front side Maryland Heights scene to the backside town of Union is approximately 40 miles. The small town of Union is represented with the double mains running by an old freight building still servicing Spring Hill Soap Company (fictional). Product is dropped off and trucks pick up the finished product to stores in the region. Also, further down the small branch is a grain and feed loading and unloading spot for a nearby farm. The small town industries probably see only about 6 cars per week combined. Most traffic is passing freights on the mains. The scene also features a convenience store and home.
Lastly, the final scene is the two mains bustling through Jefferson City, 110 miles from Maryland Heights. The short scene depicts the double mains skirting the edge of a lake on the inner side of the curve. The corners show the two mains elevated over a field, with a walking trail, and teeming with purple flowers. And one corner merges over to the other the terrain lifts up toward track level, heavily wooded.
So...being that there are set places, sets up obvious parameters for operations.
It also leaves the freedom to compose a train or two, say they are headed from STL to KC or STL to Jeff City and vise versa and just let them roll.
So...yup.
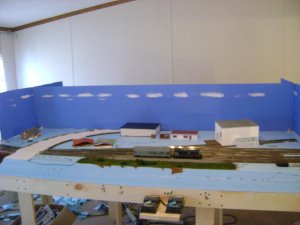
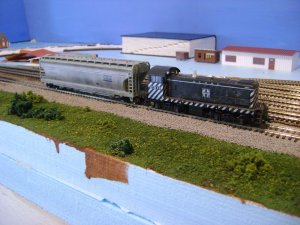
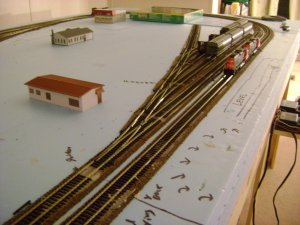
Okay, the first two photos are Maryland Heights. You can see I've started with the joint compound which takes FOREVER to dry. I'm guessing I'll be able to sand it sometime tomorrow night. You see the road curve to the right? Well the curve is going to be covered by trees so that at eye level the road disappears seemlessly. The parking lot for the grain storage facility will be paved tonight. I don't know why I didn't do that last night. Kinda wish I hadn't forgot because this stuff takes soooo long to dry.
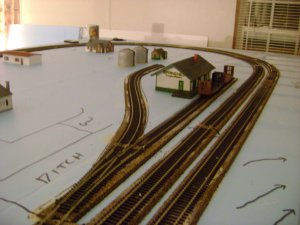
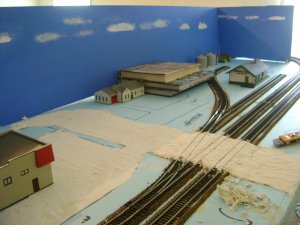
The third photo is going to be Union, MO. The is a very unimpressive shot as pretty much nothing is done here. Forgive the books as they are supporting the backdrop while the Liquid Nails used to secure the footings dry.
Now...
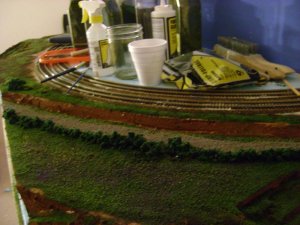
The fourth pic shows something that has changed. Until tonight, I had planned on the inner part of the radius being a lake. But honestly, it just felt forced and I didn't feel like I would be able to pull off what I had in mind, so I thought of an alternative. AND IM GLAD I DID!!!
Instead of the lake, there will be a bluff that the double mains glide around. At the base of the bluff is the track, a creek, a walking path bordered by shrubs with lush grass with purple wild flowers on the other side. If you can see the big bush right next to where the path leaves the layout on the left...that is where the woods will start. So the far half of this scene will be bluffs, track, woods. This scene might be my favorite in the end. It depicts the double mains going through Jefferson City toward the end of the 247 mile shortline.

Affiliate Disclosure: We may receive a commision from some of the links and ads shown on this website (Learn More Here)
ledzeppelinfan1
Member
Yeah...ur about the 4th person to ask. I'm gonna have to get on that...Nscaler sent me a PM explaining how to do it (never done it before) so I'll have to try to figure it out. I too want you guys to see. Although, there isnt much to look at right now by comparison to what the vision for the layout is.
 Anyhoo, I'm excited for you and really glad to hear that the Peco flex track has cooperated for you!
ledzeppelinfan1
Member
Right on...I here ya. I feel the same way. Tonight I am going to try and finish most of the rest of the track and then tommorow or the next day I want to get some pics up. Its something I need to do for myself as well. I've always documented that kind of stuff.

ledzeppelinfan1
Member
Spending tonight finishing up the track work, installing panels for the controllers, wiring, testing revealed that a feeder was required in the middle of my yard...its the tedious stuff, but needs to be done well. Ready to move onto the fun stuff.
I thought of carving out a corner and messing with the scenic supplies as something fun to do later tonight.
I'll be posting pics when the track work is done and will make it a nice presentation...with descriptions and stuff.
Might even set my locomotive roster out on display.
I thought of carving out a corner and messing with the scenic supplies as something fun to do later tonight.
I'll be posting pics when the track work is done and will make it a nice presentation...with descriptions and stuff.
Might even set my locomotive roster out on display.
ledzeppelinfan1
Member
Okay...today was spent finalizing the track work and wiring another feeder.
So basically, so far I've completed the benchwork, trackwork, wiring, and have gone around the layout with a marker marking the terrain changes. As I did that, I realized how awesome this layout will be if I execute the scenery well...which is actually the part I think will come most naturally.
The biggest plus is that I will finally have a layout that has 100 percent quality trackwork. I can run my worst cars on this Peco track and switches and they run like a dream. That means so much as derailments and bad trackwork can KILL a good model railroad...like my last one which was made of a lot of 'hand me down' junk track I bought on ebay. It was atrocious and boy did that have a LOT to do with me going with Peco. I needed the best!!!
Tomorrow, I am going to cut my backdrop. That is all I will have time for until Thursday night as I have some overnight shifts for work. When I return I will paint my backdrops. Both sides need painted so that will take a couple of days to accomodate drying time. While those are drying, I can start scenery. I must say I'm sort of nervous about cutting into the foam. I have four inches to work with so there is enough to do some cool stuff. Just need to take my time and think about what I am doing as I go. Like I said, I went and marked the foam with a marker so its mostly thought out before I start. Still...cutting stuff is irreversible when its sub road bed so...I feel a little pressure there.
Lastly (for now), I have taken some pictures and will attempt to get those on here sometime soon this week. My wife who is a computer whiz will probably do it for me and teach me as she goes. lol. Whatever.
Having fun and will probably have this layout completed in about a month. lol. I work pretty fast, I guess.
So basically, so far I've completed the benchwork, trackwork, wiring, and have gone around the layout with a marker marking the terrain changes. As I did that, I realized how awesome this layout will be if I execute the scenery well...which is actually the part I think will come most naturally.
The biggest plus is that I will finally have a layout that has 100 percent quality trackwork. I can run my worst cars on this Peco track and switches and they run like a dream. That means so much as derailments and bad trackwork can KILL a good model railroad...like my last one which was made of a lot of 'hand me down' junk track I bought on ebay. It was atrocious and boy did that have a LOT to do with me going with Peco. I needed the best!!!
Tomorrow, I am going to cut my backdrop. That is all I will have time for until Thursday night as I have some overnight shifts for work. When I return I will paint my backdrops. Both sides need painted so that will take a couple of days to accomodate drying time. While those are drying, I can start scenery. I must say I'm sort of nervous about cutting into the foam. I have four inches to work with so there is enough to do some cool stuff. Just need to take my time and think about what I am doing as I go. Like I said, I went and marked the foam with a marker so its mostly thought out before I start. Still...cutting stuff is irreversible when its sub road bed so...I feel a little pressure there.
Lastly (for now), I have taken some pictures and will attempt to get those on here sometime soon this week. My wife who is a computer whiz will probably do it for me and teach me as she goes. lol. Whatever.
Having fun and will probably have this layout completed in about a month. lol. I work pretty fast, I guess.
ledzeppelinfan1
Member
Okay there are some pics...I've cut and begun painting the scenic dividers that will divide the layout into 4 scenes...its scenery time!!! Lookin' forward to it. Will start with paving roads with joint compound and while that cures, I'll start working scenery on the corners, etc.
Wont be home much till tomorrow night. Might take my kit posted above to work (I love my job) and put it together after my client (patient) has gone to bed.
ledzeppelinfan1
Member
Started some scenery while the backdrops are being painted and drying...
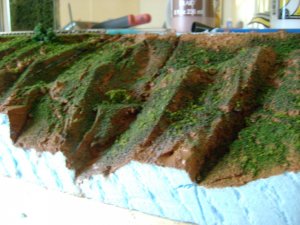
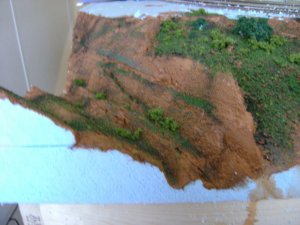
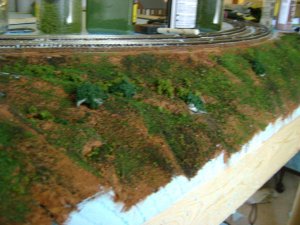
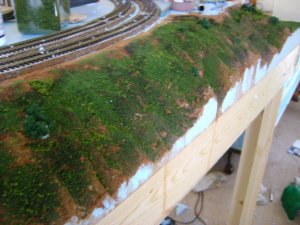
Started on one of the short scenes. A lot of work to carve this crap out...harder than I thought it would be. But I'm pleased with the results so far!!! The Blue foam on the sides will be painted black in the end. Thoughts? And before someone asks, trees will be last. I have about 250 and a fake christmas tree I will be making trees from. So maybe 400-600 in the end.
Started on one of the short scenes. A lot of work to carve this crap out...harder than I thought it would be. But I'm pleased with the results so far!!! The Blue foam on the sides will be painted black in the end. Thoughts? And before someone asks, trees will be last. I have about 250 and a fake christmas tree I will be making trees from. So maybe 400-600 in the end.
ledzeppelinfan1
Member
Looking good. What product are you using for ground cover? Woodland scenics? Seeing the way you have your foam contoured has me rethinking I might do something similar. What are you using for carving? Sorry for all the questions.
Questions are cool man, no problem. Yes, I am using woodland scenics. I am using the cheap acrylic paints from Wal-Mart (brown, obviously), WS Fine Turf soil, WS, Fine Turf Green Grass, WS Light Green Underbrush, WS Light Green Coarse Turf, and WS Green Clump Foliage.
I also picked up some of the Yellow and Purple flower stuff they have and a couple bags of field grass.
How big is your layout?
For cutting I am using a hand saw, a big serogated kitchen knife and some wire brushes...really im mostly using the knifes more than anything. I do have some sandpaper just in case.
Dudepants
Member
Well, it looks good, can't wait to see some trees in there.
My layout (just tore down the old one) will be 9'x6' or 7' (depending what the wife lets me get away with). Donut shaped, so we'll see how it goes.
Thanks for the inspiration, I'm really enjoying following your progression!
My layout (just tore down the old one) will be 9'x6' or 7' (depending what the wife lets me get away with). Donut shaped, so we'll see how it goes.
Thanks for the inspiration, I'm really enjoying following your progression!
ledzeppelinfan1
Member
After completing all that scenery in the photos, I spent some time tonight painting clouds on the backdrop, replacing ties on the flex track that were cut out at the joints, and attaching the apparatus that will hold the backdrops up and in place. Also did some more scenery while I was motivated. Tomorrow the backdrops should be ready to be installed and things will start to move even a bit faster as a lot of tasks are waiting for the installation of the backdrops to frame the borders for each scene. I put together the Walthers loading building last night at work and realized that I had to lift out the spur that had been laid for it because there were slots in the floor of the building only for the rails. So I pulled the track up and cut the ties out for the length of the facility. Also painted the roof grey while I was at it. Looked stupid being all white!!!
I'll probably breakout the joint compound and begin to pave the roads on the two long scenes after the backdrops are up.
Cheers.
I'll probably breakout the joint compound and begin to pave the roads on the two long scenes after the backdrops are up.
Cheers.
ledzeppelinfan1
Member
Looking good! I Love it when the scenery gets started...
Me too!!! The way I see it...building a model railroad is really like building a cake and the scenery is the icing. But that great icing job is meaningless unless the cake is good too. Trackwork is the cake, imo...bad track work will ruin the best scenery. Luckily, this time I think I'll have a good cake.
You can have a great looking layout (on paper) but it doesn't truly come together until the scenery is in. Guess I am bias though
The more scenery gets done, the more inspired I get definitely.
Onto some other things real quick...
Tonight I was able to mount the the 'finally' finished backdrops!!! Well, I still need to mount one of them...but they look pretty decent compared to what I expected of myself. So after mounting them I ballasted a little bit of track next to a flat area I scenic'd last night and it looks so cool. I put a weathered cover hopper on it and I couldn't stop looking at that car sitting on a tiny bit of mostly finished scenery...and was deeply inspired.
ALSO...and this is really cool...in fact, I should have said this first...
My wife has deemed the house on the front scene of the layout to be 'our house' and will be helping me do the scenery for the house...so thats cool. She is really impressed with it all so far. Me too after the backdrops went up...
Additionally...I finally have come up with the context, story, or setting of the layout. It is the early 90's on the Missouri Central RR. I've done some watching of STL railfanning vids and it is quite common to see many road names and combinations of roadnames pulling trains in the STL area.
It is a 246 mile shortline that stretches from St. Louis to Kansas City.
(Strange tidbit...I came up with the 246 above out of thin air before I looked up how far it is to KC from STL...and low and behold I was a mile off. 247miles. Guess its meant to be)
Anyhow...the freelance layout picks up 20 miles east of St. Lous in Maryland Heights, MO (where I lived till I was 14) and heads east. This is the front long scene. It is a grain storage facility where grain is transfered from trains to trucks for further delivery. This is a very busy operation with several in-bound/outbound cars everyday. It is right across from what my wife calls our house. Wouldnt that be perfect!?!?! The scene measures 76 X 30 inches.
The next scene I model is in nearby mile Chesterfield (13 miles down the line from Maryland Heights). Its the first short scene (2x5 feet) going clock wise. It depicts the double main bearing through the woods to emerge and hug the edge of a steep hill as the double mains roll through some of St. Louis Countys more undeveloped wooded areas.
The back long scene is the smaller town of Union, Mo. The simulated distance traveled from the front side Maryland Heights scene to the backside town of Union is approximately 40 miles. The small town of Union is represented with the double mains running by an old freight building still servicing Spring Hill Soap Company (fictional). Product is dropped off and trucks pick up the finished product to stores in the region. Also, further down the small branch is a grain and feed loading and unloading spot for a nearby farm. The small town industries probably see only about 6 cars per week combined. Most traffic is passing freights on the mains. The scene also features a convenience store and home.
Lastly, the final scene is the two mains bustling through Jefferson City, 110 miles from Maryland Heights. The short scene depicts the double mains skirting the edge of a lake on the inner side of the curve. The corners show the two mains elevated over a field, with a walking trail, and teeming with purple flowers. And one corner merges over to the other the terrain lifts up toward track level, heavily wooded.
So...being that there are set places, sets up obvious parameters for operations.
It also leaves the freedom to compose a train or two, say they are headed from STL to KC or STL to Jeff City and vise versa and just let them roll.
So...yup.
Last edited by a moderator:
ledzeppelinfan1
Member
Okay, the first two photos are Maryland Heights. You can see I've started with the joint compound which takes FOREVER to dry. I'm guessing I'll be able to sand it sometime tomorrow night. You see the road curve to the right? Well the curve is going to be covered by trees so that at eye level the road disappears seemlessly. The parking lot for the grain storage facility will be paved tonight. I don't know why I didn't do that last night. Kinda wish I hadn't forgot because this stuff takes soooo long to dry.
The third photo is going to be Union, MO. The is a very unimpressive shot as pretty much nothing is done here. Forgive the books as they are supporting the backdrop while the Liquid Nails used to secure the footings dry.
Now...
The fourth pic shows something that has changed. Until tonight, I had planned on the inner part of the radius being a lake. But honestly, it just felt forced and I didn't feel like I would be able to pull off what I had in mind, so I thought of an alternative. AND IM GLAD I DID!!!
Instead of the lake, there will be a bluff that the double mains glide around. At the base of the bluff is the track, a creek, a walking path bordered by shrubs with lush grass with purple wild flowers on the other side. If you can see the big bush right next to where the path leaves the layout on the left...that is where the woods will start. So the far half of this scene will be bluffs, track, woods. This scene might be my favorite in the end. It depicts the double mains going through Jefferson City toward the end of the 247 mile shortline.
Affiliate Disclosure: We may receive a commision from some of the links and ads shown on this website (Learn More Here)