Dynamic Scenery

ModelRailroadForums.com is a free Model Railroad Discussion Forum and photo gallery. We cover all scales and sizes of model railroads. Online since 2002, it's one of the oldest and largest model railroad forums on the web. Whether you're a master model railroader or just getting started, you'll find something of interest here.


Yeah, my bad. I hadn't completely read all the novels Rich has written ;)

I wanted to reply after reading some of the first page so I skimmed through the rest. I am reading through it all now.

By the way Rich... what part of Indiana are you from?
 
Last edited by a moderator:
George-Costanza-Eating-Popcorn.gif

Now that's some funny #### right there ^^^^^ :D
 
One of the considerations in building the flashing crossing is the photo sensors. These are going to pick up the train approaching the crossing and turn on the flashers.

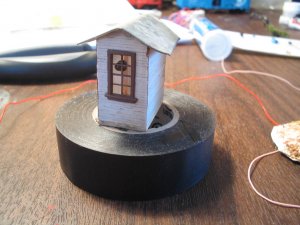
Rather than do the quick and dirty, I decided to make some trees for a couple of them and put one in a little scratch built shed. Still have to figure out what to make for the fourth, maybe another tree.

One of them is in this shed, you can see it through the window. The wires go out the bottom, and will be attached under my layout

IMG_5008.JPG

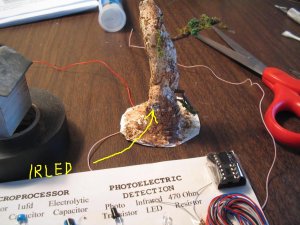
One is in this broken off and almost dead tree. It was made out of JB water weld, an epoxy putty, that forms like a stiff play dough and sets up in an hour, hard like a rock in 24 hours. You can see the lights and resistors and stuff that come with the kit.

IMG_5010.JPG

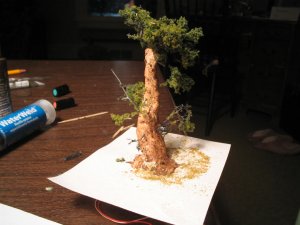
Another one is in a artsy tree made of water weld, too. Can you see the sensor? I paint the tree trunks with brown paint and water, use scenic ground cover, and the fine foliage for branches.

IMG_5012.JPG

For about what you may pay for an inexpensive box car, I am going to have a cool operating crossing.

Have fun !!!!! lasm
 
Last edited by a moderator:


One thing I think this kit might be very useful for is the various non-standard flasher installations out there -- here's just one example on Youtube: https://www.youtube.com/watch?v=XcPmtSJtuvk I'm thinking very hard about getting one of these and doing this sort of thing with it. I think it's correct to say (as Crandell pointed out) that this will appeal to the guy who doesn't want everything out of the box, and the ability to do non-standard types would definitely be a part of that. You might want to start collecting these and putting them on your site as inducements.
 
One thing I think this kit might be very useful for is the various non-standard flasher installations out there -- here's just one example on Youtube: >>snip Yeah, you're right and thanks. I'm turning this over to Hugh, that's supposed to be his department! I have my plate full right now trying to get these new projects going and working to get help evaluating and critiquing them. My only problem is; don't I have to get permission from the owner to post those on my web-page? Rich
 
Some owners are easier than others, but you can also just link to appropriate Youtubes. I would say this could be a project in itself, and something of an adventure. I looked around on the web, and while there are lots of grade crossing flasher sites, none that seem to focus on the unusual variants. But for instance, there's a single-target flasher at about 1:26 at this link. https://www.youtube.com/watch?v=oZzZhPZoHsA
 
And a couple of questions. Rich, in your instructions I got off your site, it says to use filtered DC. Would the output from the constant 12V DC terminals on an MRC power pack count for this?

logandsawman, what where the size washers you used on your version?

I get my money on the first of the month and will put in an order then. I do think, Rich, that as your user community grows, it would be most helpful to provide as many photos, dimensions, suggested parts and sizes, etc as you can. In researching what's available, I note that you mention Atlas plastic crossbucks, but this is actually a Bachmann product -- you may want to edit your instructions to cover this. However, it's currently out of stock. Oregon Rail Supply also makes a kit, though more expensive, for the same kind of flashers (also out of stock). Going the route of other commercial parts could put the cost of the project up where it's not necessarily competitive -- I'm inclined to say guys are better off using washers, plastic stirrer sticks, and so forth! Again, this would probably appeal to the do-it-from-scratch crowd, and the ability to do the really unique examples would add to this appeal.

 
One thing you realize when you go to build one is the pole sticks up like 13' and the flashers are 8' above the ground (9'6" to the top of the flasher mount) in the basic setup.

And, the ones you see on ebay look nothing like a real one, if you look close.

Anyway, they are going to add a lot to the layout.


lasm
 
Last edited by a moderator:


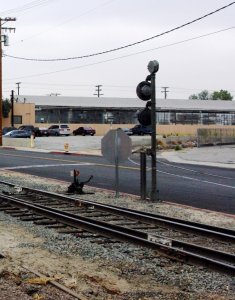
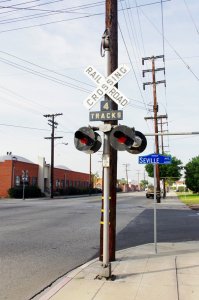
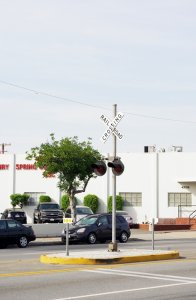
Here's another example that I found on a photo I took that didn't really focus on this item. It's not far from where I live, and I think I'll go out and take photos of this from the front and others that are similar. The Los Angeles Junction Ry has a lot of creative street crossings with signals. You're free to use this and any others I post here.

Flasher LAJ.jpg
 
One thing you realize when you go to build one is the pole sticks up like 13' and the flashers are 8' above the ground (9'6" to the top of the flasher mount) in the basic setup.>>>>

Thank you for everything! Right now I'm so proud I'm about to burst. Even if I fall flat on my face with this I'll
take great pride in having had a role in the fantastic things you're doing with it.

Rich
 
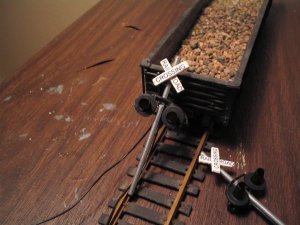
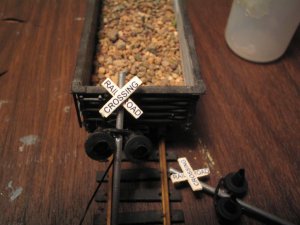
Some home made "scale" rr crossing, with the wiring done and just about ready to go on the layout.

On a previous post there is some of the beginning steps. For the lettering I modified the original approach by using plain old printer paper (imagine, we used to call it typing paper) and trying different fonts until one fit on the right size board. I just cut it out and glued it on some white painted wood using the CA glue.

IMG_5013.JPG


IMG_5014.JPG

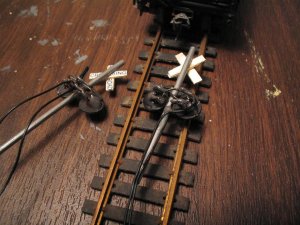
This one shows the back. I did each a little differently as I did not read the directions very well when I did the first ones. The wire got wrapped around the leads and I am experimenting with something called conductive paste, wire glue, to adhere the wire to the lead. Soldering is recommended, but if this works, I will let you know. After 24 or 48 hours to set up, I covered the hardened conductive paste with original JB weld, which makes a hard, non conductive plastic coating.


IMG_5015.JPG

Looking at the photos of the actual examples, the pole could be a tad smaller in diameter, and the targets (.08" oversized) as well, but everything is very exact to scale. From a few feet away, I think it will be fine.

We are going south (St. Paul) for a couple days for our wedding anniversary so the final hook up is still a couple weeks out. Too bad I couldn't do this full time.


Have Fun !!!!!!! lasm
 
Looks interesting. But I'm just getting ready to do a layout and am not to the point where I need something like. I will keep watching this thread and your web site.

Rick
 
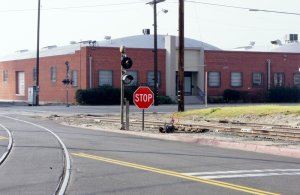
Here are some shots of plain-vanilla flashers:

Flasher LAJ Seville and Leonis Vernon 3.jpg

LAJ signal District Bl Vernon 4.jpg

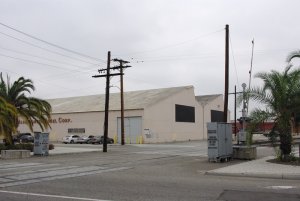
Here's another shot of the odd single flasher I posted earlier:

Flasher LAJ Seville and Leonis Vernon 6.jpg

This has one red light and one white light. Does anyone know what these do when activated?
 
Loving all the photos jwb. Do you have any good ones with gates? I am curious how hard it would be to scratch build a set of animated N scale signals with gates. I think if I did try to build a set I would want to try to get the small lamps on the arms working somehow. Maybe use fiber-optics or something. I haven't seen any that have those lamps working yet and I think that would be very cool. There is a set a couple blocks from me I may try to get some photos of tomorrow if I get of work early enough.

LASM... those look sweet dude! Good job. I cannot wait to see them working.
 
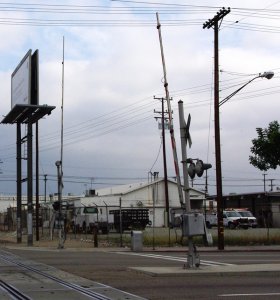
I haven't been shooting gates quite as much -- I need to do more. I've been focusing more on details that would be easier to add! But here are a couple:

Gates at Malabar looking north (2).jpg

Relay Cases and Gates BNSF Harbor Sub.jpg
 

Attachments

  • Relay Case and Battery Boxes at BNSF Malabar Yard.jpg
    Relay Case and Battery Boxes at BNSF Malabar Yard.jpg
    235.9 KB · Views: 282
Last edited by a moderator:
Hey Rich,

I am doing the final hookup of the wires and I notice that there is one terminal which does not show any wires going to it. Is this one to be left open or does the symbol by it mean something?


lasm
 
Hey Rich,
I am doing the final hookup of the wires and I notice that there is one terminal which does not show any wires going to it. Is this one to be left open or does the symbol by it mean something?
lasm

Hi LASM;

Pin #1 on the micro isn't used and should be left open. I always hate to waste a good pin, but that particular pin in
kind of fussy..... I'm standing by here in case you have difficulties. You can reach me direct to my email via the
link on my web-page, the computer beeps with incoming email to that address. I'm only here from 5 AM to 5 PM
though....

Rich


Rich,

Thanks for the quick response!! I will power up the crossing this afternoon. The only thing I am a little nervous about is if there is a short somewhere.

I would have to say that I was able to follow the instructions and figure what went where with out any difficulty.

lasm


Affiliate Disclosure: We may receive a commision from some of the links and ads shown on this website (Learn More Here)

Back
Top