Dave's Layout v. 4.0

ModelRailroadForums.com is a free Model Railroad Discussion Forum and photo gallery. We cover all scales and sizes of model railroads. Online since 2002, it's one of the oldest and largest model railroad forums on the web. Whether you're a master model railroader or just getting started, you'll find something of interest here.


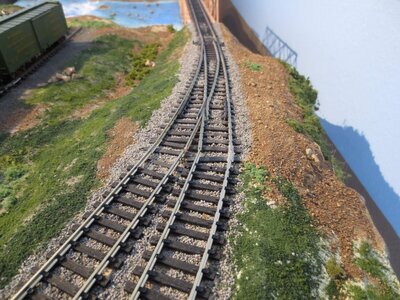
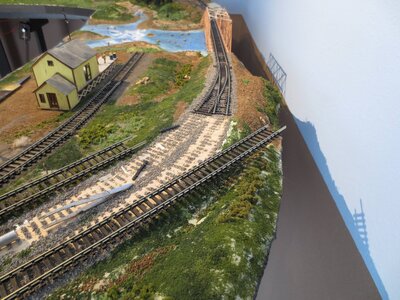
Landscape materials applied around the new buildings, also crossing modeling the "tracks-buried-in-road" completed. Sifted dry gravel is used, glued with Woodland Scenics Scenic Cement. Pins hold down cardboard base while drying. Some grass and shrubs applied on the perimeter:

View attachment 163579

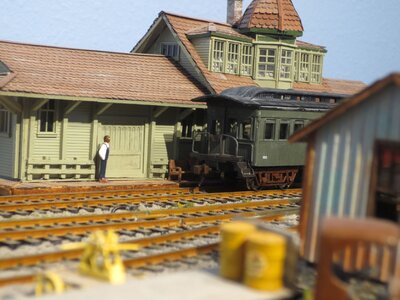
also some activity unloading/loading barrels at the freight house:

View attachment 163580


Dave LASM
Looks really good Dave, always enjoy your layout, great work.


Lookin' good Dave!
If you don’t mind I lightened this picture up just a little to show off your work. 😉

2A6651AC-CFB9-43CE-896E-FF1E5F4F6CED.jpeg
 
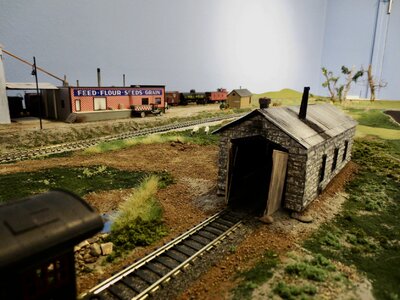
I put some finishing touches on the engine shed, added some details, glued on the doors, etc.

Note, wheel set detail is something that also appeared in the prototype pic! call me a copycat

engine house, complete.JPG


Attached the chain to my combine car, spiffed up the hand made rails a little, used a little black powder on it, it is good to go on the tracks now!

combine.JPG

THANKS to all who commented and liked the progress!! a few little things came in the mail lately, will be working on them (see also the RPO thread)


Dave LASM
 
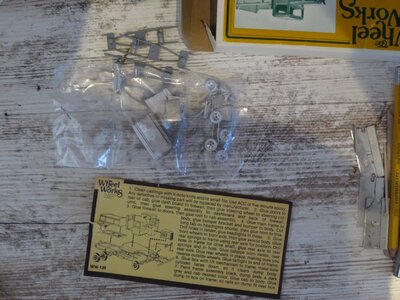
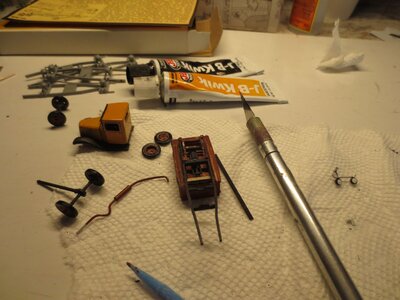
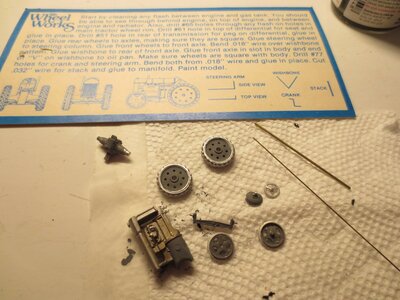
Decided to start on this "Wheel Works" old truck kit over the weekend, first of all the castings are very clean I washed them in soapy water:

truck parts etcv.JPG

Not sure what the plastic parts are for, they came in the box, possibly an alternate frame which will make rolling wheels? looks like they line up with the cast frame. I will be using the cast frame.

parts after initial painting.JPG

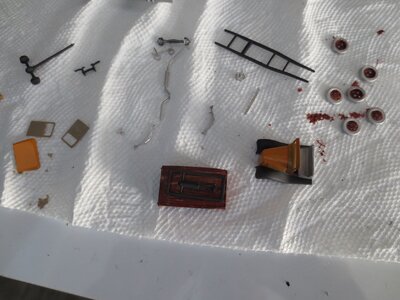
after the wash I sprayed some with the rattle can and some of the parts are brush painted. Super nice details with this small truck

parts in progress.JPG


shows a bunch of the stuff, almost ready to start assembling. Will try to fit a man in there, will have to shave down the seat probably, maybe not enough room in there.

Oddly, instructions left painting for last but with tiny stuff don't think that will work.

Dave
 
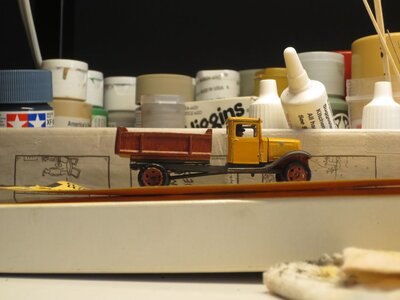
This little truck is done, hard to believe how long it took but the tires really slowed me down cause I could only paint part at a time then had to wait to handle them:

truck a.jpg

Pic above shows more intermediate progress, headlights and horn on right, just getting around to attaching the wheels to the axels, JB weld mixed in small batches to reinforce different small parts

truck 2.jpg

I had to put the driver in there before putting the roof on the cab. Pretty much had to create my own order cause of painting different items. Still a bit of touch up will be done with the wheels. Above photo prior to headlights, bumper;

truck1.JPG


here we are on the layout, not sure why driver doesn't show probably the windshield. The lights seem a bit high but maybe bend them down a little, bumper ended up in the right place. This truck is heavy. There will be a gravel pit scene here along with one of my new steam shovels ...

next I have a much simpler wheel works Ferguson tractor to paint and assemble.

There is also a couple places on the layout where I have to tweek the track a little, little 0-6-0 tank loco has no problems negotiating however the SW-1 wants to come off the rails, maybe work on that, too.

Dave LASM
 
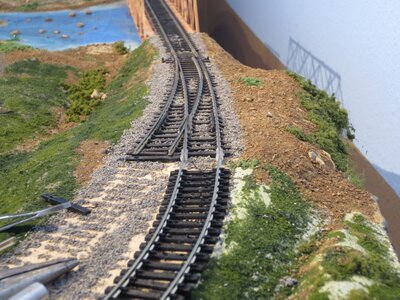
I had to rip out a little track yesterday, had a couple areas where things didn't line up well has been bugging me. Did not cause much in the way of derails but then noticed the SW-1 front trucks would ride up so I had both a grade problem and an alignment problem.

track problem 1.jpg

You can see at the turnout I ended up with this little kink, is most pronounced in the outside track. When I built the layout I was having a hard time getting the flex track to stay

track problem 2.jpg

I was able to leave some of the track glued down

track problem 3.jpg

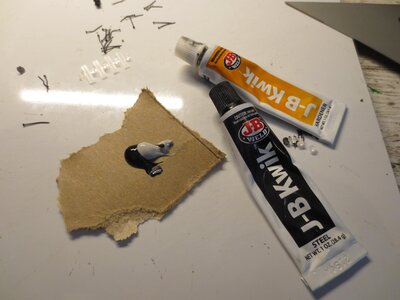
I got them lined up. Drilled about 10 or more holes in the ties also cut a couple tiny sections of rail to fill in the bigger gap I was left with. Also, I had to elevate on this side cause there was a little kink at this end of the turnout. I used numerous Code 100 "spikes" to hold the track and then tacked the track down with several applications of JB weld

JB weld.jpg

This is how I mix it. Pour equal dabs on some scrap paper then mix with the toothpick. I apply with the same toothpick. I have about 5 minutes from the time I have the epoxy mixed

Here is a closeup of the repaired track. If you look close, there are lots of nails holding things in place. Many of these will come out when the epoxy is set.

repaired track.jpg


There will be ballast. The JB weld is hard and maintains the alignment. I mixed up about 4 small batches and the goop will be covered with ballast.

This is a permanent fix. The epoxy dries to a hard plastic, can be removed with a sharp knife if necessary.

Here is another pic of my new truck:

new old truck on layoug.jpg


Lights and horn are a little funky but this is according to instructions. I like it.

THANKS for looking and feel free to comment

Dave LASM


Amazing how you don't see the kinks in the track until later. It happened to me. Then afterwards how did you not spot the blatant error.

David
I think the kink got worse with time as the table was bumped (often) and I was totally relying on the glued down ballast to hold the curve. Soon after I noticed it I ignored it cause no derails.

However, now that it is fixed and smooth, I totally am happy that I reworked it!!
 
Here is another little Wheel Works model I finished over the weekend, can't believe I forgot to take the final picture, (last eve I remembered)

tractor parts 1.jpg

At first look I thought this kit was too primitive, however upon closer inspection find that it is really neat! Castings extremely clean and finely detailed. I paint it in several sessions, also glue it together after an initial paint job then do the touch up

tractor, done.jpg


It is a Ferguson tractor. Later called Ford-Ferguson then lastly just Ford.

Louis - Thanks for commenting and great to hear from you today!

Dave LASM
 
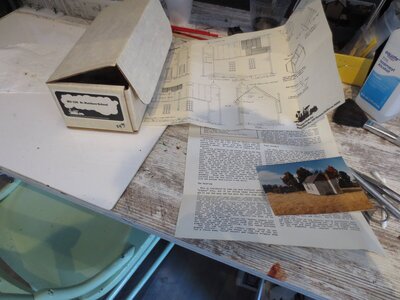
This new Thomas Yorke model of an old schoolhouse is looking like an easy assembly and also a quality model. This was something of an impulse purchase from ebay, I realized I had room for this on my layout and it is appropriate for my time frame also looks cool...

school house 1.jpg

The model kit came with the color pic which is quite nice, however I will not be modeling mine like an old school but one currently in use,

school house 2.jpg

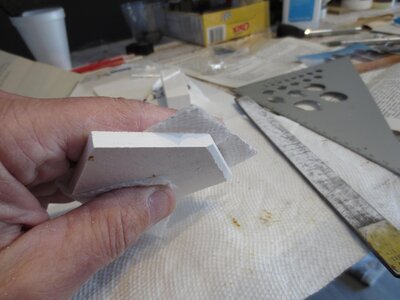
The biggest chore with this is beveling all the corners. They made a little incision on the bottom showing the angle and with the flat file I worked the edge until it matched the etching. Here I am about half done getting the corners right

school house 3.jpg

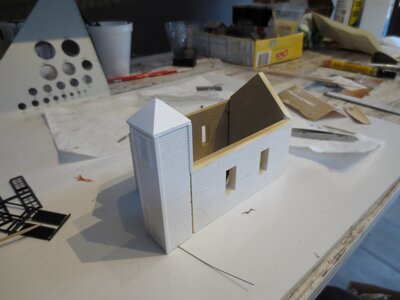
I spray painted the inside, will be adding lighting in there. All the edges are beveled and a trim piece goes into all these joins. It probably took about 1 or 2 hours to get the corners right, and I used JB weld epoxy to cement everything together. They suggested white glue but I felt I would get a better bond this way. Also used the epoxy to attach the corner upright trim pieces


school house 4.jpg


They supplied card stock for the roof, here it is just set in place while I figure what material to use. I added a center section to hold the angle. Note the windows will be red. They also included the chimney which will come out the side and up.

Next will be painting the walls and figuring out the roofing. They suggest tar paper but I have so many tar paper buildings I will probably use either standing seam or regular corrugated steel, both of which I have on hand.

Dave LASM

 
This new Thomas Yorke model of an old schoolhouse is looking like an easy assembly and also a quality model. This was something of an impulse purchase from ebay, I realized I had room for this on my layout and it is appropriate for my time frame also looks cool...

View attachment 166351

The model kit came with the color pic which is quite nice, however I will not be modeling mine like an old school but one currently in use,

View attachment 166352

The biggest chore with this is beveling all the corners. They made a little incision on the bottom showing the angle and with the flat file I worked the edge until it matched the etching. Here I am about half done getting the corners right

View attachment 166353

I spray painted the inside, will be adding lighting in there. All the edges are beveled and a trim piece goes into all these joins. It probably took about 1 or 2 hours to get the corners right, and I used JB weld epoxy to cement everything together. They suggested white glue but I felt I would get a better bond this way. Also used the epoxy to attach the corner upright trim pieces


View attachment 166354

They supplied card stock for the roof, here it is just set in place while I figure what material to use. I added a center section to hold the angle. Note the windows will be red. They also included the chimney which will come out the side and up.

Next will be painting the walls and figuring out the roofing. They suggest tar paper but I have so many tar paper buildings I will probably use either standing seam or regular corrugated steel, both of which I have on hand.

Dave LASM
That looks like a really nice model Dave, I like the detail it has too, can't wait to see this when it's complete.
 
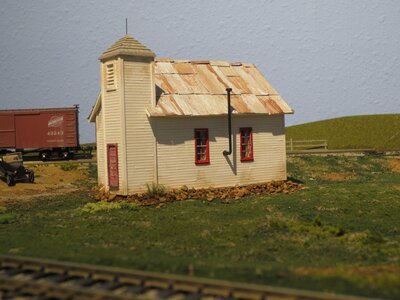
Over the last couple of days I was able to complete this Thomas Yorke schoolhouse, it is a hydrocal casting of a rural school, an old kit purchased on ebay a month or so ago:

Previously the casting was assembled, currently working on the roofing:

Roofing in progress.jpg

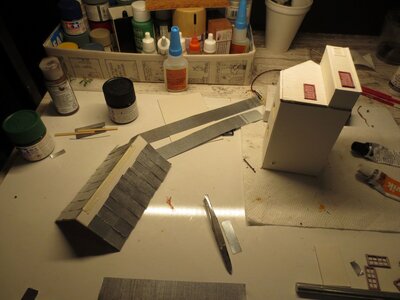
I had several sheets of this Campbell products corrugated steel, was in 7 1/2' scale strips which is kind of odd, thought I would use it up here. I began by cutting it into 4' wide strips and used JB weld to attach it to the card supplied

window parts cement.jpg

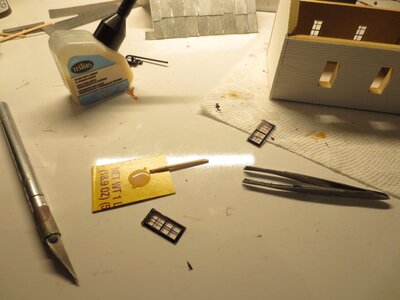
I use this Testors product to attach the glazing also used it for getting the windows into their openings, usually put a generous dab on the cardboard scrap then use a toothpick to transfer the glue to the model

completed bldg.jpg

I applied some rust powder also some gray wash to get the sections weathered down a bit. The little bell tower I used self sticking shingle strips which seemed to go on well

completed bldg3.jpg


Here it is on the layout, probably add some details, picnic table, kids, not really enough room for a swingset but maybe a tree with a large branch, hanging swing? we will see

moving on to the next project. Not sure what that will be yet,

more later, Dave


Affiliate Disclosure: We may receive a commision from some of the links and ads shown on this website (Learn More Here)

Back
Top