Dave's Layout v. 4.0

ModelRailroadForums.com is a free Model Railroad Discussion Forum and photo gallery. We cover all scales and sizes of model railroads. Online since 2002, it's one of the oldest and largest model railroad forums on the web. Whether you're a master model railroader or just getting started, you'll find something of interest here.


Some pics of the weekend progress, actually working on 2 projects simultaneously

The little Jordan 1925 work van, just about completed, still will be adding a decal also some dull coat;

truck 1.jpg

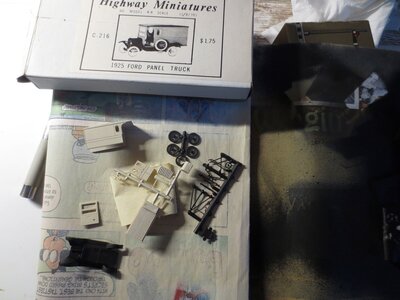
Here are the parts and package, I started by painting the black sprues a flat black then an off white for the rest, did some filing and clean up just followed the instructions on this one:

Truck 2.jpg

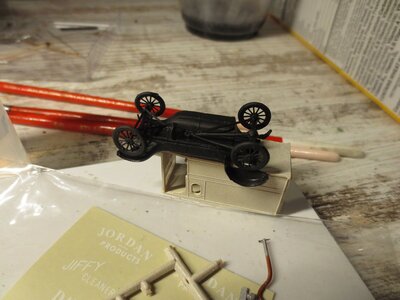
lots of detail under the frame with this one, I used CA glue then added a dab of WB weld epoxy where I thought things might fall off (wheels, axels, drive shaft)

truck 3.jpg


I added some paint. There is a decal I will apply also maybe a little more dirt,

Went to town a little on this Varney 4-6-0 as well, I have two models hope to make one good one. Turns out, the newer one gears down the motor quite a bit so will have to press on the wheels from the older model which apparently has brass wheels:

View attachment 167126

Top model is newer one. Wheels on the newer model were junk and somehow desintegrated. Motor looks much better, however

loco gear.jpg

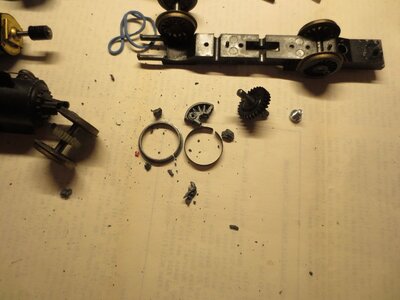
I need to incorporate the gear that pairs with the newer motor. Broken wheel fragments from unused newer model.

I found this to be the case when working on Bachmann locomotives as well, they can look the same on the outside but when you get in there I encountered differences.

loco compare edited.jpg


The gear on the newer model is larger in diameter and has the brass gear. This project may be a bust if I can't get the wheels pulled off the axel that I need, we'll see.

Otherwise, having running trains!


Dave LASM
 
Major Find over the weekend on my Quarry build. Decided to move to this subproject, the quarry section, while waiting for the gear puller for repair of the Varney project.

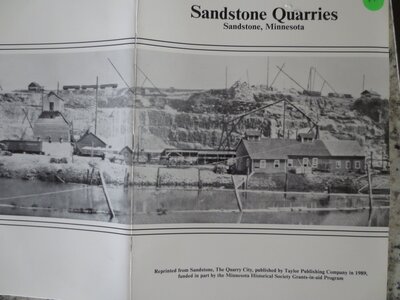
Decided to go to the local history center to make sure my story was correct for the quarry build, found this book:

Cover of publication.jpg

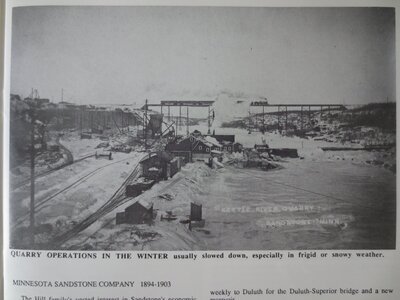
The quarry spanned several decades will pick and choose, had previously decided to build the stone cutting shed (called a saw mill) and ended up with a big history also several nice images

Mill winter view.jpg

the building they called the saw mill is an actual saw mill for lumber but also a saw mill where they cut the stone into paving sections. They used a large gang saw which was suspended from the ceiling, had 5 gang saw blades 12' x 3/4" x 6" which could be adjusted for width. They used several different power sources over the years, including horses, compressed air (there was a dam there for hydro power), gas, steam engine, all these were used at some point in time.

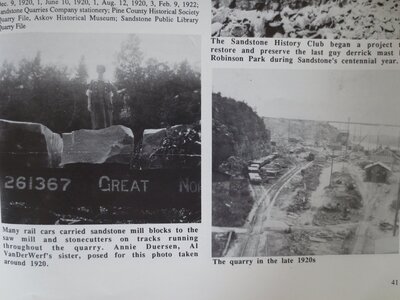
They loaded big slabs onto regular flat cars then at the saw mill put them on smaller flat cars and that is how the chunks were presented to the cutting mechanism

Photo quarry late 20's.jpg

ALL the pics from publication above, credit that.

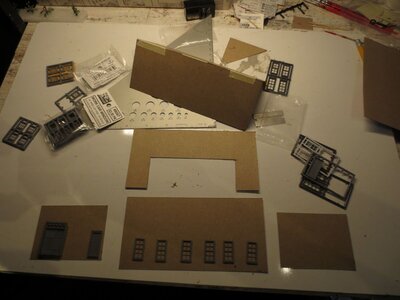
Got the mill building mocked up, still will be adding the clerestory but this will be the sawmill I think, not sure about siding they used wood.

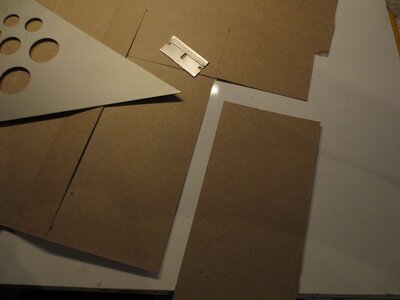
laying out pieces.jpg

I just start with a cereal box, square, and razor blade. A ruler too. Get working on pieces usually somewhat trial and error when it comes to design, definitely is a compressed version

Cardboard mock up.jpg

windows were used along one side, pics not the greatest of the inside of the sawmill but will be faced away on the layout

Mock up sandstone mill2.jpg

I got this far Sunday, still need to add clerestory. May be adding a turnout and some track off this spur in front, not quite sure about those details yet

Mock up sandstone mill.jpg

There will be two derricks another thing I am researching

Tony - Thanks for the Comment!!!

Leave a comment if you feel so inclined.

more later, Dave LASM
 
Major Find over the weekend on my Quarry build. Decided to move to this subproject, the quarry section, while waiting for the gear puller for repair of the Varney project.

Decided to go to the local history center to make sure my story was correct for the quarry build, found this book:

View attachment 167606

The quarry spanned several decades will pick and choose, had previously decided to build the stone cutting shed (called a saw mill) and ended up with a big history also several nice images

View attachment 167607

the building they called the saw mill is an actual saw mill for lumber but also a saw mill where they cut the stone into paving sections. They used a large gang saw which was suspended from the ceiling, had 5 gang saw blades 12' x 3/4" x 6" which could be adjusted for width. They used several different power sources over the years, including horses, compressed air (there was a dam there for hydro power), gas, steam engine, all these were used at some point in time.

They loaded big slabs onto regular flat cars then at the saw mill put them on smaller flat cars and that is how the chunks were presented to the cutting mechanism

View attachment 167608

ALL the pics from publication above, credit that.

Got the mill building mocked up, still will be adding the clerestory but this will be the sawmill I think, not sure about siding they used wood.

View attachment 167609

I just start with a cereal box, square, and razor blade. A ruler too. Get working on pieces usually somewhat trial and error when it comes to design, definitely is a compressed version

View attachment 167610

windows were used along one side, pics not the greatest of the inside of the sawmill but will be faced away on the layout

View attachment 167611

I got this far Sunday, still need to add clerestory. May be adding a turnout and some track off this spur in front, not quite sure about those details yet

View attachment 167612

There will be two derricks another thing I am researching

Tony - Thanks for the Comment!!!

Leave a comment if you feel so inclined.

more later, Dave LASM
Another one of your great builds Dave, love it.
 
Some pics of the weekend progress, actually working on 2 projects simultaneously

The little Jordan 1925 work van, just about completed, still will be adding a decal also some dull coat;

View attachment 167123

Here are the parts and package, I started by painting the black sprues a flat black then an off white for the rest, did some filing and clean up just followed the instructions on this one:

View attachment 167124

lots of detail under the frame with this one, I used CA glue then added a dab of WB weld epoxy where I thought things might fall off (wheels, axels, drive shaft)

View attachment 167125

I added some paint. There is a decal I will apply also maybe a little more dirt,

Went to town a little on this Varney 4-6-0 as well, I have two models hope to make one good one. Turns out, the newer one gears down the motor quite a bit so will have to press on the wheels from the older model which apparently has brass wheels:

View attachment 167126

Top model is newer one. Wheels on the newer model were junk and somehow desintegrated. Motor looks much better, however

View attachment 167127

I need to incorporate the gear that pairs with the newer motor. Broken wheel fragments from unused newer model.

I found this to be the case when working on Bachmann locomotives as well, they can look the same on the outside but when you get in there I encountered differences.

View attachment 167132


The gear on the newer model is larger in diameter and has the brass gear. This project may be a bust if I can't get the wheels pulled off the axel that I need, we'll see.

Otherwise, having running trains!


Dave LASM
OMG, I love that truck! Where can I find one?


OMG, I love that truck! Where can I find one?
They come up on ebay. I have a saved search which brings up old truck kits every day so very little effort on my part due to their sorting/notification process.

They also have some in stock at the local hobby store (mine is 88 miles away). Maybe not this exact model but they have several Jordan products. May find them at your local hobby store.

Thanks for the comments! Dave
 
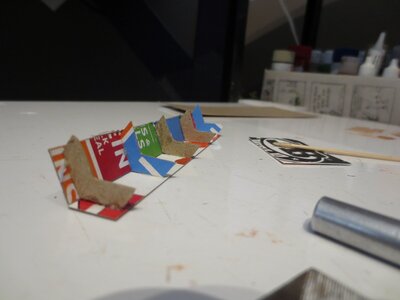
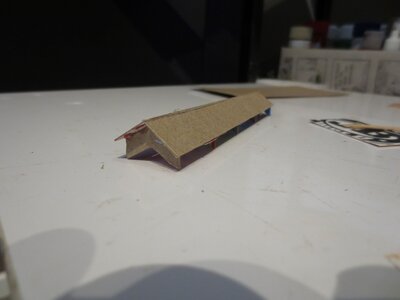
Have a pic of the clerestory that I was working on for the new sandstone sawmill. Took out a new blade for my #5 exacto knife really made cutting this cardboard a pleasure, First I had to match the pitch then scale it down a little so it looks proportional to the model,

clerestory 2.jpg

This will be spray painted if it is a go, not sure about windows yet, trying to get the look right

To glue this in place, I first used hobby tack, let that set for 15 minutes, then put a little Gorilla Glue on the cardboard piece and pressed that into the hobby tack, otherwise I had a lot of difficulty getting the pieces to stary put.

clerestory 1.jpg

Then just set it on the building to see that it may work

clerestory mockup.jpg


All the cardboard gets reinforced with scale lumber glued to the inside. Also, will cut out the center of the roof so lighting will show through when completed,

THANKS for the comments, likes!

Dave LASM
 
Dave, did you get scientific with matching the roof pitch, or did you just eyeball it?
It was an eyeball job, however this is my second attempt. The first one was too steep, made it look too much like a church...

sandstone saw mill.png


Here is a blow up of the prototype. The added lean too sections on the right will not go, also the attached wood sawmill (saws logs) which is in back will not be on the layout, just a condensed version of the original stone mill.

The end section on my model shown in a previous post will go on the back and on the front side will replicate the enclosed staircase also add the window in the gable.

I think I am very close on the pitch.

Dave LASM
 
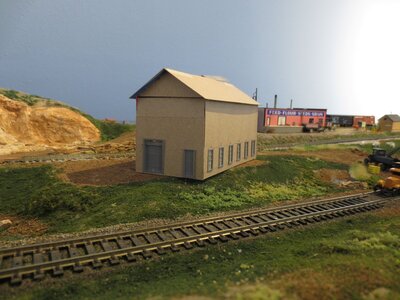
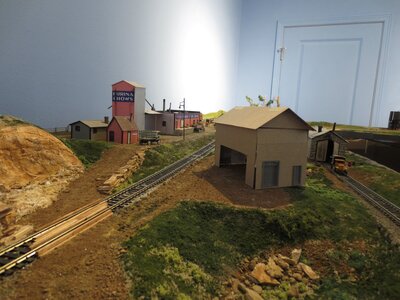
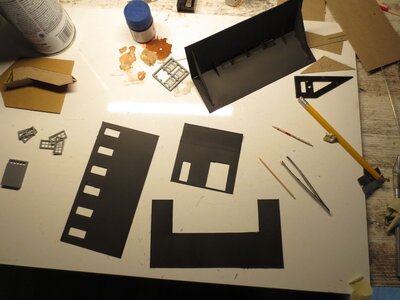
Well I got some more done on the quarry sawmill building, saws sandstone into widths of varying sizes, was one of the key buildings within the historic quarry:

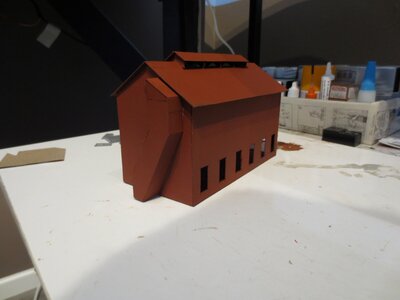
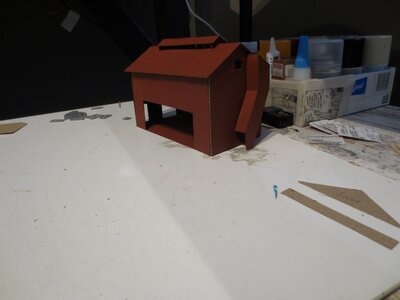
I spray painted the inside and outside, black inside

interior.jpg

The outside painted primer brown, used auto primer for all the paint

The enclosed stairway got roughed in, reversed the wall sections, popped out the windows for painting:

back view.jpg

Not sure how I will be finishing the roof or walls, it looks like there were regular shingles on the roof and walls probably had wooden siding

side view.jpg

The big opening is facing the track, and sandstone rock face so will not be visible. The prototype had some small gauge tracks going into the side of the building, and the gang saws were suspended from the cieling and cut the 3' x 3' x 5' stone blocks into slabs according to orders. They cut the stones while they sat on the smaller gauge flatcars. Will not have to model that aspect since will be out of view.

Still havent decided about putting a new turnout in and adding some track, first I need to get used to the building, maybe build a derrick and get more positioning first

Dave LASM
 
Nice work! I haven't gotten to the point of scratch building any structures other than a dock for along a river. Oh, I did build a small N scale shack... But it was cobbled together using spare parts from other kits.

I can see myself getting into building smaller dioramas. I get more enjoyment from creating a scene than I do from running the trains.

Lots of good inspiration here!
 
Nice work! I haven't gotten to the point of scratch building any structures other than a dock for along a river. Oh, I did build a small N scale shack... But it was cobbled together using spare parts from other kits.

I can see myself getting into building smaller dioramas. I get more enjoyment from creating a scene than I do from running the trains.

Lots of good inspiration here!
I will come run your trains, you can come up here and do my scenery....lol


Affiliate Disclosure: We may receive a commision from some of the links and ads shown on this website (Learn More Here)

Back
Top