
You are using an out of date browser. It may not display this or other websites correctly.
You should upgrade or use an alternative browser.
You should upgrade or use an alternative browser.
Building the Pinnacle Creek Mining & Timber Co. RR
- Thread starter HOexplorer
- Start date
ModelRailroadForums.com is a free Model Railroad Discussion Forum and photo gallery. We cover all scales and sizes of model railroads. Online since 2002, it's one of the oldest and largest model railroad forums on the web. Whether you're a master model railroader or just getting started, you'll find something of interest here.


Sure is!!.


Affiliate Disclosure: We may receive a commision from some of the links and ads shown on this website (Learn More Here)
HOexplorer
Well-Known Member
toot, Thanks. Some were wondering about pinnacles so I threw some in!
Thanks Mike, Always good to here from you.
My wife says I have to improve my shaky videos. I agree. I just wanted a quick vid. Next time I will do better. Hopefully. Jim
Thanks Mike, Always good to here from you.
My wife says I have to improve my shaky videos. I agree. I just wanted a quick vid. Next time I will do better. Hopefully. Jim
HOexplorer
Well-Known Member
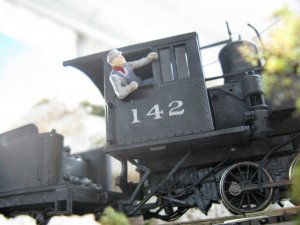
toot, Here is the engineer. I think he's looking out saying, "Look out Fred here comes that old trestle." Jim 
Last edited by a moderator:
Fifer
Member
Yep , he is gonna jump !!!!!!toot, Here is the engineer. I think he's looking out saying, "Look out Fred here comes that old trestle." Jim

Yep , he is gonna jump !!!!!!
Sure is!!.
HOexplorer
Well-Known Member
If he did jump it is over 150 feet, O scale, to the floor. Best of luck!
Actually he did jump when he saw the funnel on 142 hit the top of the tunnel opening. Naturally it is the farthest reach on the layout. Work to be done. Jim
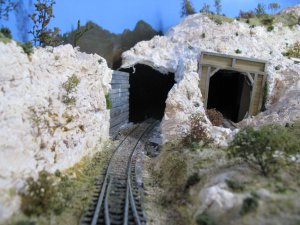
Actually he did jump when he saw the funnel on 142 hit the top of the tunnel opening. Naturally it is the farthest reach on the layout. Work to be done. Jim
Last edited by a moderator:
HOexplorer
Well-Known Member
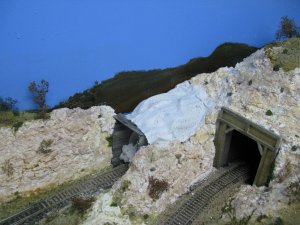
Repairs ongoing. Jim
Last edited by a moderator:

HOexplorer
Well-Known Member
Tony, You are correct of course!
Jim
Jim
HOexplorer
Well-Known Member
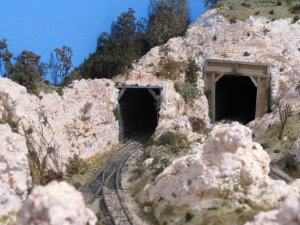
Finished the redo of the tunnel. It is tall enough now for anything I will ever have. Good lesson here: I always try to measure twice and cut once. In fact I made my tunnel tall enough for my Shay, it was my largest loco at the time. I just got a new loco, much larger, last week. So I guess the lesson is to go by NMRA standards. Which I did not! Jim
Last edited by a moderator:

HOexplorer
Well-Known Member
Thanks A2T and Tony. Yes, not the first time I've hit a portal top. I guess it is my way of modeling. I measure, or mismeasure everything with 'just enough' when it comes to portals and bridges. I believe that the smaller such things are the larger the layout looks in my 10'x11' bedroom. Illusions, if you will.
Tony, No problem, I just have my wife throw more money at these types of things! Jim
Tony, No problem, I just have my wife throw more money at these types of things! Jim
Last edited by a moderator:
HOexplorer
Well-Known Member
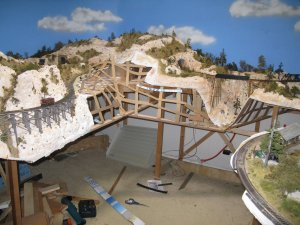
Finally the last of the top surface of the layout is getting finished. Here you see simple cardboard webbing held together with hot wax. I have used staples and glue and clamps in the past for this webbing, trust me hot wax is the way I like best. On the left of the photo you can see the cliff by the trestle. The cliff will be my fascia all around the layout. I may add a curtain for open houses. Jim
Last edited by a moderator:
Sirfoldalot
Days Gone Bye!
Shaping up very nicely, Jim.
Won't be too long before I am going to want to visit again?
Won't be too long before I am going to want to visit again?
Great stuff!. It would be somewhat hard to finish that with a fascia considering the steep angle of the scenery and short of continuing that to the floor, the best option. Looks like there'll be plenty of photo ops.
HOexplorer
Well-Known Member
Toot, It is always about the photography. I wouldn't build unless I could get photos.
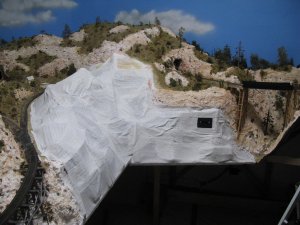
In this photo you can see the last plaster cloth on the left side of the layout. You will notice the dark rectangle. I couldn't come with a solution to the NCE cable so I decided to simply build the socket into the cliff scenery. We'll see how this goes. I've never seen this done so I'm excited to see if it works. I put extra plaster cloth reinforcing around the socket. The socket is also mounted on a larger piece of plastic so it will be quite strong and stable. Jim
In this photo you can see the last plaster cloth on the left side of the layout. You will notice the dark rectangle. I couldn't come with a solution to the NCE cable so I decided to simply build the socket into the cliff scenery. We'll see how this goes. I've never seen this done so I'm excited to see if it works. I put extra plaster cloth reinforcing around the socket. The socket is also mounted on a larger piece of plastic so it will be quite strong and stable. Jim
Last edited by a moderator:
Sirfoldalot
Days Gone Bye!
ARGGGG!
Wish it was not so close to the nice tunnell and trestle there - like more to the left?
Maybe you can place, like a turtle shell, cover over it?
Wish it was not so close to the nice tunnell and trestle there - like more to the left?
Maybe you can place, like a turtle shell, cover over it?
HOexplorer
Well-Known Member
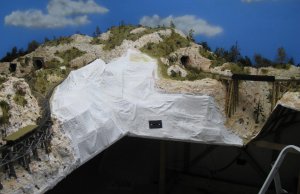
Thanks Sherrel, I'm glad you caught this error. I would have figured it out next week after everything was dry! Luckly it is just a 5 minute fix with damp plaster cloth. How's this:
Jim
Jim
Last edited by a moderator:
Sirfoldalot
Days Gone Bye!
MUCH, much better .. Thank you!
I know that you were just testing us .. Right?
I know that you were just testing us .. Right?
Affiliate Disclosure: We may receive a commision from some of the links and ads shown on this website (Learn More Here)