Building the Pinnacle Creek Mining & Timber Co. RR

ModelRailroadForums.com is a free Model Railroad Discussion Forum and photo gallery. We cover all scales and sizes of model railroads. Online since 2002, it's one of the oldest and largest model railroad forums on the web. Whether you're a master model railroader or just getting started, you'll find something of interest here.


Yea, Jim's not afraid to chopit up if he's not satisfied or see's an improvement is he. Uses a lot of the older techniques but with up to date materials not usually considered.
At the last buy and sell we had at my club I picked up an old Kalmbach book on scenery written by a Bill McClanahan for $5 in real good condition. Has all those good old hints and tips to do scenery effectively on the cheap. Considering it's original price displayed on the cover was $4 I reckon I still got a bargain.
 
Buzz, Good luck with the fire. That community is where I live.

Jim, Thank you. That is what this is all about. And, it's free!

Toot, Definately not afraid to redo or remodel. If something doesn't feel right to me then I do something about it. Generally there is always something to do. Good grab on the scenery book. I taught Bill all he knew. Just kidding! Jim:)
 
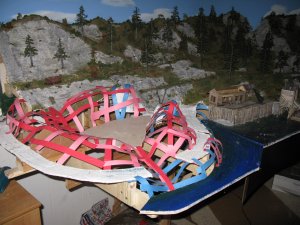
Thanks to me stealing some of my wife's file folders I can show you the webbing results up to two minutes ago. As usual I use hot glue. I can't believe I ever stapled and glued these things in the past. Hot glue is virtually instaneous and makes this job doable in no time.

You can see the basic finish to the land form. I may add a pinnacle here or there we'll see. Plaster cloth next. Jim:)

IMG_4084.JPG
 
Last edited by a moderator:


And I see the engine house is coming back together too, If it wasn't a boiler explosion, I thought the roof must have got blown off when the foreman "fired" the carpenter.
 
I am out of danger of the fire. It has burned 2300 acres with one death.

Here I was worried about my toys.

I do like the way your addition is coming. I would like to start mine but other things in life have gotten in the way. So I am living my model life vicariously through your progress here. :)


Buzz.
 
Perhaps I missed what you said about it Jim, but I'm starting to think that middle area may be a slag pond with prospectors panning for gold?
 
You sir are awesome! I am building my first N scale layout, and if you are ever in Whittier California, pleae stop by and lend me a hand :) Im 44, and have been working on my layout for a week, and im not even done with the benchwork and its a small layout hhehe.....

Again, you are the best!! Ty for posting all the pictures and all the tips and how too's... Unbelieveable... Awesome!!
 
Thanks guys. I like the gold panner idea. My streams are perfect for this. I don't know of any premade, but I bet I can make one of these panners.

k0, Thank you. Keep to the task. If you've only been at it a week you can't expect to be much further along. Not only study my benchwork, but check out the mags at your LHS. That's how I learned. N scale fits right in with what I cover here. I've mention all along that this thread is adaptable to all the scale. Thanks again, much appreciated. Jim :)
 
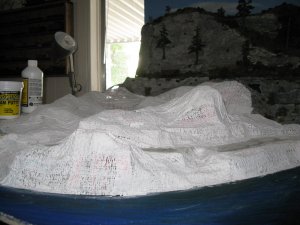
I added plaster cloth until I ran out last night. Nice and dry this morning. I'm off to the LHS for another roll, that should do me. Most of this photo will be covered with stucco rock I'm thinking. We'll see. Next up, pond painting. Jim:)

IMG_4092.JPG
 
Last edited by a moderator:


Buzz, Practice makes all this stuff easier. This is layout #11 or so, I've lost count. But when you do these layouts and dioramas for pay then you really have to learn fast or no money for my own layouts. We are not wealthy folks, my wife and I, so I get my trains if I can to pay for them. Jim:)
 
Last edited by a moderator:
About Pond Painting

I love ponds, lakes, all water for that matter on my layouts. I didn't have a pond on this one and that always bugged me. No more. There are different ways to do ponds/lakes. First, I will show you my method for painting the bottom.

Painting is fairly cheap using acrylics and while it may seem daunting it really isn't. You should start by figuring out what kind of pond/lake you want. These bodies of water are far from being equal. You may want a muddy color, or green, or even blue. What is your pond located near? Logging pond? Brown will be the main color. High mountains your pond will probably be clear except after a heavy rain.

Think about your backdrop. All blue sky with a couple of clouds and you may want 'blue' look. Your pond will reflect whatever your backdrop sky is. Caution: I'm not a fan of colored water for your lakes/ponds/streams. Water is clear and should be on your layouts as well.

On the PCM&T Co. layout I wanted a clear mountain lake. My sky is blue so I will paint the bottom blue, but I won't stop there. Many folks just slap some blue paint and add their 'water' product. Wrong! If you want a believeable pond or lake try it this way:

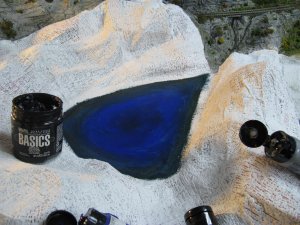
First in the middle paint your primary color. In this case blue.
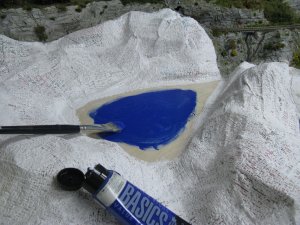
IMG_4085.JPG

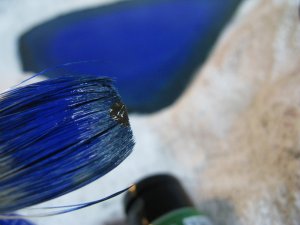
Second is some green around the edges. This helps portray the shallowing of your pond. IMPORTANT POINT: Do Not wash your brush between applications of new color. Reason: The major stumbling block to painting pond and lake bottoms is blending in the colors. By not washing your brush this job of blending becomes fun and quite doable. So, all the way through this tutorial just add paint to the brush no washing.
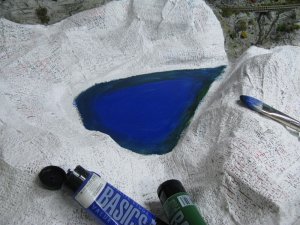
IMG_4086.JPG

Third, Add some gray to the green edge area.
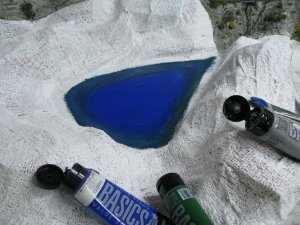
IMG_4087.JPG

More later. Jim:)
 
Last edited by a moderator:
Ponds:

Fourth, Here's a shot of some brown added to the brush. You can still see the previous three colors. This brown will go on top of the edge colors.

IMG_4088.JPG

Fifth, Some black. Black? Yup. This is added to the middle of the pond or anywhere you want to really show some depth. I could have used a mix of blue/black but black alone will do. Remember this will all be cover with at least three pourings of realistic water.

IMG_4089.JPG

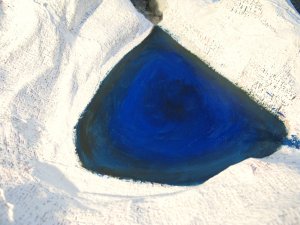
Final look.

IMG_4091.JPG

There you have it. A pond most anyone, including me can live with.

HOWEVER, you regulars have probably figured out this is not the only, or final, solution to this pond. Next up: A different and I think better way of doing this traditional pond bottom. Later, Jim:D
 
Last edited by a moderator:
Toot, You will have to wait a bit longer. :)

Before I can get to the pond I will have to seal it. I use clear silicon for this job. Before I can seal it I have to have all the rocks dry. (A few days)

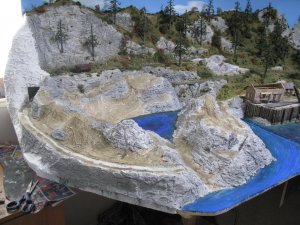
You can see in this photo that managing time and jobs is important. While the rock is drying I put some WS Earth coat on the non rock surfaces. I don't worry about brown color touching my rocks. It is a well know fact that rocks can pick up a stain from surrounding earth! Really!

IMG_4093.JPG

You can see the small pinnacle in the front is a late addition and only has a couple of sprays of gray. On the back left you see the edge of the layout. This was hard to figure out, but it proves stucco will stick to vertical walls. No stain yet.

When this is all dried I will take the pond bottom. Jim:)
 
Last edited by a moderator:
I'm gonna run this idea by you Jim for the end of the headland where the tunnel comes out, to me it looks not quite right being rounded off.

It started me thinking about the name of the layout "Pinnacle Creek". This is in an area where exploration would most likely first have been done from seaward and names were given to areas, often because of landform features. (We have the Glass House Mountains just to the north) and a pinnacle would have to stand out and be clearly visible from that point of view.

How about turning that headland into a prominent pinnacle, the creek would then have taken it's name from both that main geologic feature and it's own one.
 
Toot, Great minds think alike. I had initially planned to have a pinnacle there. As I couldn't seem to settle on shortening my desk and the track geometry was working against me I left it out. It would have made the layout hang over the desk a bit more and also cover up the window. I thought it would be weird to add more backdrop and I didn't care for the gap between the pinnacle and the exsisting layout cliff with window behind.

I would like to do have had it. I know what your saying. This is a good lesson for layout builders: it is your layout don't be afrad to change it. Think things through the best you can. Even if you do it wrong you can always change it afterwards. Jim :)


Ha! I don't know about me having a great mind Jim, but I don't mind if you don't mind. The way I see it you won't need to come out much further over your bench, if at all, It just needs that last peak made a bit peakier (my word) and it's face made a bit chunkier (another my word) so it combines with that area where the hopper is now sitting. This might enable you to make the peak more 3 dimensional i.e the actual peak would move away from the backdrop.

The drawback to all this of course would be in having to relocate the top track forward as well, by curving the switchback siding around the base of the pinnacle.

Is that getting to radical?
 
Last edited by a moderator:


Affiliate Disclosure: We may receive a commision from some of the links and ads shown on this website (Learn More Here)

Back
Top