A beginner's layout

ModelRailroadForums.com is a free Model Railroad Discussion Forum and photo gallery. We cover all scales and sizes of model railroads. Online since 2002, it's one of the oldest and largest model railroad forums on the web. Whether you're a master model railroader or just getting started, you'll find something of interest here.


Well the bridge shoes arrived. I ordered about enough Peco flex track to finish my track plan but didn't order the roadbed because my LHS always has roadbed. Figured I'd get it today and have the roadbed all ready when the track arrived.....the store had no roadbed :(. I'll have to order it.

Since I was there anyway I did get some Chooch self stick stone walls for my new abutments....maybe get them done this weekend (fingers crossed)


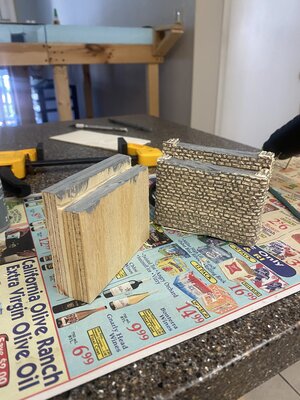
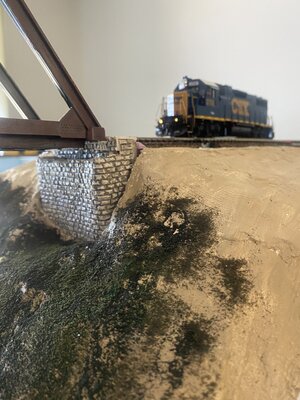
Here is my second try at the bridge abutments. You can go all the way back to post #5 to see my first try and how it was pointed out to me they were, well.... less than perfect :). They still are but an improvement I think. Just a couple of pieces of 1/2" plywood glued together and wrapped in a Chooch stone wall product.

The bridge shoes I bought didn't create much of an offset of the different heights of the abutment so I made it more to my liking and I'll figure something out to put some kind of new shoes (or something) in later. Ideas are always welcome!
 

Attachments

  • 001.JPG
    001.JPG
    602.8 KB · Views: 308
  • 002.JPG
    002.JPG
    528.7 KB · Views: 329
Here is my second try at the bridge abutments. You can go all the way back to post #5 to see my first try and how it was pointed out to me they were, well.... less than perfect :). They still are but an improvement I think. Just a couple of pieces of 1/2" plywood glued together and wrapped in a Chooch stone wall product.

The bridge shoes I bought didn't create much of an offset of the different heights of the abutment so I made it more to my liking and I'll figure something out to put some kind of new shoes (or something) in later. Ideas are always welcome!
Definitely better than mine, and I bought those. :confused:


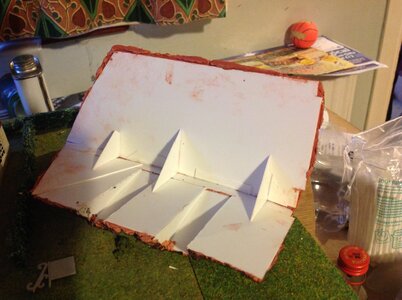
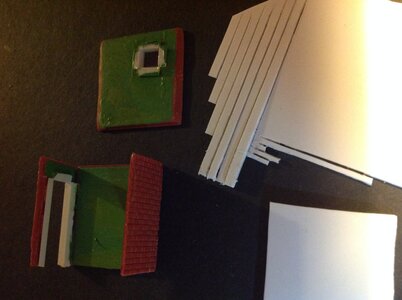
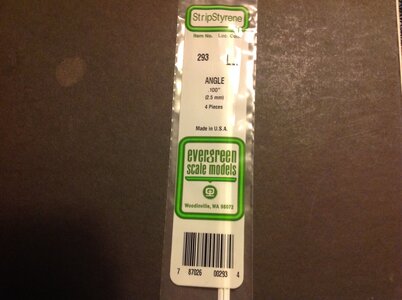
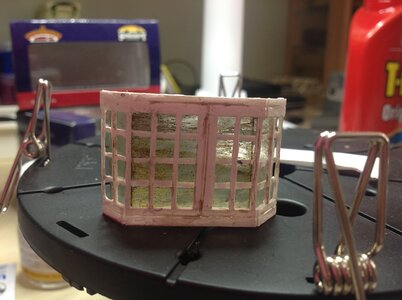
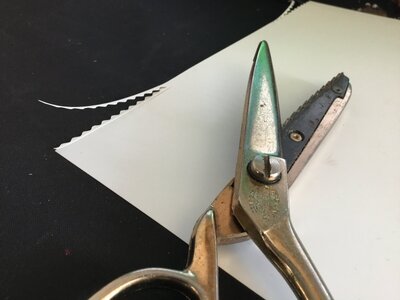
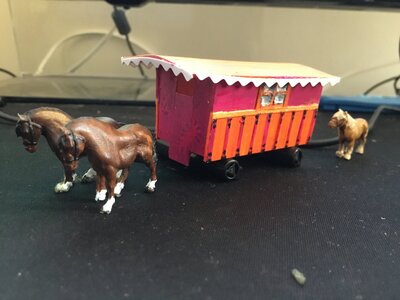
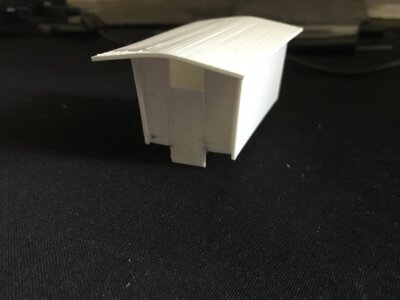
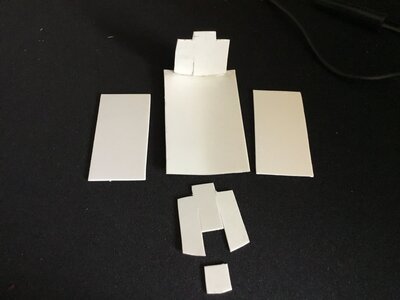
Feel free to delete this once you had a look I use 10 thou 20 thou 30 thou, evergreen does pre cut strips and shapes the window was an early attempt, the caravan once I started to get a feel for the product, but you could build your self if you have the patience and time, I won’t enlarge the pictures as this is yiour thread,and hence the feel free to delete or msg me and I’ll pull them…oooh and you can buy a modellers metal ruler for the sizes,saves mistakes on the math
 

Attachments

  • IMG_0224.jpeg
    IMG_0224.jpeg
    410.8 KB · Views: 260
  • IMG_1689.jpeg
    IMG_1689.jpeg
    331.4 KB · Views: 216
  • IMG_1687.jpeg
    IMG_1687.jpeg
    373.3 KB · Views: 207
  • IMG_0182.jpeg
    IMG_0182.jpeg
    323.6 KB · Views: 213
  • IMG_1367.jpeg
    IMG_1367.jpeg
    295.3 KB · Views: 228
  • IMG_1369.jpeg
    IMG_1369.jpeg
    396.1 KB · Views: 227
  • IMG_1355.jpeg
    IMG_1355.jpeg
    362 KB · Views: 206
  • IMG_1354.jpeg
    IMG_1354.jpeg
    399.8 KB · Views: 219
  • IMG_9063.jpeg
    IMG_9063.jpeg
    528.5 KB · Views: 243
Feel free to delete this once you had a look I use 10 thou 20 thou 30 thou, evergreen does pre cut strips and shapes the window was an early attempt, the caravan once I started to get a feel for the product, but you could build your self if you have the patience and time, I won’t enlarge the pictures as this is yiour thread,and hence the feel free to delete or msg me and I’ll pull them…oooh and you can buy a modellers metal ruler for the sizes,saves mistakes on the math
Nice looking stuff! I think I'll grab some and see what I can do. Once I do I'll post pics.
 
Feel free to delete this once you had a look I use 10 thou 20 thou 30 thou, evergreen does pre cut strips and shapes the window was an early attempt, the caravan once I started to get a feel for the product, but you could build your self if you have the patience and time, I won’t enlarge the pictures as this is yiour thread,and hence the feel free to delete or msg me and I’ll pull them…oooh and you can buy a modellers metal ruler for the sizes,saves mistakes on the math
I grabbed some plastic square tubing. The store didn't have anything for cutting it though. I'm thinking an Exacto Knife isn't the tool for it. What do you use? Thanks
 
I grabbed some plastic square tubing. The store didn't have anything for cutting it though. I'm thinking an Exacto Knife isn't the tool for it. What do you use? Thanks
I use my tabletop bandsaw, or my new tool of choice Is a Northwest Shortline chopper

 
I grabbed some plastic square tubing. The store didn't have anything for cutting it though. I'm thinking an Exacto Knife isn't the tool for it. What do you use? Thanks
I used a bog standard scapel, you can buy metal rulers with angles usually 45 deg that makes it easy to follow the metal to cut and conveniently give you a nice joint edge for glueing they tend to be easier to hold as well, an old chopping board or one of those self repair mats may attract you,but continuous cutting especially deep can damage them too eventually. Just have a fine sandpaper to clean blade if necessary, or if you nick blade it is really cheap to just rep,ace and not mess I can probably find my ruler if you need to see
mine was not coloured,same both sides and a lot cheaper but then I bought it like 2 decades ago, I saw a chunky triangular one for the same money but I think a thin straight one more versatile, notice this one has nice grooves for holding
 
I grabbed some plastic square tubing. The store didn't have anything for cutting it though. I'm thinking an Exacto Knife isn't the tool for it. What do you use? Thanks
I use a razor blade, making several cuts after the initial marking groove. I get them from the hardware store, with a sharp side and the other side has a flat rounded cover.

A new blade always works best, throwing it away when the corners become dull.

Dave LASM


That's great but I'll probably not spend that much unless I end up doing a lot of cutting.
I purchased the chopper several (10) years ago and ended up not using it a lot.

If I was cutting thicker wood the razor blade that went in there would bend a little and I had to straighten the cut by hand. It was somewhat useful when cutting several boards of the same size as there were a couple little clamps and gadgets so you could cut multiple parts.

It ended up taking up too much space and, believe it or not, it went in the wastebasket?

Dave


Affiliate Disclosure: We may receive a commision from some of the links and ads shown on this website (Learn More Here)

Back
Top