You are using an out of date browser. It may not display this or other websites correctly.
You should upgrade or use an alternative browser.
You should upgrade or use an alternative browser.
Week of 1/30 - 2/6
- Thread starter RBMNfan
- Start date
NYC_George
Well-Known Member
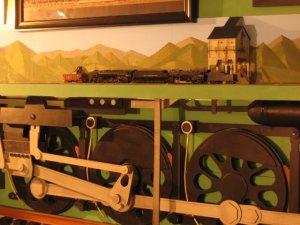
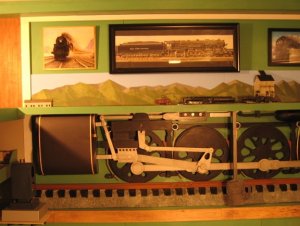
I started a new project a few weeks ago. My goal was to add a steam engine servicing yard over my steam wheels display. It will consist of duel ash pits, sanding tower, water tower and coaling tower which is in the photos. I also added a not done yet dwarf signal to the display which you can see in the lower left of the second photo.


Last edited by a moderator:
GarryCBQ
Well-Known Member
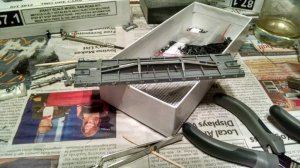
RBMN fan ... Thanks for starting thi thread. The flat car kit looks like a fun project.
George ...... I'm impressed ! ...... You definitely are not one of those guys with clutter stashed under the layout .
...............
Below is a GN passneger train headed by E7A-F7B-F7A. Some express cars are visible, but the rest of the train is out of view. ..... Teh switcher is a CB&Q SW1000.

George ...... I'm impressed ! ...... You definitely are not one of those guys with clutter stashed under the layout .
...............
Below is a GN passneger train headed by E7A-F7B-F7A. Some express cars are visible, but the rest of the train is out of view. ..... Teh switcher is a CB&Q SW1000.
NYC_George
Well-Known Member
RBMNfan what are you putting on this flat car? Thanks JR59. Garry nice photo. I like the rusted water tower and the switcher sitting there. I need one of those water towers.
I am so far from the finish details. Hopefully eventually paint and some custom decal letters for my fictional railroad. It's hard to find flatcars old enough for my era, 1925. These are nice for all the details even though they are a lot of detail work to build each one. I have to be awake during assembly.RBMNfan what are you putting on this flat car? Thanks JR59. Garry nice photo. I like the rusted water tower and the switcher sitting there. I need one of those water towers.
Sent from my XT1080 using Tapatalk
rhoward
S.L.O.&W. Trainman
I have actually found some time to get back to work on the Girder Bridge Project on the SLOW. Last time I was in the area looked like this:

After a few more hours of work it looked like this:


And today I did some earth painting and ballasting on the upper track and the far side of the track going under the bridge:


Keep the good stuff coming!
After a few more hours of work it looked like this:
And today I did some earth painting and ballasting on the upper track and the far side of the track going under the bridge:
Keep the good stuff coming!
Ray, would you mind telling me what type of plaster you're using? I'm currently working with Sculpt-a-mold, and while I don't hate it, I'm having just a little trouble working it into small areas, like that gap you have between road bed and the stone wall. Looks great so far!
rhoward
S.L.O.&W. Trainman
Thank you Sir!
For most of my scenery I start with plaster cloth (sometimes WS but will use whatever I can find on sale. It is all about the same.) over the foam base. Then I use diluted Dry Wall Plaster (I use the ready made in a gallon tub). I dilute it to be about like pancake batter. Generally use two or three coats of that. Then I paint the plaster with a dirt colored paint (I am using one called Misty Taupe). I got that color by photographing some plain old dirt I had here and taking a print down to the paint store for them to match. What color you use should be close to what "dirt" looks like whatever you are modeling (yes dirt can be many different colors....). Then grass, weeds, bushes and trees are added over the painted plaster work.
Sculpt-a-mold is great stuff for some circumstances and places, but I generally use what I outlined above...
Hope that is helpful.
Last edited by a moderator:


