Weathering Rolling Stock, a Continous thread

ModelRailroadForums.com is a free Model Railroad Discussion Forum and photo gallery. We cover all scales and sizes of model railroads. Online since 2002, it's one of the oldest and largest model railroad forums on the web. Whether you're a master model railroader or just getting started, you'll find something of interest here.


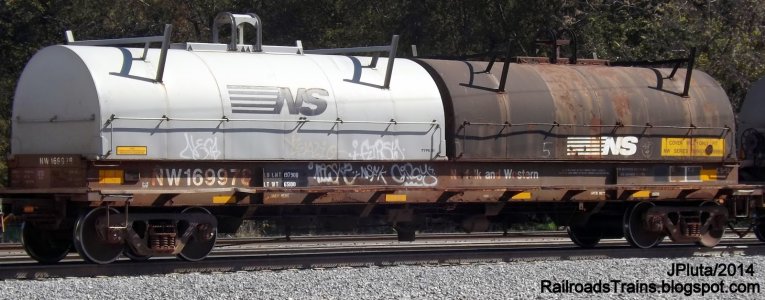
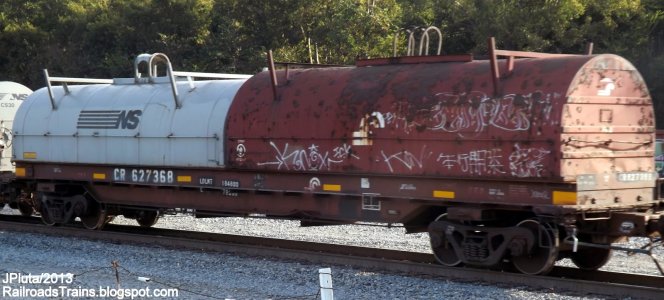
It’s been determined to use this picture for the coil cover inspiration!
View attachment 202620

I sent these to the client. The gondola has its 1st fade only
View attachment 202624View attachment 202625
View attachment 202621View attachment 202622
Edit: 10/26 @9:31am

Client is sending me a new picture of what he wants. So the above is a FAIL. No weathering today so I will strip it down Sunday morning

The coil covers and gondola, as you weathered them, were they together as a set, or were they intended to be representative individual pieces?

I ask because the two coil covers look like they come from radically different environments.
 
I think if you blend the rust spots with powder (different tones) it'll give it depth/ 3D look.
Great idea and I will do that today

Turns out the client does like the covers but wants one full cover like each side I showed

Pictures on Monday as it’s 6:58am and I’ve been at the bench since 5:40. Breakfast for me next and when the girls wake by 8 I usually take the granddaughter to the bakery for her choice
The coil covers and gondola, as you weathered them, were they together as a set, or were they intended to be representative individual pieces?

I ask because the two coil covers look like they come from radically different environments.
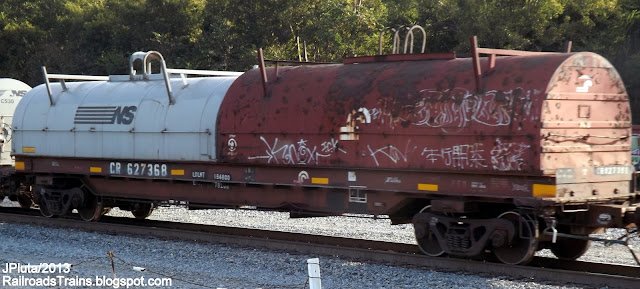
They are an interlocking set in real life but the model is moulded as 1 piece. I was trying to show the client 2 different types of finishing for his choice. Turns out he likes both types and I will do I one of each. The graphics on top near the end indicate which lid goes on first and which one gets removed 1st. That wording needs to be visible
 
I ask because the two coil covers look like they come from radically different environments.
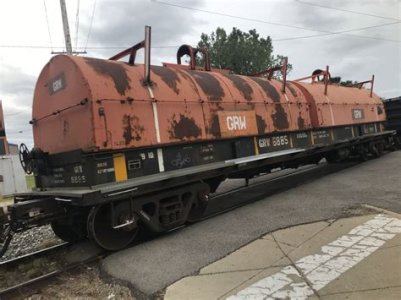
My work took me to various mills and shops and I got to see these taken off and put back on.
Some shops lifted them off and stacked them neatly until they were placed back on.
The union shops flipped them onto the ground, pushed them around, hit them with forklifts, and basically threw them back on. That’s where the real weathering occurred! 😆
So which one do you like best

Left side or right side or neither
IMG_8285.jpeg
 
A few things! Marlin39 really liked the cars and the S-2 diesel. That makes me happy, thanks to all who commented during that adventure in Weathering. He’ll be back with more!

Saturday and Sunday have seen very little weathering. But I did test the mainline, the paper mill and transload trackage. This morning I pulled up one of the Saturday trouble spots (the switch)
IMG_8299.jpeg

and finished stripping the coil cover
IMG_8302.jpeg

After the Packer football game I went back to the layout for more testing! All cars and locomotives used are weathered or primed.
IMG_8310.jpeg
Tested the pulp and
IMG_8316.jpeg

Wood chip tracks
IMG_8306.jpeg
IMG_8305.jpeg


Gotta set priorities, right? 😉
Happy wife happy life

Terry is a born and bred Packer fan, still has 4 outside tickets her Dad started buying in 1957. We had a couple issues when we started dating and she invited me to a Bear/Packer game when we were in college. I grew up a Bear fan and until the invite our NFL allegiance had not been discussed. She learned to love me in spite of that perceived short coming!
 
The coil covers have been moved aside and the inside of the gondolas were worked on yesterday. The outside has just 1 fade coat and the underside has been faded and spot rusted

IMG_8328.jpeg
This car floor (different from previous car’s pictures and methodology) and inside walls have a base of Tamiya xf-9 hull red with 2 drops of x-1 black added to the 40% paint and 60% thinner mixture. After drying overnight a mop brush of 50/50 Vallejo Air burnt umber 71.040 was dabbed onto the floor and in some spots pulled up onto the walls. After drying I sprayed a VMS matte clear varnish
IMG_8327.jpeg
IMG_8326.jpeg

Then a mix of dark rust and steel pigments from AK Interactives was dabbed onto a damp floor of water. Let dry and then with a dry brush scrubbed to create some peel effects. Again a clear coat was applied
IMG_8325.jpeg

Yes, the coil covers still fit!

I doubt I’ll see the weathering bench today as most of the afternoon I will be at a op session
 
What do I know? Just because I don’t like it doesn’t mean the client doesn’t. He thinks it’s a great contrast. So in a few minutes I will clear coat both cars
IMG_8393.jpeg

IMG_8392.jpeg
IMG_8389.jpeg


I made up a rack and put it in the car and added 120,000#’s of steel coil. The cover still fits. I put pictures of the 2 cars on my weathering page and got an order for 5 cars and some nice comments! Cool…

You never know
 
View attachment 203110

The one on the right the floor isn’t right. Looks like a brush dabbed the floor, need to fix that…

It may not be the look you want, but I’ve seen flat mild steel surfaces look like that: a little standing water for a few days, some structure overhead to drip in areas and flush away fresh rust in the dark spots, and you’ll get that.

Haven’t seen it in railroad gondolas, but on flat mild steel surfaces of similar size.


Affiliate Disclosure: We may receive a commision from some of the links and ads shown on this website (Learn More Here)

Back
Top