ModelRailroadForums.com is a free Model Railroad Discussion Forum and photo gallery. We cover all scales and sizes of model railroads. Online since 2002, it's one of the oldest and largest model railroad forums on the web. Whether you're a master model railroader or just getting started, you'll find something of interest here.
I have decided to do exactly that. Those blue tinted lights were just NOT appealing to me,...seemed to wash out true colors of items on the deck. So I'm going to see what I can work out with amazon (if possible) to exchange those 6500K units with 4000K units to match those LED's I had purchased originally. Those 'daylight glow' 4000K units just put out a much more pleasant color.
EDIT: I've been able to work out a deal,...so I will be buying two more batches of 4000K lights to make all of my primary layout decks all lit with 4000K lights. I will take the 5000K set I have and use them in my 3 staging areas,...so my staging will be very well lit.
I'm terming them visors rather than valences, as they are individual to each strip light.
Turns out I had several scraps of plastic venation-blind material that were approx the correct width to make visors for those LED lights,...and they were a light weight plastic that might be glued to one of the edges of the LED strips. they were not the correct length (too much to hope for),...but here is the general idea of how it might look....
Those 2 are thicker plastic blinds.
This is a thinner material I only had one of,..
(are the images showing up??...when I hit the delete button they show up, but when I go back to the normal view they drop out?)
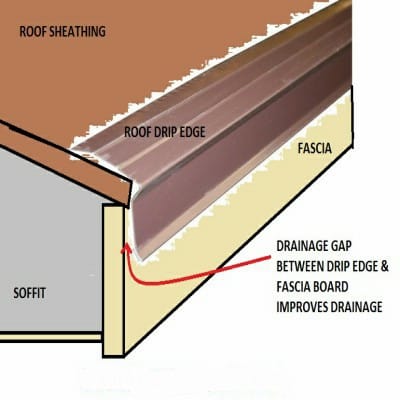
Went by my local metal scrap yard today to see if there were any items that might give me inspirations. There were a couple of bent up pieces of 'drip edge' that made me want to look into their use.
I dropped by my local Home Depot and first visited their venation-blind area. I discovered the vertical kits of vinyl materials that were about 3" wide and 10 foot long. The pieces were approx the same thickness of my sample piece. And it was pretty cheap,...about 11.50 for 9 pieces. This would work,...but might still present some challenges with mounting.
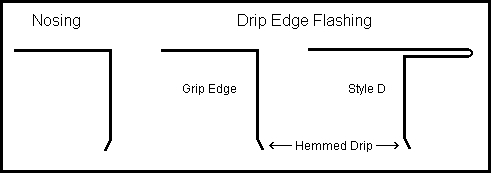
I then wondered over to a selection of 'metal drip edge'. Wow, a selection of different types, most very thin lightweight metal, most 10 foot long,...and very reasonable prices.
I really like the idea on being able to easily attach those LED lights onto one of the 2 inner surfaces of these drip edges, then easily screw mount those to my ceiling.
Plus now I can use a continuous 10 foot strip down each side of the shed,...have to refer to it as a valance now rather than a visor. It will also hind the connecting wiring between the LED strips. And the exterior surface can be painted blue to match my sky color.
I decided on a paint,...a flat version as most recommended. It is a Valspar paint called Autumn Sky #4008-7C I had mixed up at Lowes for only $20.
Will start painting today. The only negative so far is that I had to removed all my 'mock-up' structures and tracks to make all the new painting most easy,...one step forward with layout construction, 2 steps backward....ha...ha.
I have these 2" galvanized beams holding up the cantilevered plywood decks. I wanted to color these the same sky blue in that area between the upper and main deck,..so I had to prime them with an undercoating prior to their blue coating. I did this with rattle can spray,...not so good in an enclosed shed with hot humid conditions out doors !!
I started painting today, and as I reached one end of the layout I began to think I made the wrong choice,...it was just too dark of a blue. I stopped, thinking I needed to re-evaluate.
Then i thought perhaps I need to wire up a few more of those LED lights, and see how that brightened things up. Wow, what a difference. My corners were now not so dark. I waited a few hours and things seem to be getting better.
Does this latex paint continue to get lighter in shade after a few days? I though I recall something like this?
I'm beginning to get comfortable with the new color. It could be even better after addition of clouds, but I'm not so sure about adding them,...or if I do perhaps something like drybrushing them??
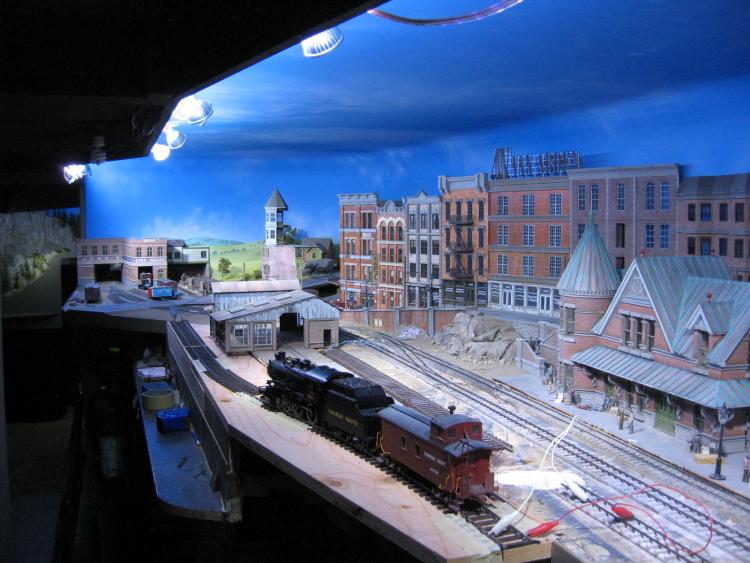
These first 2 photos show the difference between the old blue and the new blue
It might be worthwhile to look at a couple of Bob Ross episodes , exact colors and precision aren't that important , and you can do a lot with a 2" brush. He made it look stupidly simple.
it looks like they are using halogen spot lights and the main room lighting is off. The spot lights focus your attention to specific detail scenes , and away from less detailed areas or "mistakes" or "goofs".
If the lights have a lower color temp like 3000-4000K , the overhead blue will absorb most of the light instead of reflecting it.
PBS https://www.pbs.org/show/best-joy-painting/ check your local listing . All he does is landscapes , he just throws up whatever color he feels like , 30 mins later boom done. No more than 2- 3 brushes and paint knife , once you see what hes doing its not that difficult.
Little known fact: Bob Ross did not spontaneously create those paintings in front of the camera. He actually painted one beforehand, and had it positioned out of camera view. He would refer to that one while painting the other on camera. I hope this does not disillusion anyone.
Little known fact: Bob Ross did not spontaneously create those paintings in front of the camera. He actually painted one beforehand, and had it positioned out of camera view. He would refer to that one while painting the other on camera. I hope this does not disillusion anyone.
He actually painted three of every painting. The third was done after the show with a photographer recording every brush stroke for inclusion in his "How To" books. What Happened to Bob Ross' Paintings?
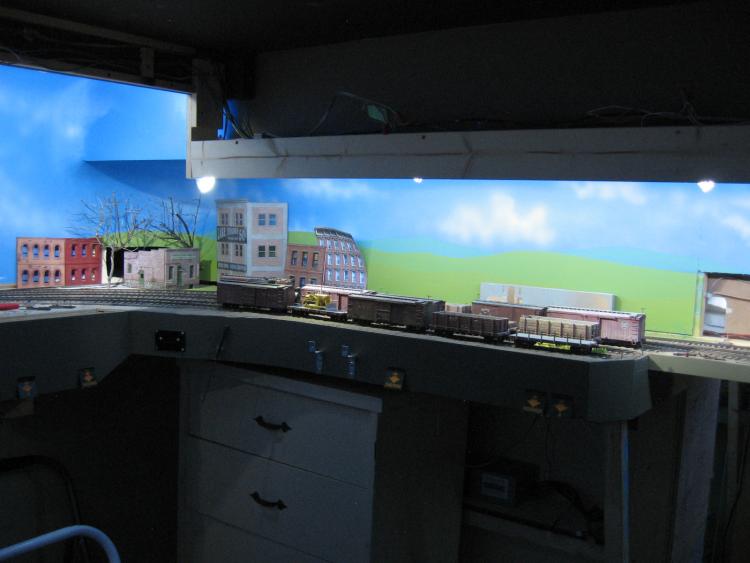
Here are some photos of my blue sky finish (a flat blue color called Autumn Sky) along with the LED tube lights. There are 2 on the upper ceiling at that one end that are still undetermined about their ____.
I took these without any flash, so the ceiling appears darker than it really is.
I even put a couple of lights down in my staging deck where the tracks will enter from the helix (that waded up paper is hiding the hole for the entrance track)....
The 3 staging areas will be well lit, and will be curtained off,...plus those lights can be shut off when not needed.
Finally decided to put some 'shades on those other 2 lights on the ceiling,...but still need to paint them blue.
I added some 'secondary' LED's to undersides of the upper deck,... back in those corners were the lights at the outer edge of the plywood were not providing what I thought were enough. I adapted a little 90 degree alum bracket to glue onto the LED tube, and screw into the wood deck,..
I am happy with my color choice for the sky, and openness of the space between two decks of my cantilevered style benchwork
It looks real good. The spacing between decks looks about right. I set the top deck back about six inches on mine and I am very happy with the way it turned out.