Starting from scratch.... Literally.


bsiss11

New Member
Morning everyone,

My name is Ben, just found these forums after doing some research on ideas for a layout.

I started in the hobby young, growing up with O Gauge that we had inherited from my dad's uncle (much of it pre-war). I loved it and always wanted room to set up and create my own layout in my own home.

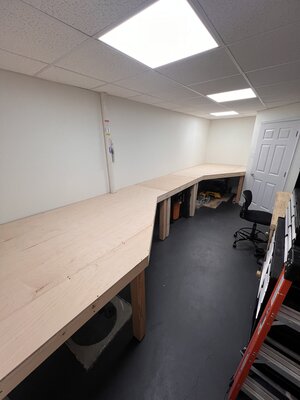
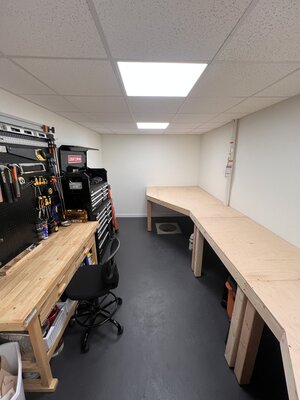
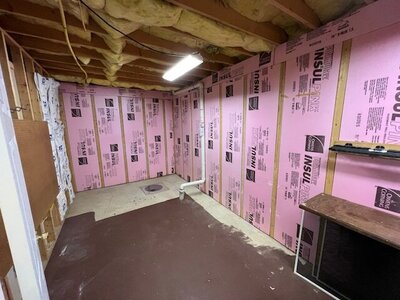
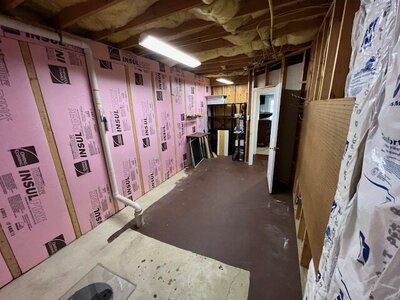
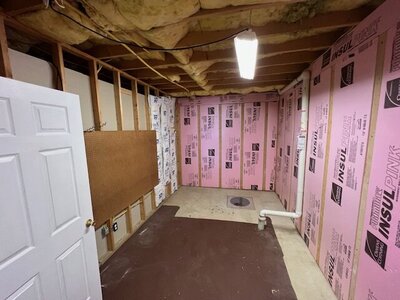
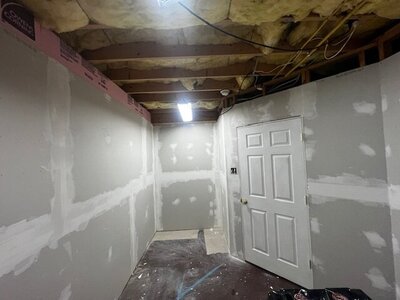
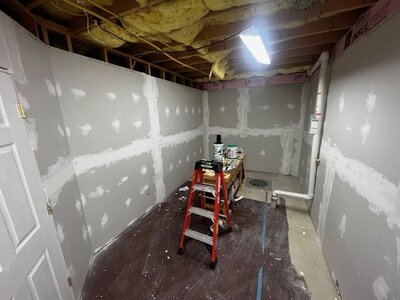
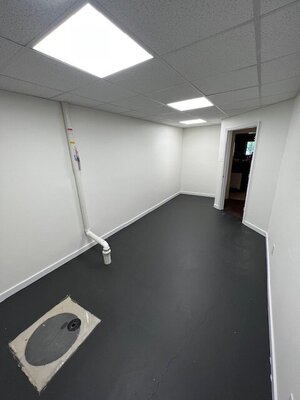
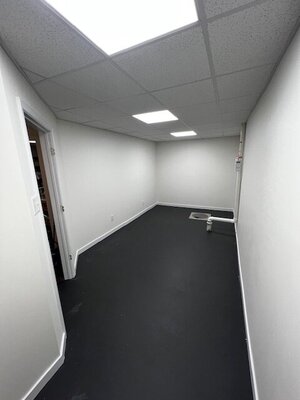
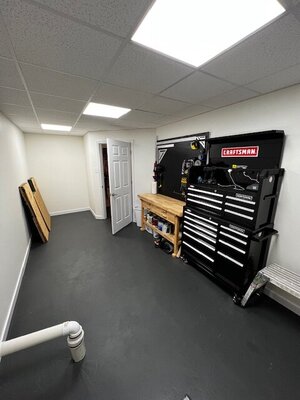
Fast forward to present day, my wife and I bought our home almost two years ago, and last year I convinced her to let me turn an unfinished storage room in our basement into a workshop/train room. The room is 20' x 9' at the widest and tapers down to a little under 5' at the narrow end. I finally finished the room and am at the point where I am ready to start building the layout. As much as I love(d) O gauge, I believe the space the room provides won't allow me to get into the level of detail that I hope I can get with HO.

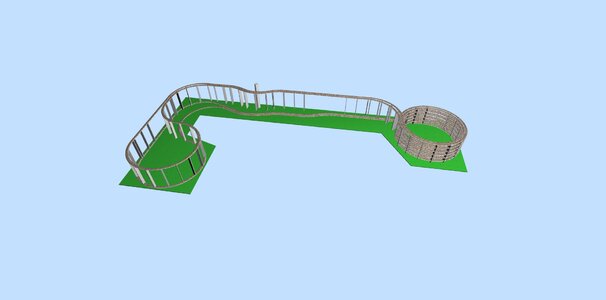
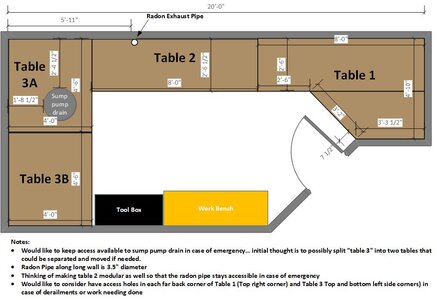
Here is where I am looking for input from you all... as you can see, I have my sump pump drain and a radon exhaust pipe that come up through the foundation of the house. In the two years we've lived here I've never had an issue requiring access to either one of them, but I'd like to keep access fairly simple in case something comes up. My thought was to build something semi-modular to allow access (and ease to remove if we were to move again in the future).

I'd love to hear any thoughts/ideas/input that you more experienced folks might have and see what else can come up with. I've attached some pictures of the room and a diagram I drew up in Visio of what I'm thinking of making the table itself build out to be. I'm still working out a track plan (which is more difficult that I thought) but certainly open to suggestions on that as well...

Thanks for the thoughts in advanced, happy modeling and looking forward to learning a lot and hopefully sharing a lot in the group!

Ben
 

Attachments

  • IMG_1968.jpg
    IMG_1968.jpg
    69.5 KB · Views: 73
  • IMG_1969.jpg
    IMG_1969.jpg
    132.9 KB · Views: 48
  • IMG_1970.jpg
    IMG_1970.jpg
    122.1 KB · Views: 50
  • IMG_6182.jpg
    IMG_6182.jpg
    46.5 KB · Views: 46
  • IMG_6183.jpg
    IMG_6183.jpg
    115.4 KB · Views: 48
  • IMG_7332.jpg
    IMG_7332.jpg
    33.4 KB · Views: 36
  • IMG_7333.jpg
    IMG_7333.jpg
    32.9 KB · Views: 36
  • IMG_7334.jpg
    IMG_7334.jpg
    32.3 KB · Views: 42
  • IMG_7389.jpg
    IMG_7389.jpg
    49.6 KB · Views: 59
  • train room layout.jpg
    train room layout.jpg
    84.7 KB · Views: 63
Nice little room to start a small empire.
It could lend itself well to a multiple level layout.
The tables you have in the last picture are way to deep to reach anything at the back. At some point you're going to venture into scenery. Having to reach 4 feet to do detailed work gets old and tiresome real quick.
I would suggest you consider something closer to the walls where you can easily reach everything, otherwise you probably will never get past the plywood stage.
 
Welcome to the group Ben.
Looks like you have a quiet comfortable place to build a layout.
Keep us updated on your progress.
 
Nice!! You can have a continuous loop if you want, maybe even twinned. You could put a backdrop near the pinch point and have a curved track staging facility there. You'd lose maybe four feet, but still have 16 feet for a nice, sinuous, track over terrain, even a small switching yard. A couple of switching industries, and you'd have a layout with lots of interest and fun.

I would make it an around-the-room loop and benchwork. Operate from the middle.
 
What sort of model railroading interests you most? As others have already said, the shelves you're proposing are far too deep, which will create big problems for access, but if you were to approach this as a shelf layout, with shelves 1-2 feet deep, you've got enough room for a lot of switching. If you want continuous running, you could use a "water wings" design, with return loops at 1 and 3B, which, while not solving the problem of access to the corners of the layout, allow you to make Tables 2 and 3a a lot narrower, which would also ensure comfortable access to the sump drain if needed (or covering with a mat when you don't need it.) But if you're a switching/operations nut, a point-to-point layout would fit well.

One other option to consider: if that big Craftsman tool chest is separable into two cabinets that can sit next to each other, you can add more shelf layout above the cabinet, or even above your workbench if you're willing to give up some tool wall. That would also mean you could add a lift-out section across the door and have a layout that runs all around the room.

Another idea that served my own layout well: consider putting cabinets above the layout to provide lots of storage, plus you can mount layout lighting under the cabinets. Helps keep the room tidier & more organized, plus gives the layout a more finished look if you take the shelf-layout approach. Although since the door opens inward, you'd effectively be barring the door from entry when the loop track is in place.
All very good ideas!!
 
Thanks for all the ideas. I know the 4 feet is deep. My thought was to maybe add some kind of an access port to do work/access the harder to reach areas.
Im definitely more interested in the continuous loop operation but would like to add in a couple of industries. Primarily would like to aim to model a small town USA in the 1950/60/70’s era.
A lot of the videos I’ve watched online talk about starting small and then adding as you go, which may not be a bad idea. That would lean me more to start building down in the “table 3” area first.

My other concern is curve radius. I’d like to have it set up to be able to accommodate larger locomotives and have more of a natural curve angle to it, from which I understand a 24” radius would be the way to go…. Or am I thinking too big here?

Thanks again in advanced and appreciate the welcome and input!
 
A lot depends on the kind of motive power you want to run within that era: if you want to model 1950s-70s, that's generally early diesel or very late steam, most freight rolling stock was still in the 40-60' range. While many will recommend 24" as the bare minimum even for small switching locomotives and 40' cars, in my own experience, if you're careful with your trackwork and use a smooth transition into the curve, 18" is manageable, or even 15" if you stick to things like 44 and 70 tonners, SW-1 and S-1, and other small B-B diesels. A Geep or EMD F-unit, or other similar 4-axle diesel, will do just fine on 18" radius, but that still means benchwork at least 40" deep. Note that if you want 24" curves, Table 3A will have to be more like 4'6" deep at least. You mentioned larger locomotives, but that's going to be a bit of a challenge.

Access ports are a solution, but they're literally a pain in the neck (and the head) to deal with in practice. One approach you might try, especially if you decide to go sectional: build 2 40" deep by 5' wide tables with 18" reverse loops (you don't even need scenery, just a loop on the plywood, with a big hole cut in the middle for access if you want), and a 10' long by 12"-18" double-tracked center module with a couple industry spurs in the foreground (if it's a Midwestern small town, likely a grain elevator, fuel oil distributor, and team track) and a row of Main Street USA small-town building flats in the background. Connect the central table to the reverse loops with C-clamps and rail joiners. Note that if you add a passing track that connects the two mainline tracks together, you'll have to wire for a reverse loop.

If that suits your style and you want to expand, you can disconnect Table 3A, rotate it 90 degrees, and build an L-shaped new Table 3A to add more industries or just more track & scenery; you could also add a couple more tracks to the middle section and make it into a yard. Alternately, you could put a small yard in the center of either of the reverse loops, although that means a smaller access hole. Or, if you decide you want a little more elbow room, you can disassemble the reverse loops and use the 10' section as part of an around-the-room layout, which would let you use wider curves (more amenable to large locos), plus trains always look better when viewed from inside the curve than outside. There's no need to make it more complex to start with; if your main interest is railfanning, a loop and a couple industries is enough to get you started, and if you decide you want more, there's room to grow.

I went sectional myself, and found that it was a good way to start small and build bigger, and you can always change your mind halfway through and take another track to where you want the layout to go.

Screenshot 2024-01-11 150114.jpg
 
Last edited:
I love posts like this as it becomes a total Zen moment for me as my brain wanders and dreams of possibilities. :D
Ben, you have a GREAT space to play with. It looks wonderful!

My recommendation would not be going modular, but rather a purpose built layout for that space (as I type this, I have recently torn down my purpose built layout with the intentions of going modular). Like others, my thoughts immediately jumped to a multi level layout using the "condensed" section at the end (behind your door) for a helix. If you haven't done so already, I recommend downloading a track planning software and just playing around with it for a while to come up with something you like. I use SCARM. There's a free version, or you can pay for the license and build bigger plans, etc. Attached is a quick plan I drew up in SCARM for a two level layout with a double track Helix in your space (22" and 24" radius curves in the helix). It didn't take took long and I even included your Radon pipe. :)

You've got a lot of possibilities! Think! Plan! Re-Plan! Plan Again! And don't be afraid to start over. ;)
 

Attachments

  • Bsiss11 Option.jpg
    Bsiss11 Option.jpg
    100.7 KB · Views: 27
Also, I regard to your sump pump access: IF you went with a custom-built-for-that-space type design, I would recommend supporting the shelving with angled brackets on the wall and NOT straight down legs to the floor. A.) Less stubbed toes, B.) Better access to the sump opening if needed.

I look back at my posts and have to laugh. Everything I am recommending to you are things I am getting rid of as I rebuild MY layout. 🤣
 
Angled brackets instead of legs to support the layout are another big reason to have a narrower shelf layout; under-layout access, storage room (cabinets on rollers or bins make it easy to move things in & out), and fewer stubbed toes!

I'd respectfully disagree with the idea of double-decking this room, at least for your first layout. While a double-deck layout provides additional room for main line, constructing a helix is a challenge, and it adds considerably to the complexity of planning and building a layout. But building a wall-hugging shelf layout (with or without return loops) can help hone those skills, and if you decide it's time for a second level, you can always add one.

Below is my current layout space; a little bit bigger at 15'x23', but the layout visible here is 9'6" wide by 12' deep (there's another 12' of layout on the left and right side out of shot, a classification yard on one side and a staging yard on the other) so in some ways comparable; admittedly, I'm much more interested in point-to-point switching than continuous running so your layout design methodology would be very different. Most of the shelf layout is 12" deep, with 3 small peninsulas; only about 2' of the layout is 24" from the edge of the layout at any point, and those 2' are where about half my derailments happen. Storage shelves & cabinets above the layout have LED lighting strips and valence underneath; workbench, more cabinets, woodworking tools and storage tubs are under the layout with room to reach the underside of the layout without too much yoga.

20230327_161905.jpg
 
Hi all!

I appreciate all the feedback, thank you! Life has been a little crazy with a wife due with our first kid any second, but I was able to escape while on a nesting escapade and finish the benchwork. I already called one audible and decided against using the whole space where “table 3A” is, and went with a mirror dog-bone of the other end. I figured this would better allow for the wider curves I’d like, and allow for more working room as well, and leave the room to feel more open in general. This left plenty of room around the sump pump underneath the table, should it need work at some point, and still allows for plenty of storage for stuff underneath.

Overall, I’m pretty happy with the results! Now I suppose the real fun is ready to begin!
 

Attachments

  • IMG_9291.jpeg
    IMG_9291.jpeg
    420.2 KB · Views: 24
  • IMG_9290.jpeg
    IMG_9290.jpeg
    496.1 KB · Views: 25


Back
Top