My Northern Pacific Butte Montana Layout.


HPIM6731.jpg

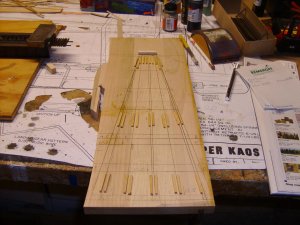
Getting ahead of myself a bit; but, here is a photo of the jig I built to manufacture trestle bents with. You can see that at first I drew the bents a tad to wide.

The planing stage included a look through the Kalmbach book: Model Railroad Bridges and Trestles Vol. 1. I needed to determine how tall the bents needed to be and how many of them I should build.
I settled on the tallest bent being 100 scale feet tall. I determined that the Gulch I was going to span, would need 5 bents to get across. The book explained what the distance between bents should be and gave dimensions of the lumber needed. Then I decided what I was going to make the trestle bents out of and drew the jig on the board you see. There was an old trestle for the Great Northern near where I live (Since torn down and replaced with a typical bike trail bridge). This trestle used round pilings, so I thought, I'll use 1/8th inch diameter doweling and balsa strips for the lumber. I have since been told that the railroads did not use round pilings if pilings where to have multiple stories (they would not put one round piling atop another round piling and that they would have used deminsional timbers in this case). My trestle was done by the time I heard this information and I felt no compunction to re-build it.
 
Last edited by a moderator:
I don't have a photo of the old strip of mahogany trim I used as a bridge for probably 10 years. However, because I had used this piece of lumber to span the gulch and it was fitted to the two approach ends, I simply traced the the rails onto the strip of wood. This gave me a dotted line I should cut the board to, to give me the width of the stringers that was to support the bridge track with. I ordered a piece of Code 83 Micro Engineering Bridge track and two Code 100 to Code 83 transition tracks. Normally, the stringers would be made up of timbers that spanned between three bents. Then their joints would be staggered so that they did not all end on the same bent. Also, the stringers, three or four of them, would only be under the rails, directly. Since the track on my trestle was going to be only slightly below eye level and the real way that the stringers would have been made would not be seen, I used the solid piece of mahogany as the stringers. I sanded there edges smooth, then with my Xacto knife I cut these edges so that from edge on the one piece, looked as though it was made up of many parts. I painted the top of this strip Grimy Black so it would not be noticeable between the ties. Once the bridge track arrived, I cut it to length and glued the bridge track to my strip of mahogany. I now had the bridge deck, ready for positioning my bents onto.
 
I am really liking your posts. Building a trestle is a lot of work but they sure are impressive on a layout. I had thought of putting one on my layout but never got around to it.

Toot - A hoodoo is a rock formation common to some areas of the western US. Here's a link. https://en.wikipedia.org/wiki/Hoodoo_(geology)

Keep the posts coming.
 
HPIM6734.jpg

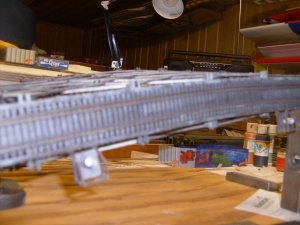
The above photo was taken before I finally learned how to take close-ups, so it is a tad blurry. It also shows the deck after the bents, girts and diagonals had been applied. However, it does show the deck with track and guard rails glued onto the it. In this photo, you can see that the deck does have a slight curve on one end. Also, in this shot you can see that there is no gap between the stringers under the rails. The ties, rails and guard rails have all been painted Roof Brown, to match the rest of of the track on my layout.
 
Last edited by a moderator:
HPIM6727.jpgHPIM6728.jpg

Here the bents are being glued to the underside of the deck. Photo 2 shows the short bent, supporting the through girder portion of the trestle being glued in place.
 
Last edited by a moderator:
I'm going to discuss building the bents, now. The process is really pretty simple. I laid the pilings in the jig and cut them to the correct length. Although not easy to see in the photo of the jig, the horizontal lines on the jig are either where the pilings where cut to the 5 lengths I used, in which case the horizontal line had a check mark on it; or, the horizontal line was the top edge of one of the story sills. After placing all the pilings in their proper slots, the next item was to install the Cap Sill, this goes at the top of the bent. I used white glue, to glue all of the sills and sway braces in position. After the glue had dried securing all the sills and sway braces in position, the bent was flipped over and the same process performed on the other side for it's sills and sway braces. I used the white glue very sparingly as it tends to not allow any staining to take place. In the above manner, is how each bent was made. Again, I have gotten slightly ahead of myself! To have the trestle look right, I made a scale drawing of the trestle before I started construction. Knowing that I wanted my tallest bent to be 100 scale feet tall allowed me to determine how tall the rest should be. When I was satisfied with how the trestle looked I then built the jig for the bents.

Those are plans for an R/C airplane under the trestle.
 
Last edited by a moderator:
HPIM6730.jpg

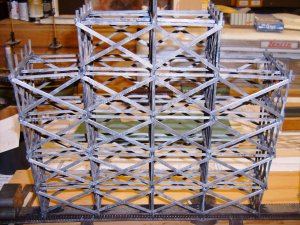
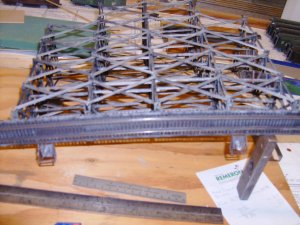
In the above photo, the Bents have been glued to the Deck. I started with the 100 foot tall Bent and used a combination square and a light weight plastic clamp to hold the Bent up to the square to make sure the Bent was perpendicular to the Deck. I used white glue to glue the Bent in place. I did this because I wanted time to make sure the the Bent was in the correct location. When the glue had set, I glued on the next Bent closest to the center, again using white glue for the long set time. When the glue had set, I glued on a couple layers of Girts (Girts run between the Bents on the horizontal). Then I glued on the Bent on the the other side of the tall center Bent and when the glue set, secured it with a couple layers of Girts. The process was repeated until all the Bents where glued into position. Then I secured the Bents by gluing on all the rest of the Girts. Once all the Girts where in place, i glued on all the Diagonals. I laid the trestle on its' side, making it easier to to glue on the Diagonals. I used clothes pin clamps to hold the Diagonals in place. The Diagonals push on each other where they cross in the center and it's a good thing to use a spot of glue there to strengthen the overall structure. The use of Diagonals is optional. The Rio Grand Southern had many, many trestles and none of them used Diagonals. Or, you might use Diagonals on one set of Bents, skip a set and use another batch of diagonals on the next pair of Bents, so on and so forth.
 
Last edited by a moderator:
HPIM6737.jpg

Here I've show the trestle laying on it side. This was the position it was in while I glued on the Diagonals and while I stained the Pilings, Sills, Sway Bracing, Girts and Diagonals. I used my mixture of black wash to stain the trestle. In places where the white glue precluded getting a good coat of stain, I used straight Grimy Black to cover.
 
Last edited by a moderator:
View attachment 58787

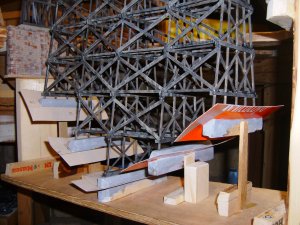
Of course I had to test fit the trestle into its' location on the layout. Look, the structure of the trestle, even though it is unsupported from below, is strong enough to support the weight of a 40 foot box car! The photo shows that two of the abutments on the left side have been installed. However the abutment on the right still needs installation.
 
HPIM6738.jpg

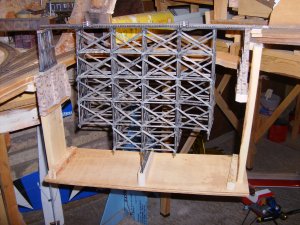
In this photo we see the shelf that will support the concrete piers that will meet the Bents. The center bent already has one of the supports installed. The photo in the post previous to this one, shows the horizontal plywood scenery contour support, in back of the trestle. This will be a place to anchor the cardboard strips used to define the rocky edge of the Gulch. Also, the right abutment is now in place, as well as the bottom portion of the abutment on the left, supporting the small bent under the Girder Bridge.
 
Last edited by a moderator:
HPIM6749.jpg

This is how I supported the footings for my Bents. The footings are made of pine and cut and sanded to shape then painted with Acrylic Paints, mixed to look like concrete. Then I glued chunks of wood to the shelf under the trestle, and glue in footings to sticks and aligning them so that they would just touch the bottom of the trestle bent. Then I made up pieces of thin cardboard that fit around the footings for something to glue my cardboard webbing scenic supports to. After this was done I removed the trestle from the scenic base, again. With this all being done, I was ready to build my scenic webbing base, to outline and support my plaster impregnated cloth.
 
HPIM6756.jpg

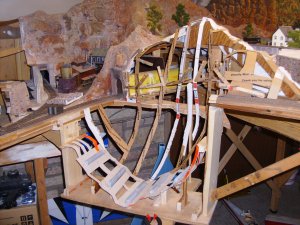
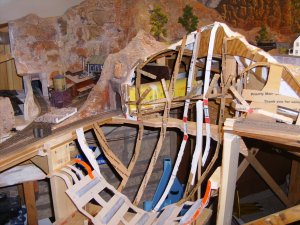
Photo #1 Here I have started putting together the webbing. I used some thinner cardboard in some areas than I would normally use, as the place where they are used is basically pretty vertical so the this stuff was only used to support vertical scenery. It has been stapled to the plywood shaped horizontal support at the back of the gulch.
 
Last edited by a moderator:
HPIM6755.jpg

This photo is a slightly closer shot of the one above. In both of these photos one of the supports for a Hoodoo is shown and the board glued to the bottom of the trestle support shelf, to support the Hoodoos can be seen. I have used a dowel as one of the Hoodoo supports. Sorry to say, I thought I had more photos of the cardboard webbing being installed; but, I don't seem to be able to find them now.
 
Even though I will not have any trestles on my layout, this is a very good tutorial on building them You are doing a great job. Keep posting.

Willie
 
Most of my working life I've found work to be less than fun, building the trestle was as much fun as seeing it in place with trains running over it. I am a modeler, I find my fun in building models!
 
Maybe it's time to talk a little about my philosophy on modeling. How I was attracted to flying Radio Controlled models, Model Ships and Model Railroading was my interest in building models. I would rather build models, than fly R/C, sail model ships; or, run trains. The operation of models is secondary. I am disappointed in the direction the modelling hobbies seem to be headed. R/C is totally dominated by the Ready To Fly; or, Almost Ready to Fly airplanes. When most R/Cers crash their airplane, they take out the radio parts and toss the airplane in the garbage. People like me take them out of the garbage, take them home and repair them. We all know what is going on with Model Railroading, almost totally RTR and this movement is also getting into structures, there are more and more structures being built previous to being sold than ever before. I see now that Menards is getting into selling ready for the layout model railroad structures.

If you don't see that this is the direction the hobbies are headed, my feelings are you are somewhat blind. That this is occurring is a reaction to the demands of the market. They wouldn't be offering, if this wasn't what the public demands. It increases the manufacturers profits, also. Of the 150 plus freight and passenger cars I have, less than 5 are RTR. Of the buildings on my railroad, zero have been ready built.

So, what I'm saying is: From where I'm sitting, I'm not liking what is happening. Yes, there are still kits available and to those manufacturers that are providing kits, I am very thankful. I also am not going to believe that people just don't have the time to build models anymore. We make time to do the things we want. It is most likely that people simply are not making time for kit building. In which case I have to be satisfied with the kits I can find, and I am!
 
Last edited by a moderator:
You're not the first by a long shot to lament the diminishing (won't say dying, 'cause modellers like you will keep that side of it alive) interest in "make almost everything yourself" side of this great hobby. Often gets raised. It's a bit like when fibreglass bodies and body parts entered the car building "hobby" (Hot Rods, Modified Street cars in particular, my other interest), I can remember the phrase, oft still repeated "Steel is real, Glass is Ass" of the diehard builders. This faded because of the lack of real steel, older cars.

I am among the fans of RTR, not just because of time constraints, and even now there are still plenty of those (whoever told me retirement was when you could be free and do as you like was either a liar or very, very rich and already well set up) Life for most today is more tightly packed, but in my case, I also admit to not having the skills or the patience to build the trains in particular, buildings probably, trackwork, yes. Scenery yes. but I love the detail that they can put into the stuff today and appreciate the control and sound that would be extremely rare if only the full DIYers were all there was to this hobby. No-one should look down on another modeller if his, or her skills or interest level varies from theirs. It's a hobby, we all must enjoy it in our own way and rejoice that there has, because of the ready availability of ready built models of all levels, entry or ultra detailed to warm the cockles of the heart, renewed interest when it looked as though it had a terminal disease. To the hobby in all it's facet's, I say "Live long and prosper".


Back
Top