My Northern Pacific Butte Montana Layout.


Maybe a better description would have been "CONEHEAD" Trees?

I want people to know that if you like the trees I am talking about, you have every right to do so. I have to agree that the trees in the photo of HOExplorer's "Building the Pinacle Creek Mining & Logging Co. RR" thread are excellent models. I would be very happy to use models like them on my layout, I would just add a little more foliage at the top to cover up the CONEHEAD. I guess I might be being critical; however, he is not the only person who builds trees this way. In fact, I have been seeing CONEHEAD trees since I first got into this hobby!
 
Last edited by a moderator:
Back to my Northern Pacific layout. I have ordered a few of the things I need to get started, the turnouts: one #6 and two #4 are on their way, along with three Caboose Industries ground throws with contacts for powering the frogs. I needed to order track joiners and I bought some with red and black wires attached. I have bid on 25 Midwest Cork Road bed pieces on Ebay and am wining, so far. I have never used Midwest's Turn-out pads, I've always made them from the regular cork road bed. Tomorrow I will order my Atlas Code 100 Flex Track. I only need twelve; but, have to order 15, as it is sold in Packs of 5, 10, 25 and 100. Since this is going to be for staging, Code 100 with black ties will do.
 
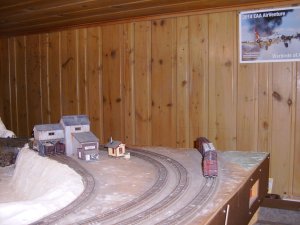
I have taken a few photos to show where this new Staging yard is going to be located.

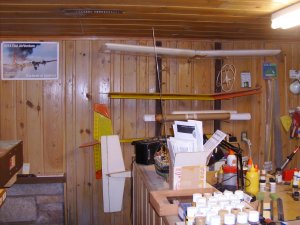
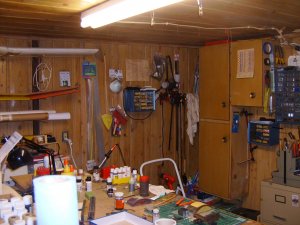
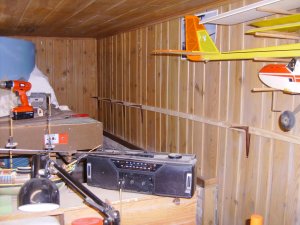
HPIM7601.jpg HPIM7602.jpg HPIM7603.jpg

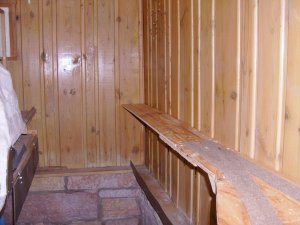
The first photo shows where the staging tracks will connect to the layout. Where the freight cars are stored right now will be the lead to staging. The track under the cars will be shortened and a #6 right hand turnout will be added to the shortened track. This track may be straightened out a bit, making it more parallel to the edge of the layout. The the staging track shelf will run along the knotty pine wall and be six inches wide.

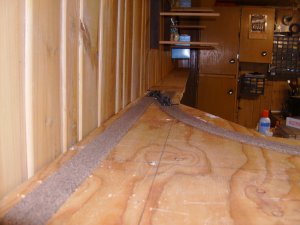
In the second photo, you can just see the edge of the layout. The staging yard shelf will be at the same level as the layout at this location. You can see the storage area I use for off layout storage of rolling stock above the flagstone partial wall. The model airplane storage rack will be cut in two just above where the staging tracks will run and the bottom half of the rack lowered to get it out of the way.

The third photo shows where the end of the 9 foot section of staging will be after some stuff gets moved out of the way. It will end just behind the the cabinet, visible to the right of the center of the photo.
 
Last edited by a moderator:
So, I have been buying the things I need to make the addition to my layout. Five pieces of Atlas Flex track, Ftwo #4 turnouts and one #6. A box of twenty five pieces of Midwest Cork Road Bed and five Caboose Industries Ground Throws with contacts for powering the frogs. I have also purchased at my local Lumber store a 4X8 sheet of CDX 1/2 inch thick plywood and four straight 1X2 X 8 feet furring strips. At my local Ace Hardware, I purchase a few boxes of various length wood screws and eight 6 X 8 Shelf brackets. While at the lumber store I had them rip off three strips 6 inches wide by 8 feet long to be the shelves that will hold my staging yards. The remainder of the Plywood sheet will be the cross over piece from my existing layout to the new shelf staging yard. I am awaiting the receipt of 10 pieces of Atlas Flex Track, Two more Atlas # 4 turnouts and a Digitrax AR-1 auto reverse Booster.
 
HPIM7627.jpg HPIM7628.jpg

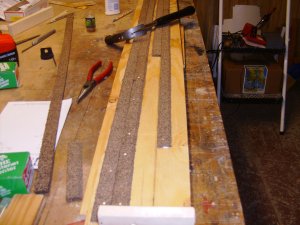
Photo #1 Shows the shelf brackets and furring strips for the North end of the new staging yard. Although the Knotty Pine paneling isn't very straight, it is good enough for what I want to do. Photo # 2 shows the connecting piece that will allow trains to exit the main layout. While looking over my design, I thought I might be missing out on an operational aspect if I didn't make the Wye into an operating wye for turning trains or locomotives!

Here is an admonishment to think things through, thoroughly! I took a 3 foot long straight edge I had and laid it atop the existing layout, to transfer the top of the existing layout's level to the wall for the new staging yard. Then, with a level, I drew a straight line on the knotty pine wall. For some reason, I forgot that this line would be the top of the shelf, thinking it would be the bottom of the new plywood staging shelf. Most of the work I have done to this point was making sure that line was level, installing the shelf brackets and screwing the furring strips to the wall on this line. It turns out that I was mistaken, the line I had so carefully laid out on the Knotty Pine wall should have been at the top of the plywood shelf and not at the bottom. So, I have a grade of 1/2 inch in 22 inches up to the staging shelf. It's not a big thing, I could pull everything off the wall and fix. However, i think I will just leave the short grade and see if it causes any problems. Oh, well the best laid plans...
 
Last edited by a moderator:
That's going to be a great addition Mark!
You can probably squeeze a shallow industry of some kind to add operations too.
 
Looks like you're moving forward. I know for me that staging tracks are quite important and have really worked out well. By the way, I can remember when my layout was covered by an assortment like you have on yours. Now I have to find somewhere else to put all that crap because most of the scenery is done.
 
Last edited by a moderator:
That's going to be a great addition Mark!
You can probably squeeze a shallow industry of some kind to add operations too.

I could put an industry at the back leg of the wye, we'll see.
 
Looks like you're moving forward. I know for me that staging tracks are quite important and have really worked out well. By the way, I can remember when my layout was covered bay an assortment like you have on yours. Now I have to find somewhere else to put all that crap because most of the scenery is done.


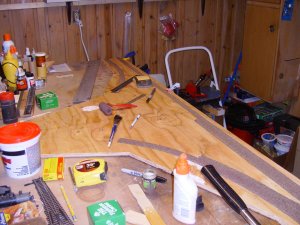
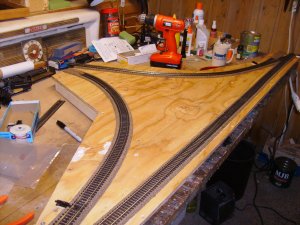
There really isn't much junk on the layout, the crap you see, is on my work bench. I am laying road bed on the wye part of the addition in the 2nd photo above.
 
Last edited by a moderator:
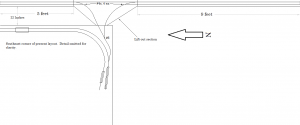
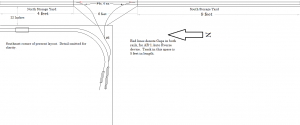
Here is the latest and greatest drawing of my new addition to my layout. Although the lengths of the tail (Storage) tracks has been given, I really don't know their true length yet as the actual length of the Wye is known; but, hasn't been subtracted from the tail track length, yet. Also I need to determine where to put the rail gaps for the Auto Reverse device.

FiddleYards.png
 
Last edited by a moderator:
Mark:

I enjoy seeing the progress on your layout since construction is one of my favorite aspects of the hobby. I would work on the my layout for several nights and then on weekends watch several of Allen Keller's model railroad videos for inspiration and then back to work. My favorite video was footage of Lee Nickel's layout based on his home location in Utah.

Keep us posted on your progress.

I plan on doing a freight or switching yard based on a section of the Model Railroader's Beer Line. The line will connect to the original layout thru a wall via a tunnel. Track side signals will let operators (or me) know when a train was entered the yard limits and the engineer can stop the train since the engine will have left the sight of the engineer.

This section of the layout will operate independent of the original layout.

The work has been delayed due to the fact that the area is the wife's storage area and she is busy selling her mother's home and the work involved in cleaning out the house of furniture and years of possessions. Closing is February 28th. Once the closing is completed, new storage shelves will be constructed in the last remaining section of the basement. Then the layout construction will commence.

Similar to when building my original layout, once I start the bench work I'll purchase all the turnouts, track and roadbed in advance and keep the supplies in inventory. Right now, it looks like the entire area will be code 70 track with PECO turnouts.

I plan on doing progress reports with photos in the forum.

Thanks.

Greg
 
Last edited by a moderator:
HPIM7629.jpg

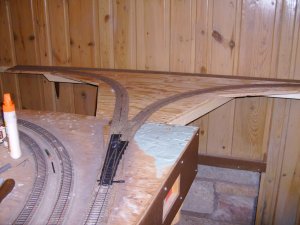
Here is photo of the Wye and the #6 turnout just laid down. When I designed this new portion of my layout I considered making this part of it a lift-out section. While thinking about this, once I actually started construction, I decided all the complications of making it a lift-out section, just was not worth the extra effort. Also, it is very easy to duck under this section as it is at least a foot higher than my other duck under.
 
Last edited by a moderator:
I have installed the two tail track shelves, they are fastened to the Wye section; but, not secured down. I want to remove all three parts so I can install the track, jumpers and other electrical stuff before securing them in place.

HPIM7630.jpgHPIM7632.jpg

Photo # 1 shows the South end staging Tail Track and Photo #2 shows the North end. I now have all the parts needed to finish this build.
 
I have finally made a decision on how I'm going to wire up my wye track. Once I start laying track on the center portion of the new part of my layout, I will take a few photos to show how I am going to do this. I will also be building a panel to control the storage tracks and operate the turn-outs on the South East part of the existing layout, where the existing powered turnouts are now operated from the main panel, which is somewhat inconvenient.

I am enjoying the planing track laying and head scratching part to this new portion of the layout. All other work; or, operation on the layout is put aside at this time. I figured I would be farther along on this project, than I am. However, I'm not hitting it very hard and am not surprised by the length of time this is taking. When your goal is to have fun with the railroad, I'm finding reaching that goal to be very easy to achieve!
 
Last edited by a moderator:
FiddleYards.png

Here is what I think will be the final draft of the addition to my layout. Click to make the drawing bigger.
 
Last edited by a moderator:
You know, for being retired, I'm amazed at how my time is taken up by simple life things! When I was working I would hear older folks make statements about how now that they are retired, they wondered how the could have ever made time to have a job and go to work every day! This is a truism! The wife and I volunteer at our local "food shelf" once a month, so there is a day. Church seems to take up a goodly amount on every Sunday. The wife's mother is in a memory care unit and at least one day a month; or, more, is taken up with going to see her, a 250 mile round trip. We have to make trips to see our two sons and the grand kids at least once a month. You add in that in the mid sixties we are regularly going to funerals for people who we know; or, are very good friends who have passed away. The list is endless as it is for everybody.

Don't get me wrong, retirement is wonderful! I say retire early and retire often! Just know, "Things" take up the time that you thought was going to be your own.


Boy, I sure hear you!

Willie
 
HPIM7643.jpgHPIM7644.jpg

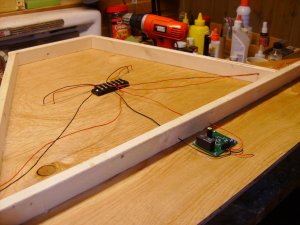
I am about ready to move the wye section to its' permanent home, so I took another photo of the tracks on the top, flipped the panel over and took another photo of the underside with the AR-1 Auto Reverse device mounted and wired up, ready to go. The black item that the wires go to in the center of the panel is a screw terminal strip. Yesterday, I ran out of #22 black insulated solid wire, so I went to town to get more and was unable to locate any. We used to have a Radio Shack in town. They went out of business at the same time Radio Shack Corp went belly-up. That is where I bought my wire before. So I ended up using red wire and put black bands on it to identify it as black. My Ace Hardware barely had any solid copper wire in lighter gauges and none of it in black, red or green.


Back
Top