My Garden Railway Build - 1/1 Scale :-)

ModelRailroadForums.com is a free Model Railroad Discussion Forum and photo gallery. We cover all scales and sizes of model railroads. Online since 2002, it's one of the oldest and largest model railroad forums on the web. Whether you're a master model railroader or just getting started, you'll find something of interest here.


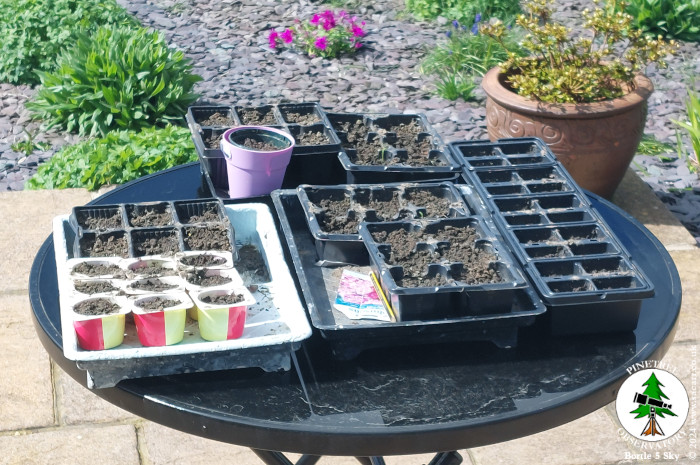
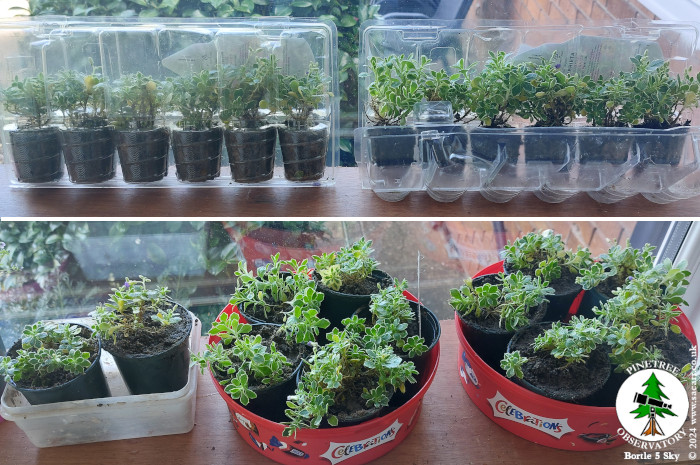
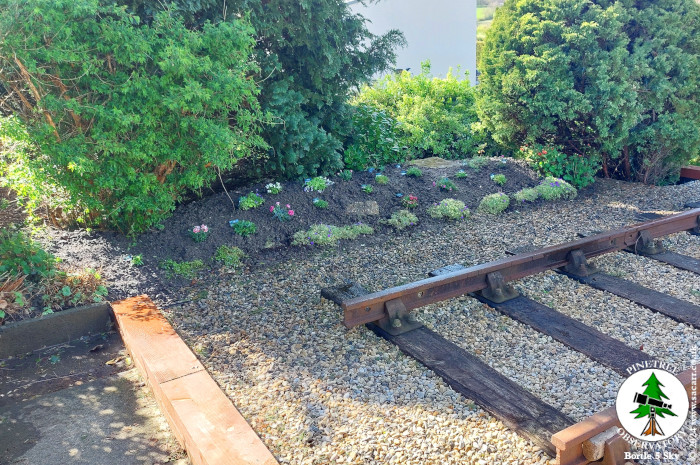
We are still looking for some more Purple Rock Cress, to make a more solid boundary between the plants and the ballast. Other than that, for now, the planting is done and we need to wait and let everything grow and spread. Next year, we can take another look and see if anything died and whether there are still spaces that could do with filling.

obsy600.jpg


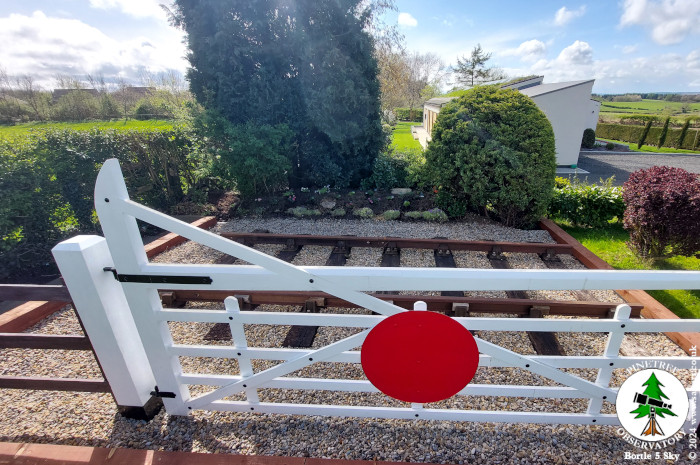
There's one chair screw left to fit on the rear sleeper - the "Golden Spike" to complete the railway. I need to drill the sleeper for this, then the family will all take turns on the two feet stilson wrench, to complete the railway! I'm looking forwards to the Summer, leaning on my crossing gate, with a cold drink in my hand, watching the buzzy things going mental around all the flowers!!

obsy601.jpg
 
I've followed your adventure from the beginning, but I do not recall if you ever mentioned whether or not you were going to add a railcar to this railway at any time. ???


April 19th

Funny how life is circular. When the old Victorian school was knocked down in 1969, to make way for our house, the site was around one acre, with the bungalow only taking up a small part of that plot. The rest of the land was used as a plant nursery.

Here we are in 2024, with plant production now going into industrial levels to fill the garden. We've multiple seed trays on the go, which have started to come to life in the last week. Having already spent around £200 on plants for the railway and path, I'm now looking for a cheaper source to fill in gaps.

obsy603.jpg


The postman also brought another box of twelve Purple Rock Cress plants. Right now, they are tiny, but they will go along the edge of the railway to complete a solid line of these plants as a barrier between the ballast and embankment. With night time frosts still possible, I've potted them for now, until we can be sure the frosts are behind us. Lynne was fretting a couple of nights ago, that we might loose £200 of plants to a late frost!

obsy604.jpg


In the picture below, I've got three pots of Forget-me-nots, pulled from the lawn and the grass separated from them. To their right, in the Flash box, are three pots of wildflower seeds. I think the seeds are tiny, so the box has a white powder mixed in to help to show where they've been spread. With it being still cold outside, I planted some in pots, kept indoors, to see if anything would emerge from the powder mix!

The remaining two pictures are Candy Tuft seedlings, which were big enough to separate from the seed trays and plant in their own pots. The Slushy pots, complete with lids, make quite nice mini greenhouses which also helps to keep the moisture in. The open top still allows fresh CO2 in, for the leaves to breathe. I'm interested to know if those with lids grow faster or slower than the others.

obsy605.jpg
 
April 20th & 21st

The clear Friday night developed into a clear, calm and dry weekend, so it was time to get back to the wall. I've built walls before at the Washington house. Made from modern metric bricks, they turned out so neat, that some people thought the pictures were CGI of what I planned to build. This wall isn't like that at all.

The bricks are Victorian, dating from around 1860, appear hand made. Some are huge, around four and a half to five inches wide in places and none are exactly the same size, nor have flat faces. Some are bulged, some are con-caved, the ends aren't necessarily square and the proportions aren't right for the length of one brick, to work with the width of two bricks for the pillar.

All of this is made laying them a real challenge. Straight and level needs to be an average, as a small level won't sit flat on any of the bricks! Several bricks broke or crumbled during dismantling of the wall, so multiple half bricks were used on the far side, below ground level. They are all being reused from the original wall, so all are stained from age or lime mortar. I may try cleaning them once the wall is finished.

By the end of Saturday, I had four courses added on the front and two on the back.

obsy606.jpg


My back really didn't want me to go back out on Sunday, but I couldn't waste another good weather day. Another two courses were added to the front, with four at the back, though every fourth layer has the bricks laid across the wall, to tie the two sides together. It was all covered in plastic by the end of the day, as the rain came back that evening and has continued on and off to today. Lynne also gave the lawn its first cut of the year. It was still a bit wet, but had got so long, it took her two hours.

I'm hoping a rotary wire brush or grinder can clean off the bricks a bit. A quick test seemed to suggest that would work, but they've got 150 years of weathering to catch up on to match the rest of the wall - which also needs pointing. Yet another job!

obsy607.jpg
 
April 21st ~ May 9th

I got a little more done to the wall on the 21st, the 26th and May 1st. I ran out of original wall bricks and started recycling the bricks from the wall, demolished by the BMW in December.

obsy608.jpg


Lynne decided she wanted another vegetable planter, just for the strawberries, as the potato crop was creeping into the strawberry area. There was just enough room for a 3 feet square planter, but we had to get a 3 x 6 ft planter and just assemble it as a 3 foot square.

The slates were cleared on the 5th of May, while the planter arrived a few days later. It was assembled on the 9th, lined and filled with the leftover lawn topsoil and compost. The bird netting frame was a really tight fit, but did go in without alterations.

obsy609.jpg
 
On April the 24th, I got four more packets of seeds. They were Daisy Pomponettes, Cinercria Silver Dust, Canterbury Bells for various locations around the garden. I also got Creeping Thyme as ground cover for the earth next to the path behind the garage.

obsy610.jpg


May 8th

Due to the poor weather and really dull start to the first half of the year, I bought four LED grow lights to help the seedlings develop.

obsy611.jpg
 
By the 16th, I'd also added two cold frames to the patio outside the workshop, to move the plants on to. My workshop window sill was getting a bit full and the seedlings would need hardening off before planting outside.

obsy612.jpg


I got a bit of real railway action on the 26th of May while visiting Tanfield Railway for their 1940s weekend. I had my Jeep and Dodge on display there and got the opportunity for a footplate ride on "Horden", their 0-6-0 saddle tank loco.

obsy613.jpg
 
Back to my own railway and after a few days out in the cold frame, on the 29th, I planted the rock cress to finish the edge of the embankment. What I thought had been Forget-me-not, turned out to be an invasive weed, so that was pulled out and the rock cress planted to fill in the remaining gaps to the left and right.

obsy614.jpg


May 29th

The red Water Avens were shedding lots of petals on the ballast, so the plant closest to the track was dug out and moved further back. This left more space for the rock cress under the edge of the conifer. I still need something to fill that space that doesn't mind being in the partial shade and shelter of the conifer.

obsy615.jpg
 
The other embankment plants have almost been in the ground for seven weeks now. All of them have survived planting out and several cold nights in April. While they still need to grow and spread, they have been flowering well.

obsy616.jpg


May 31st

With a few days of dry weather predicted at the end of May into June, I wanted to get on with the wall. I'd previously cleaned up a number of bricks that were used on the 1st of May, but needed more. So on the 31st, I got another 120 bricks cleaned of mortar, ready to be laid.

obsy619.jpg


June 1st

The wall is pretty much finished. I've used all the original capping stones, so I'm going to leave the wall for now and try to find a terracotta capping stone to finish the row. The pillar isn't going any higher, as that was just used to tie the wall to the neighbour's wall. I'll either cut some of the existing bricks to put a sloping top on it, or look for another suitable capping stone. For now, it's complete enough, as the year is ticking by very quickly and I want to make a start on the patio extension.

obsy620.jpg


June 4th & 5th

On the 4th, I began digging out and clearing plants from the location of the patio extension. Some of the tall plants, which I think are Astrantia Major 'White Giant', would be moved to the back of the railway embankment. On the 5th, with most of the plants out of the way, I began to mark out the foundations for the low wall that would be needed to support the edge of the new patio and retain the hardcore. Foundation digging began after that.

obsy621.jpg
 
June 6th

On the morning of the 6th, I moved several Astrantia Major 'White Giant' plants to the railway. They were fairly tall and would make a nice background to the low alpines at the front of the embankment.

obsy623.jpg


obsy624.jpg


I got that done in time to watch SpaceX fly their Starship for its 4th test flight, followed by preparing my military vehicles for an evening D-Day beacon lighting ceremony in the village.

dday_05.jpg
 
June 18th ~ July 11th

Between mid June and Mid July, I got the patio foundation filled with hardcore, followed by concrete. I planned to build a small box of bricks around the circular drain cover which would support a removable slab.

obsy626.jpg


Two layers of bricks followed, to support the edge of the patio and to contain the hardcore which would support the slabs. When the brickwork had set, I started breaking up old bricks to back fill the patio area. These were all the broken and half bricks left over from the garden side and front walls.

obsy627.jpg


Several paving slabs were pulled up from the side path, as they matched the existing patio. I'll get some replacements for here as close a match as I can, but being around the side of the house, it rarely gets used, except for access to weed the border.

obsy625.jpg


A layer of mortar was added over the top and the paving laid on top. The following day, I pointed between all the slabs.

With the patio done, the new borders had some unwanted plants dug out and the earth level raised to just below the new patio height. I put some 12 inch square stepping stones along the yew hedge, to give access for trimming. Between and around the stones, I planted Thyme as ground cover. Canterbury Bells and Silver Dust were planted up to the patio edge.

In the lower border, I added more stepping stones down the middle, to give better access for weeding. Thyme was again planted around the stones, with Daisy Pomponettes along each side. These may not be permanent, but will give some colour and greenery for this year. Some of the other existing plants were moved around and a space left for an evergreen shrub, yet to be purchased.

obsy628.jpg


I think I'm going to wrap up the garden updates and end the story here, considering the observatory, railway, lawn and patio are now complete. They were the main tasks planned when we first moved here, three and a half years ago.
 
It's been nine months since I last posted in this thread, so I thought I'd give you all an update via a video walkaround. We planted the railway embankment a year ago today. It looked rather bare at the time, with tiny plants and lots of soil. It has filled out quite nicely in the following year, as can be seen in the picture below. There's still more I want to do, which includes adding more soil at the back, by the conifer, to give more depth for some taller plants as a backdrop.

250411e.jpg


The walkaround video was shot in March and early April, so there's not as much colour as there is now. There's been plenty of other work going on in the garden, developing the woodland, adding a micro pond for the wildlife to drink and wash in and I've just started adding around 140 feet of wood effect, concrete lawn edging.

250412a.jpg


Anyway, here's the video.


Affiliate Disclosure: We may receive a commision from some of the links and ads shown on this website (Learn More Here)

Back
Top