
You are using an out of date browser. It may not display this or other websites correctly.
You should upgrade or use an alternative browser.
You should upgrade or use an alternative browser.
My Garden Railway Build - 1/1 Scale :-)
- Thread starter armyairforce
- Start date

armyairforce
Well-Known Member
Go for it!!!.....you may have started a trend/fashion......
Smudge617
Well-Known Member
Same place as the soda.This is exciting, where's the popcorn.

Excuse the digression but do you keep your popcorn in the refrigerator or the soda in the popcorn machine?Same place as the soda.
Oh, you were probably referring to the kitchen in general....got it
armyairforce
Well-Known Member
On the 1st of June, I took a day off from the railway to do some pointing work on the patio.
June 2nd
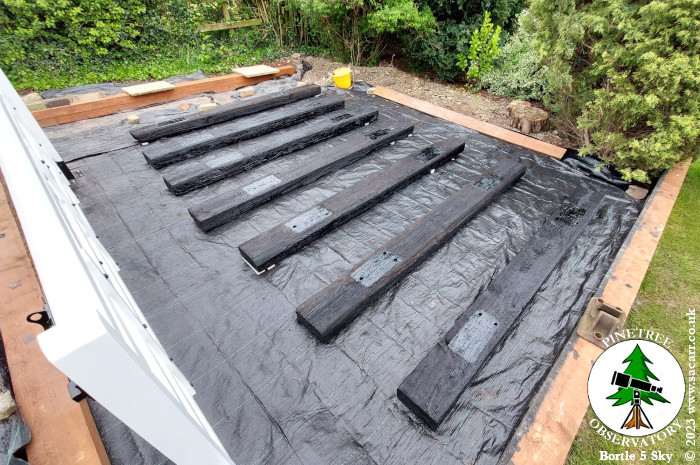
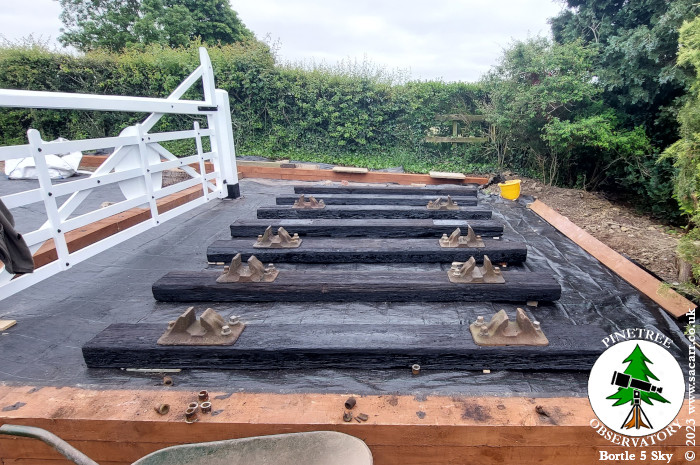
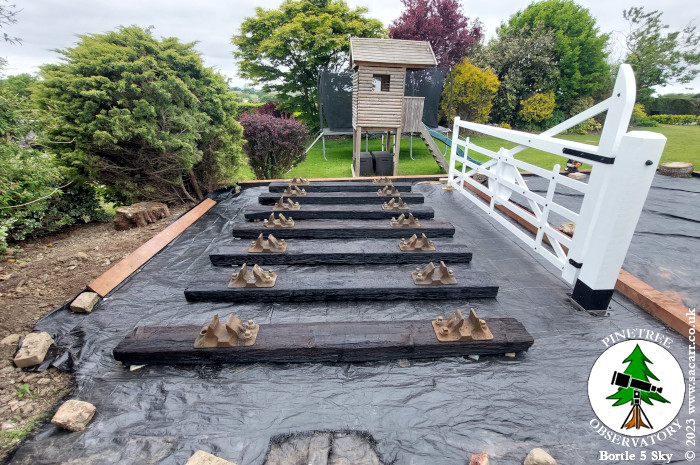
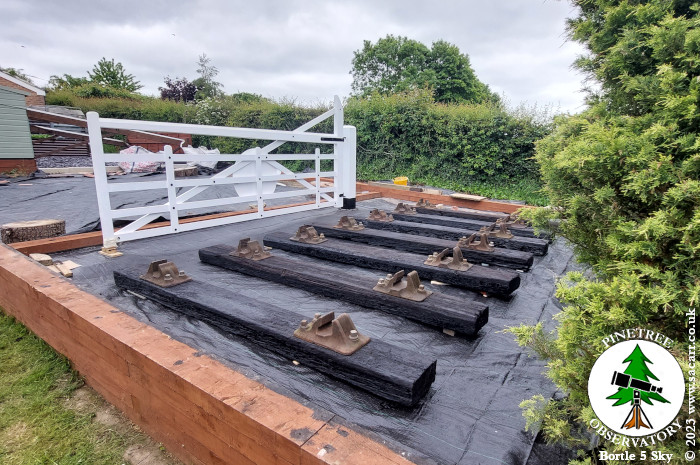
I got back to the sleepers on Friday 2nd. The sleepers were turned so that the sides could be treated with the Creocote. They were turned again for the upper face and once more for the other side. In some places, it soaked in quite quickly so further coats were added in these areas. In the inset picture, you can see how light the wood looks prior to painting. The seven sleepers have soaked up a gallon and a half of Creocote so far. I'd hate to think of how much preservative went into each sleeper under pressure when first made.
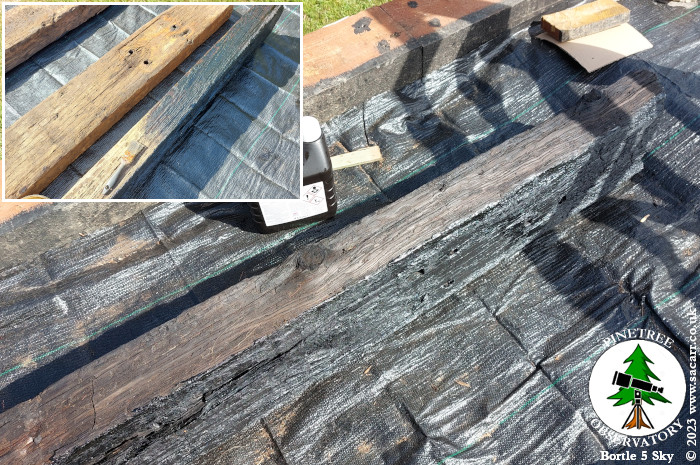
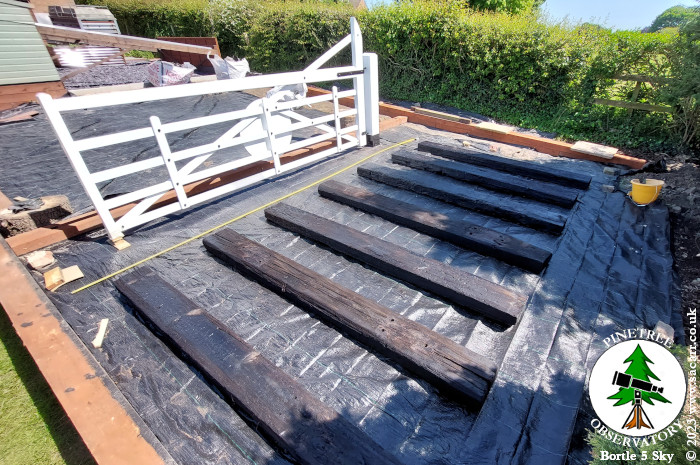
I also dragged some more earth from the pile to under the right edge of the weed barrier, to allow the sleepers to be positioned a little further away from the gate. In the picture with all seven sleepers laid out, they've been spaced out pretty much to their final positions. A yellow steel tape measure can be seen along the left side of the sleepers, which is the approximate length of the rail.
June 2nd
I got back to the sleepers on Friday 2nd. The sleepers were turned so that the sides could be treated with the Creocote. They were turned again for the upper face and once more for the other side. In some places, it soaked in quite quickly so further coats were added in these areas. In the inset picture, you can see how light the wood looks prior to painting. The seven sleepers have soaked up a gallon and a half of Creocote so far. I'd hate to think of how much preservative went into each sleeper under pressure when first made.
I also dragged some more earth from the pile to under the right edge of the weed barrier, to allow the sleepers to be positioned a little further away from the gate. In the picture with all seven sleepers laid out, they've been spaced out pretty much to their final positions. A yellow steel tape measure can be seen along the left side of the sleepers, which is the approximate length of the rail.
armyairforce
Well-Known Member
I ran out of bitumen the other day and have some more on order. Once it's here, I plan on painting the sides and ends of the sleepers to at least half their height, to help waterproof the lower portions, as I don't want to be digging out the ballast regularly to re-treat the wood.
Later in the day, after the temperature dropped a bit, I pulled the trailer out and unloaded all the R/C aircraft. This was to allow me to remove the four pieces of rail from the back of the box.
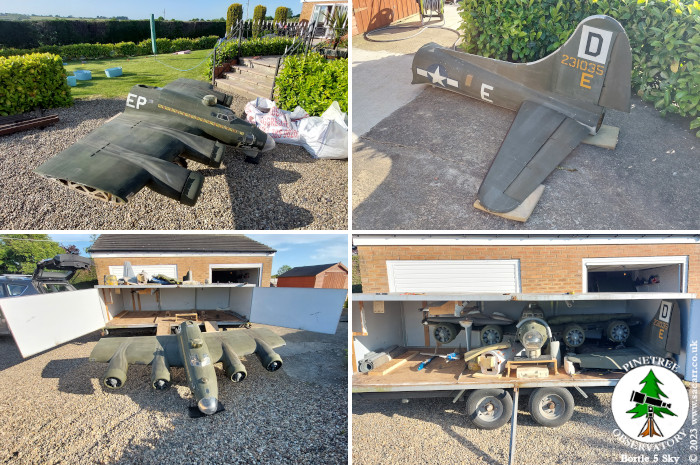
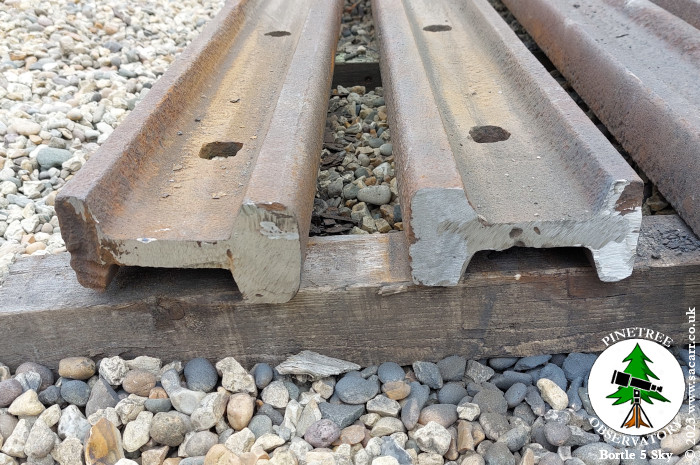
There are two 9 feet long sections and two pieces at 7 feet 6 inches. They are HEAVY; and I thought the sleepers were heavy! If they are 100 to 130 pound rail, the longest pieces could be up to almost 400 pounds in weight.
Using some wooden levers, the rails were moved to the front edge of the trailer. Tie-down straps were wrapped around the rail and a piece of wood as a handle and they were dragged out to the edge of the drive. I think I'll make some wooden 'A' frames with lifting straps, to 'walk' the rails down the garden, rather than trying to lift them.
Later in the day, after the temperature dropped a bit, I pulled the trailer out and unloaded all the R/C aircraft. This was to allow me to remove the four pieces of rail from the back of the box.
There are two 9 feet long sections and two pieces at 7 feet 6 inches. They are HEAVY; and I thought the sleepers were heavy! If they are 100 to 130 pound rail, the longest pieces could be up to almost 400 pounds in weight.
Using some wooden levers, the rails were moved to the front edge of the trailer. Tie-down straps were wrapped around the rail and a piece of wood as a handle and they were dragged out to the edge of the drive. I think I'll make some wooden 'A' frames with lifting straps, to 'walk' the rails down the garden, rather than trying to lift them.
armyairforce
Well-Known Member
June 3rd
On the 3rd, the sleepers were treated again with the Creocote wood treatment and left to dry.
June 4th
On the 4th, I painted three quarters of the way up the sides and ends of the sleepers with bitumen to help waterproof them. I also painted the footprints where the rail chairs sit, as water could gather under there.
June 6th
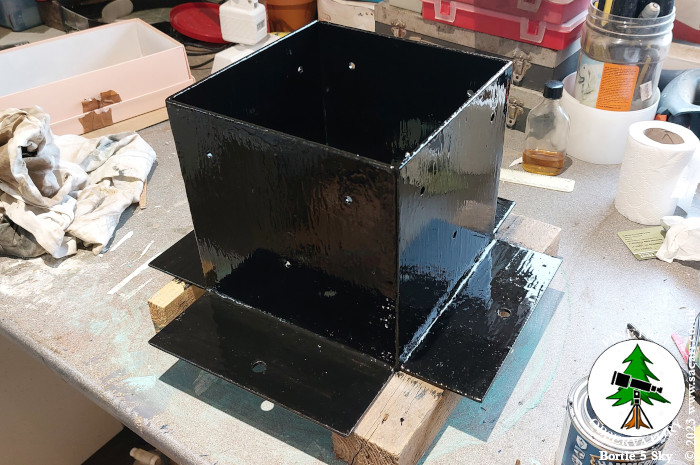
On the 6th, I collected the steel for the second gatepost mount and welded up the parts. Late in the day, the inside, outside and upper surfaces were painted in Hammerite.
On the 3rd, the sleepers were treated again with the Creocote wood treatment and left to dry.
June 4th
On the 4th, I painted three quarters of the way up the sides and ends of the sleepers with bitumen to help waterproof them. I also painted the footprints where the rail chairs sit, as water could gather under there.
June 6th
On the 6th, I collected the steel for the second gatepost mount and welded up the parts. Late in the day, the inside, outside and upper surfaces were painted in Hammerite.
armyairforce
Well-Known Member
June 7th
On the morning of the 7th, I painted the gatepost mount a second coat of Hammerite over all the areas that had been already painted. Once cured, it can be turned over and the underside can be painted. I also painted the anchor bolts that hold the main gatepost onto its concrete footing.
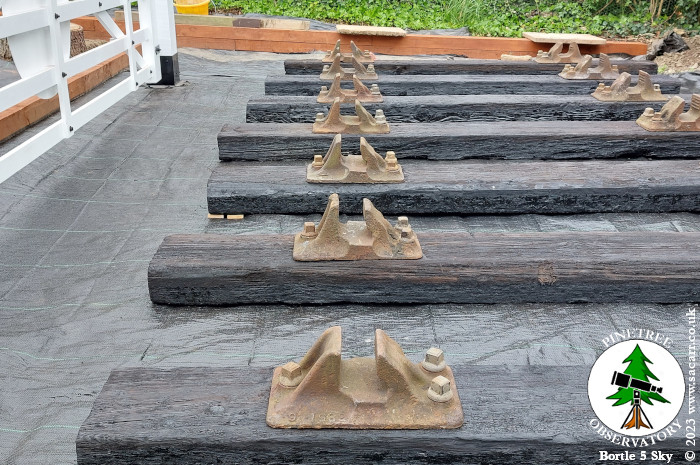
After lunch, I began to transport rail chairs from the garage to the trackbed. Two chairs at a time, plus six chair screws was as much as I could carry in the wheelbarrow. They are very heavy.
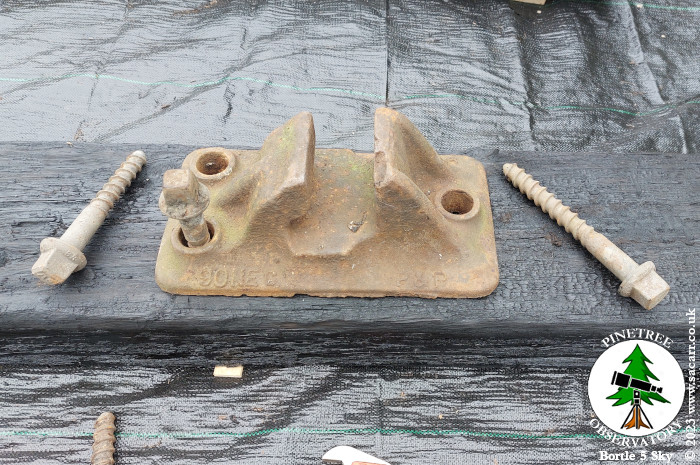
While there were already holes in the sleepers from previous chair screws, they were very tight to screw in, especially the last couple of inches. Even with the two feet long wrench, it took two hands and a lot of force to get the screws all the way home.
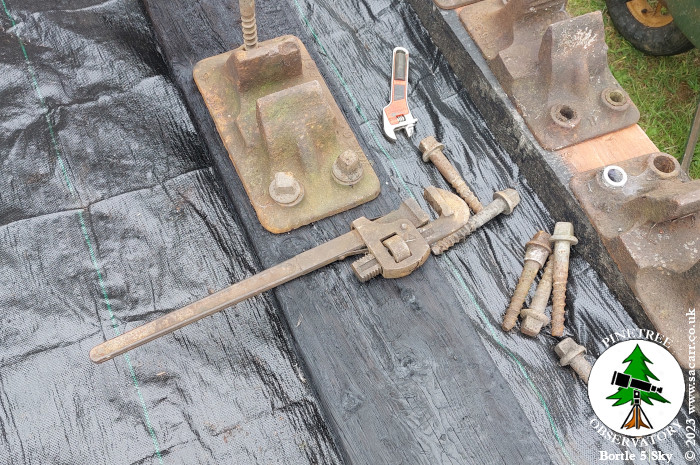
Actually, I left them with about a sixteenth of an inch of play, to allow the chair to move slightly on the sleeper. This should help with alignment once I drop the rail into the top of the chairs. It took most of the afternoon to transport the chairs and to get them screwed down.
On the morning of the 7th, I painted the gatepost mount a second coat of Hammerite over all the areas that had been already painted. Once cured, it can be turned over and the underside can be painted. I also painted the anchor bolts that hold the main gatepost onto its concrete footing.
After lunch, I began to transport rail chairs from the garage to the trackbed. Two chairs at a time, plus six chair screws was as much as I could carry in the wheelbarrow. They are very heavy.
While there were already holes in the sleepers from previous chair screws, they were very tight to screw in, especially the last couple of inches. Even with the two feet long wrench, it took two hands and a lot of force to get the screws all the way home.
Actually, I left them with about a sixteenth of an inch of play, to allow the chair to move slightly on the sleeper. This should help with alignment once I drop the rail into the top of the chairs. It took most of the afternoon to transport the chairs and to get them screwed down.
armyairforce
Well-Known Member
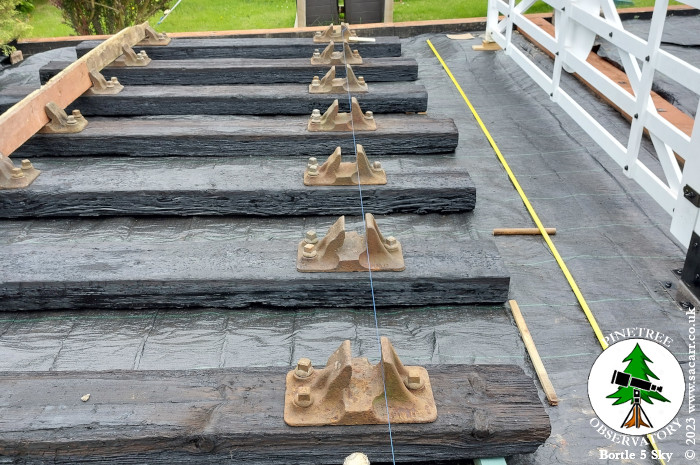
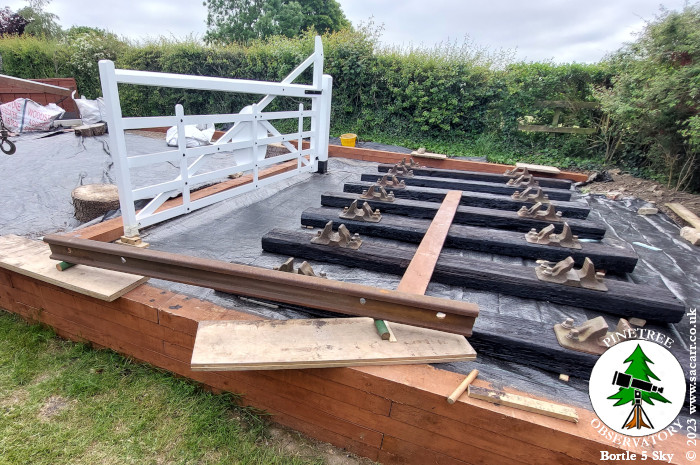
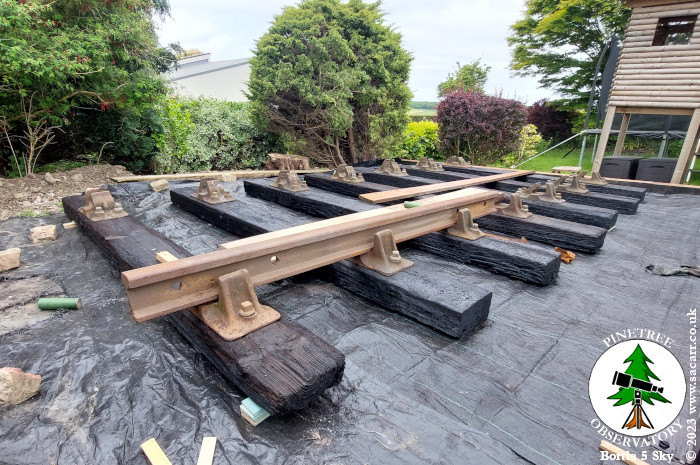
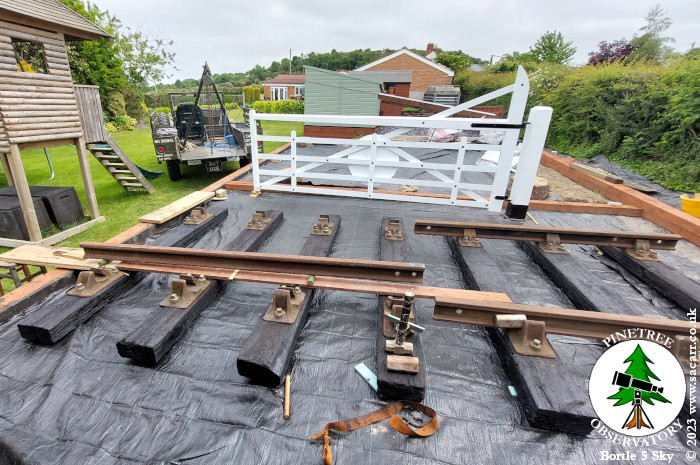
Here's a shot, part way through the afternoon. Eight chairs are screwed down, the empty sleeper needs the holes re-drilling as they didn't line up with the chairs I had.
With all the chairs fitted, I could see the sleeper position was close, but not quite lined up. They all need a slight adjustment, moving the sleeper to the left or right to get a straight line through the chairs.
With all the chairs fitted, I could see the sleeper position was close, but not quite lined up. They all need a slight adjustment, moving the sleeper to the left or right to get a straight line through the chairs.
armyairforce
Well-Known Member
When I got to the bottom of the bucket of chair screws, I found I was one short, so I'll have to contact the railway where I bought the track and get one more screw from them.
The middle sleeper of the seven must have had a different style of rail chair fitted, as the hole spacing was out and didn't line up with my chairs. As a result, I had to do some drilling to make new holes.
The middle sleeper of the seven must have had a different style of rail chair fitted, as the hole spacing was out and didn't line up with my chairs. As a result, I had to do some drilling to make new holes.
armyairforce
Well-Known Member
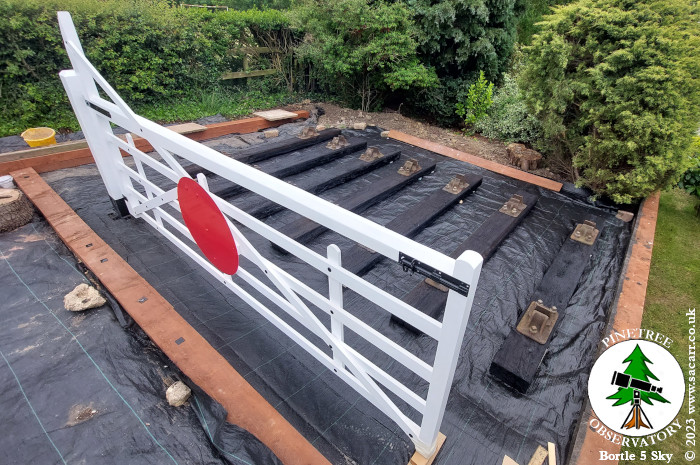
That left a load of wood chippings on the weed membrane, so I got the garden leaf blower out and blew it clean, then packed all the tools away and took the latest update pictures.
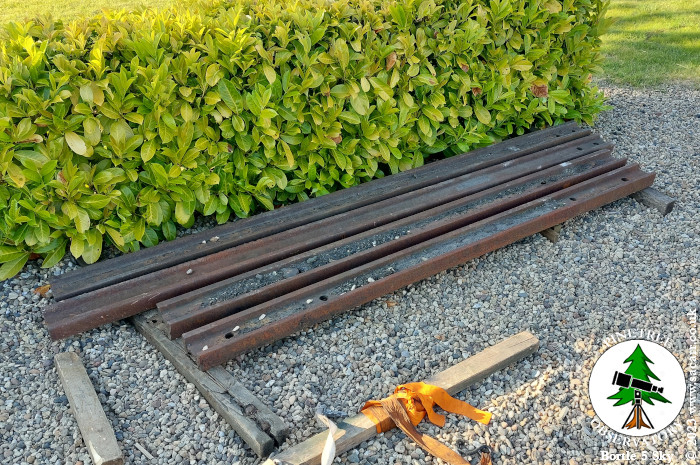
The two shorter lengths of rail need the ends trimming square before they can butt up against the longer rail, so that will probably be the next job. When they are done, I'll be able to move the rails down the garden and onto the chairs.
The two shorter lengths of rail need the ends trimming square before they can butt up against the longer rail, so that will probably be the next job. When they are done, I'll be able to move the rails down the garden and onto the chairs.
armyairforce
Well-Known Member
My friends call the playhouse the signal box!!.....that playhouse....
armyairforce
Well-Known Member
Here we go, the biggest update yet....
June 8th
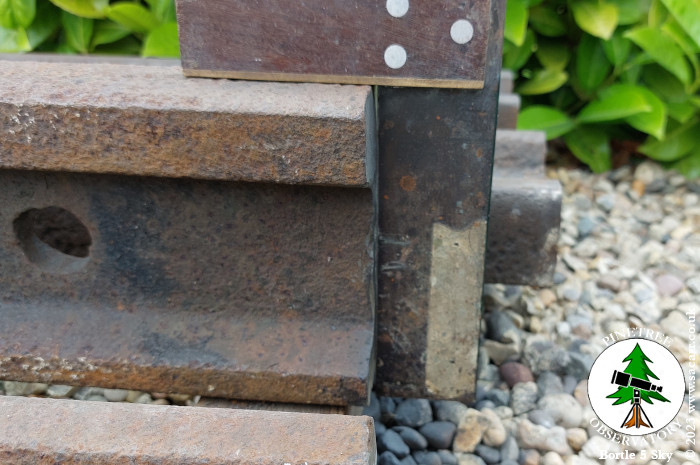
The two shorter lengths of rail needed the ends trimming square, before they could butt up against the longer rail. As can be seen in the first picture, the ends were very untidy.
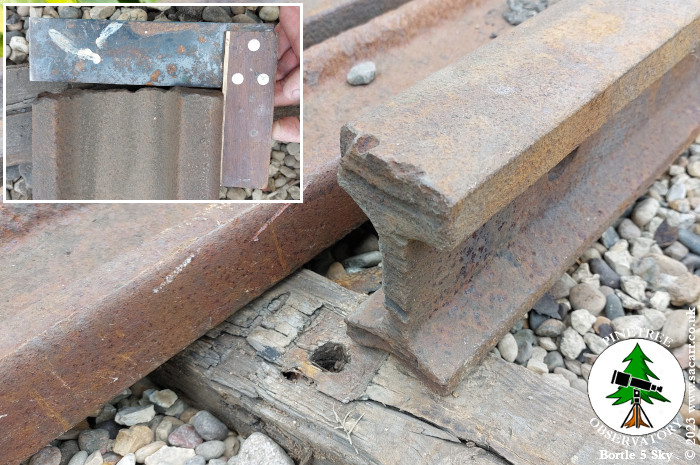
I picked the two straightest ends and took my angle grinder to them. It took some time, but I got both cleaned up and square enough that they should fit together well.
June 8th
The two shorter lengths of rail needed the ends trimming square, before they could butt up against the longer rail. As can be seen in the first picture, the ends were very untidy.
I picked the two straightest ends and took my angle grinder to them. It took some time, but I got both cleaned up and square enough that they should fit together well.
armyairforce
Well-Known Member
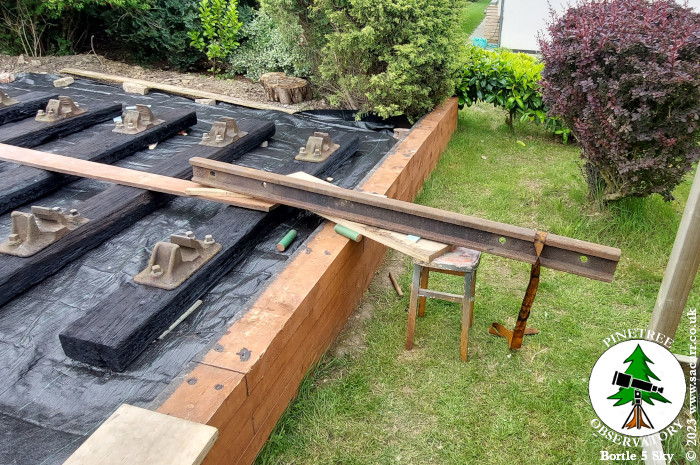
The next small step was to get my builder's line out and check the alignment of the rail chairs. I'd roughly lined up the sleepers based on the chair mounting holes, but once the chairs were fitted, I was able to get a much better alignment.
I then used some timber sitting in the chairs to make some final adjustments to the heights of the sleepers. It turned out that this wasn't the final adjustments!
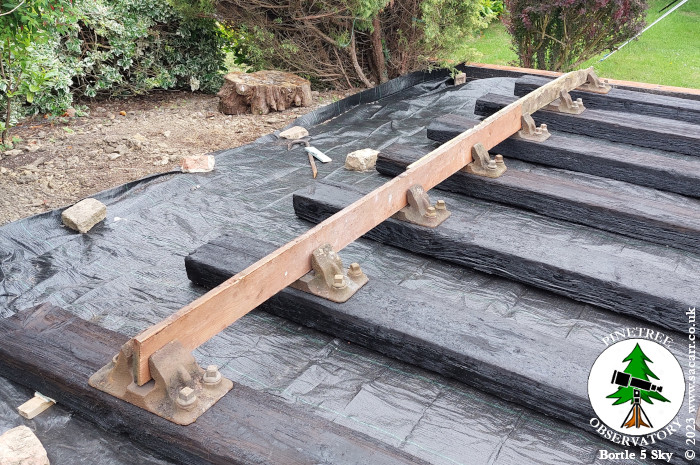
I then used some timber sitting in the chairs to make some final adjustments to the heights of the sleepers. It turned out that this wasn't the final adjustments!
armyairforce
Well-Known Member
June 9th
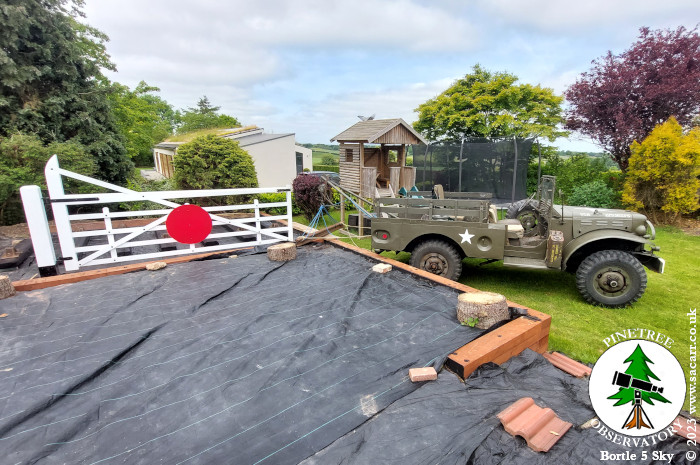
The 9th was the big day! I wanted the rails fitted. Step 1 was to get my Dodge Weapons Carrier out of the garage and assemble the crane on the back. There was no way I was going to be able to carry the rails down the garden, but the Dodge would manage to get them almost all of the way with very little effort. Nylon ropes attached through bolt holes in the rail and connected the rail to the chain hoist on the Dodge crane. Another rope was tied to each end of the rail and was fastened to part of the crane frame inside the Dodge. This triangulated the rail to stop it from swinging around while I was driving. There's a video further down the page showing one trip down the garden in the Dodge.

The rail was picked up from the driveway, near the garage, reversed through a gap in the hedge onto the lawn, then I swung around, heading backwards towards the play house and level crossing gate.
The 9th was the big day! I wanted the rails fitted. Step 1 was to get my Dodge Weapons Carrier out of the garage and assemble the crane on the back. There was no way I was going to be able to carry the rails down the garden, but the Dodge would manage to get them almost all of the way with very little effort. Nylon ropes attached through bolt holes in the rail and connected the rail to the chain hoist on the Dodge crane. Another rope was tied to each end of the rail and was fastened to part of the crane frame inside the Dodge. This triangulated the rail to stop it from swinging around while I was driving. There's a video further down the page showing one trip down the garden in the Dodge.
The rail was picked up from the driveway, near the garage, reversed through a gap in the hedge onto the lawn, then I swung around, heading backwards towards the play house and level crossing gate.
armyairforce
Well-Known Member
The playhouse limited how close I could get, so once there, the rail was raised with the chain hoist, then the jib was lowered, swinging the rail further back from the Dodge. It was then lowered onto the sleeper wall, next to the railway.
Once sitting on the sleeper wall, I lifted each end by hand, and placed a two inch diameter roller under the rail. The rollers were made from two offcuts of tent poles. This allowed me to roll the rail along the wall to where the trackbed was.
Once sitting on the sleeper wall, I lifted each end by hand, and placed a two inch diameter roller under the rail. The rollers were made from two offcuts of tent poles. This allowed me to roll the rail along the wall to where the trackbed was.
armyairforce
Well-Known Member
Once aligned between the sleepers, one end was lifted by hand and turned 90 degrees. Another plank running up the railway sleepers, allowed me to then roll the rail towards the hedge. I was fitting the shorter sections of rail at the hedge end and the longer pieces at the playhouse end.
It took thirty six minutes from hooking up the first piece of rail to the crane, to having it sitting in the rail chairs.
It took thirty six minutes from hooking up the first piece of rail to the crane, to having it sitting in the rail chairs.
armyairforce
Well-Known Member
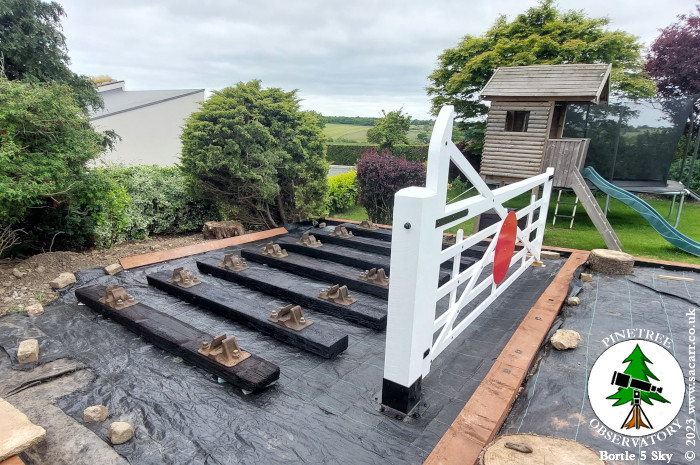
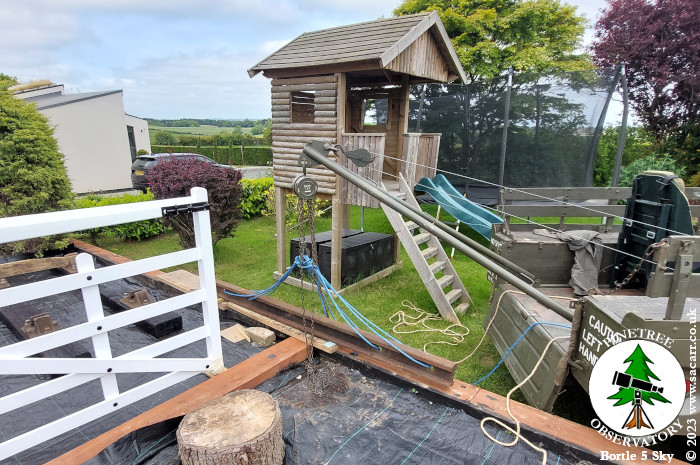
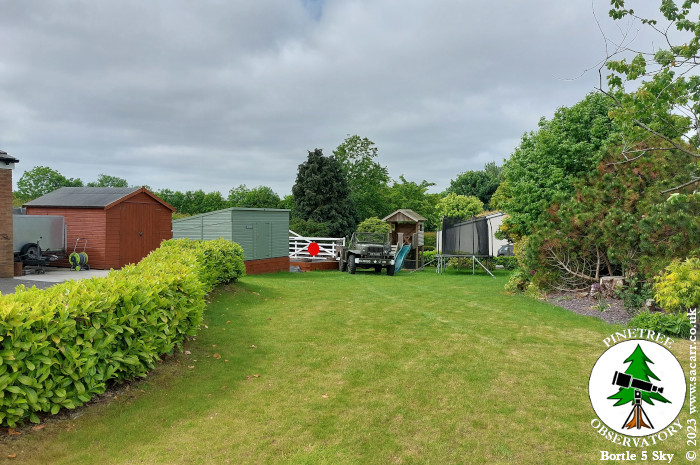
The long view down the garden shows four of my hobbies/interests in one shot. On the left, is the trailer that I carried my R/C aircraft in. The light green building is my observatory for astronomy. The railway is next and finally the Dodge for my military vehicle interest. It also shows the long trip down the garden - the reason I used the Dodge in the first place.
The whole process repeated - lift, drive, drop, roll and lift into place. At this point, the rails were just being dropped into the chairs, not properly fitted at this time. The longer rails took a little longer to rig for lifting, as only one end of those rails had a hole through.
The whole process repeated - lift, drive, drop, roll and lift into place. At this point, the rails were just being dropped into the chairs, not properly fitted at this time. The longer rails took a little longer to rig for lifting, as only one end of those rails had a hole through.
