Manual Turnout Control by Cable


Sullivan Gold-N-Cable


I guess it might be said that this is Sullivan's answer to a very small diameter, and very flexible system. It also uses a .032" inner cable that is a multistrand cable rather than a solid rod,...thus the name. Its outer diameter is slightly less at approx .06X"
http://sullivanproducts.com/product/032-brass-plated-ss-very-flexible/
Twice as expensive as the Du-Bro size for size,.....not so high on my list.

Oops I missed this solid rod version of theirs,....
http://sullivanproducts.com/product/solid-steel-rod/
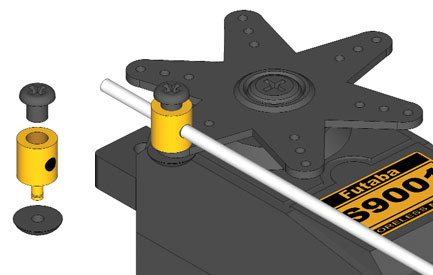
"S587 – .025 High Tensile Rating Music Wire, Z-Bend, 36″ length, 12″ Minimum Radius, 1 set per package"
$3.74 each
 
Sullivan Gold-N-Rods


This would be another favorite on mine, but it is one that needs to be attached to the underside of the deck. Very robust and very smooth. Also comes in 40" lengths in addition to 36"
http://sullivanproducts.com/product/2-56-nylon-flexible-gold-n-rods/
That inner core material appears good enough to anchor a piece of music wire directly drilled thru it. More on this idea later.
image-20200720150737-1.jpeg
 
Last edited:
Teflon tubing and piano wire. Make up whatever length you want . Metal wire clamps to hold it or nylon tywraps. Everything is available from multiple vendors .

Dirt Cheap Alternative : Teflon tubing and 304 stainless 7x7 1/16 wire rope (100ft spools are $10-$15) use standard electrical ring terminals to crimp on the ends
 
This has turned into a bit more of a problem that I foresaw. The cabling not so much, there is a lot of options out there.

It is the end fitting that is the problem area,...connecting the cable to the vertical post/wire/ whatever that moves the turnout's throw bar. Mine needs to reach up thru the 3/4" plywood deck and the approx 1/4" cork roadbed to the throwout bar,....1" plus tall. You would think a stiff piece of piano wire with a 90 degree bend in it would do the job?

But wait a minute, that upper joint (wire within a hole) needs to be the slightest bit 'loose fitting' so as not to bind. Then if the bottom is not dead on tight in the vertical direction you get a little too much slop in the situation,...particularly working against the spring action of the stock Peco turnout.

I'm glad I thought I should mock this up full scale as I have found faults I never anticipated,...back to the drawing board.


For cabling or servoing a switch its usually necessary to a spring in the mechanical connection , a "vee" in the piano wire or a loop, otherwise you inevitably end up with to much or to little throw.

To hold the piano wire under the turnout you'd need to pass it through something like a staple or cable clamp. But even with that on a Peco you'll have binding with stock action.


Over the years , I have found that to do anything with a Peco other than manual, its best to remove the stock action. But then I dont usually "remote" a switch unless I can't reach it or its to inconvenient. That means hidden yards and mainlines , Also if your using a walk-around throttle you have less need to remote switches vs. a power pack because your not "tethered" to the packs location all the time .

Well the hurricane finally brought some rain , nice little torrent , we needed it.
 
Slide Switch on its Side


I'm looking more closely at this basic idea of a slide switch mounted on its side with its plastic handle sticking out its side,....

Turnout control 1.jpg


turnout control2.jpg


image-20200727113045-2.jpeg

image-20200727113045-2.jpeg


image-20200727113137-3.jpeg


image-20200727112955-1.jpeg

I like the idea of that vertical piano wire anchored firmly in the plastic handle. It likely would not require any 'hook' on its top end to secure its position in that existing thrownbar of the Peco turnout, ...and if attached outside of the center hole of the throwbar, it could have a slight hook that could be passed up thru that oval hole in the deck.
What I do NOT like about these applications is the method of attaching the cable control (or rod) to the switch handles. All of the examples above require that control cable to line DIRECTLY up with throw bar's direction. I would like to have some leeway to have that control cable come into the handle at some slight angles. I believe if the receptive hole for that cable was drilled like this (up-down) then this might be possible,...coat hanger control rod
image-20200727114619-4.jpeg


Don't understand why 2 of those images don't show up ??
 
Last edited:
Manual Control of Single Crossovers


my latest project,..

In my original planning I had been going to utilize a couple of double crossovers by Shinohara that I had picked up at a train show a number of years ago. As I got to studying them, and discussing them here on the forum, plus running some experiments with them, I began to look for alternatives.

Turns out I had room (length enough) to utilize 2 pairs of single crossovers rather than the doubles. I also discovered that I could make very effective single crossovers using 2 Peco large size turnouts back-to-back. Here is a comparison,....Shino Dbl on left, then Peco large pair, Peco med pair, Peco sm pair,....
image%2830%29.png

I ran experiments with those Peco large pairs and was very satisfied.


So where I was going to have a dbl-crossover, I will now have 2 single crossovers consisting of 4 large size Peco turnouts.
image%2829%29.png


My dilemma now is how to manually control (from a distance) each 2 Peco turnouts of the crossover with a single control rod/whatever.,..some sort of linkage situation.
 
Linkage Idea


Here is what I have in mind for a linkage to coordinate the operation of 2 Peco turnouts together. It's basically a stiff piece of metal strip that would be a little bit longer than the distance between the holes in those Peco throw bars . It would have two vertical 'post' of music wire welded at that exact distance between the throwbar holes, and they would be long enough to reach up thru the plywood deck (and roadbed) to operate the turnouts when the metal strip was rotated slightly. The rotation center of the metal strip would be the exact center between those vertical post.


The rotating metal strip would bear against the underside of the plywood deck, perhaps against a very thin plastic shim for friction purposes. It would only need a single central screw mounted into the plywood deck to rotate about, and it would only need one push rod attachment to operate its rotation,...one control rod / cable to activate 2 crossover turnouts simultaneously.


image%2831%29.png


image%2832%29.png


image%2833%29.png


image%2834%29.png


image%2835%29.png

(that vertical pin would be centered in that metal strip & firmly anchored)
 
DU-BRO

One of the things I like about their 30" micro pushrod system is its solid inner wire and its small overall outer diameter . The rod is quoted as .032", and I measure the outer diameter of the housing as .070".
This means it can be mounted right on upper surface of the deck, and still snake between and BELOW the ties of other tracks mounted directly on the deck surface as well. It can reach those turnouts that are slightly out of reach WITHOUT having to be attached to the underside of the deck. And it can snake under some tracks that might be located between the edge of the layout and the sought out turnout.
image%282%29.png

https://www.dubro.com/collections/push-rods-accessories/products/micro-push-rod-system

I imagine that vertical bent end there would not even have to be led up thru the existing center hole in the turnout's tie bar, but might be quite happy just bound to some other portion of that tie bar.
PS: that one fitting that comes in the pkg with this product looks like this image,..
ht-making-connections-08.jpg


Brian
I've come back to investigate this idea of mounting the control rods/cables up on the top deck surface rather than down under it.
This became even more appropriate when I started looking at the amount of cork roadbed I was now going to utilize. So I drug out a number of solid rod I had been saving up, and looked at how I might provide some protective covering for them. here are 3 such examples,..
1604943999435.png


I wanted the overall thickness of the rod and its tube covering to be able to fit thru a slot in the cork roadbed,...even the thinnest cork I was going to utilize. As I thought about how I was going to connect those rods to the turnout, my thoughts lingered back to those Dubro cables that used either .047" or .032" solid rod inside a nylon tube.,...nice small overall diameter. They also had a 90 degree bend in their piano wire end that could reach right up under the Peco throwbar.

I did a few experiments and found that the cable/rod did NOT have to be in-line with the switch throwbar,...nice.

Now if I can just get some longer versions,...48" in a number of cases.
 
@dave
Can you give us a little more details on the connections of those wood dowels to the switch handles,...and the subsequent connetion to the turnout throwbar??
 
Eshleman & Windsor units

As mentioned before I purchased some Eshleman turnout links, and more recently I bought about a dozen Windsor turnout links. Basically these two are similar in transmitting motion from the underside of the deck to the topsides,...in a circular motion of a wire within a tube.

I had become content with using these (and or slight modifications of them) on a number of my turnouts that were not within easy hand-flick distance from the deck's edges.

But leave it to me to arrive at another alternative.....
 
Control Rods on top of the Deck

This comes back to an idea I had considered early on,...having the control rods snake along the top of the plywood deck, ...perhaps in small trenches cut into the plywood surface. That idea was nixed very quickly with the messy thought of digging those trenches in plywood,...foam okay, just not plywood.

As I began to look at the plans to elevate most of the track up onto cork roadbed, this idea reemerged,...how about a rod/cable control system that could easily snake under the tracks to the turnouts in question? In fact it really would not have to 'snake' itself around, but could run in a straight line. thru little slots in the cork roadbed, and under some structures that might be only raised by a very little amount.

First off,...WHY
It might simplify the connection at the turnout itself,....and it might put the control knob/whatever on the top surface of the deck rather than under it, nor sticking out in the aisle.

Here is my present idea for the attachment to the turnout itself. Both control cables are solid rod running inside a very small diameter plastic tube,..Dubro cables. I've pictured both the .032" & the .047" rods they use.


underside view...
image-20201110095313-2.jpeg

The cables come with a 90 degree bend as shown, and both fit into that center hole in the throwout bar. As shown the cables are NOT exactly in-line with the throwbar, but that seems to make no problem. In fact the angle can be more extreme than i have shown. The cork roadbed is simply slotted (left out) under the throwbar.

What a simple connection that requires no turnout linkage units,...nor installation of same !!

I might add a little horizontal piece of wire or small plate onto the wire at the bend point that would keep it dead upright (not rotating over).


I also have a collection of bigger dia steel rods that might come in handy in a few other spots. I have found that I can solder a short piece of music wire onto the ends of those to facilitate their passing up thru the turnout throwbars.
1605031517156.png


1605031552718.jpeg
 
Last edited:
That system from Sullivan is quite similar to the Humpyard kits. I ran my choke cables inder the layout and brought the end up at that tie that the throw rod was located and carefully bent the end to a hole in the end of the throw. Has been working for over 30 years. The web site is down from Humpyard Purveyance so I am guessing that he imay be out of business. I would love to get my hands on some more of his kits.
Humpyard is indeed out of business. I was gonna get some of thir stuff but they would not take a credit card or even paypal so that stopped me from buying.
 
The bullfrog cost something like $9,.....then you have to purchase the control cable for it.

The Dubro cables can be had for $9-$10 for a pair
 
Control Rods on top of the Deck


This idea re-emerged when I started laying my cork ballast,..over on this discussion thread
image%2843%29.png


image-20201107151716-2.jpeg


Then just this morning I discover another short discussion of the same basic idea,..
https://model-railroad-hobbyist.com/node/33915
071318_3.jpg

071318_1.jpg


I sold myself on this idea of 'on-the-deck' cable controls, and went forward with ordering 36" lengths of .047" music wire, and the plastic tubing that could be used to cover it in most places,...settled?


BUT,... as I went forward with laying more cork and track in the freight yard, I discovered several things I did NOT like about this idea !! (I'll document that coming up)


Back
Top