You are using an out of date browser. It may not display this or other websites correctly.
You should upgrade or use an alternative browser.
You should upgrade or use an alternative browser.
Guess I am committed
- Thread starter jim81147
- Start date
ModelRailroadForums.com is a free Model Railroad Discussion Forum and photo gallery. We cover all scales and sizes of model railroads. Online since 2002, it's one of the oldest and largest model railroad forums on the web. Whether you're a master model railroader or just getting started, you'll find something of interest here.
Another easy one Jim, clear silicone. I basicly squeezed it out of the tube in long strips , not thick streaks , put about 4 lines , then with your favorite tool start thinning it down , pulling downward like the direction of water falling, join all 4 rows the same and leave it for a few days until you can pull it from what ever you put it on, think I used glass, don't remember. When its set you simply drape it and at the top use more clear silicone to stick it in place.
Affiliate Disclosure: We may receive a commision from some of the links and ads shown on this website (Learn More Here)
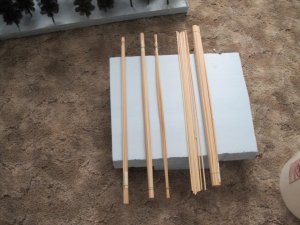
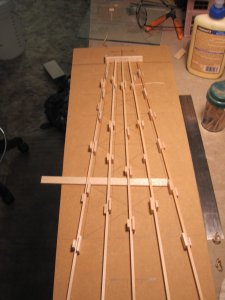
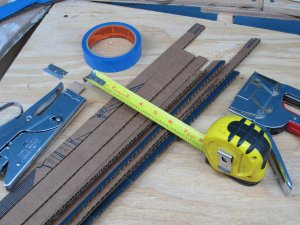
Tony , here are the simple tools I used and the material . Sometimes a picture just works better.
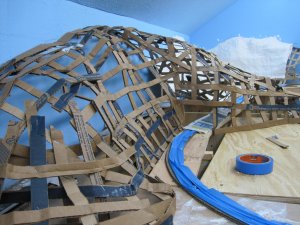
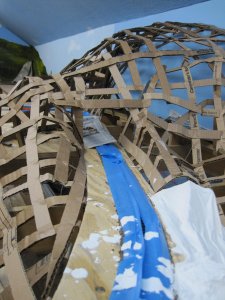
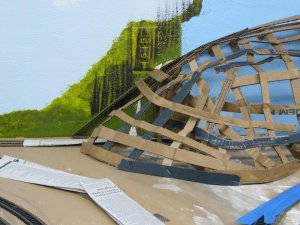
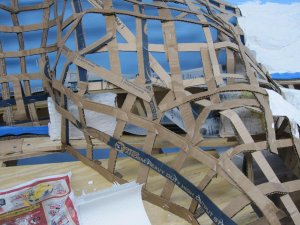
You can see here how you can just bend and pull the strips to get the desired effect. Once I have it like I want , I just hit it with a staple and it pretty well holds like that .
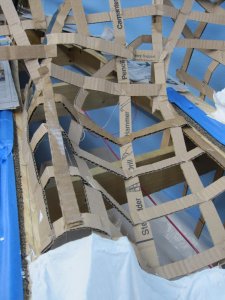
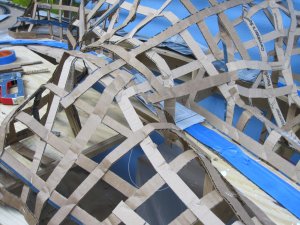
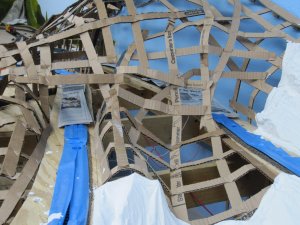
I don't know if this is the "correct " way to do this but it seems to work for me . I would advise you to put down a plastic drop cloth underneath were you are working as it does get messy . Hope this makes my explanation a bit more clear.

You can see here how you can just bend and pull the strips to get the desired effect. Once I have it like I want , I just hit it with a staple and it pretty well holds like that .


I don't know if this is the "correct " way to do this but it seems to work for me . I would advise you to put down a plastic drop cloth underneath were you are working as it does get messy . Hope this makes my explanation a bit more clear.
wombat457
I'm the one
Jim,
I am a visual sorta person so yes, the pictures are worth a thousand words and thanks. I take your point re a drop cloth as well - don't want plaster etc all over the place.
The obvious question now is, what do you use to cover the "webbing" and how does it all hold up to the initial weight of the plaster?
PS: Your gonna need a LOT of trains to plug all them there holes Sir
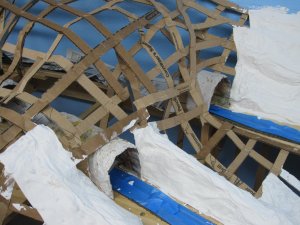
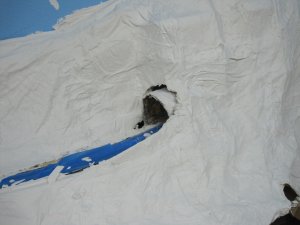
Tony , you use paper towels . You dip them in a fairly wet mixture of plaster them lay them on the skeleton . I have not had any trouble with the cardboard supporting the towels , but I have had it where the webbing was too far apart and the towels would sag a bit . Once dry it makes a good base to put a thin layer of hydrocal or more plaster on .
Lynn , you may be right on that , I will recheck that tomorrow before I apply any plaster towels . Thanks for looking and pointing that out .
Lynn , you may be right on that , I will recheck that tomorrow before I apply any plaster towels . Thanks for looking and pointing that out .
Lynnb
Well-Known Member
Lynn , how did you make your falling water at your water fall?
Another easy one Jim, clear silicone. I basicly squeezed it out of the tube in long strips , not thick streaks , put about 4 lines , then with your favorite tool start thinning it down , pulling downward like the direction of water falling, join all 4 rows the same and leave it for a few days until you can pull it from what ever you put it on, think I used glass, don't remember. When its set you simply drape it and at the top use more clear silicone to stick it in place.
That's the trouble I have Lynn , that finished vision . I can pretty well have a good idea what I want for a rough shape and configuration . Its those finishing touches that kill me . I guess that is what separates the real modelers from so so modelers. The rock work is what really gives me a fit . I have seen pics where you can not see where 2 or several molded rocks were joined together , or where someone did some hand carving , that just looked absolutely real . When I try , well let just say , you can see my hand carving and mold joints. I totally expect to re-do all my mountains if/when I can get that process down.
wombat457
I'm the one
Jim,
As Lynn said, you can start your mountain/s out with a gradual slope then make "radical" slope changes once you have good clearance. Once you have your basic "shape" it is just a matter of placing your "rocks" where you want them to be, don't worry about "seems or joins" when doing that - they will never fit the layout perfectly smooth or seamless to start with.
Once you have your rocks in place you will be able to use a little plaster and ground cover to "hide the joins" so they become invisible. Also keep in mind that you can create your own rocks, over hangs and stuff when you apply the initial layer/s of plaster, that doesn't have to follow the exact lines of your "frame work" for the mountain.
I know it is easy to say this stuff, but trust me, once you have the basics down, the "detail" will fall into place
Lynnb
Well-Known Member
For the joints of two rock molds I will use a #1 or so paint brush dip it into plaster and fill the crack. Too smooth out just dip brush in water and manipulate the plaster to smoothness.
Jim you have to think baby steps when building up scenery , only you will know at what point your happy and when to stop adding. Kind of like weathering , when do you stop.and speaking of weathering you can use chalks on scenery as well. I also will use A/I sprayed over the scenery at will to dull down the brite colors as well if the fresh ground twigs and stuff are too new looking.
Jim you have to think baby steps when building up scenery , only you will know at what point your happy and when to stop adding. Kind of like weathering , when do you stop.and speaking of weathering you can use chalks on scenery as well. I also will use A/I sprayed over the scenery at will to dull down the brite colors as well if the fresh ground twigs and stuff are too new looking.
Affiliate Disclosure: We may receive a commision from some of the links and ads shown on this website (Learn More Here)

