You are using an out of date browser. It may not display this or other websites correctly.
You should upgrade or use an alternative browser.
You should upgrade or use an alternative browser.
Building The CMMR
- Thread starter CMMR
- Start date
CMMR
Member
Took a break from laying out track and started laying down roadbed this weekend. While doing so I was thinking about uncoupling. I had seen some info online about using rare earth magnets, and it just so happened that our local Princess Auto had some on sale, so I thought I would do some experimenting.


I happened to have some metal brackets kicking around that were about the right width and thickness, so I put a couple of magnets on one and placed it between 2 pieces of roadbed. I spaced the magnets so that each one was centered on a rail, and just played with uncoupling some cars over top. It seemed to work pretty well, so I cut the bracket into 1" long pieces, and epoxied a magnet flush to each end. The magnets are 8mm dia x 3mm thick, and together with the bracket are just about flush to the top of the roadbed. I notched out the roadbed at one of the yard lines and test fit one. Once the track is ballasted you should never notice them.


I happened to have some metal brackets kicking around that were about the right width and thickness, so I put a couple of magnets on one and placed it between 2 pieces of roadbed. I spaced the magnets so that each one was centered on a rail, and just played with uncoupling some cars over top. It seemed to work pretty well, so I cut the bracket into 1" long pieces, and epoxied a magnet flush to each end. The magnets are 8mm dia x 3mm thick, and together with the bracket are just about flush to the top of the roadbed. I notched out the roadbed at one of the yard lines and test fit one. Once the track is ballasted you should never notice them.


CMMR
Member
I've been jumping around the layout, doing odds and ends while waiting for turnout pads and turnouts. First I finished laying out all the track locations by printing my SCARM plan 1:1 and transferring it to the layout.

After I had the track locations marked I located the creek and cut lines for the elevations at the north end of the layout. Once I had these marked I pulled the plywood and cut everything out in the garage. I also cut some risers out of the leftover 1 x 4's.

At the creek area I notched out the framing so it sits down about an inch.

I then pieced everything back together and elevated the track over the creek with the risers.


I also completed the Atlas passenger station.


After I had the track locations marked I located the creek and cut lines for the elevations at the north end of the layout. Once I had these marked I pulled the plywood and cut everything out in the garage. I also cut some risers out of the leftover 1 x 4's.

At the creek area I notched out the framing so it sits down about an inch.

I then pieced everything back together and elevated the track over the creek with the risers.


I also completed the Atlas passenger station.


goscrewyourselves
I'm the one
Am really liking the benchwork, wish I could do it!
Cheers,
wombat457
Cheers,
wombat457
CMMR
Member
While I have been putting down the roadbed it has become it has become painfully obvious that I need to add more lighting to the layout room, so I decided to do something about it. My plan all along with this layout is to build everything so that it is removable with a minimum of damage to the room, just in case we decide to move and have to restore it back to a bedroom.
With that in mind I decide to add a couple of surface mount fluorescent fixtures connected to the existing fixture box via a box extension and some pvc conduit. This way the only repairs I have to make to the ceiling if we move are to fill 4 screw holes.
Here is the existing fixture

Here are the parts to add the fluorescents, minus the conduit. The first thing I did was to remove the existing fixture, then temporarily install the box extension and take some measurements to where the new fixtures were going to go. After I had my measurements I cut the pvc conduit and assembled it to the box extensions with the threaded fittings. I took this assembly out to the garage and gave it a coat of satin white paint.


Once the paint had dried I installed the assembly to the existing box, then located the fluorescents and installed them. Next I ran the wiring through the conduit, connected everything up, and finished it off with a single incandescent to cover the box extension.


I have to say that it makes a huge difference in the room now. I should have done it right after I painted, but live and learn....
With that in mind I decide to add a couple of surface mount fluorescent fixtures connected to the existing fixture box via a box extension and some pvc conduit. This way the only repairs I have to make to the ceiling if we move are to fill 4 screw holes.
Here is the existing fixture

Here are the parts to add the fluorescents, minus the conduit. The first thing I did was to remove the existing fixture, then temporarily install the box extension and take some measurements to where the new fixtures were going to go. After I had my measurements I cut the pvc conduit and assembled it to the box extensions with the threaded fittings. I took this assembly out to the garage and gave it a coat of satin white paint.


Once the paint had dried I installed the assembly to the existing box, then located the fluorescents and installed them. Next I ran the wiring through the conduit, connected everything up, and finished it off with a single incandescent to cover the box extension.


I have to say that it makes a huge difference in the room now. I should have done it right after I painted, but live and learn....
CMMR
Member
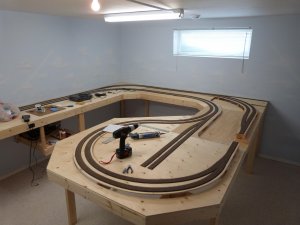
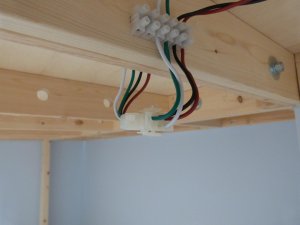
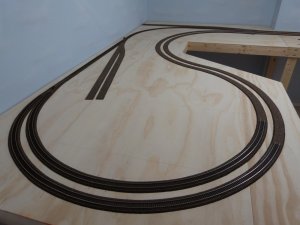
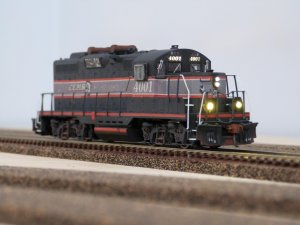
Well, I have about 80% of the roadbed down. I am waiting on a few more turnout pads to arrive at the LHS before I can finish the rest. I also picked up some Molex connectors and terminals and wired them up between all the modules. This past weekend I figured what the heck, I might as well install the only two turnouts I own and some flex track. I put the track down with brown Dynaflex 230, and once it was all set I soldered the rail joiners and track feeders. After that it was time for the first official run and lo and behold it works!


Davidellias
Member
Oh man, I love that Geep!
CMMR
Member
We had our first snowfall today - time to get back to the layout!
Since my last post I have finished putting down all the roadbed and have received all the turnouts. I have also laid and wired more track, including the interchange. I quickly found out that I will have to power the frogs, as the wheel spacing on the GP9 is perfectly aligned with all the dead spots!

Today I finished up detailing the bridge and abutments. I made the abutments out of modeling clay.

With any luck I will have a complete loop done by Christmas!
Since my last post I have finished putting down all the roadbed and have received all the turnouts. I have also laid and wired more track, including the interchange. I quickly found out that I will have to power the frogs, as the wheel spacing on the GP9 is perfectly aligned with all the dead spots!

Today I finished up detailing the bridge and abutments. I made the abutments out of modeling clay.

With any luck I will have a complete loop done by Christmas!
Manitobamodeler24
Member
Looking awesome, can't wait for more.
goscrewyourselves
I'm the one
Gary,
Agreed, your layout is looking very good and moving along at a steady rate.
Agreed, your layout is looking very good and moving along at a steady rate.
CMMR
Member
I have been putting down track a little bit here and there as time permits.
Here is a picture of the crossover with the ground throws installed. I have also mounted a few of the switches leading into the yard.
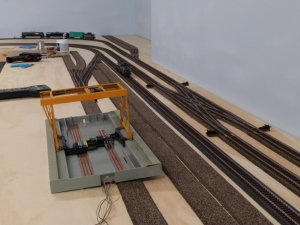
I placed the Brawa container terminal that I bought off of ebay and am rebuilding in place to show roughly where it is going.
Here is a view looking North at the bridge over what will be Sturgeon Creek.
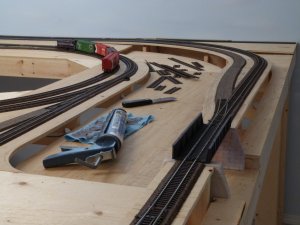
Here is a picture of the crossover with the ground throws installed. I have also mounted a few of the switches leading into the yard.
I placed the Brawa container terminal that I bought off of ebay and am rebuilding in place to show roughly where it is going.

Here is a view looking North at the bridge over what will be Sturgeon Creek.

CMMR
Member
I take it you plan to reach over the layout to activate the ground throws?
Yes, that portion of the layout is only 2' wide. There are only 2 turnouts on the layout that I can't reach and will have to use tortoise's on.

