Alternative materials


logandsawman

Well-Known Member
There is more than one way to skin a cat, has the saying goes. This is where I hope we can get some good ideas on how to make stuff or use stuff that may not come off a shelf. The best, of course, being stuff that is already in your home.

And how much does this stuff cost? Some of us are seriously aware of our budgets.

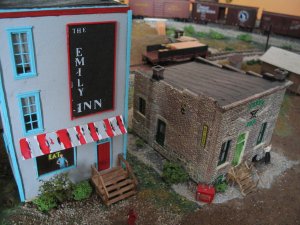
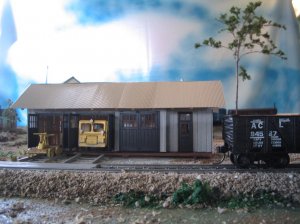
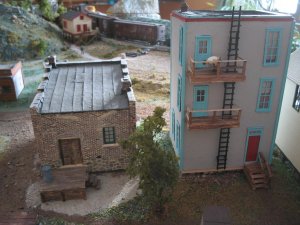
My best and first is the cereal box. Here is the Emily Inn, named after my grandmother, who loathed to throw anything away. It is meant to be a stucco sided three story , rooms above cafe. Very believable for the late 40's.

It cost less than $10.00 to build. Of course, a couple of the pieces came from my scrap box. Cereal boxes made up the walls, roof, and floors/ceiling (which I put in all my buildings, as well as painted interiors. Some day I will also put in the furniture). The tarpaper is newsprint spray painted flat black and cut into scale 3' widths for authenticity. Also used on the adjacent brick building.

For the extra nit picky, this would work as a background building.
IMG_4574.JPG


IMG_4576.JPG

logandsawman
 
That's some nice work. I have used many different materials in scratchbuilding. I'm cheap.

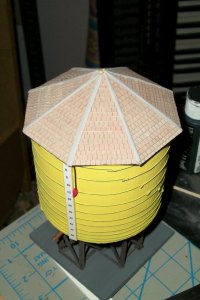
I call it being thrifty and creative lol. Using what you got on hand. I built a water tower out of a spray paint can lid, some dowel, wire, a drinking straw, and a spare grain-of-wheat bulb. It was easier than I thought too...just an evening of work. Saved me $30-$40 to boot. Does it look super-duper-prototypical? No. But it looks good enough from 7'-8' down from where it is.
 
Last edited by a moderator:
I usually keep a fairly good supply of scratchbuilding materials handy. I think my favorite is Evergreen sheeting of different thicknesses and various shapes. I also have a lot of wood sheeting on hand and will use any other materials or objects that will do the job. Any time I have a kit and end up with any extra doors, windows or other details, they go into the parts box. I also have quite a collection of strip wood that I have built up over the years. You never know what will come in handy an a scratchbuilding project.
 
Hey Montanan, I know you do those cool trees from sage brush, too. They look like cottonwoods to me, which are common in the western cities, riverbottoms, etc.

Shadow, could you throw a photo on of your tower? I used a piece of aluminum rolled and riveted, but sprung for the spout kit from somewhere for like $12.00. Came with some tiny pullys and the spout and stuff.


logandsawman

I will get a photo of it up in a couple hours ;).
 
Paint can lid on that watertower RC? From normal viewing distance on your elevated layout it should look just fine. If Shaq comes over and is staring at it from eyeball level he is just going to have to deal with it.:)

LOL! Thanks for the levity.

My wife has corrected me. She reminded me that the lid is from a Gain soap container, not a paint can lid. My memory is failing me. Let's see, my hair is gone...now my memory...as long as I don't loose that third thing I should be good to go ;).
 
Last edited by a moderator:
Stoker: excellent job on the Tarpaper! I tried something to make some of the gooey asphalt, using some pure black artist pigment, applying a little to a couple seams and around chimneys, looks like a repair job. I used a toothpick.


Shadow: the superb job you did on your stand and adding the light takes the attention off the tank; which, as you said, looks good from where anyone is standing, anyway.


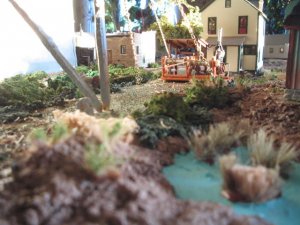
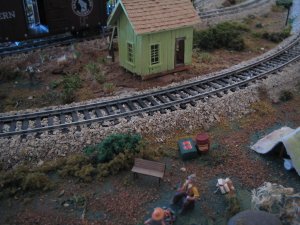
One of my favorite non conventional things is adding sand to paint to make uneven ground or, like here, build up around a 5/8 " plywood riser to make a berm around a pond. I know the blue is a bit fakey, but the effect to bystanders is that it is really a pond and looks cool. For the tall weeds, I take multi threaded cheap sisal or hemp rope, cut it into 3/8" lengths, and stick it into either some cracks filled with hobby tack (from woodland scenics) or glue. After a day, paint a little green on some of the stems. Can even paint some brown on some of the tops to get cat tails.


All the shrubs in this shot are saw dust mixed with paint. Drop them on wax paper and wait a day. When I move stuff around, they go in a baggie and come out to be re used. They also work in conjunction with store bought products to create the effect of different types of shrubs growing together.


IMG3399.jpg


Keep the stuff coming, Thanks guys,


logandsawman
 
Hey Armchair, cool water tank, too.

How did you make the cables that hold the thing together and make them tight?

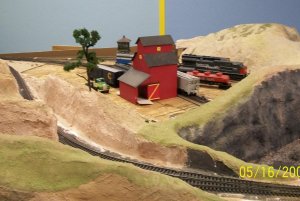
Your grain elevator is first class, too.
 
Log... The cable, or straps represent threaded steel bars (somewhat) I used .020 steel craft wire about a foot long, folded in half, twisted the folded end to represent a turnbuckle. Placed around the tank and the ends twisted. When tight I cut the twisted ends to turnbuckle length and laid flat as shown. This represented 2 bars per ring. I staggered them to prevent a stress point on any one board joint. Most rings would have consisted of a number of bars, each no longer than what several men could handle. I tried to scribe a groove in the tank to locate the wire with some success. Broke several wires twisting them on the tank, so use caution.
What I call turnbuckles were actually cast iron connectors where the threaded end of one bar passed through a tube-like hole and a nut screwed on. The other bar went through a somewhat parallel tube-like hole, a nut screwed on and tightened, placing the cast iron fitting in compression for strength.
I know, you asked for the time and I told you how to build a clock. The old engineer keeps falling out.
Remember, if it walks like a duck, and quacks like a duck, it is a duck.
Armchair aka Glen Wasson
 
One of the recent months of Model Railroader had an article about how to make a tank with the wire to hold it together. I have it here somewhere :\

@LASM

Thanks for your comments but certainly not the craftsmanship of Armchair. I really need to get a place where I can have a "real" layout. I'll always have one that is suspended though ;). I'd like to have a layout where I run a helix up to the suspended part. It'll happen one of these days.
 
Last edited by a moderator:
Hey,

Something else I picked up but most of you probably know about already. It is the cat litter for ballast trick. Another modeler said he used cat litter, and I was skeptical, but mine has held up for years and I can't complain.

I used the Arm in Hammer brand. I guess what it actually is is small pieces of natural clay. When it gets saturated, it will clump. It works good with your glue mixture, water and elmers, or that woodland scenic spray glue.

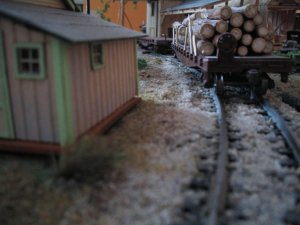
I tried a hundred things and ended up using kitchen silicone caulk along the edges of the grade and watery glue between the tracks. If you run the litter through a kitchen strainer, you can get the big chunks out. If you rup the litter with your finger you can get some of the clay dust into the ties. The glue will tack the dust. Vacuum all the excess after glue dries.


IMG_4698.JPG


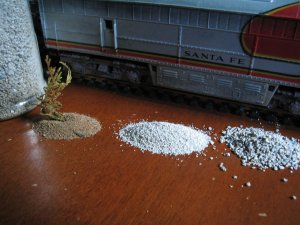
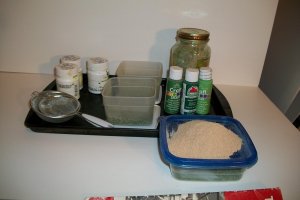
Here is a pile of some natural sand run through a kitchen strainer, the store bought medium texture ballast, and some kitty litter run through a kitchen sieve.

I finally mixed all three to get the most natural stuff.

Do not let the natural materials connect the right rail to the left rail or you could loose current.

IMG_3359.jpg


(Brand new roof could use some weathering tips)


logandsawman
 

Attachments

  • IMG_4639.JPG
    IMG_4639.JPG
    87.2 KB · Views: 198
  • IMG_4222.JPG
    IMG_4222.JPG
    160.6 KB · Views: 193
The magnetic particle issue is a big concern though, so going over any natural ballast with a magnet is a good idea, otherwise you might have magnetic particles clinging to your locos, or even worse, getting up into the motor.


I am glad you posted your river gravel idea. I know lots of different materials are used throughout the country on the "real" railroads.

I would eye dropper the watery glue mixture on the ballast to not only coat them, but adhere them to the base. Also, use the shop vac over everything when the glue has set. We usually have our windows open all summer and lots of stuff floats in, not to mention spiders and webs.


lasm
 
Stoker .. You have hit the ball out of the park with the tin.
I have thought about your same idea, but just have not taken the time to make it.
I have made some , very sloppy, using two threaded bolts together and pulling the foil threw them .. But it tears very easy.
You have inspired me to attempt your method.

I have seen the bolts held within a frame with thumb screws to apply tension and a very small crank on the fixed bolt.
I never got around to trying to copy his design.


Back
Top