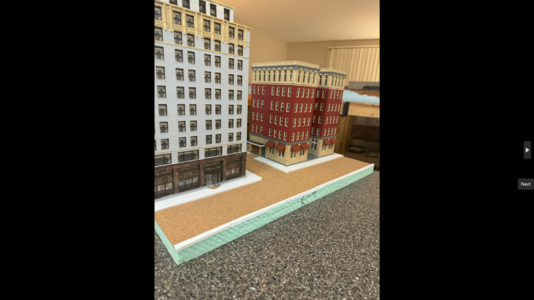
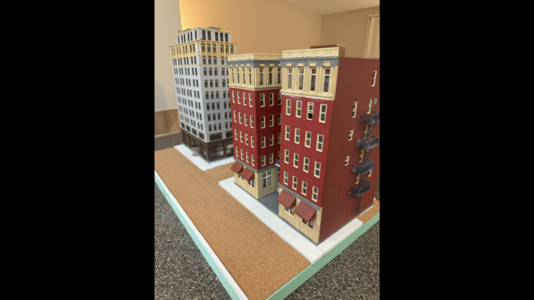
A beginner's layout


PMW. I just started at the beginning and kept reading during the NCAA championship FB game. Impressive build and reading the trials and tribulations of a 1st time builder.

To me you are on the right path but I missed if you are running trains. The buildings you are using are nice kits and with all the glass on the last one you are getting in some great training. What glue are you using to hold the glass to the walls? I use canopy glue as it dries clear and if it smudges (sorry Chris) it dries clear and no one knows but you.

I agree with Mike (migalyto) about lighting the buildings but in my experience I work on the layout first, city scenes later. But, if you want lights add them while you build the kit. I have turned a few kits into just facade fronts and used the back side of the kits to stretch out the building.

I will continue following as you progress. Have fun
 
Are you going to add lighting?

I bet this building would look faboulous with some random rooms lit
I hadn't been planning on it but you all have me thinking...

I think it would be difficult to light only some of the rooms because of the way the printed interior is installed. I suspect there would be a lot of light bleed from room to room :confused:. I'm open to suggestions!
PMW. I just started at the beginning and kept reading during the NCAA championship FB game. Impressive build and reading the trials and tribulations of a 1st time builder.

To me you are on the right path but I missed if you are running trains. The buildings you are using are nice kits and with all the glass on the last one you are getting in some great training. What glue are you using to hold the glass to the walls? I use canopy glue as it dries clear and if it smudges (sorry Chris) it dries clear and no one knows but you.

I agree with Mike (migalyto) about lighting the buildings but in my experience I work on the layout first, city scenes later. But, if you want lights add them while you build the kit. I have turned a few kits into just facade fronts and used the back side of the kits to stretch out the building.

I will continue following as you progress. Have fun
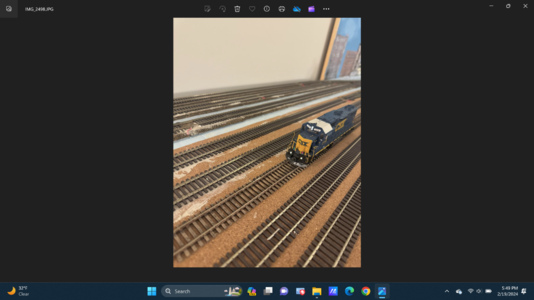
Thanks so much for taking the time to get caught up with my build thread! Yes I'm running trains. That's my favorite part of the hobby. I can promise you kit building isn't 😂. I use JMRI Operations on Panel Pro. I love that program and as time goes on I've got it working very much to my liking.
 
I hadn't been planning on it but you all have me thinking...

I think it would be difficult to light only some of the rooms because of the way the printed interior is installed. I suspect there would be a lot of light bleed from room to room :confused:. I'm open to suggestions!
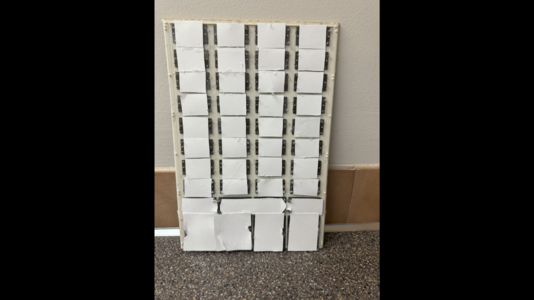
Can you snap a quick photo of the backside of the front panel?

I have seen where some have built boxes of styrene or similar material to box in the individual rooms they want lit. If you seal the seams with silicon and paint the interior black, the light wont bleed and random rooms can be lit this way. It would be some extra work and planning but would look awesome for a night scene. That was my thought on how I was going to light mine.

Screenshot (263).png

Here's I ended up doing it.

Wouldn't I have to box in all the rooms I didn't want lit? I may be misunderstanding. Probably not going to do all that to be honest. I have a couple of pre-lit buildings and plans to add lighting to a couple of other kits...

What about just black caulking around the rooms which won't be lit?
 
View attachment 179277

Here's I ended up doing it.

Wouldn't I have to box in all the rooms I didn't want lit? I may be misunderstanding. Probably not going to do all that to be honest. I have a couple of pre-lit buildings and plans to add lighting to a couple of other kits...

What about just black caulking around the rooms which won't be lit?
You only need to prevent light bleed from the ones you add lights to, I think Mike suggested creating small boxes that contain lights and just make them bleed proof so they only light the "room" they're in
 
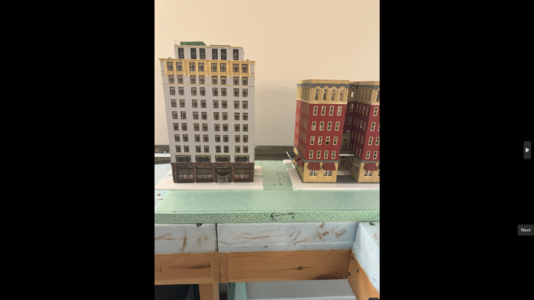
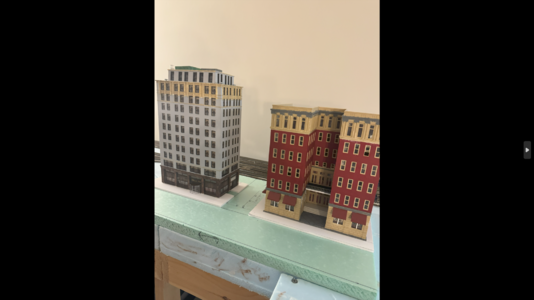
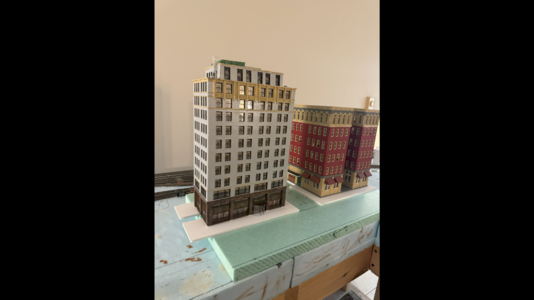
Largely done but still some work to do (mostly rooftop stuff).

As far as lighting goes...I strongly considered it after your suggestions but I found a problem. I had already glued all the interior in the front wall. Seems I should have pre-cut out the blacked out section leaving only the curtains in the rooms I planned to light. Couldn't imagine lighting would give me good results now.

@migalyto, when you build yours I suggest you don't use the included interior or cut out the black between the curtains before you glue them in place. Or better yet, show me your idea I haven't even thought of yet :D.

This is about half of what will be my elevated city scene trains will run beneath.Screenshot (264).pngScreenshot (265).pngScreenshot (266).png
 
Did a little more work on the first of two sections of the city scene. I've said it before but the 13"x48" scene will eventually be elevated and trains will run beneath it (for the new folks :))

Screenshot (268).png
Screenshot (269).pngScreenshot (270).png

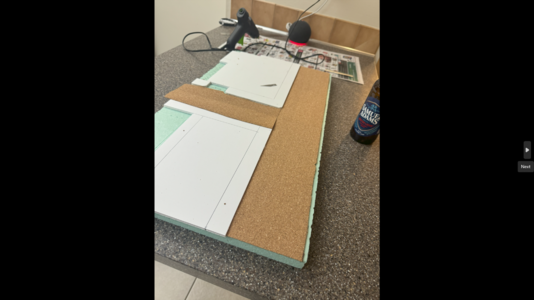
The roads are cork. Not sure how well painting cork will work but that's ok because I wouldn't mind building the roads up a little. Maybe I should coat the cork with plaster or something? Suggestions?

Thanks!
 
I have a little trackwork to re-do. Ripping it up will cause some damage to the foam so I got some WS Foam Putty to repair it before doing the trackwork again. I use Liquid Nails for Projects to glue roadbed to foam. Does anyone know if that will work with the Foam Putty? Should I go with a different adhesive? Should I go with something other than the Foam Putty?

Thanks
 
Another glaring example that this is a "beginner's layout" :eek:

I mentioned elsewhere that I'm getting ready to ballast my yard....nope....I never painted the track :oops:

I started today. I painted the rails what I hope looks like a rusty brown and lightly painted the ties to create some variation among the ties. If I ever finish this I have to get it all straight and pinned in place again....THEN BALLAST :(

Screenshot (294).png
 
Another glaring example that this is a "beginner's layout" :eek:

I mentioned elsewhere that I'm getting ready to ballast my yard....nope....I never painted the track :oops:

I started today. I painted the rails what I hope looks like a rusty brown and lightly painted the ties to create some variation among the ties. If I ever finish this I have to get it all straight and pinned in place again....THEN BALLAST :(

View attachment 181758
We have all gone through hiccups, as long as it is just time and not money you are ok to think could have been far far worse, do ensure your tracks are not too close especially if later you plan to add signals etc as the sizes do not work, I had to tear out loads of a pair of tracks when I went to add Railway detail and cabling…..so do not beat yourself up.
 
We have all gone through hiccups, as long as it is just time and not money you are ok to think could have been far far worse, do ensure your tracks are not too close especially if later you plan to add signals etc as the sizes do not work, I had to tear out loads of a pair of tracks when I went to add Railway detail and cabling…..so do not beat yourself up.
Good advise!

If I had it to do over again I'd make the yard tracks a little further apart but they function fine (they're not glued yet and I moved some a little while painting so some spots might look a little worse than they are). That yard is between the mainline and a reversing section so changing the spacing would necessitate a lot of work. I've decided to live with them as is. They are 2" on center. 2 1/4 - 2 1/2 would probably be better.

Now, off to continue painting 😩
The other thing to notice is in reallife the railway maintenance repair in patches, so the chance of a ysrd being just one texture and colour is unlikely, check out a few real yards


it really makes one feel good about one’s layout :D
 
The other thing to notice is in reallife the railway maintenance repair in patches, so the chance of a ysrd being just one texture and colour is unlikely, check out a few real yards


it really makes one feel good about one’s layout :D
That's a great point. Believe it or not I spend quite a bit of time looking at the prototype on video and whenever possible in the real world 😂

I hope you and others will follow along and continue to offer advise....we'll see how it comes out together!


Back
Top