New Layout

ModelRailroadForums.com is a free Model Railroad Discussion Forum and photo gallery. We cover all scales and sizes of model railroads. Online since 2002, it's one of the oldest and largest model railroad forums on the web. Whether you're a master model railroader or just getting started, you'll find something of interest here.


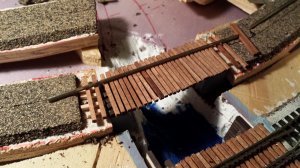
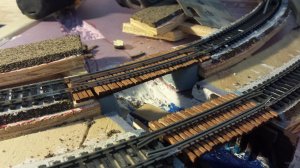
So the previous small bridge had it's problems. I intend to try and resolve those problems in the next bridge. I started last night with making some "cement" blocks out of some foam and painting. After they were glued down, I put down the stringers (wood that runs in the direction of the bridge). I put the ties down and let everything dry. Sorry, I didn't get pictures of this process.

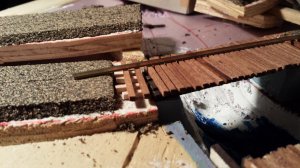
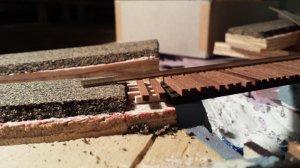
After the ties were down, I realized I could end up with the same problem as the previous bridge - the bridge grade can be different than the track on either side. Per the advice of CJCrescent, I plan to have the track rails continue about 1.5 inches beyond the ends of the bridge. Since the rail will continue, I thought the ties should also. I was talking to the guys at the LHS and they took out one of the bridge books they had to reference pictures. The standard was to have the ties continue for some distance beyond the bridge. And so, that is what I plan to do.

I cut the cork back a little pit to make space for the ties. Then I had to add spacers underneath to get the ties to the proper height. In the picture, I had found a few small pieces of trash wood that happened to be the perfect height. What I ended up actually using was a solid piece of wood that fit in the area that was the same height as those small pieces. I glued those down to the plywood and the ties to the spacers. Again, no pictures because it was getting late and I wanted to get those down so I can continue tonight. Hopefully the next post will be of some rails being laid!
20140914_213624.jpg20140914_213632.jpg20140914_213641.jpg
 
If so, what would be a better method?

Thanks for the input!

I don't know if this idea is any better, it depends on what you are going for, but I put down the ballast and brush it off the ties, then put drops of glue on with a dropper to get the glue (watered down glue or Scenic Cement) between the ties and not over the ties.

I like to get some fine dirt powder or dust on the ties to bring out the wood grain, it gives them more the look of old, weathered, rural ties. If you doing a more modern thing with the new, freshly treated ties, not much grain shows.

As for the bridge, did you condider using longer track to breach the small kink at the end of the bridge, or did I misread your method?

THANKS for posting your progress and the updates!!!! lasm

lasm
 
I don't know if this idea is any better, it depends on what you are going for, but I put down the ballast and brush it off the ties, then put drops of glue on with a dropper to get the glue (watered down glue or Scenic Cement) between the ties and not over the ties.

I haven't started ballasting yet. The plan (as of now at least) is to get all the track laid first. Then I can paint it all with the rust brown color that can cover both track and ties. After that, ballast the track. In the area shown around this bridge, the ballast will run right up to the cement blocks, hiding the small wood spacers beneath the ties.

I like to get some fine dirt powder or dust on the ties to bring out the wood grain, it gives them more the look of old, weathered, rural ties. If you doing a more modern thing with the new, freshly treated ties, not much grain shows.

After painting the track and ballasting, I want to try my hand at air brushing some black paint between the rails for the effect of oil drips, train gook, and all the rest. I'll likely test this in one of the tunneled areas so if it's not right, I'll be able to tweak before hitting the visible space.

As for the bridge, did you condider using longer track to breach the small kink at the end of the bridge, or did I misread your method?

For the bridge, the rail shown in the pictures is what I plan to use. You can see it runs past the ties onto the cork area. The idea is that I will cut the rail short on the section of flex track that runs up to the bridge, then "thread" the rail into the flex track ties and spike down the rail to the hand laid ties. This should prevent any kink in the rail as the train heads onto and off of the bridge.


I want to try my hand at air brushing some black paint between the rails for the effect of oil drips, train gook, and all the rest. I'll likely test this in one of the tunneled areas so if it's not right, I'll be able to tweak before hitting the visible space.


.

Would you have a photo of this effect? Could goup be replicated with a paint brush?
 
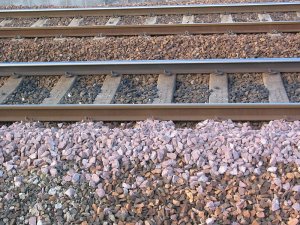
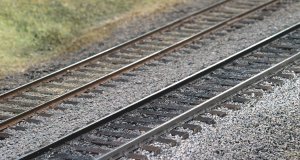
lasm, I had seen the results in some youtube videos and that is where I got the idea. Since I'm modeling mostly steam, oil spots seemed to fit right in. There's a couple of pictures below to show what I'll be aiming for. You can see how the area between the rails is "dirtier" than the outside. When using the airbrush, some will splatter outside too, so it won't look quite as perfect as these guys'.

800px-Rails.and.ballast.bb.jpg1180375363_3_FT0_trackdetail.jpg
 
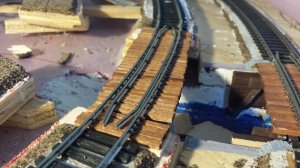
So I finally got around to spiking down down the rails on that bridge yesterday. You can see the pictures below. For whatever reason, the bridge ties ended up having a different height than than the flex track leading up to it. Some small adjustments by adding/removing shims under the cement blocks to adjust the height and it was good.

The only thing I worry about, and only time will tell, it how the inner "guide rails" look with only a few spikes holding them down. Overall the look isn't bad, but the bridge right next to it has a spike in every tie. Over time, I'll be able to see how much I notice or don't notice it. I figure I can always add ties if I don't like. Anyone else have any opinions?

20140927_164143.jpg20140927_164152.jpg

Also, just a side note... I didn't get anything done today because I spent my hour of train room time cleaning up the layout and my bench. LASM has a build thread going where the cleanliness of his layout comes up. Without giving a summary of his thread (but check it out if you haven't already!), I will simply say it inspired me to clean up my own mess. Hopefully we can keep it that way!
 
Nice Work!

I have been on some old track sections where the spikes were spaced out, realize here that the hand laid spikes quite a bit larger than what the
" real" ones would be.

Did you put a little white chalk on some of the ties to bring out the wood grain? looks that way bottom left of second photo
 
lasm, I'm sorry it took so long to answer! I did not use any chalk on those ties. What I did was cut the HO scale 8x8 lumber into tie width section, them dropped those into a jar of Dark Mahogany penetrating stain for about 30 minutes. Take out and let dry separated so they don't stick together. The cracks that you view are likely the places where the pliers slipped off the spike and slammed into the ties! That happened only a couple of times.
 
Quick update!

Okay, so I already typed this once and lost it. Sorry guys, but this will be the abbreviated version.

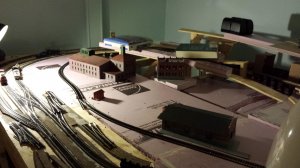
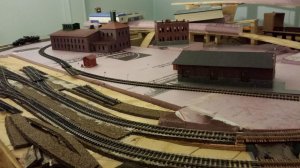
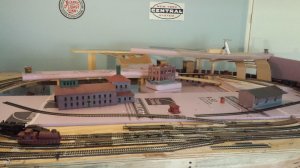
This isn't exactly what it will look like, but pretty close. I had an old freight station kit that I built a few years ago as part of a diorama. It looked cool, but there were no running trains, so I took the kit off of it! It was two building, seen here as the buildings in the center and right. The office building part of the station will now become a building up on a hill. I'm thinking (time period is prohibition) a brothel. Should just take some red lights in individual windows and a few Johns hanging around outside! The brewery is on the left and the loading dock section of the freight station is on the right. I need to rebuild the actual dock since the two buildings are no separated, but that's okay.

Let me know what you guys think. Progress is slow, but I keep on chugging!!

20141024_222702.jpg20141024_222740.jpg20141025_111132.jpg


Heh... Get out of work at the docs, head to the brewery for a pint (or five) and then over to the Brothel. Sounds like a perfect layout. ;)
 
Since babies don't understand daylight savings time (I don't really get it either...), the boy was asleep at 7pm today. That means I had an extra hour to get stuff done! So what do I do? Put the TV on and watch some football as I get some work done. Here's what I was able to get done with a sleeping baby and some football on the tube (do they make TVs with tubes anymore?)...

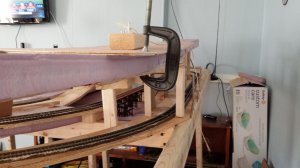
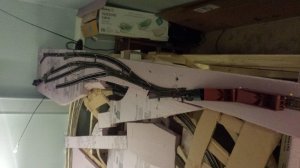
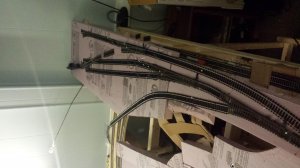
I have foam in place for the entire line leading up to where the coal mine will go. I have not put the large area in where the coal mine will actually sit. For that I will wait until I have the footprint at least decided. Getting up there, there was spot where the grade changes from (+) to (-). Here, I caulked the area, placed the foam, then clamped a piece of thin birch on top. Thin birch because I happened to have some in the garage, but mainly because it is flexible enough to keep the shape while strong enough to allow tight clamping without breaking.

20141102_162628.jpg

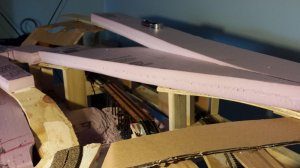
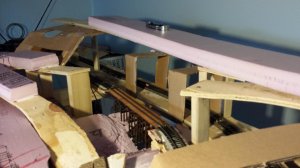
Next, I have a question. I'm hoping what I did was right here. There is a spot that originally was planned to have a river run through, and so my cookie cutter platform had a section missing as to allow the construction of a bridge. I have since changed the design and instead need to bridge this gap with solid ground. Should I run plywood first? Or will 2" foam be enough? The gap is about 14" across, and the foam I have to put in place is long enough to reach past the edge of plywood by about 6" on either side. My feeling is that 2" foam is structurally strong enough to hold the weight of a small loco and two coal hoppers with the small amount of scenery that will be there. Anyone else think otherwise?

20141102_165428.jpg20141102_165436.jpg

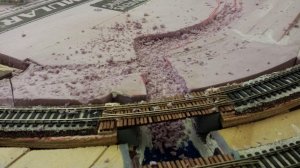
And then there is my last update. For the coal line leading up, it will need to get over a shallow waterway. The gap is short, and should be simple enough to get over. With my lack of knowledge in this area, can anyone suggest what type of bridge would have been used here? The line is "owned" by the coal mine company and is the track that leads from staging to the first switch back. I carved the river into the foam, so we can see where it will go. The track will run from the cork on the left of the picture to the "ramp" on the right of the picture. Any suggestions?

20141102_203714.jpg


That's all for now. I'll be back at it probably tomorrow evening (wife is taking the baby). Other than that, next weekend will be another work day!
 
I cant answer about the bridge but the 2" foam should be plenty strong for that area.The layout is coming along nicely and I like the river.
 
Your layout is very interesting. I never really thought about building a bridge in place, good idea.
 
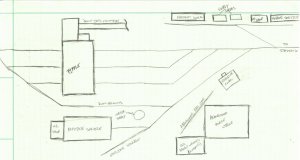
The last couple of nights, I wasn't able to get anything done before the baby went to sleep. That means so sanding and no shop-vac as my train room happens to be directly underneath his room. I can make some noise, but a hand sander is not exactly a quiet device. Anyway, since major work on the foam is beyond ability right now, I've started to think about how much space I'll need for the coal mine area. Attached is a rough idea of what it will look like. I think I have all of the required buildings shown. I put an area for an abandoned dandy wagon storage/service and stable. It gives the idea that the mine is very old, and at one time was very poor. If anyone doesn't understand what I mean for this, check the Wiki page for dandy wagons. I found the history pretty damn interesting, thus the addition of these structures.

Let me know what you guys think of the concept. If I'm missing anything or something would look good, I'm all ears!
coal mine area r0.JPG
 
The last couple of nights, I wasn't able to get anything done before the baby went to sleep. That means so sanding and no shop-vac as my train room happens to be directly underneath his room. I can make some noise, but a hand sander is not exactly a quiet device. Anyway, since major work on the foam is beyond ability right now, I've started to think about how much space I'll need for the coal mine area. Attached is a rough idea of what it will look like. I think I have all of the required buildings shown. I put an area for an abandoned dandy wagon storage/service and stable. It gives the idea that the mine is very old, and at one time was very poor. If anyone doesn't understand what I mean for this, check the Wiki page for dandy wagons. I found the history pretty damn interesting, thus the addition of these structures.

Let me know what you guys think of the concept. If I'm missing anything or something would look good, I'm all ears!
View attachment 46343


That looks like it will work pretty well as drawn
 
Your layout is looking good and moving along nicely. You have so many parts to it which, as Lynnb said, makes it so interesting.
 
Honestly, from my phone I can't tell which of the two pictures is better, so I'm attaching both of them.

I did a little mock up last night of the coal mine area. The biggest downer is that comfortably, there is only space for two tracks to the tipple and one run around. No biggy, the mine just got a little smaller and easier to build. If I really get upset, I have some thinner foam in larger sections I can use to increase the area, but then I would have to reconsider some other areas around the layout. I'm a little early in this area, so I'm not in a rush to make a decision. All the track was pinned into place so I can look at it for a while and decide how much I like it. Easier to tweak now than after its all glued down.

I took a Loco and put two hoppers with it to confirm the amount of space for the switch back. Then took the longest Loco that I would use for the mine to Guage how much space I need for the run around at the far end of the mine. In the pictures, the rails go right up to the edge of the foam. There will actually be about another inch or so at the end. I plan to put a single piece of foam mounted vertically on the side of the layout with the end flush to the top. Then the end can be used as modeling ground.

Any feedback is widely appreciated.
 

Attachments

  • uploadfromtaptalk1415394212679.jpg
    uploadfromtaptalk1415394212679.jpg
    131.2 KB · Views: 223
  • uploadfromtaptalk1415394251465.jpg
    uploadfromtaptalk1415394251465.jpg
    146.9 KB · Views: 231


They both look good, maybe you can make some mockup building for the tipple and I'm assuming mine shaft.


Affiliate Disclosure: We may receive a commision from some of the links and ads shown on this website (Learn More Here)

Back
Top