ModelRailroadForums.com is a free Model Railroad Discussion Forum and photo gallery. We cover all scales and sizes of model railroads. Online since 2002, it's one of the oldest and largest model railroad forums on the web. Whether you're a master model railroader or just getting started, you'll find something of interest here.
Thanks for the idea, Chet; the stuff I am buying requires using rubber cement and pasting it to something solid, otherwise your method would save lots of time!!
May as well take the opportunity while it is all out and you have the access, besides, what else would you do?
Just a thought for the "curved corners" and you needing something solid to adhere your back drop to - could you use blocks of "hard foam" in the corners, so they were adhered to the walls, and curve them for the backdrop to attach to?
That is something I havent thought of, I am not sure if you say Dairy State Dads post but I checked the link (it is the Model Railroader Forum) and had to use a password to look at it,
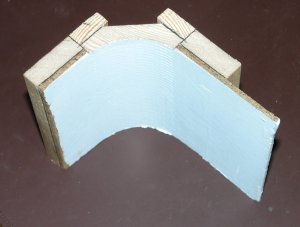
It is using a piece of cove from crown molding which I think will be pretty easy. I will try to copy and paste the photo.
"I constructed the coved corner from pieces of commercial, milled softwood moldings obtained from a building supply center. The curved center piece is a cove molding supported with trim strips to match the thickness of my tempered hardboard backgrounds. Then I blended the edges with joint compound and sanded the surface smooth" MRR
Dun'no about the US, but we have coving for ceilings made from the same material as drywall sheeting. Comes in 2 sizes, 3" and 4-5" with about a 3/8" edge.
Thanks, Steve; Nice to have you check in! Chet--I think it is solved, now to see if we can get that product in our hardware stores; I hope so.
In the meantime, I have been getting the build sequence formulated, I think I have to buy the hardboard and lumber for the framework and put that up. That may take a few weeks to complete.
Then, or towards the end of that, I will order the backdrops and glue, etc. That way if my scene ideas change I can make adaptations.
This is the key scene I will be incorporating. It is 42" H and 12' long and will be reversed to the tall hill is at the maintenance shed end of the layout and the bottom field area is right along the track and it transitions into sky. That is where the layout is already built up.
This is the web site of the backdrop company. They have literally hundreds of choices:
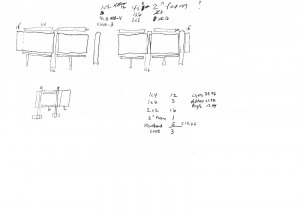
I figured out the construction of the frame for the new backdrop, also picked out some lights to mount above, it looks like the entire backdrop project is going to cost me around $1100. That is about 4x what I paid for the benchwork.
But, I guess the benchwork is all covered, wheras the backdrop shows!
Here is the plan list for the backdrop also items purchased and costs:
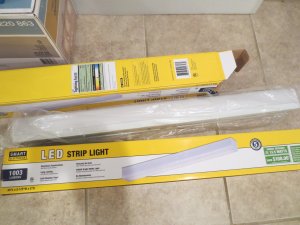
These are LED lights supposed to give off very little heat also sends out a "middle" spectrum rather than the yellow hue I am getting from the current lights.
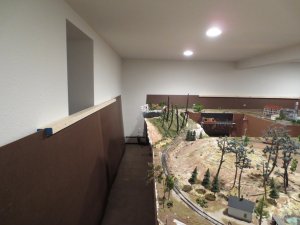
I managed to get some of the hardboard glued together and staged before straining my right hand. Here is the pic of the initial glueing that will create the surface for mounting my backdrops,
rather than use vises I glued the hardboard to a 2 x 2 on the back side and used a temporary 2 x 2 and screwed that in through from the front to clamp the hardboard to the frame. The front 2 x 2 is coming off when I get a few more of the braces in place.
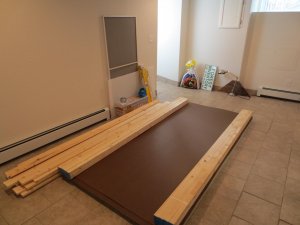
Here is the pile of stuff for the backdrop, also another sheet of foam because I am adding a couple inches to the back of the layout and about 8" to the side:
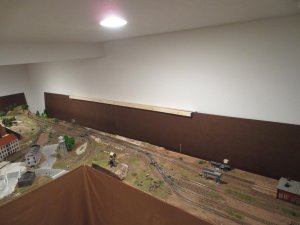
I put the hardboard behind where it belongs and glued a strip along the top, using another strip of wood and wood screws as a clamp to get a tight bond
On this side I did pretty much the same thing. Some scenery will be added to the layout using the foam. First I will get the board finished and the backdrop applied.
Then I will finish the scenery and slide the table back against the backdrop. I also have some LED strip lights that will be mounted on top of the backdrop.
Looking great LASM. I think this will change the entire look of the layout once finished, make it self contained in its own "world" and that should look first rate.
Tony--Thanks, I am really getting excited because it doesn't seem to be that hard. I am really glad I built this thing on a movable table so I can slide it out and get behind it.
Unfortunately I hurt my hand doing a plumbing project a couple weeks ago and then overdid it maneuvering these sheets of hardboard so have to wait several days before I can do any more screwing and glueing.
I guess the good thing is it gives me a few more days to cement my process in my head before I go any further.
Chet, I agree that the new backdrop is going to make it way better!
Louis, Thanks for voicing your concern. I am going to see the Doctor today as it has been nothing but pain for the last 4 days. No bruise visible any more, but it hurts day and night.
You are correct about the not rushing back to work. I have been going to the office but I don't think that has been smart, either. I need to give it some time to heal.
Funny you should log on as I was just thinking about you yesterday!
Looking good David, I like your backdrops so far. I'm sure they will pay off once installed. I put that on my list of lessons learned for my next layout - always plan for/install the backdrops before finishing all of the benchwork and securing to the walls. I'm still having to add backdrops to my layout after the fact. Would have been so much easier and cleaner if I did it up front. Can't wait to see the finished product.